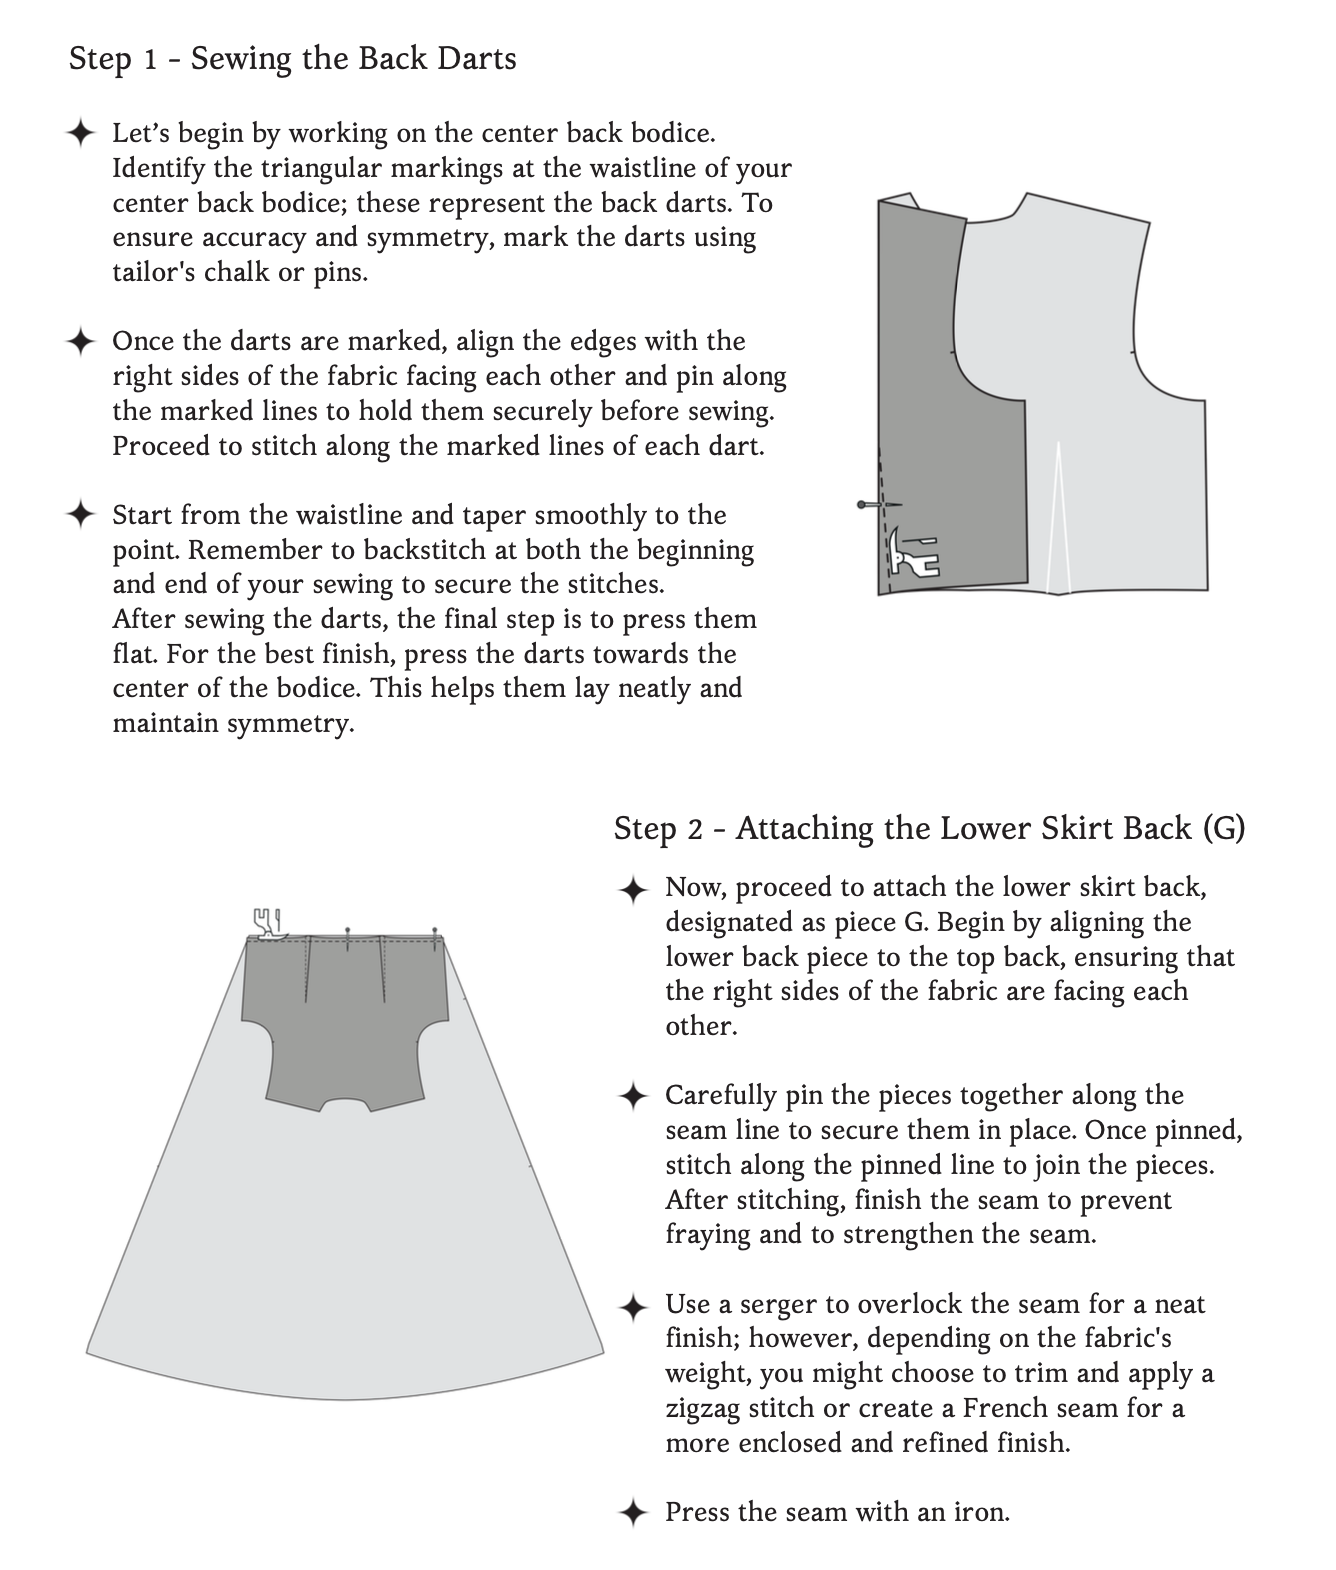
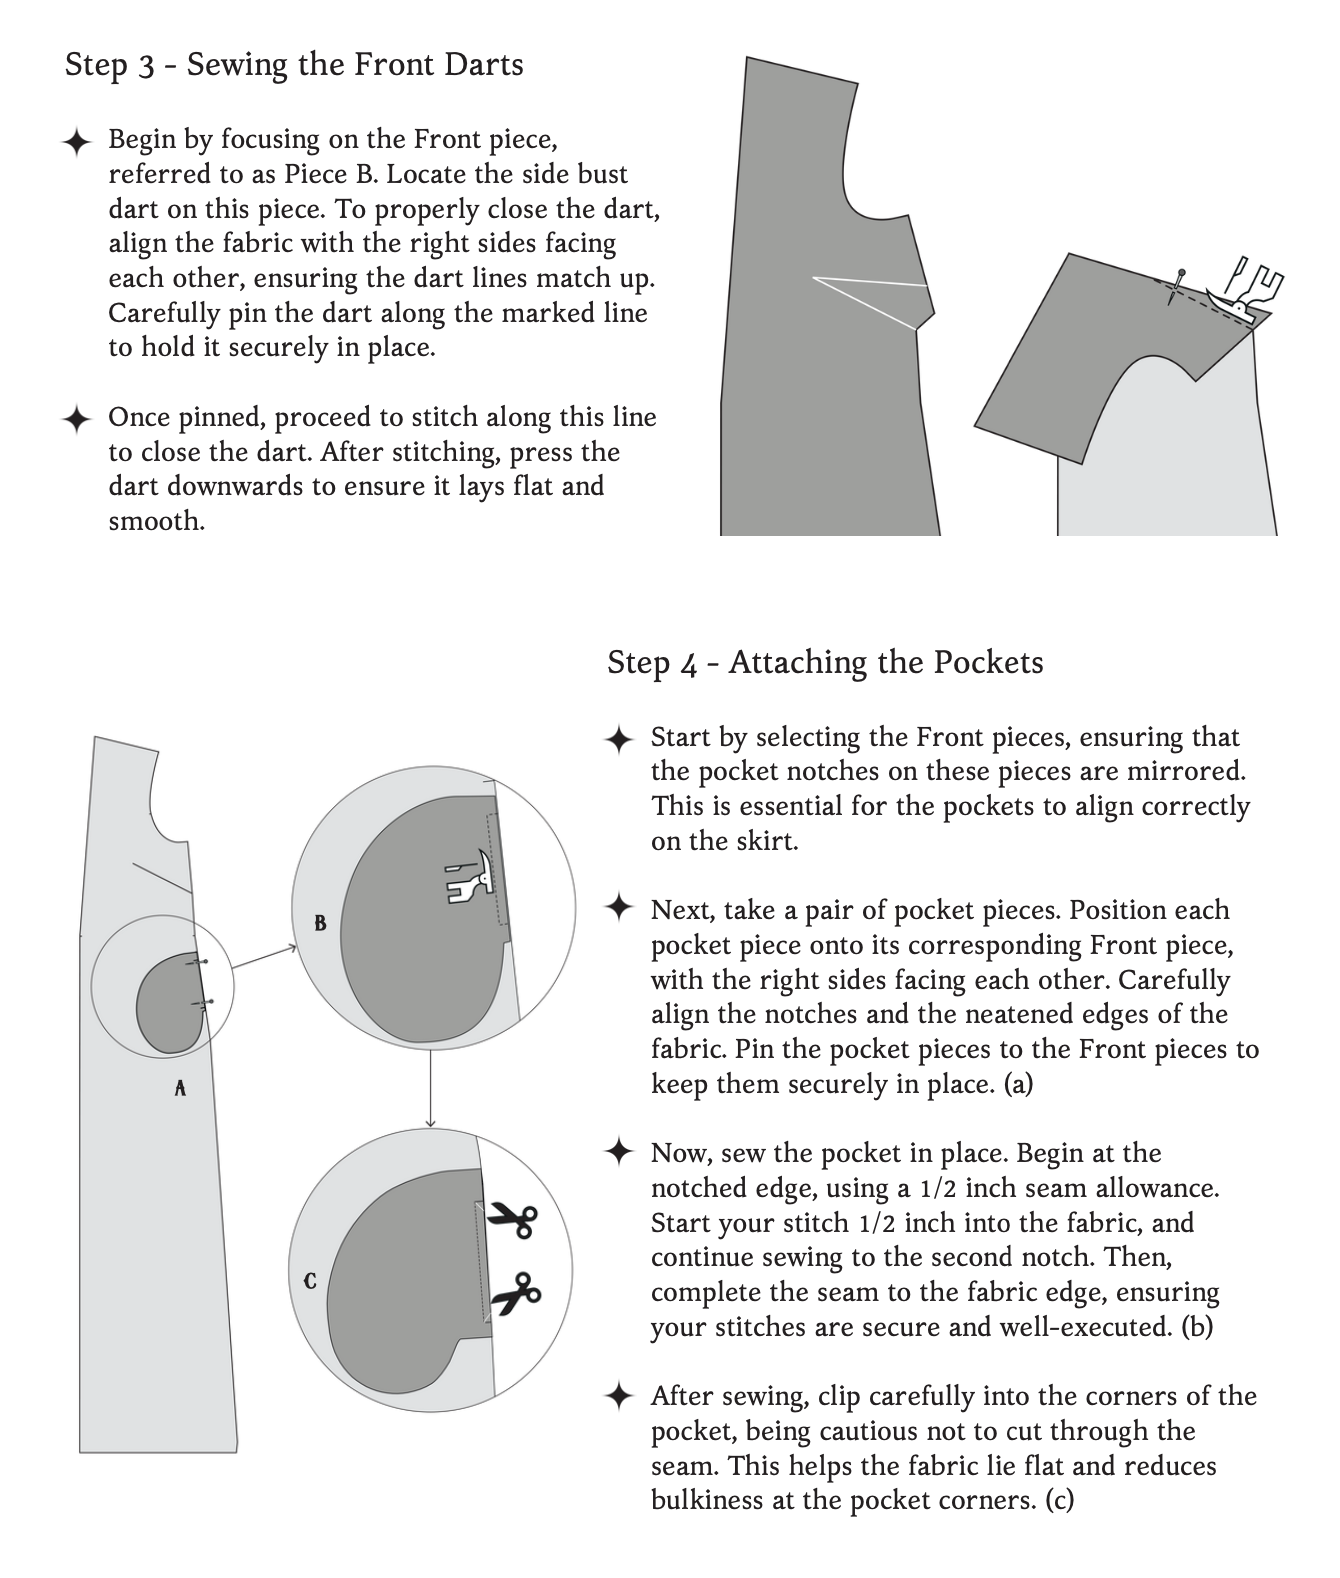
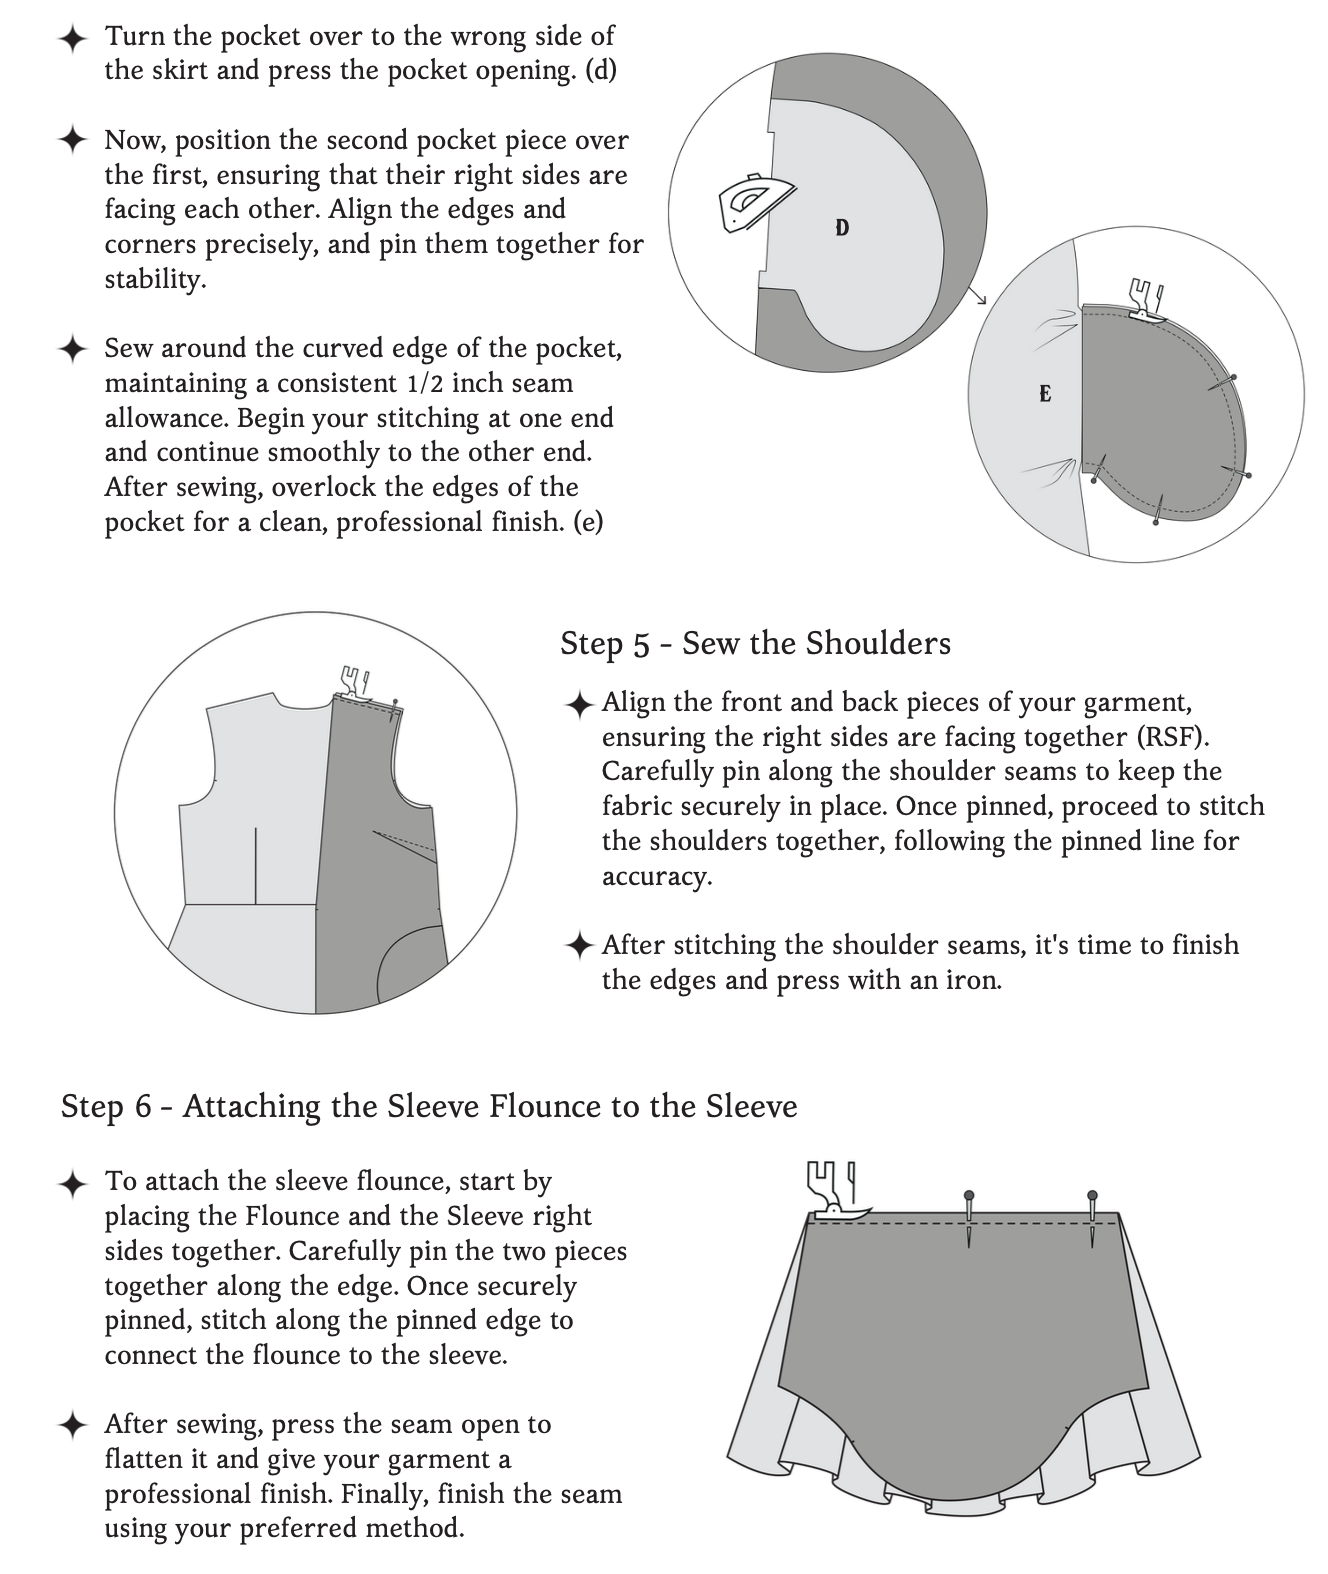
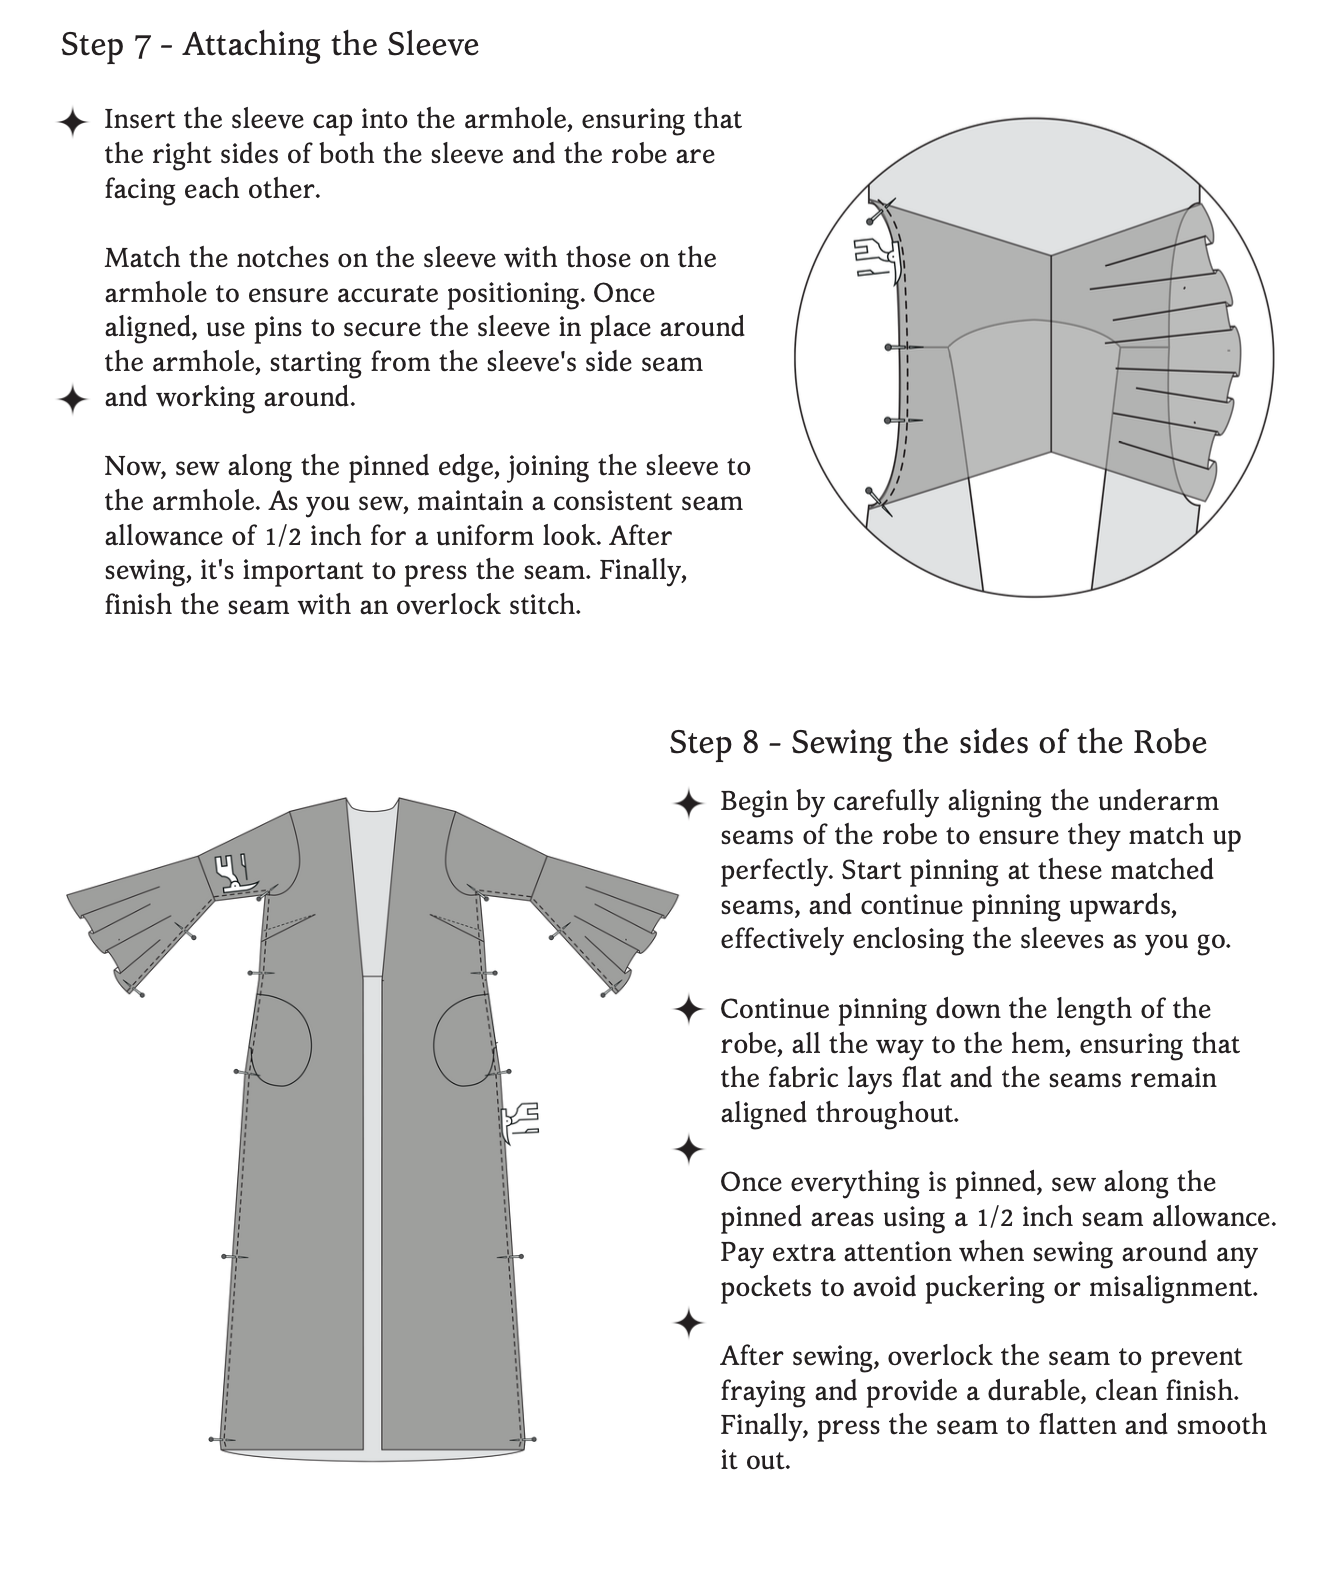
The Daydream Duster Robe Sewing Pattern Guide
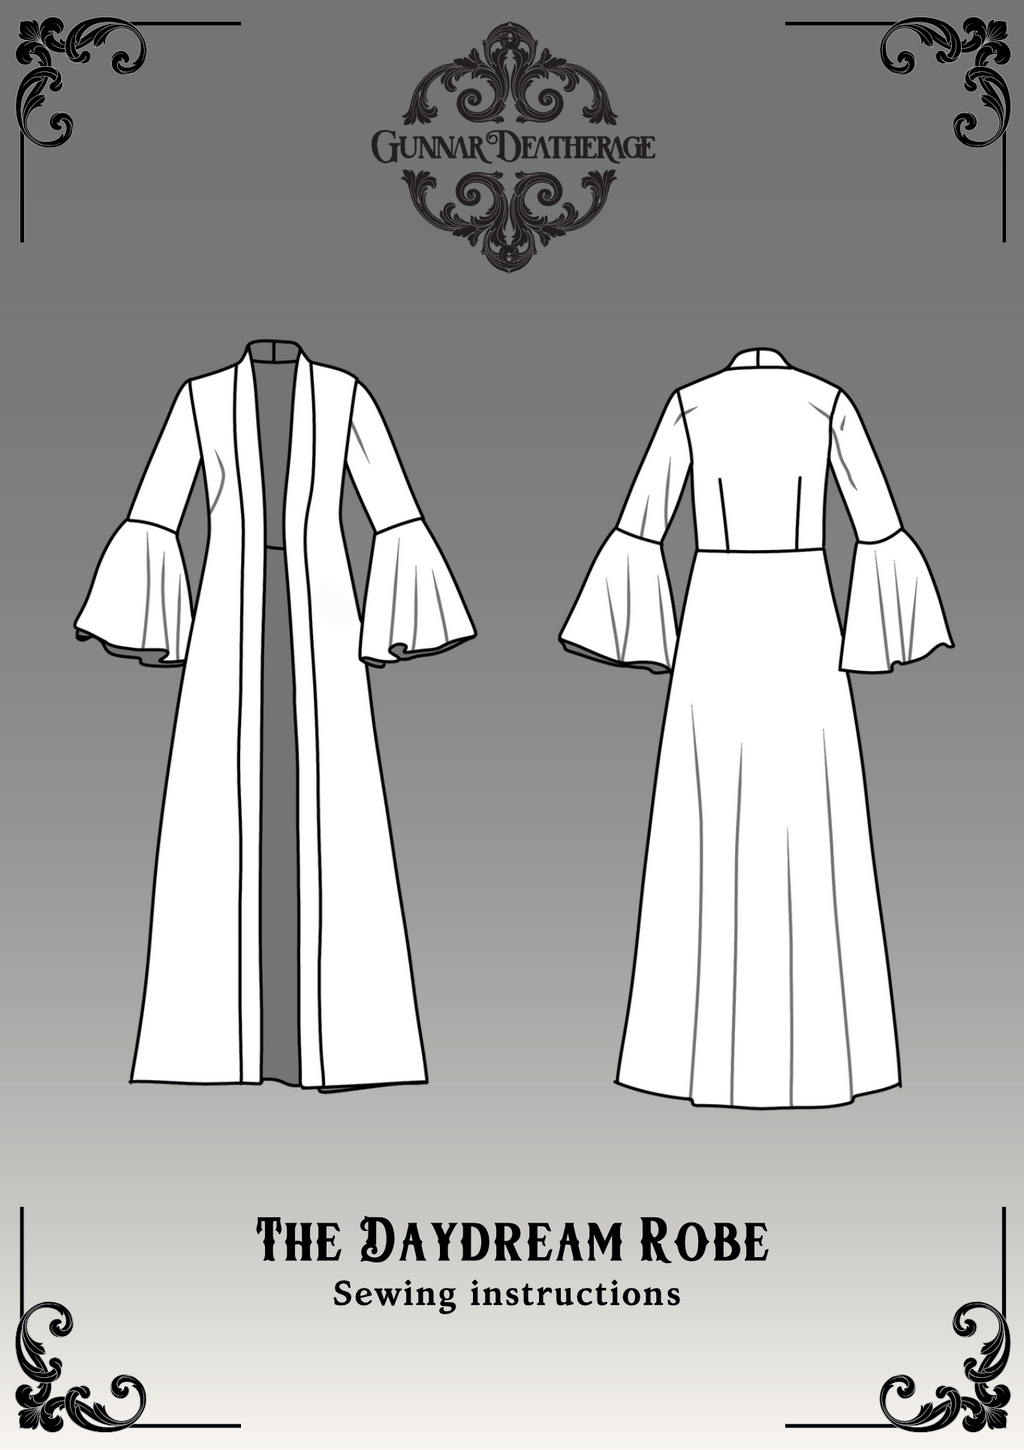
Welcome to the world of elegant loungewear with our Daydream Duster Robe, a stunning addition to any wardrobe that's as practical as it is stylish. Designed with the transition seasons in mind, this robe is perfect for the mild breezes of spring and the crisp air of fall. Its versatile nature makes it ideal for layering over other garments, providing both warmth and style.
Featuring elegant flounces on the sleeves and practical side pockets, the Daydream Duster adds a dash of drama and convenience to your loungewear. The robe’s flowing silhouette captures the essence of ease and style, making it a staple piece for your transitional wardrobe.
Craft your own Daydream Duster Robe and bring a bit of everyday luxury into your wardrobe. This pattern is suited for sewists looking to create a piece that’s both functional and fabulous—perfect for those moments when you want to wrap yourself in a bit of daydream.
Before You Get Started
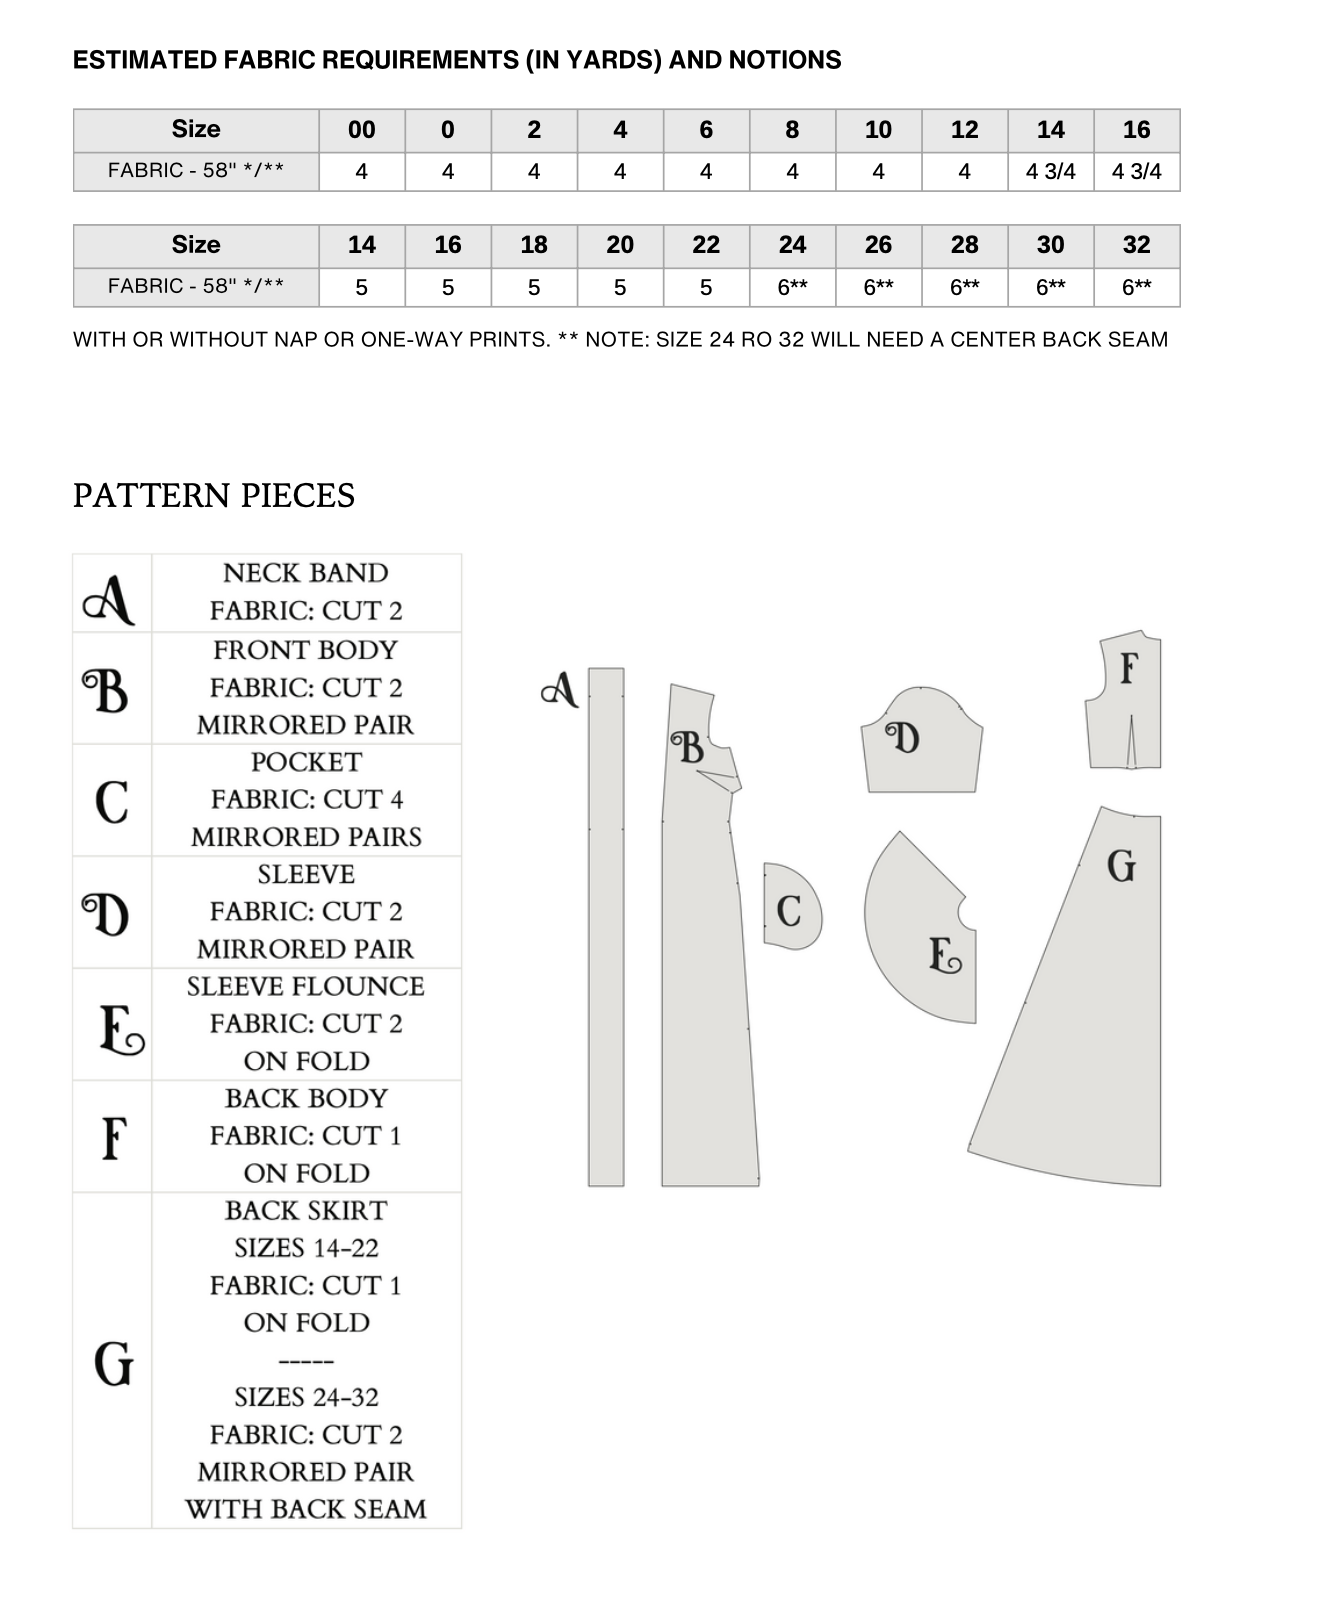
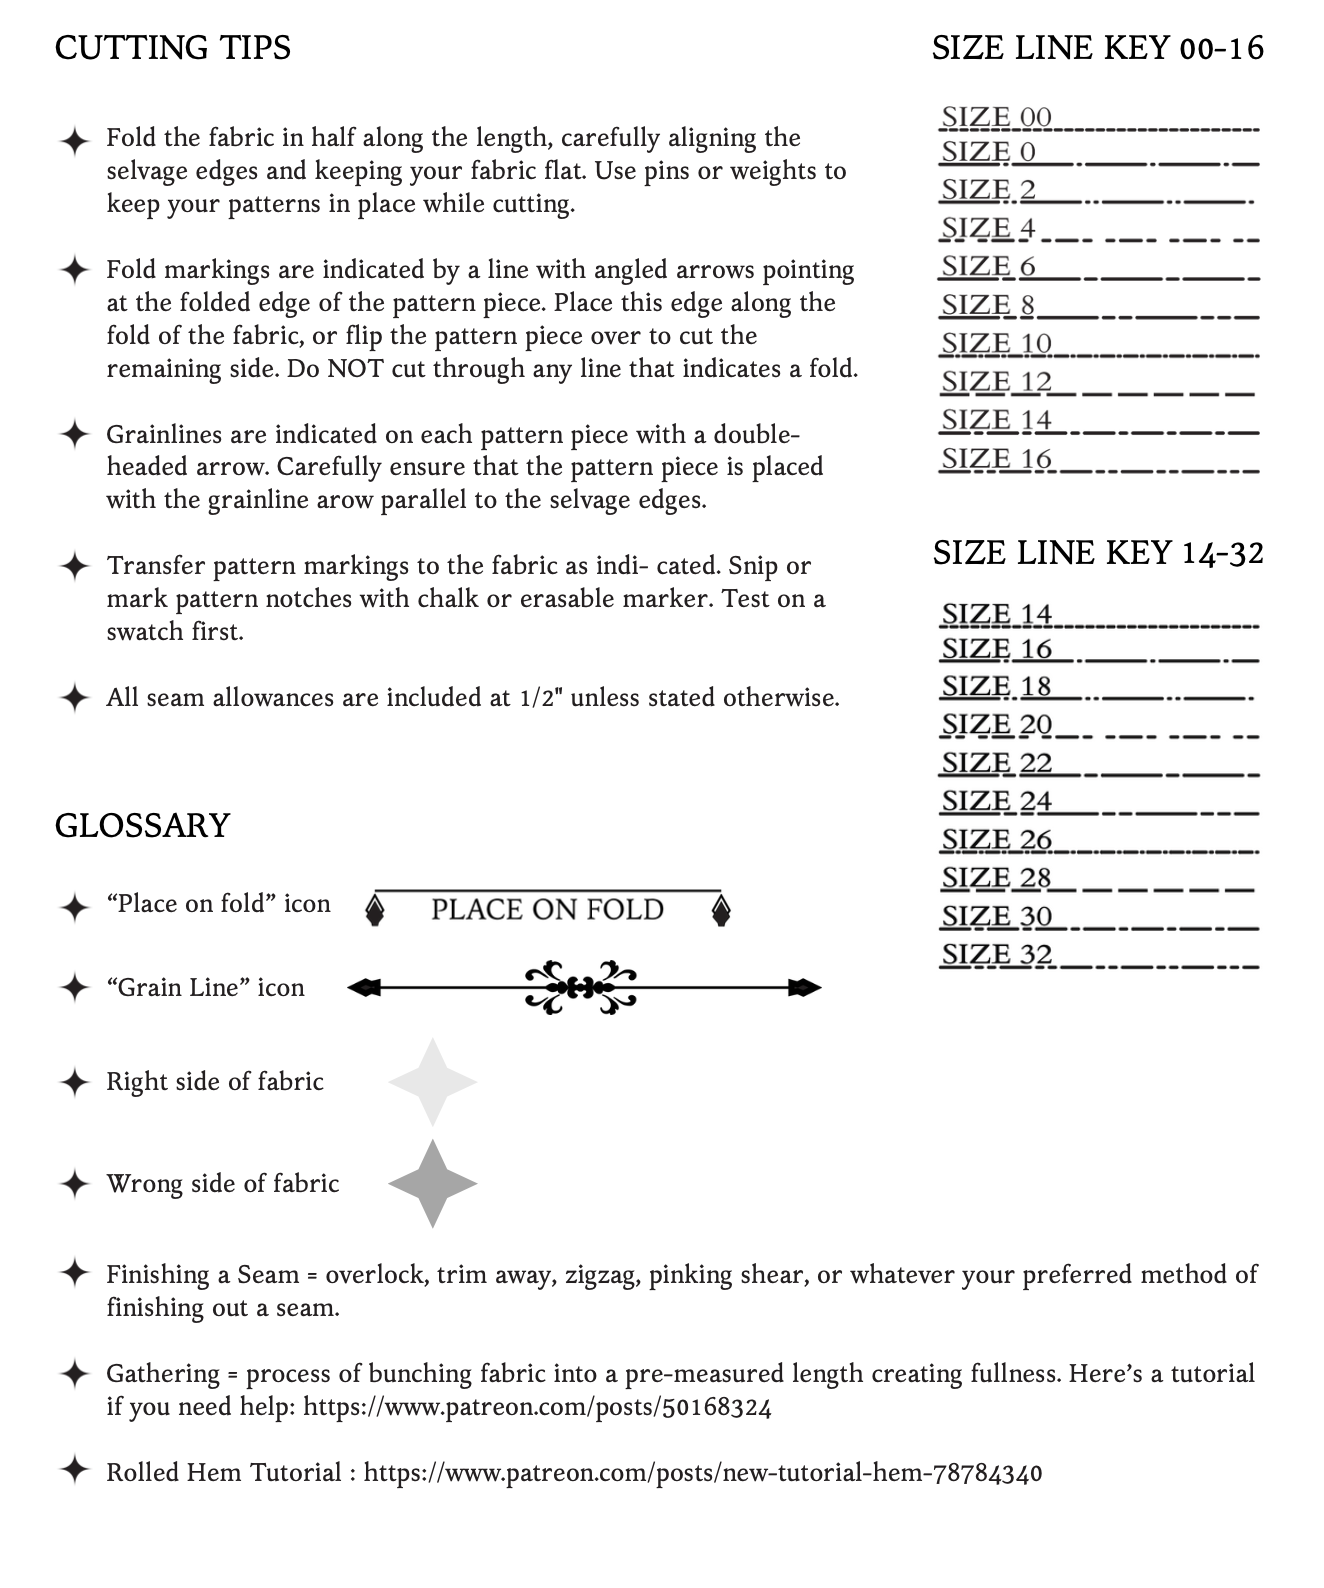
Please take note that the seam allowances on this pattern are 1/2” unless otherwise stated.
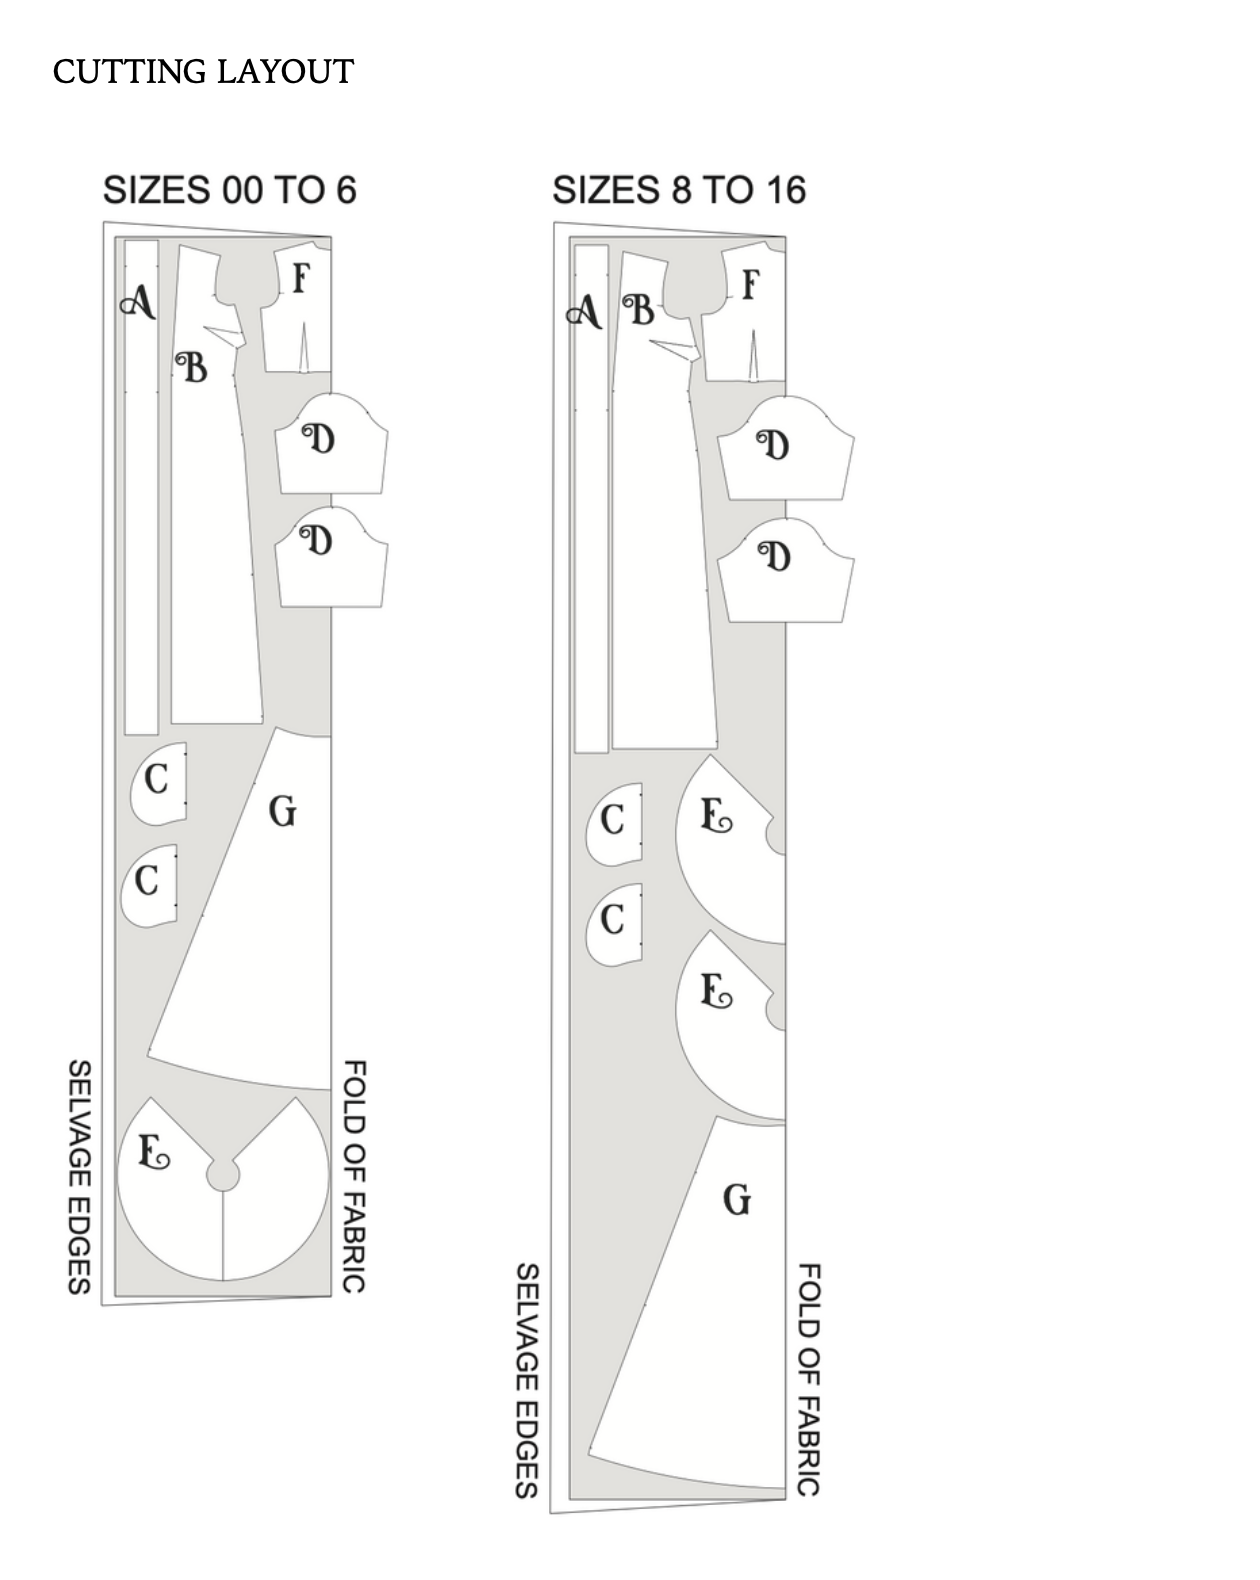
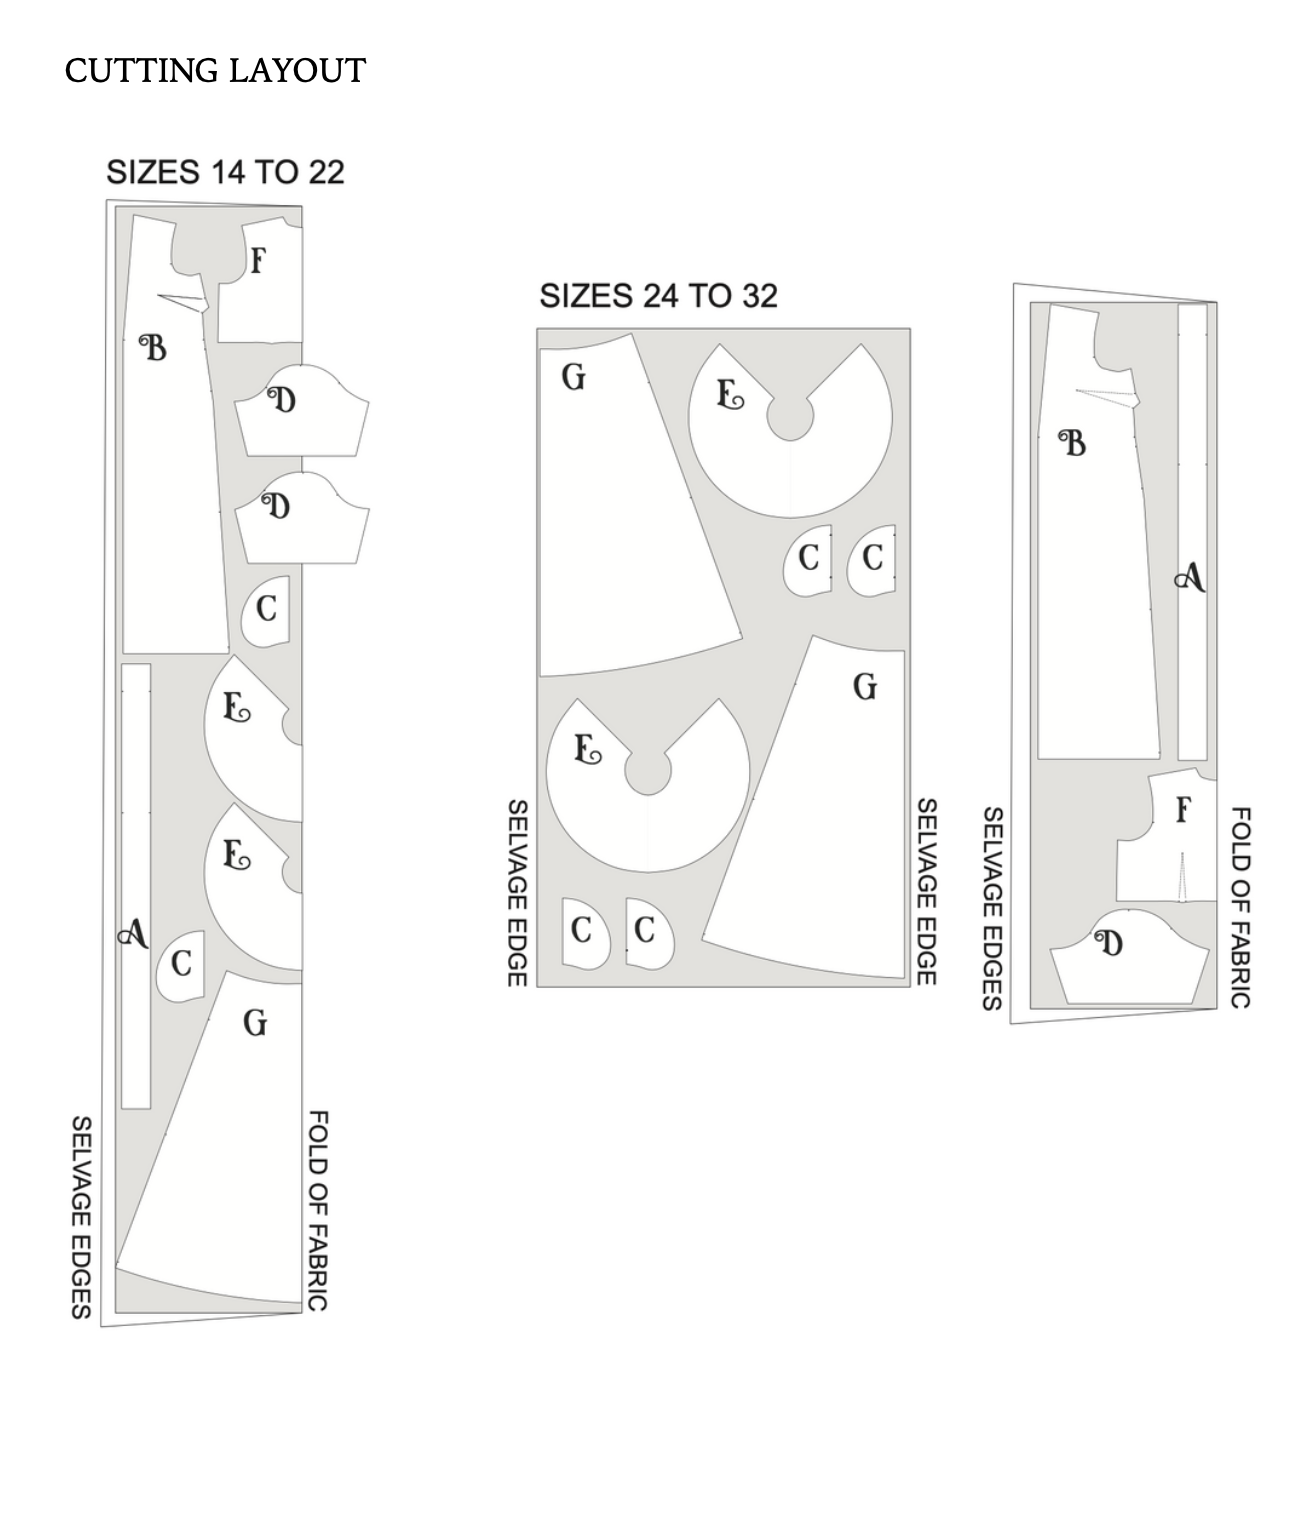
The Pattern will have all the notions and cutting layout you will need in the provided PDF files.
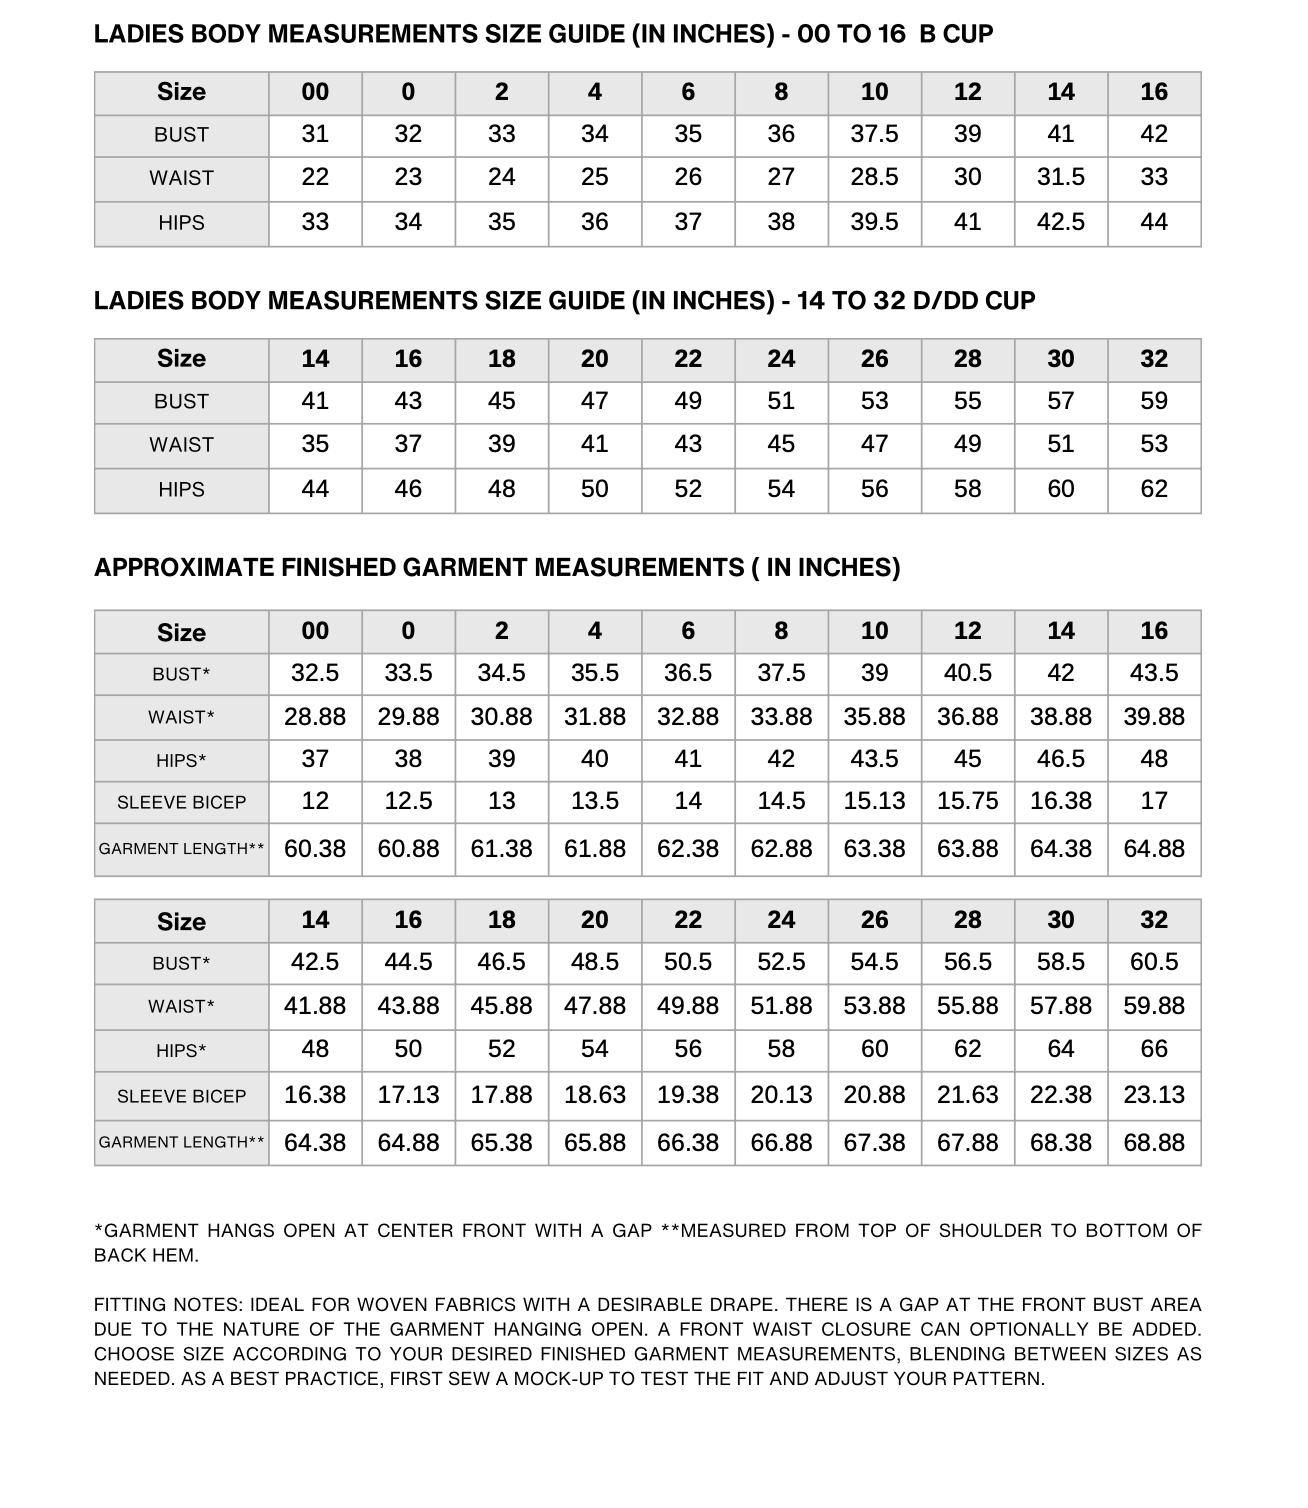
Size Charts, and Finished Garment Measurements
Yardage/ Fabric Consumption