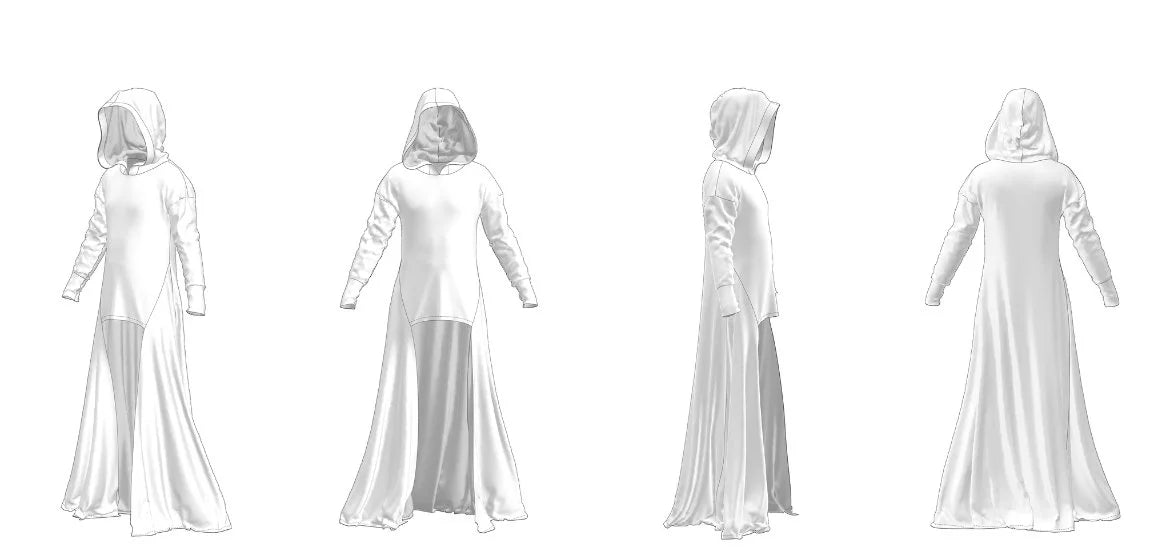
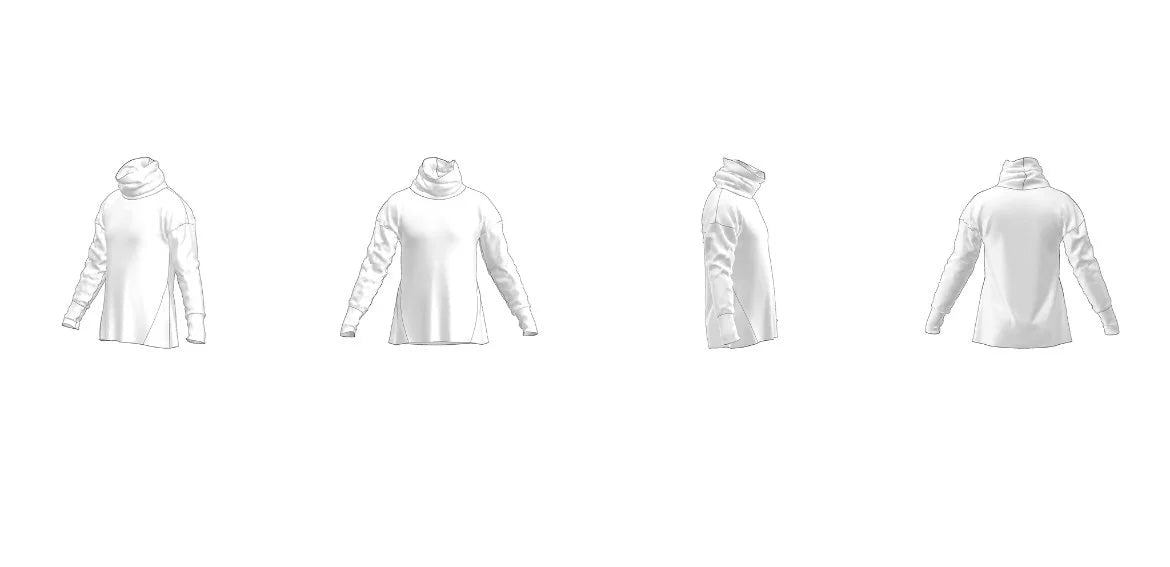
Obscuras Hooded Cloak Sewing Pattern Guide

Hello, and welcome to the Obscuras Hooded Cloak!

As always I HIGHLY suggest making a cotton Muslin mock-up! You want to make sure you don’t need to make any alterations before hopping into your real fabric.


Please also take note of the seam allowances on this pattern is 1/2” unless otherwise stated.

Now, let’s familiarize ourselves with the pattern! 

Pattern Pieces

A - Hood

B - Collar

C - Front

D - Side Panel

E - Side Insert

F - Pocket

G - Pocket Facing

H - Back

I - Sleeve

J - Cuff

Two Things To Note:

Cut out all of your fabrics. The pattern will include a cutting layout, a guide, and seam allowance rules. You’ll want to look over those.

If you are using a knit fabric or a fabric prone to fraying overlock or zigzag stitch the edges to prevent that.

  1. If you are not making the hood you can skip to Step 3. Cut out both pieces of the hood. Note that the pattern piece has a stitch line around the border as well as notches indicating where the two pieces align. Next sew the back curve of the hood. You’ll want to align the two pieces with the faces together. Pin the back of the hood around the curve then stitch. Now that the back of the hood is stitched together, press the seam open. If you are not lining the hood press the seam to one side for a cleaner look.

  2. (STOP! If you are going to add a lining to the hood please see next step before continuing.) Roll under the front outside edge towards the inside of the hood. The pattern has a fold line that denotes how much fabric you should fold. You’ll want to use as many pins that you need and press the fold, especially if you’re using a bulkier fabric, making it easier to sew. Then stitch using your machine sewing guides to make a straight line as this stitch will show from the outside. This will create a nice topstitch and a clean line around the hood.

  3. Optional Hood Lining: Cut your lining following the hood pieces, sew the back just like in the previous step, pin the lining to the hood, continue with the previous step.

4. Next we will be working on the shoulder seams. If you have a fabric that is really going to stretch or drape you should use a tulle tape in the seam. If you have a thinner fabric you should sew them together and overlock afterwards. For a heavier fabric, like the one in the example, you’ll want to overlock/zigzag stitch all the pieces first so there is no fraying,then press open) Pin with the right sides facing. Then stitch the shoulder seams together.

5. Now let’s work on the pockets! There are two pocket facings and a pocket thats cut on the fold. On the Front Piece there are notches that match up with the notches on the Pocket facing. With shears create tiny cuts to mark your notches (these will not be visible once the garment is complete) into the edge of the fabric where the notches are on the pattern to help mark where to align the two fabric pieces. Pin the right side Pocket Facing to the right side of the front using the notches as a guide. Using Tailor's Chalk (or something similar) mark on the pocket facing a half inch seem allowance forming a rectangle connecting the notches. Stitch the rectangle. Repeat on the other side of the Chest Piece.

6. Using the chalked markings as a guide relieve some bulk by cutting parallel to what we just sewed. Do not cut through what you just sewed! Flip the Pocket Facing to the other side and press the seam flat. There will be a rectangular pocket opening. Do the same to the other side. Once both are pressed open, do a topstitch around the pocket opening to help secure the pocket facing and for a cleaner look.

7.Using the Pocket make sure the right side is facing out as you’ll be able to see a small portion of the pocket interior from the outside. When aligning the Pocket the bottom of the piece will match up with Pocket Facing bottom. Then pin the Pocket to the Chest Piece Flip over the fabric. Then pin on both the top and bottom of the Pocket. Once that is complete, top stitch the Pocket on (this stitch will be visible from the outside). Press the seams flat and beautiful!

8.There are two different version of this hoodie: longer and shorter. If you have not decided which version you will make now is the time to do so. If you are doing the longer version, roll the bottom hem up and hem the front section first before you’re able to sew on the side seams. If you are making the shorter version, No need to hem the bottom yet. You’ll be making the whole hoodie and hem it at the very end.

9.Longer Version - Roll up the hem of the Front Piece to the back and pin. Then top stitch across to secure. If done correctly, with the addition of the topstitch we completed for he pocket, it will look like a double stitch from the front of the garment. There are notches on the Front Piece and Side Piece to indicated where to stitch the pattern pieces together. Pin the two pattern pieces matching the notches with the right side of the fabric facing each other. Stitch from the top all the way down, at a half inch, creating a slanted side seam. As always, press flat and beautiful. Repeat on the other side. Short version - The first step will be aligning the Side Piece fabric to the Front Piece. When aligning the Side Piece use the notches on both patterns pieces to align with the pocket. Pin the Side Piece to the pocket piece. Sew the Side Piece, at a half inch, on the side of the hoodie all the way down. The bottom should match up with the bottom of the hoodie. Press flat and beautiful.

10.Next we will be working on sewing the back to the front starting at the shoulder seams. Match the right sides facing, pin all the way across, and stitch the shoulder seams. The next step will be to stitch up the side seam. Start by pinning from the bottom of the sleeve all the way down and stitch at a half inch. Don’t close off the arm hole. Repeat to the other side.

11.The sleeves are the same for both versions. Start by folding the sleeve in half, pin, and stitch at a half inch. Press the seams open.

12. Note: This is a tight fitting cuff. If you feel like your fabric doesn’t have as much give you can cut it on the bias which will give you a little more give. Just like the sleeves ,the cuffs will get folded in half “long ways” as well. Pin and stitch at a half inch creating a tube. Roll your cuff inside out half way. Make sure the seam matches all the way around. Insert the sleeve into the cuff seam up to seam up. Pin the cuff to the sleeve all the way around the edges. Depending on the fabric you are using you may have to stretch the fabric some. Sew the cuff to the sleeve. Repeat to the side.

13.Flip the garment inside out. This will make accessing the arm holes easier. Insert the sleeve into the arm hole. Make sure to match the sleeve seam with the under arm sleeve. Once those are matched pin all the way around the arm hole. Joining the sleeve and the body of the hoodie. If you are making the longer version there will be a lot of fabric to deal with. Don’t get frustrated and take your time, ha! Once the arm hole is pinned stitch around the arm hole. Repeat on the other arm.

14. If you have decided to use the Collar, let’s create that. The collar is a bit like a cowl neck and let’s treat it like we did the cuffs. Fold the collar piece in half, pin, stitch the seam, and press open. Whether you’re attaching the collar or the hood you will want to match the center of the collar/hood to the center back of the hoodie. Pin the collar/hood to the center seam. Then work your way all the way around the neck hole. It should be noted that the hood ends won’t touch each other. Stitch the hood/collar on.

15.This step is not necessary. Top stitch the seam allowance below the hood. Stitching the seam allowance down to the body of the garment.

16. Longer Version: Top stitch the seam allowance of the side seam from the front to the hem.

17.Longer Version: Trim how long you want the bottom to be.

18.Roll the bottom and hem that as well. Shorter Version: Roll and hem the bottom of the back piece.


.

.

.

.

.


.

.


.


.

.

.

.