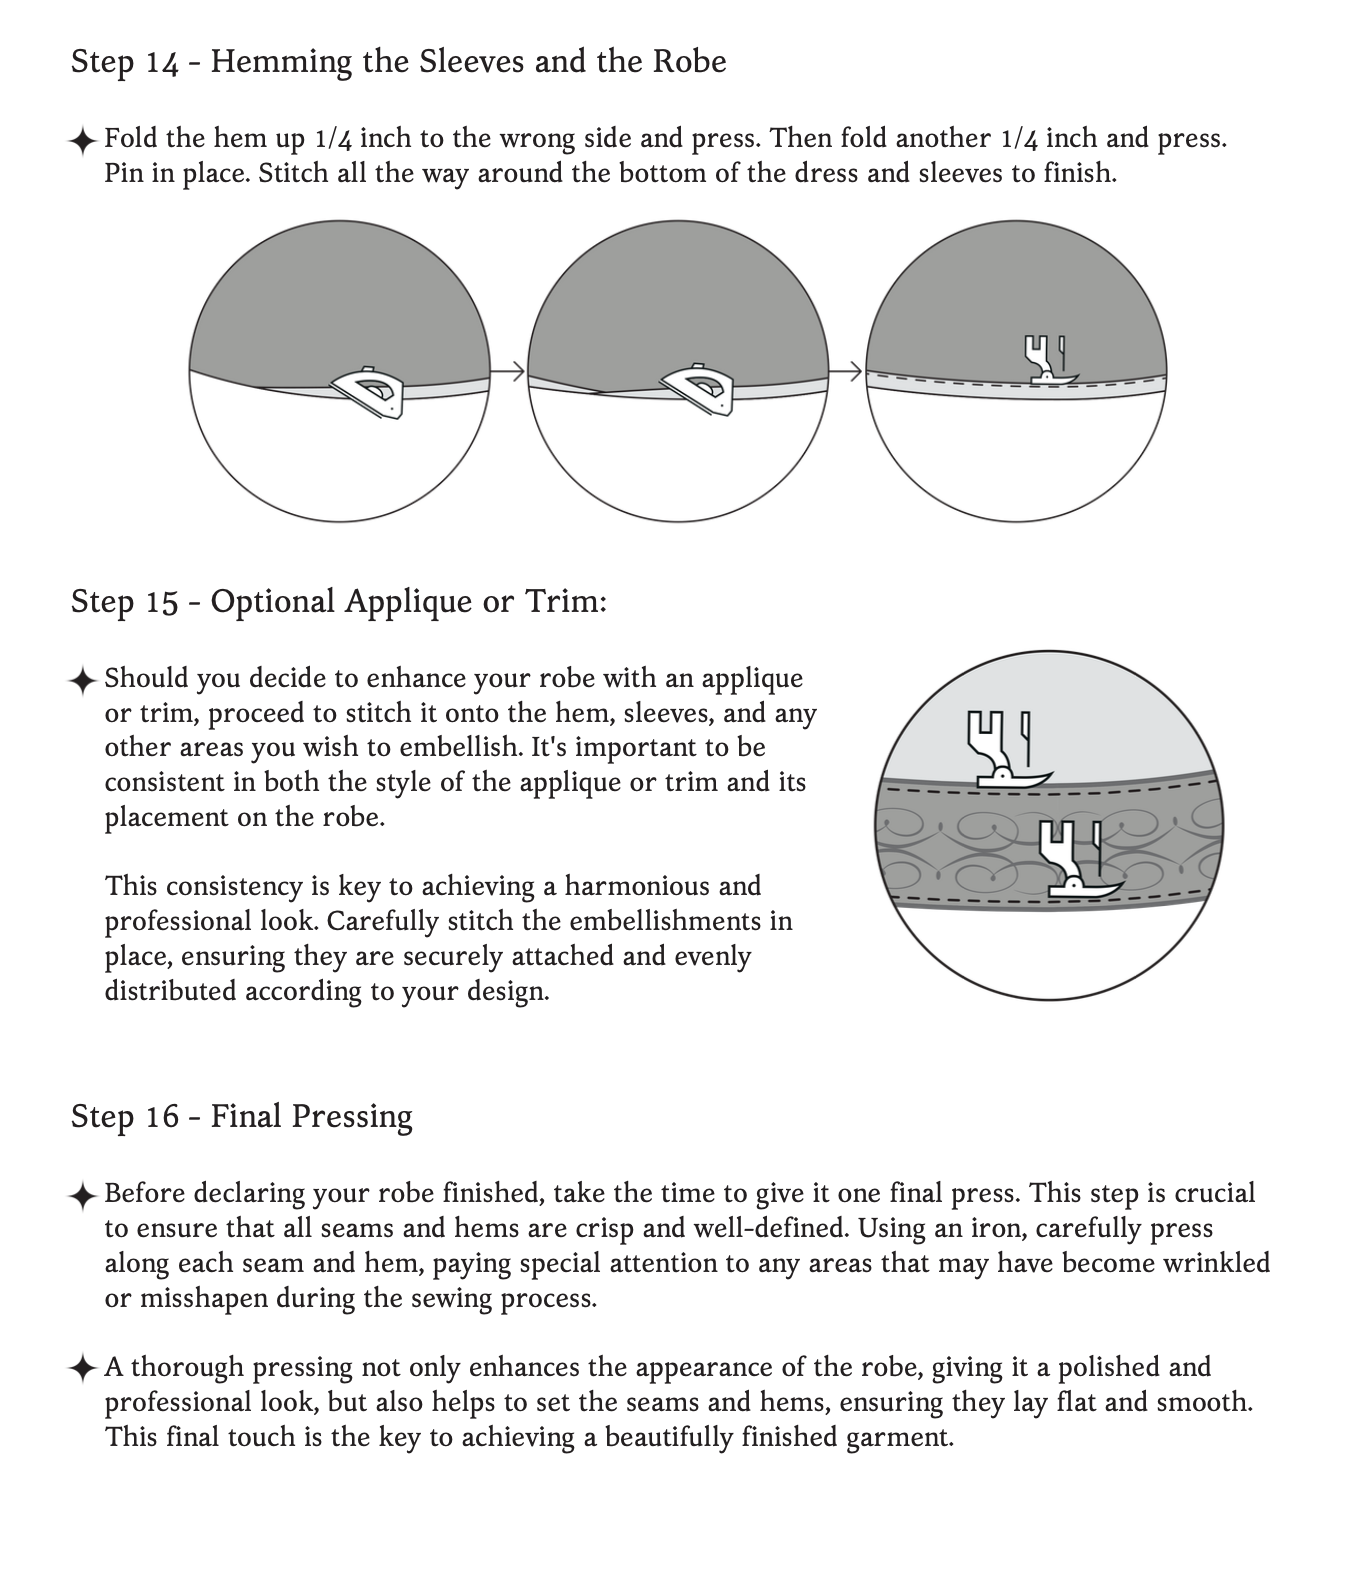
The Aurora Robe Sewing Pattern Guide
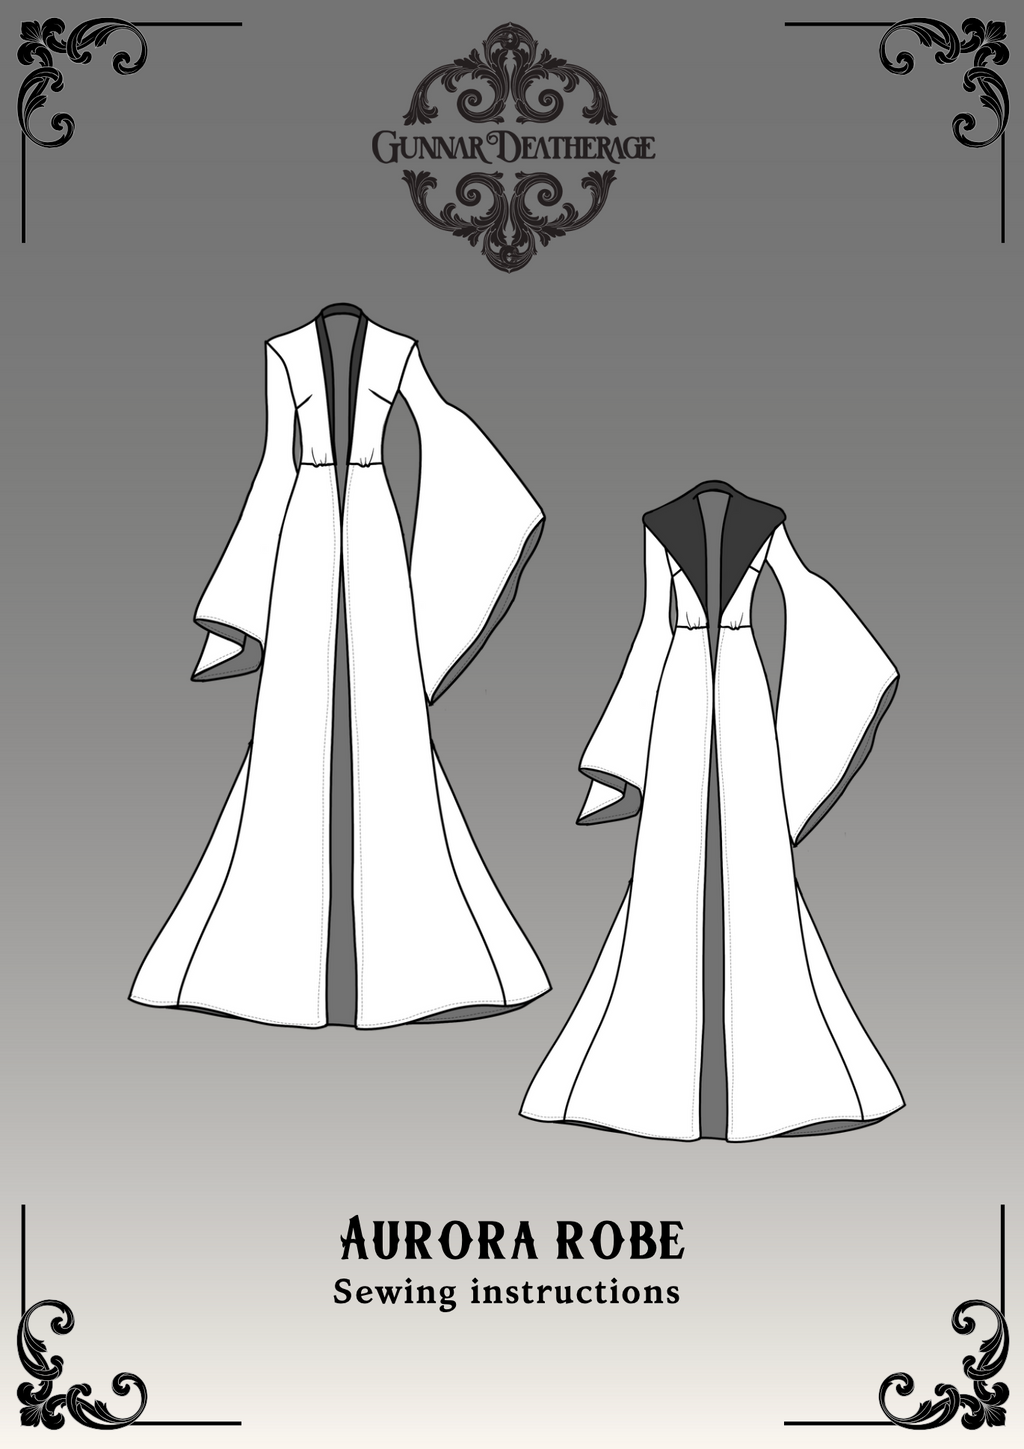
Hello and welcome to The Aurora Robe Sewing Guide!

This robe was inspired by the golden age of Hollywood! It is perfect for Brides, bridesmaids, Weddings, Boudoir shoots, Burlesque shows, Cosplays, and anything in between!

Before You Get Started


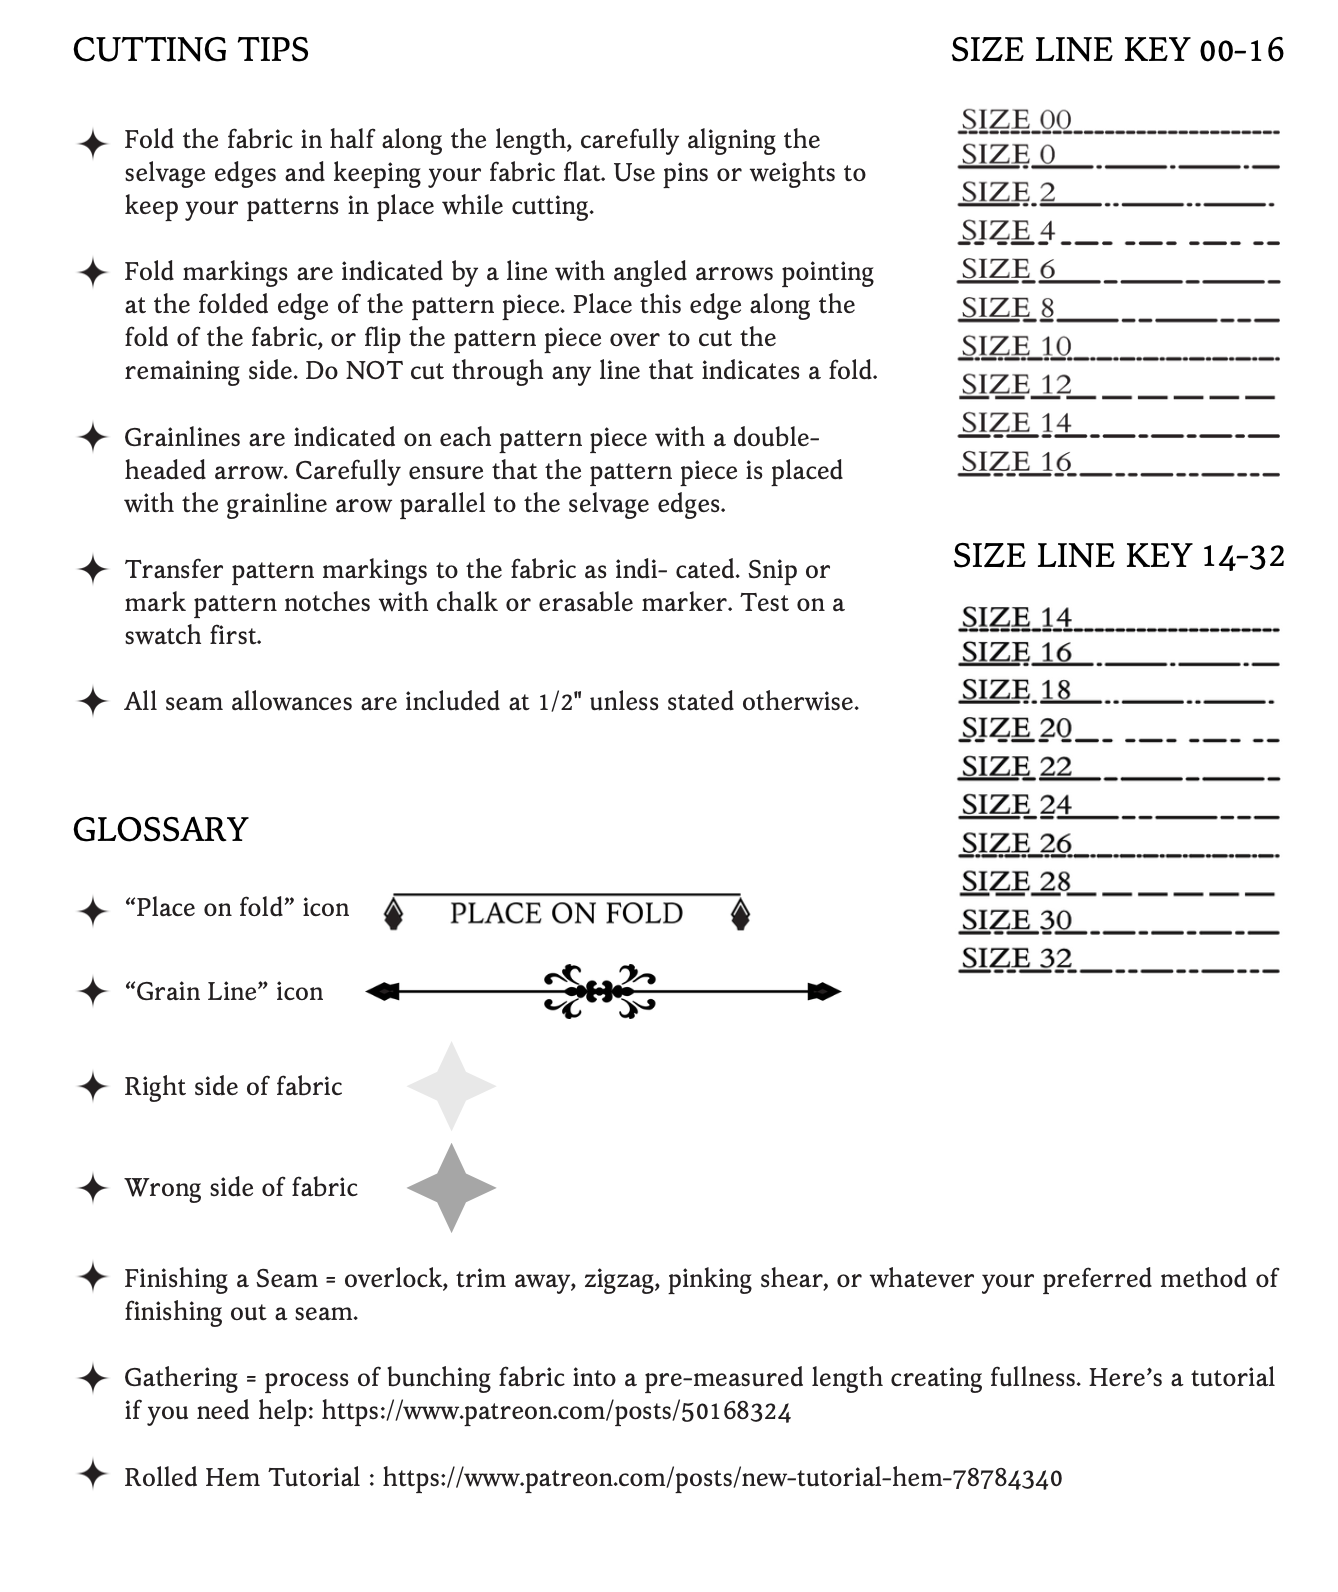
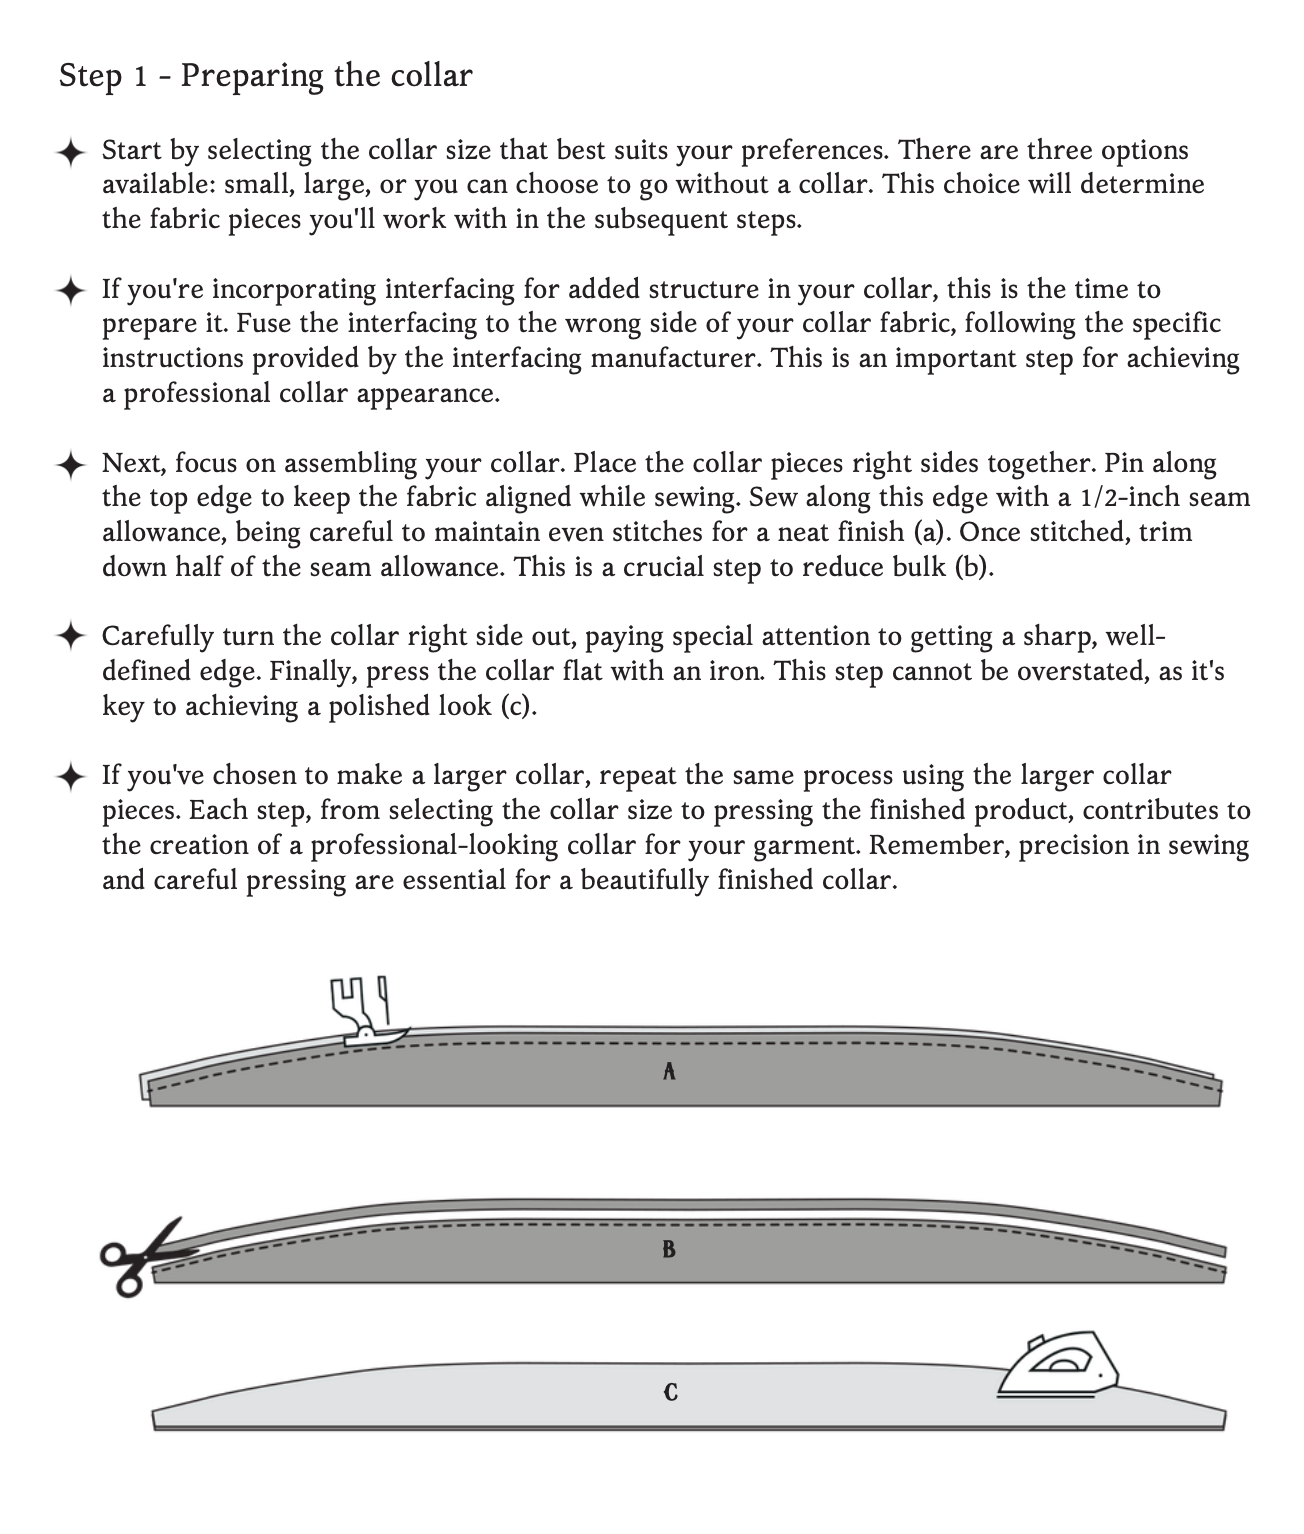
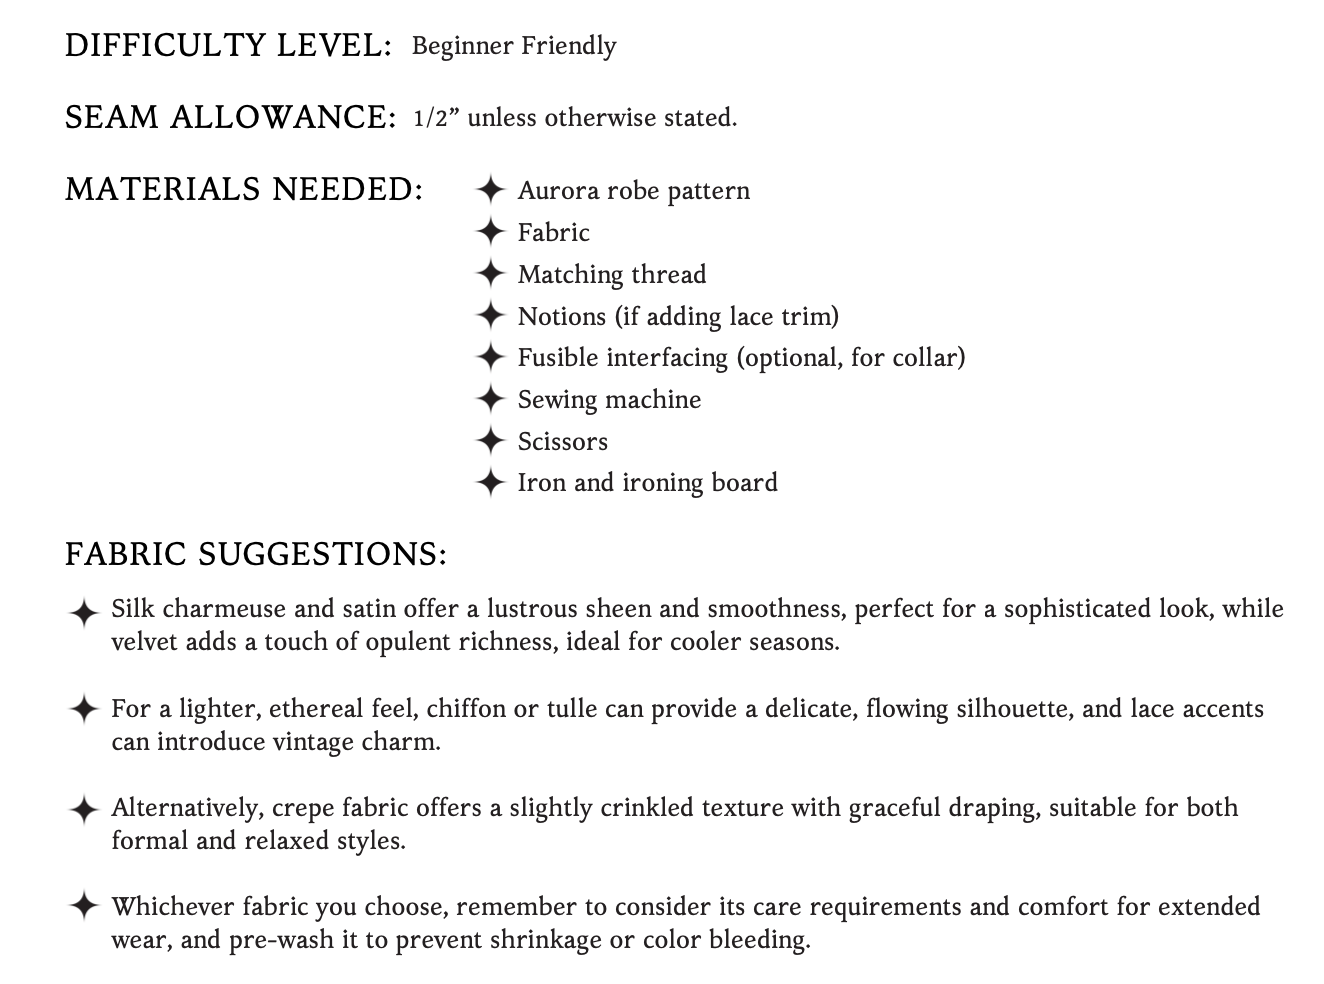
Please take note that the seam allowances on this pattern are 1/2” unless otherwise stated.

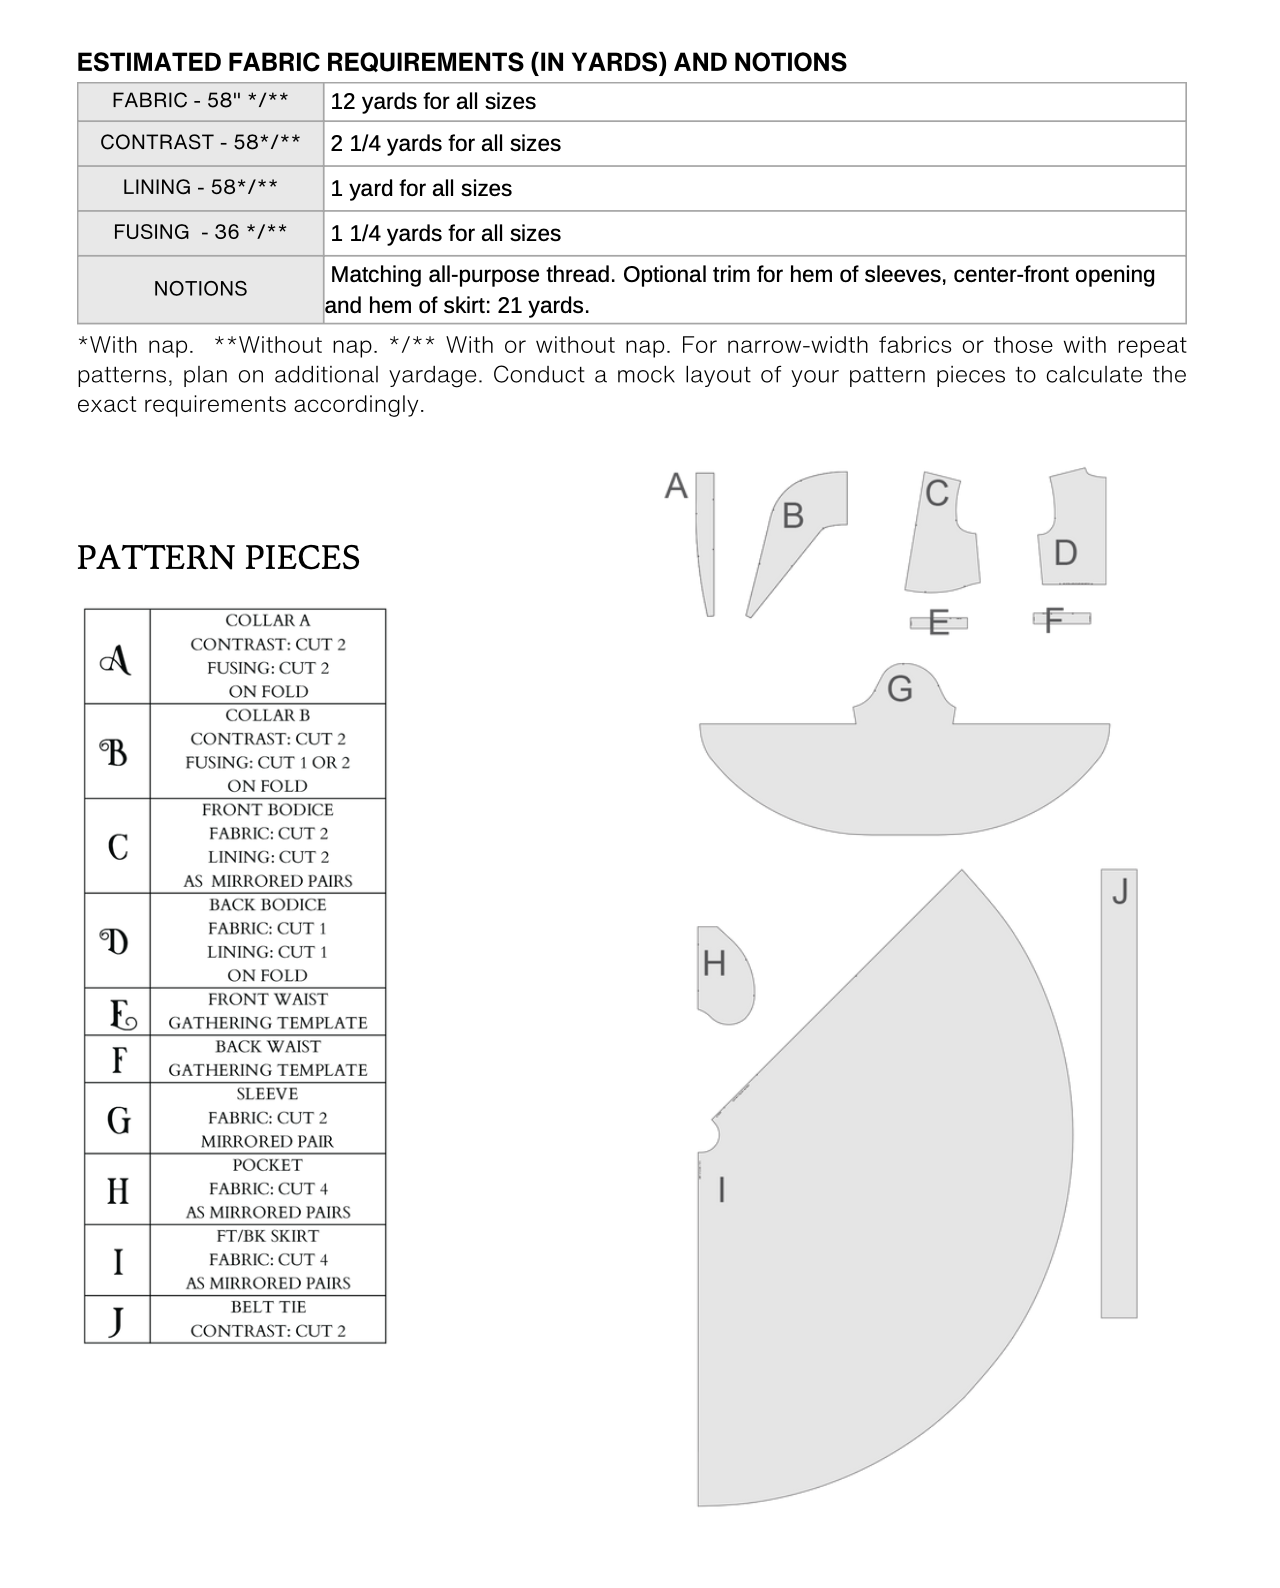
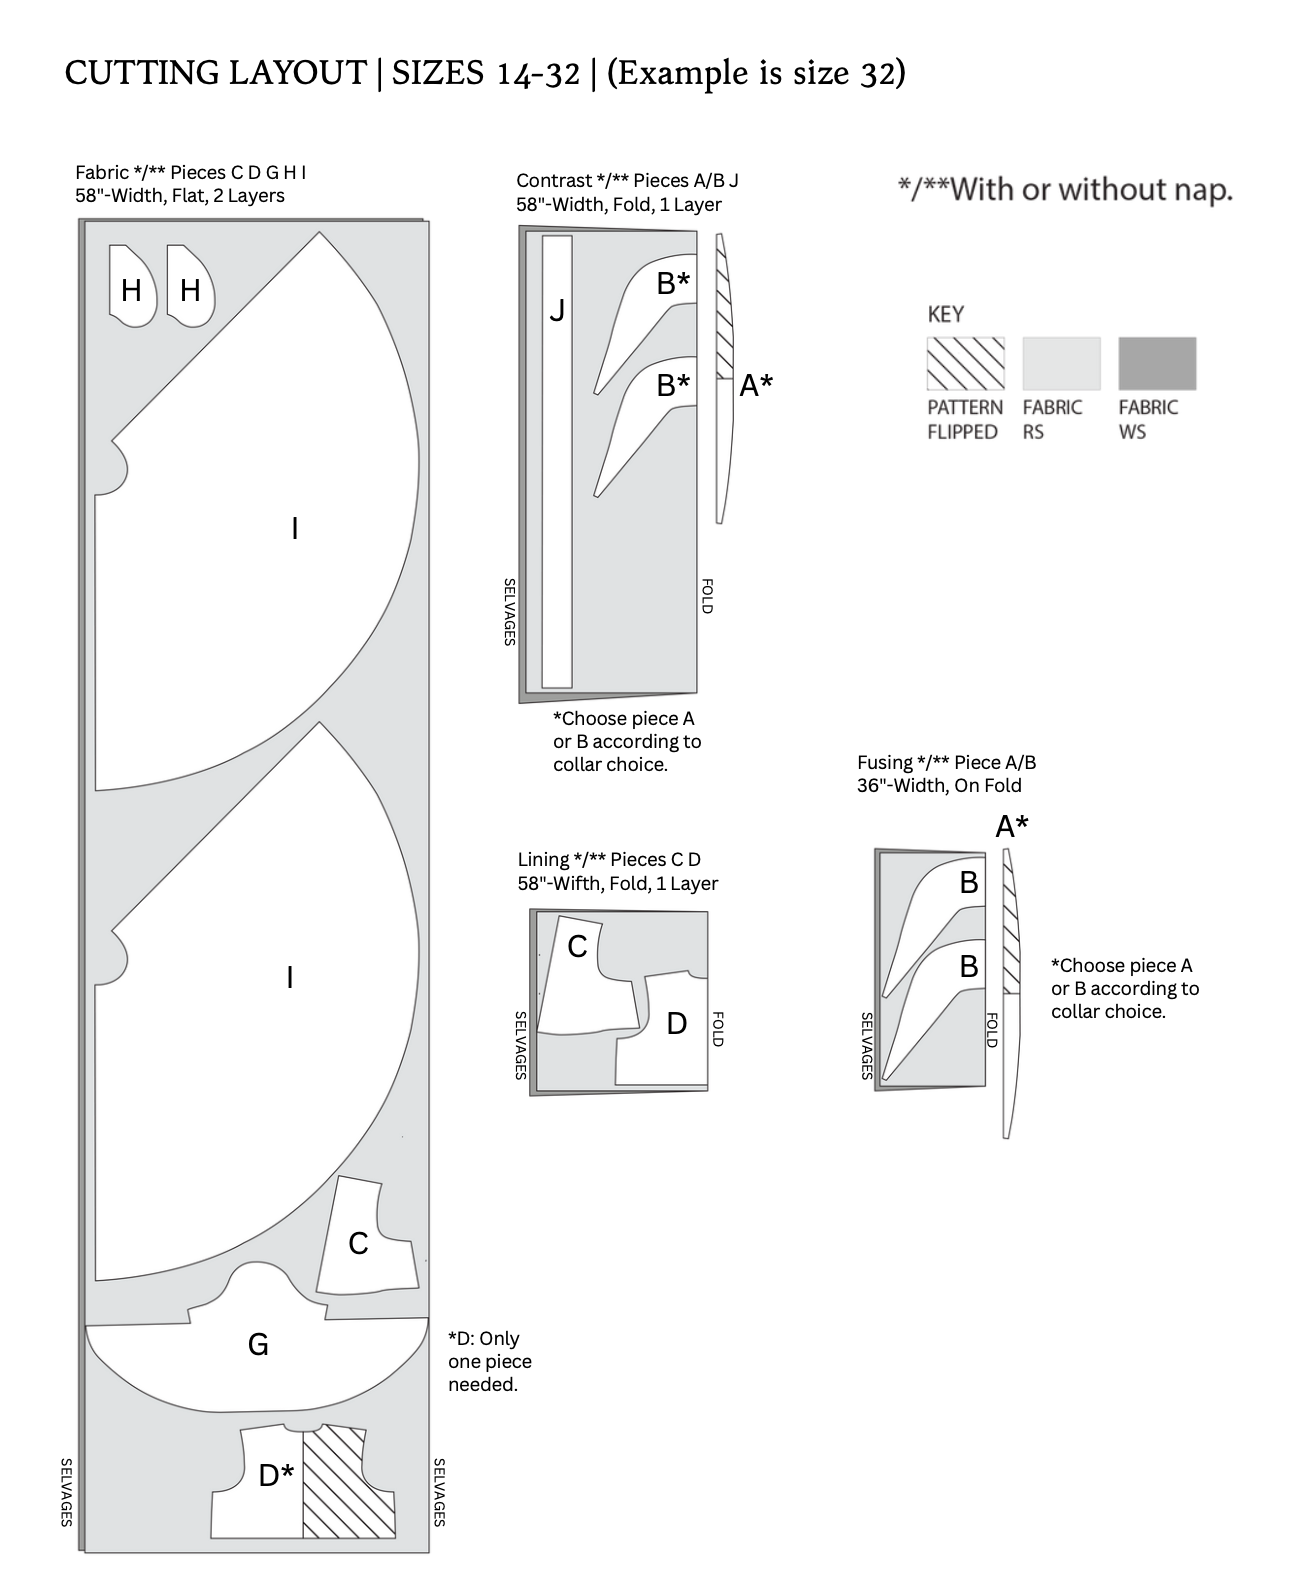
The Pattern will have all the notions and cutting layout you will need in the provided PDF files.


IF YOU PLAN ON CREATING THE VERSION OF THIS ROBE THAT HAS FUR LINING AT THE SKIRT, AND SLEEVES, PLEASE WATCH THE TUTORIAL ABOVE BEFORE CUTTING ALL OF YOUR PATTERN PIECES OUT.


Difficulty: Beginner Friendly

Fabrics: woven satins, charmeuse, silks, stretch velvets, laces

Sharing: If you created something with a Gunnar Deatherage pattern, PLEASE give us a review, and post a photo! Gunnar loves to see your creations, and your reviews really help our little shop grow!

Glossary

RSF = Right Side Facing

RSO = Right Side Out

WSO = Wrong Side Out

Finishing a Seam = overlock, trim away, zigzag, pinking shear, or whatever your preferred method of finishing out a seam.

Gathering = process of bunching fabric into a pre-measured length creating fullness. Here’s a tutorial if you need help. https://www.patreon.com/posts/50168324

Rolled Hem Tutorial = https://www.patreon.com/posts/new-tutorial-hem-78784340

This pattern tutorial already assumes you’ve cut out all the pattern pieces.

Gunnar Tip: Make sure to press your seams flat and beautiful. Find the correct setting on your iron and use a little steam if you need to.


Creating the Aurora Robe

Materials Needed:

  • Aurora robe pattern

  • Fabric for the robe (satin, velvet, lightweight fabrics, or stretch fabrics)

  • Matching thread

  • Notions (if adding lace trim)

  • Fusible interfacing (optional, for collar)

  • Sewing machine

  • Pins

  • Tailor's chalk

  • Scissors

  • Iron and ironing board

Introduction to the Project

Welcome to the Aurora Robe tutorial! In this section, we'll guide you through the steps of creating our luxurious robe pattern. Gather your materials, set up your workspace, and let's get started on this exciting project.

Preparing Back Pieces

  • Retrieve the back pieces from your pattern, ensuring they're cut on the fold.


  • Mark notches on the bottom of the back pieces using Taylor's chalk.

  • Set up your sewing machine with a long stitch length and slightly reduced tension to prepare for your gather stitch.

  • Create a gather stitch between the notches on both back pieces, about 1/4 inch from the edge.

  • gather the second set of back pieces you cut for the lining and repeat the gather stitch process.

  • Use the back waist gathering template to ensure the gathers match the intended length.

  • Gather the lining piece to match the back waist stay length.


Preparing the Front Robe Pieces

  • Retrieve the front pieces from your pattern


  • Mark notches on the bottom of the front pieces using Taylor's chalk.

  • Set up your sewing machine with a long stitch length and slightly reduced tension to prepare for your gather stitch.

  • Create a gather stitch between the notches on both front pieces, about 1/4 inch from the bottom edge.


  • Gather the second set of front pieces you cut for the lining and repeat the gather stitch process.

  • Use the front waist gathering template to ensure the gathers match the intended length.

  • Gather the lining piece to match the front waist stay length.

Creating Collars

  • Choose the appropriate collar size based on your preference (small, large, or no collar).

  • If using interfacing, fuse it to the collar fabric following the manufacturer's instructions.

  • Pin the collar pieces with right sides facing, and stitch along the top edge at a 1/2-inch seam allowance.


  • Trim half of the seam allowance to reduce bulk.

  • Turn the collar right side out and press it flat.

  • Repeat the process for the larger collar if chosen.

Assembling the Bodice

  • Align the front and back pieces with right sides facing, pinning the sides and shoulders together.


  • Stitch the sides and shoulders at a 1/2-inch seam allowance.

  • Press all seams open for a polished look.

Attaching Collars to Bodice

  • Mark the center back of both the bodice and collar with pins.

  • Pin the collar to the bodice, matching center backs and sandwiching the collar between the lining and outer shell. ( collar should be pointed inside bodice)

  • Stitch around the front and neck seam.


Sleeves:

Sleeve Preparation:

  • Examine the sleeve, noting the asymmetry at the top for proper armhole fitting.


  • Identify notches on the sleeve; use Taylor's chalk to mark them.

Sleeve Assembly:

  • Fold the sleeve in half, and pin it together with the right sides facing.

  • Begin sewing at the underarm seam, pivot at the notch, and continue down.


  • Clip the notch, Trim excess fabric, then either overlock or zigzag the edge.


  • Press the seam open to ensure a smooth and clean finish.

The Skirt and Pockets

  • Using 2 of the 4 skirt pieces you cut, pin together with right sides facing, and stitch. This will serve as your center back skirt seam. Finish the center back seam by overlocking or zigzagging the edges.

    Locate pocket notches on the skirt and pocket pieces for alignment.( these will be at the side seams)


  • Begin by pinning one of the pocket pieces to the top of the skirt with right sides facing, and matching notches)

  • Stitch a rectangular box 1/2” from the raw edge , using the notches as your guide.

  • Clip the corners of the box you stitched, turn to the right side, and press open.


  • align the other pocket piece to the pocket piece you stitched to the skirt with the right sides facing.

  • pin around the edges, and then stitch, ensuring you are only stitching the two pocket pieces together. Afterwards, clean finish your stitch.


  • Press the pocket.

  • Align the front skirt pieces to the back skirt pieces at the side seams, right sides facing, pinning along the side seam ( where you stitched your pockets.

  • Sew the side seam.

  • Repeat on the other side.

  • Afterwards, clean finish your stitch.

  • Hem the center front edges of the skirt to prepare for attachment.

    Attaching Skirt to Bodice:

  • Align the Right side of the skirt with the right side of the bodice.

  • Use pins to attach them together.

  • Ensure the top of the pocket aligns correctly.

  • Stitch the entire seam to secure the skirt to the bodice.


  • Optionally, reinforce the seam with a parallel or overlapping stitch.

  • Finish the seam edges using zigzag or overlock.

  • Confirm the pocket remains functional and accessible after stitching.

Creating the Belt Loops:

  • Fold them in half with right sides facing each other.

  • Pin along the edge.

  • Stitch along the edge, leaving one end open.

  • Turn the belt loop right side out using a turning tool or any suitable object.

  • Press the belt loops flat.

Attach Belt Loops to the Robe:

  • Position the belt loops at the side seams of your robe, between the waist seams.

  • Pin the belt loops, ensuring they are secure.

  • Stitch across the top and bottom of each belt loop to attach them securely. Use a backstitch at the beginning and end for added strength.

Belt Tie:

  • Fold the belt tie in half with right sides together.

  • Pin along one end.

  • Stitch the pinned end, leaving the other end open.


  • Use a turning tool to flip the belt tie right side out.

  • Press the belt tie flat.

  • Tuck in the seam allowance at the open end.

  • Pin it closed.

  • Hand stitch the open end closed securely.

  • Finish the bottom edge of the robe with overlock or zigzag stitch.

  • Apply the same hemming method used for the sleeves to the bottom edge of the robe.

Optional Applique or Trim:

  • If you've chosen to add an applique or trim, stitch it onto the hem of the robe, sleeves, and any other desired areas. Be consistent with the style and placement.

Final Pressing:

  • Before completing your robe, give it a final press to ensure all seams and hems are crisp and well-defined.

With these steps completed, your robe should be fully assembled and ready to wear. Enjoy your handmade creation!