The Reverie Dress Sewing Pattern Guide
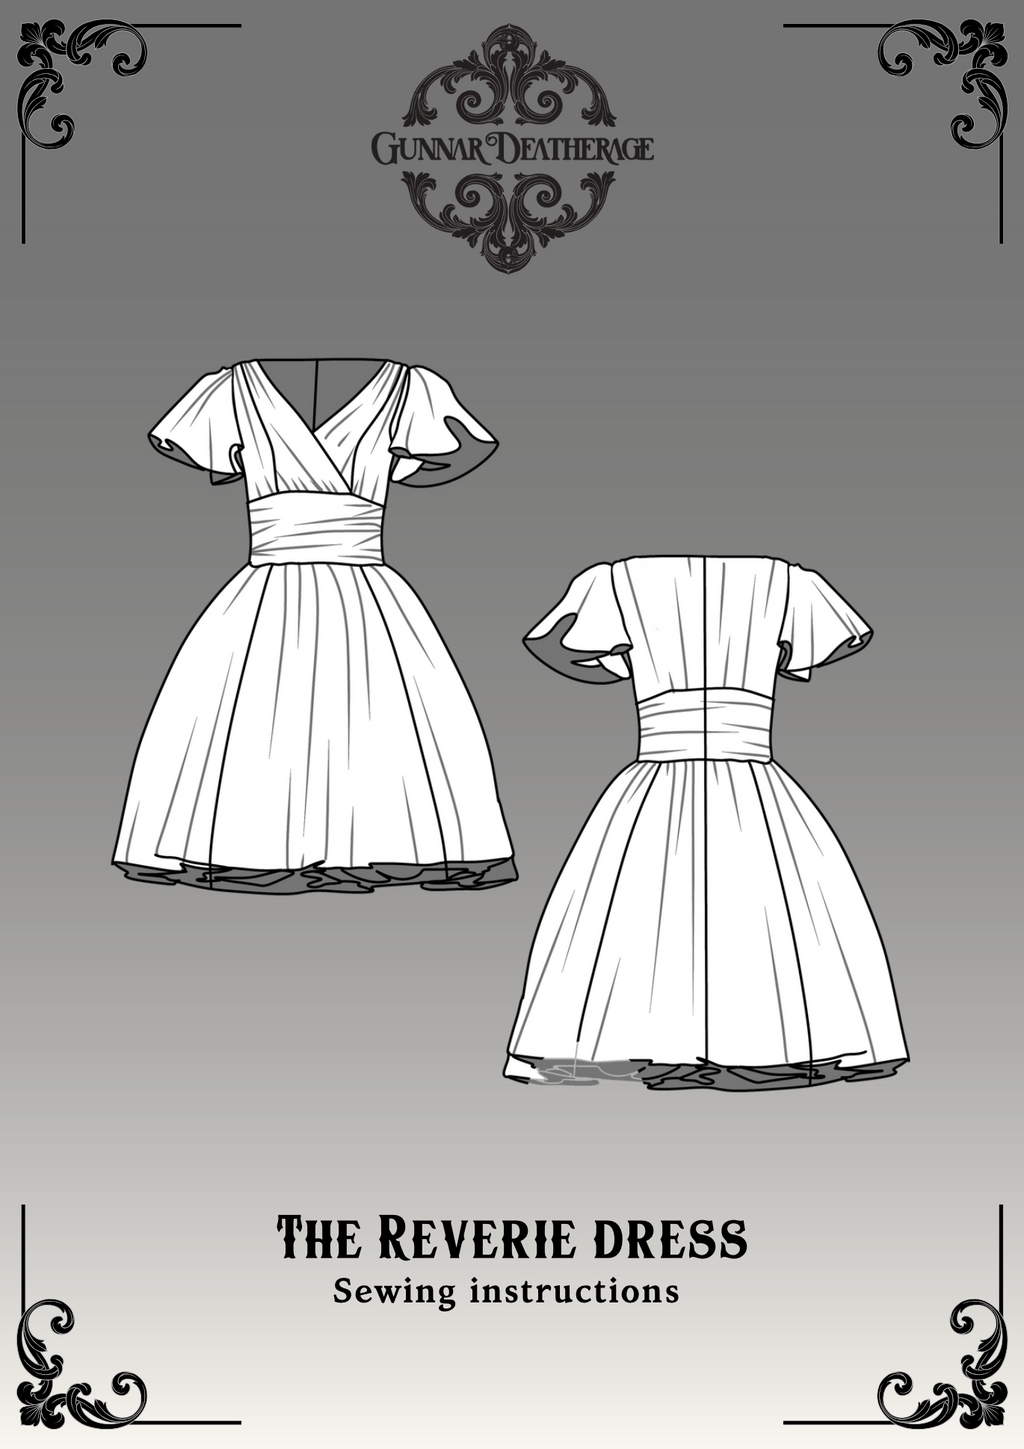
Introducing the Reverie Dress – a captivating pattern that evokes the romance of eras gone by. With its flattering fit-and-flare silhouette and elegant bodice design, this dress is ideal for those special moments—whether you’re attending a dinner party, dancing the night away, or celebrating a grand event. Reverie’s vintage inspiration shines through in every detail, offering a look that’s both sophisticated and delightfully whimsical.
This pattern features an optional flutter sleeve for a touch of effortless femininity, along with the choice of adding a sheer overlay. Perfect in lightweight, dreamy fabrics, the overlay adds an ethereal quality to your finished garment, while still allowing room for personalization—if you prefer a simpler look, you can easily sew Reverie without it. With so many styling options, this pattern provides the perfect canvas for your creative vision, bringing together timeless charm and modern versatility in one unforgettable dress.
Before You Get Started
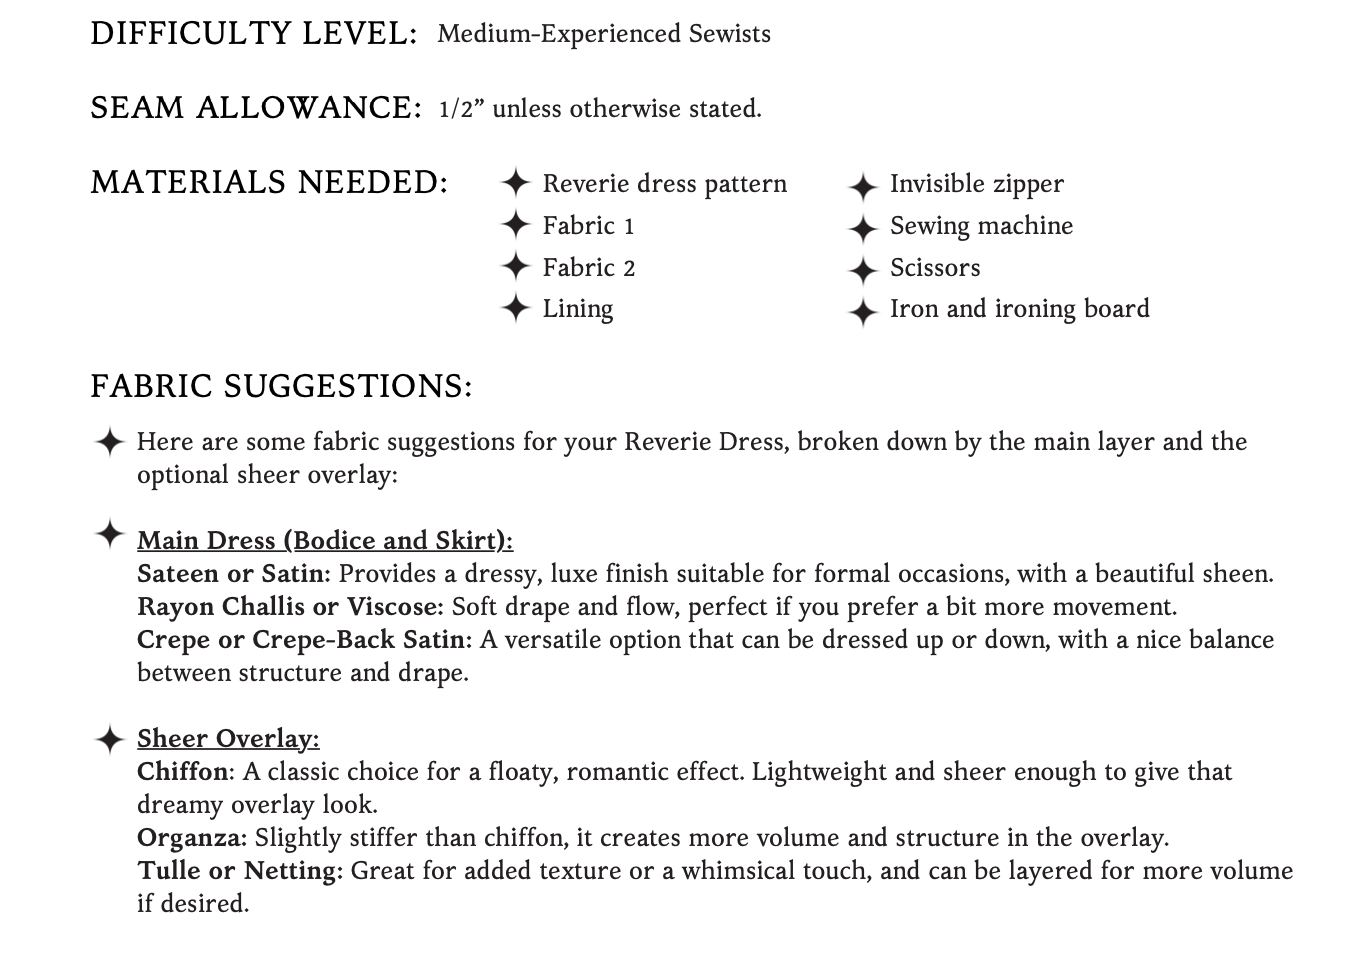
Please take note that the seam allowances on this pattern are 1/2” unless otherwise stated.
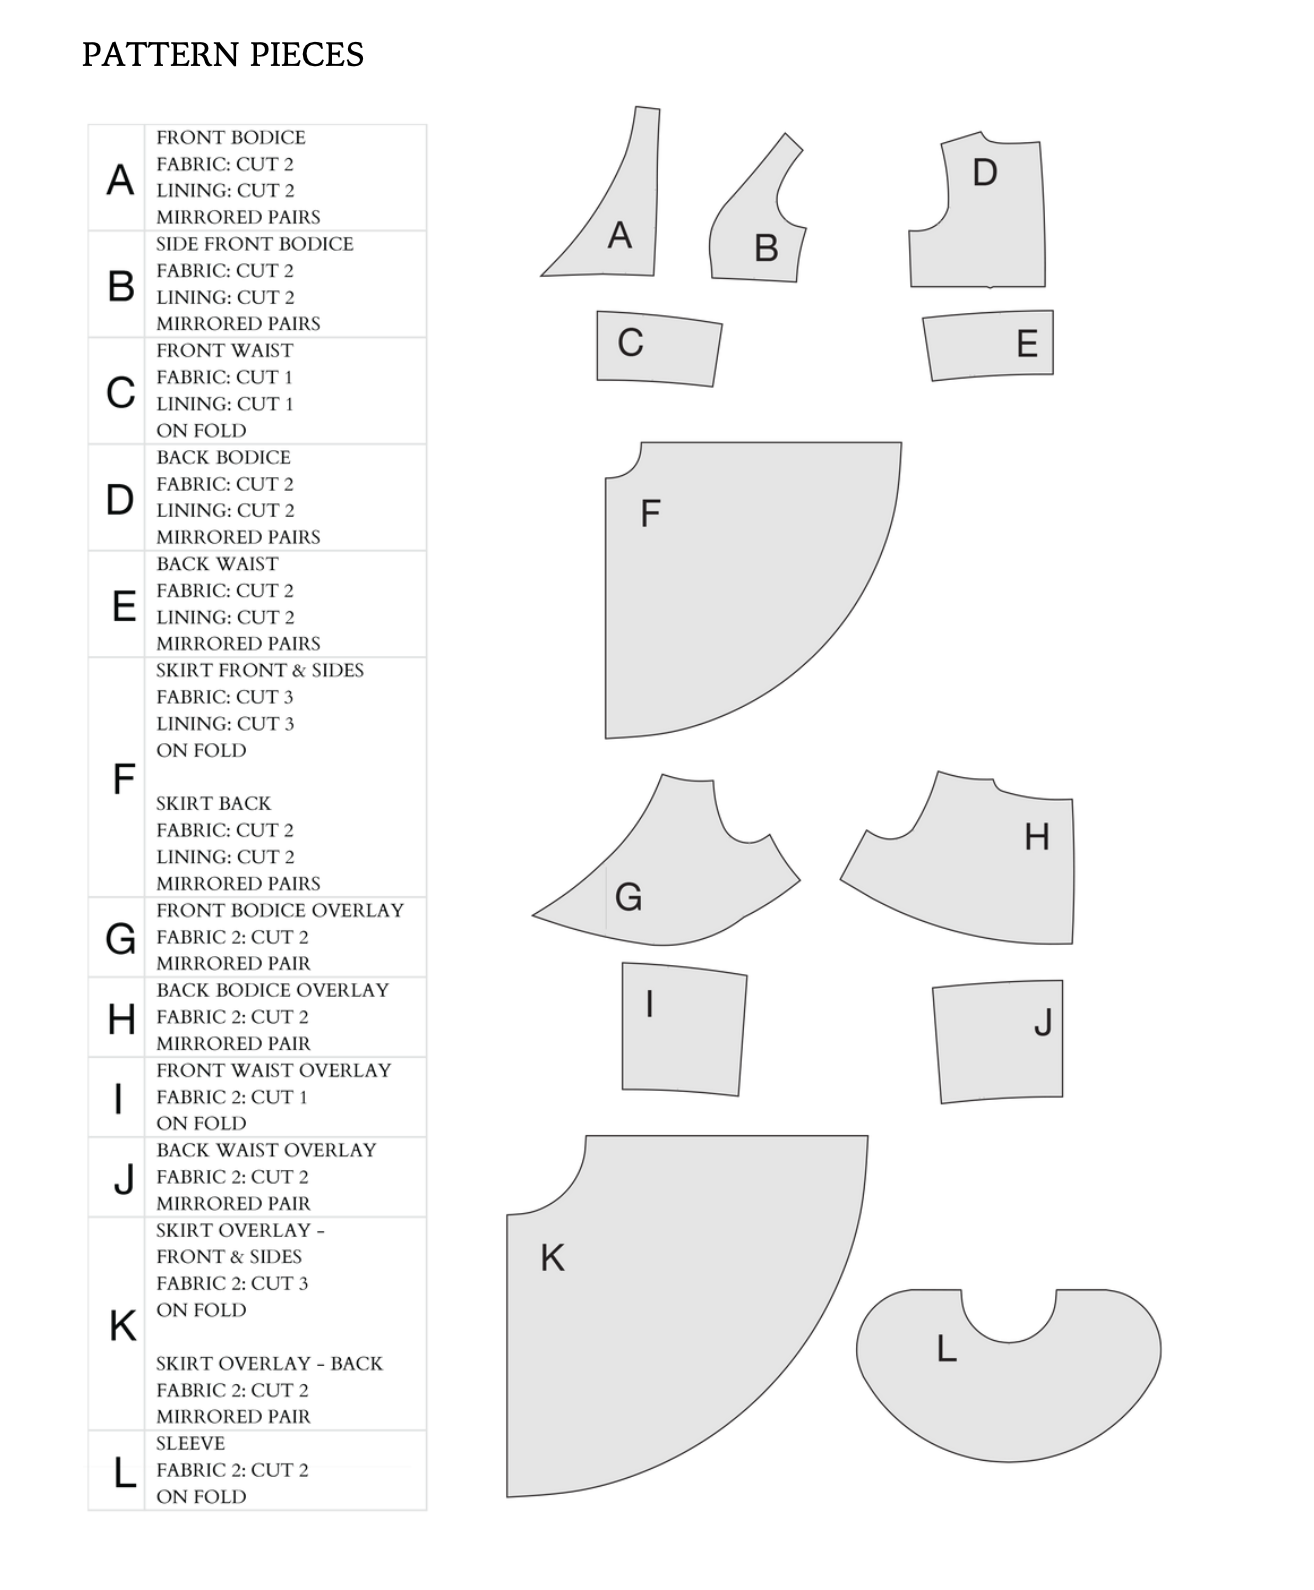
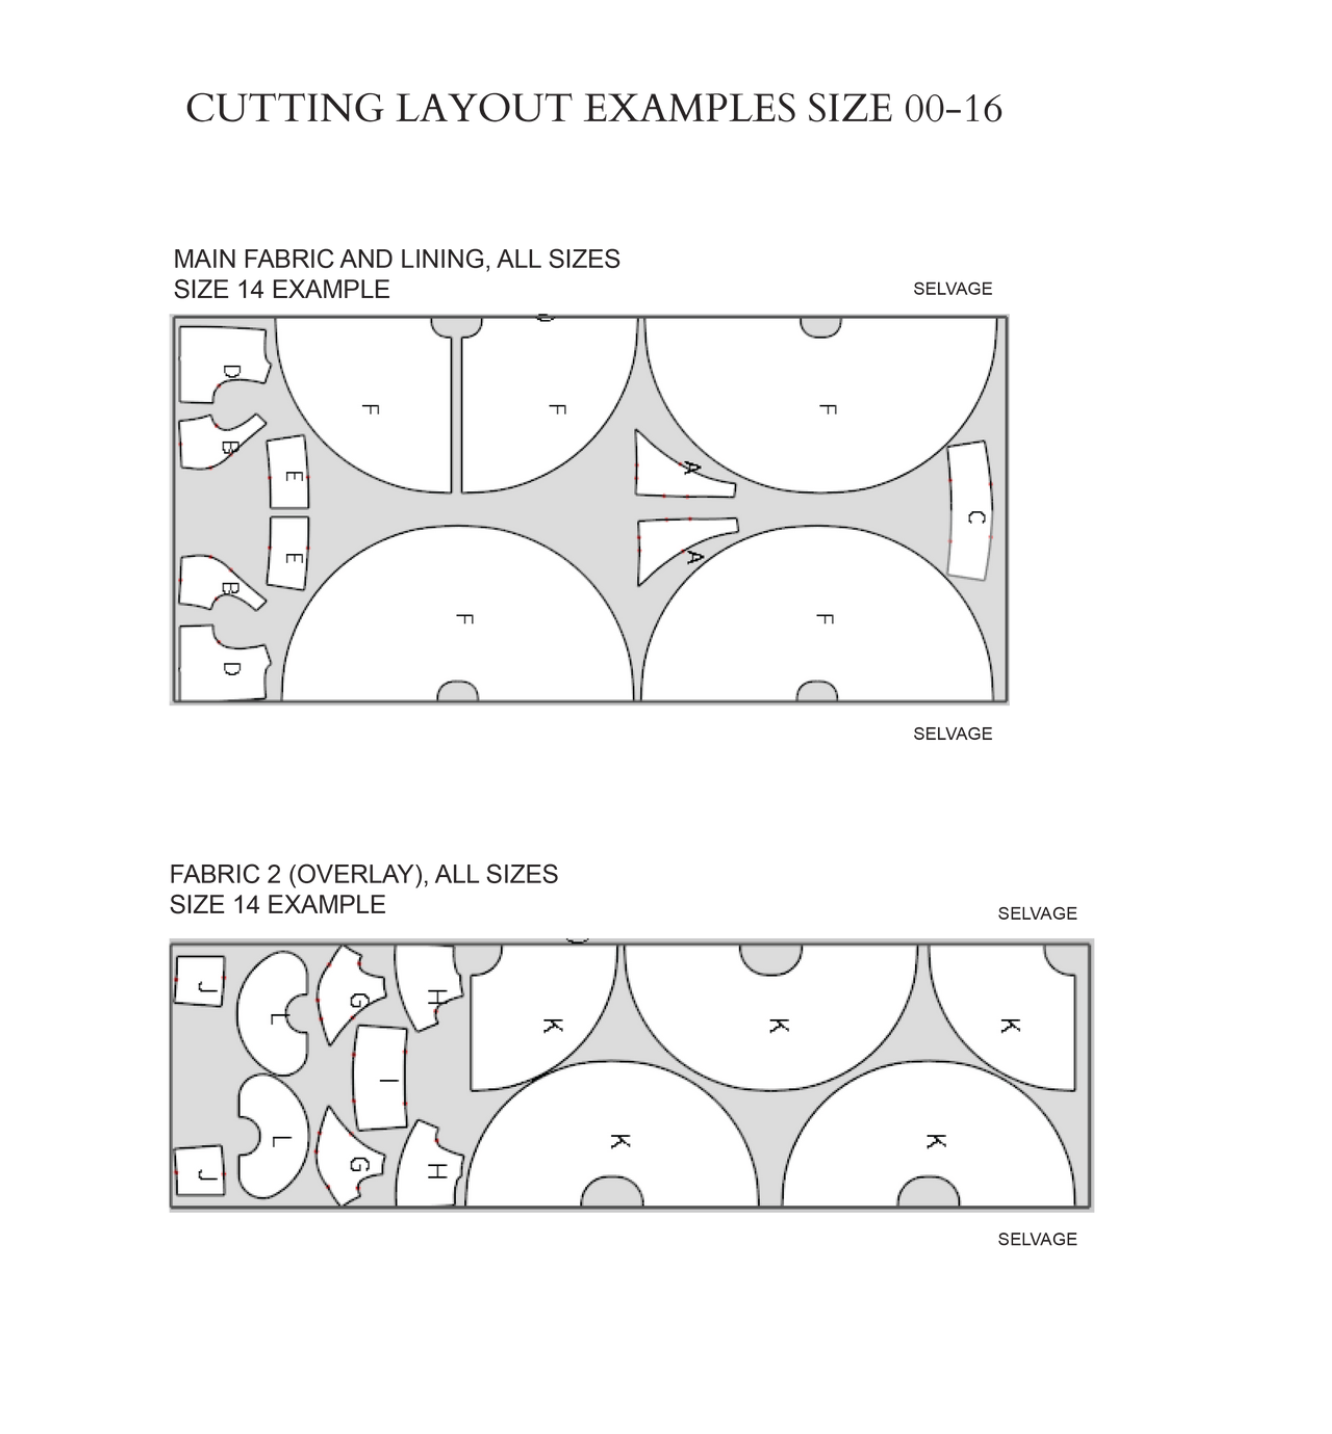
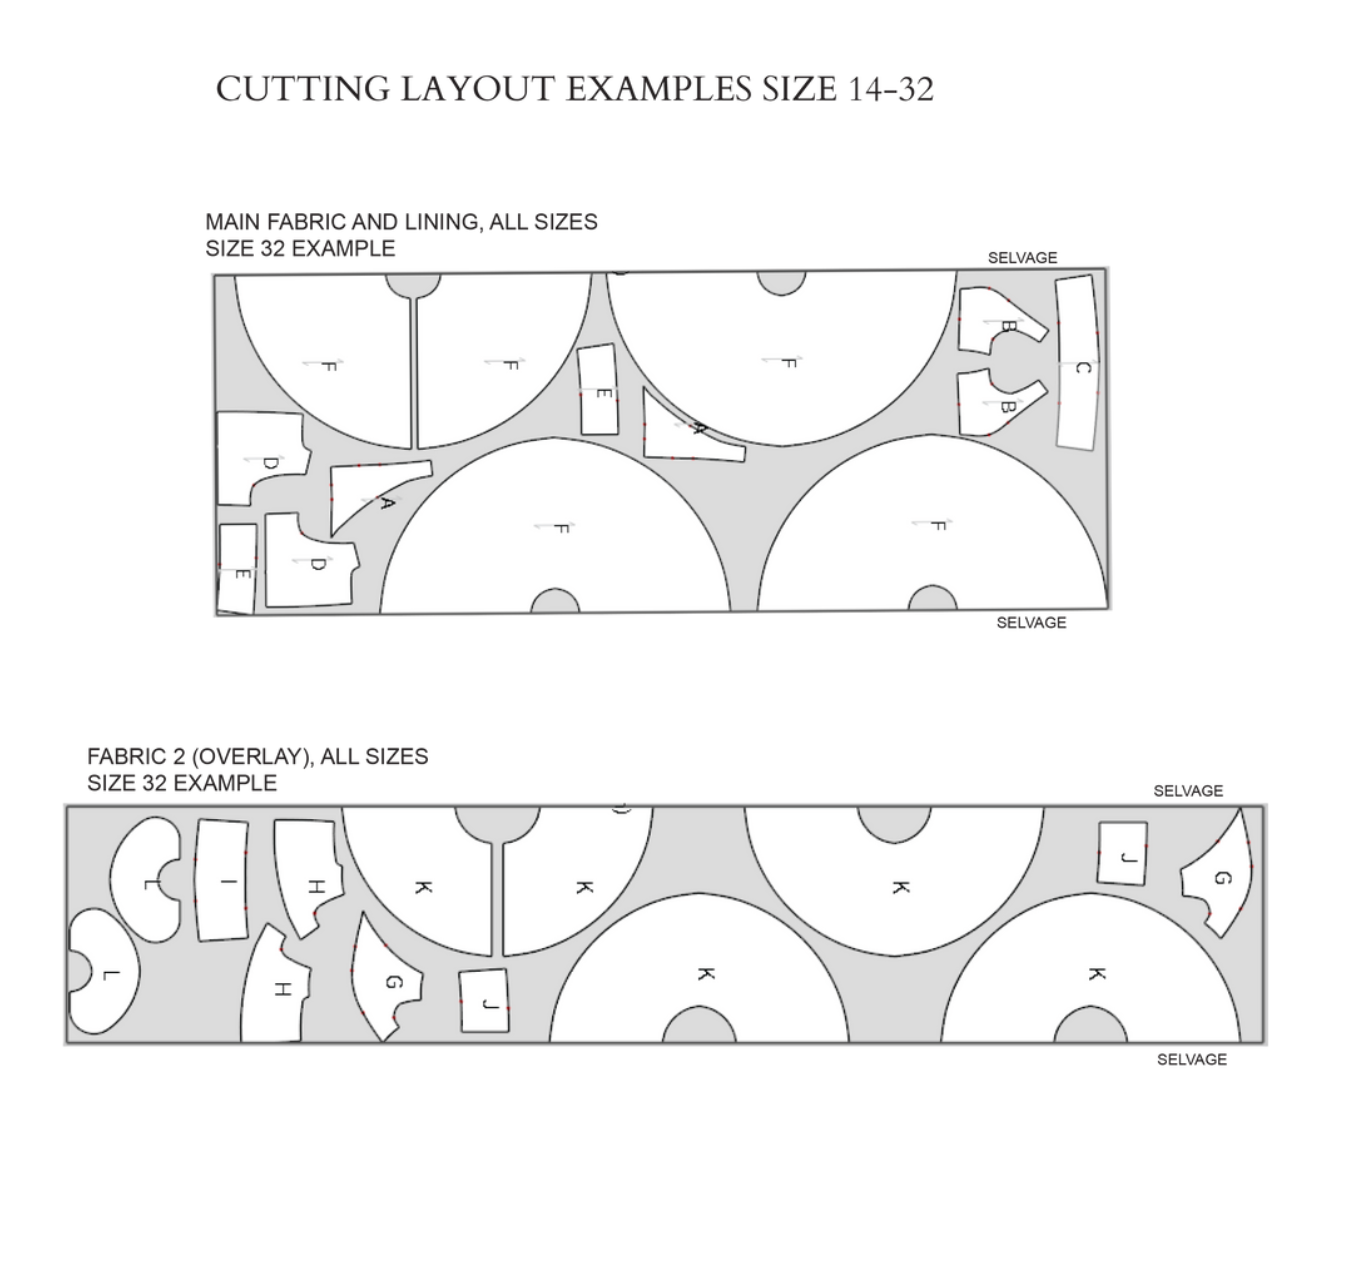
The Pattern will have all the notions and cutting layout you will need in the provided PDF files.
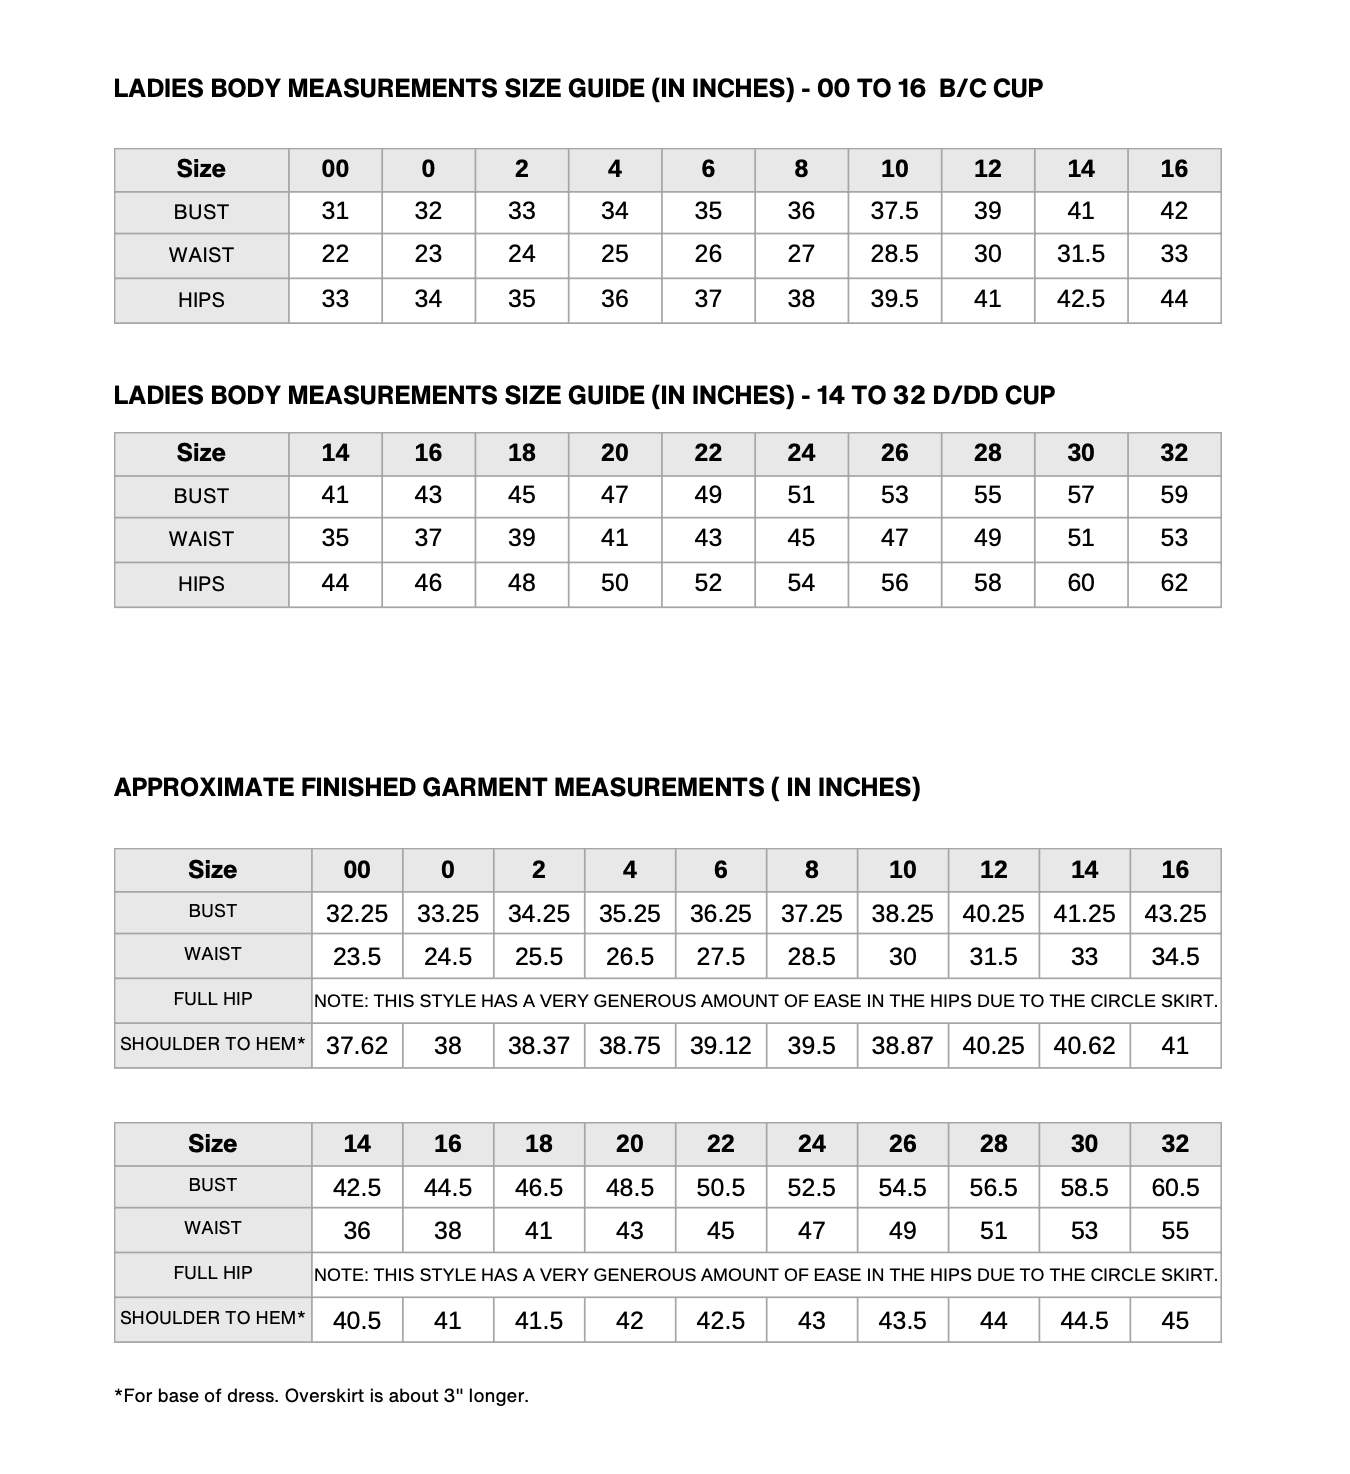
Size Charts, and Finished Garment Measurements
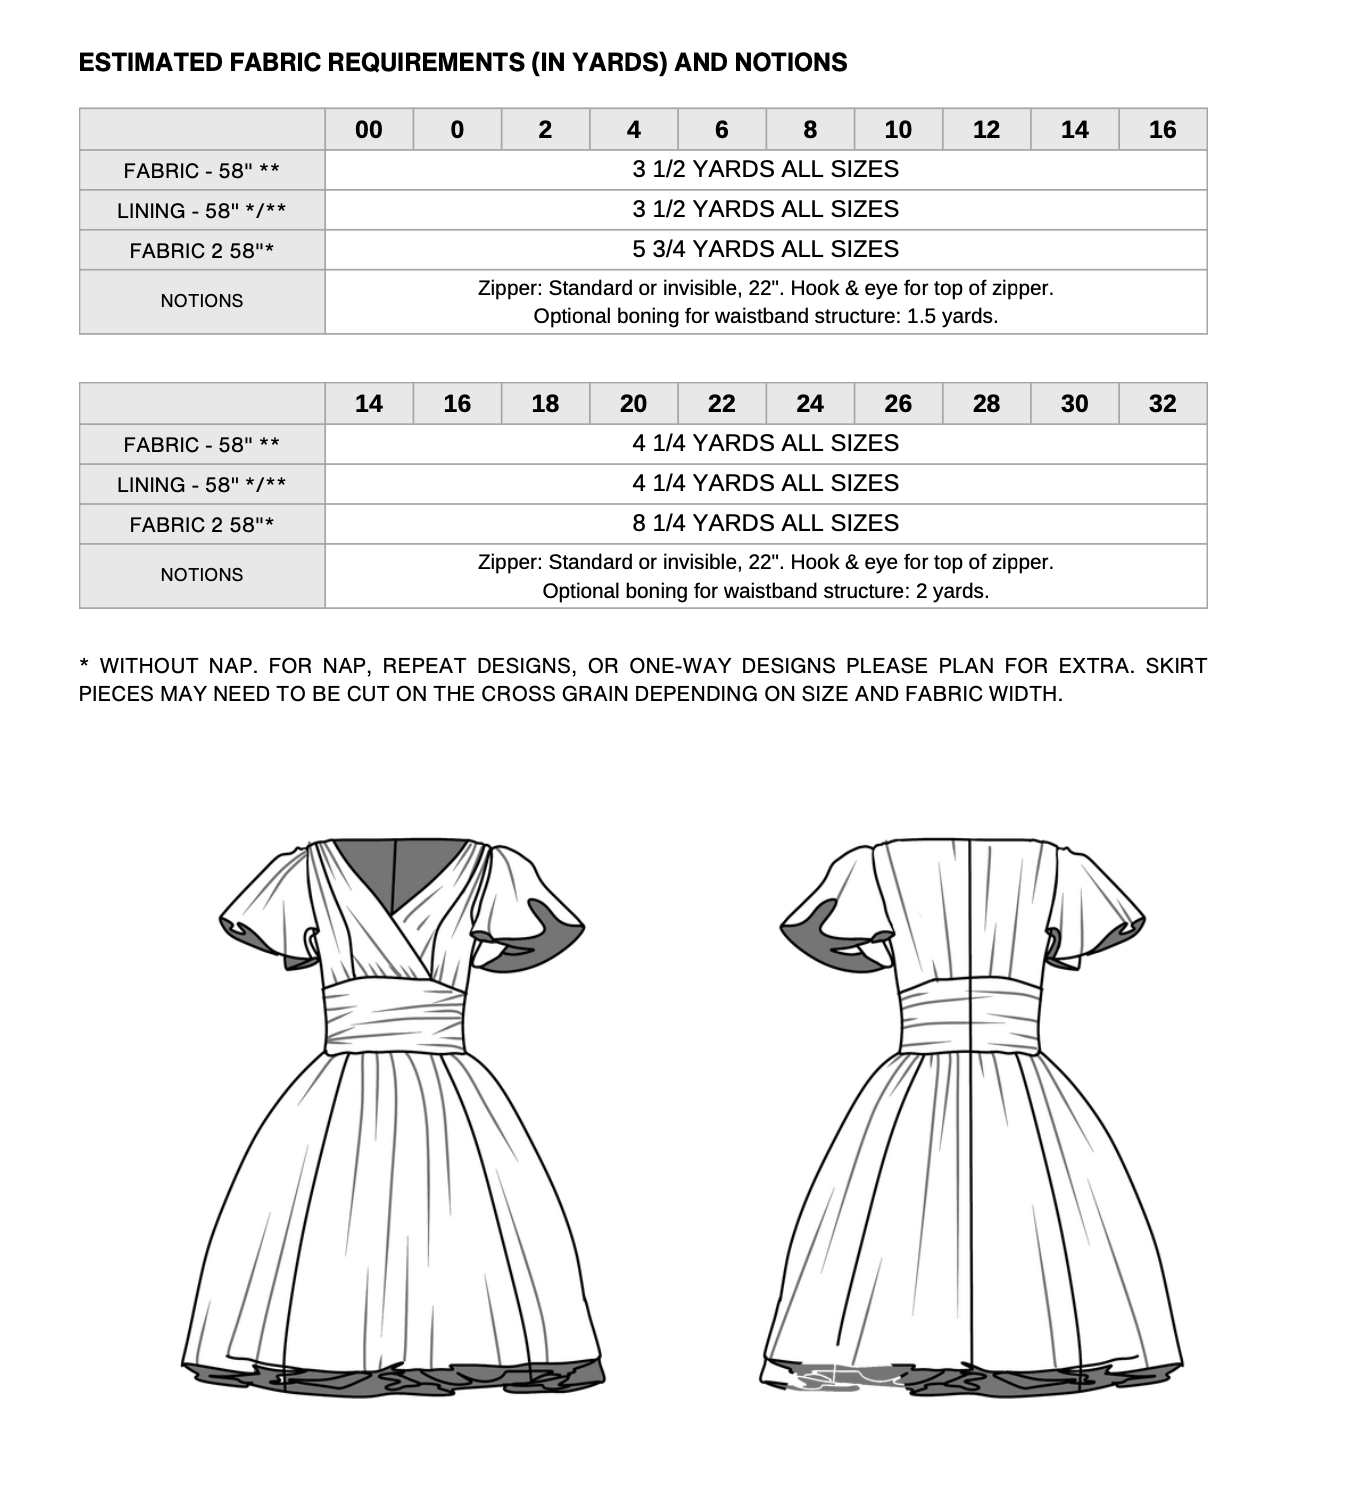
Yardage/ Fabric Consumption