The Villanelle Dress Sewing Pattern Guide
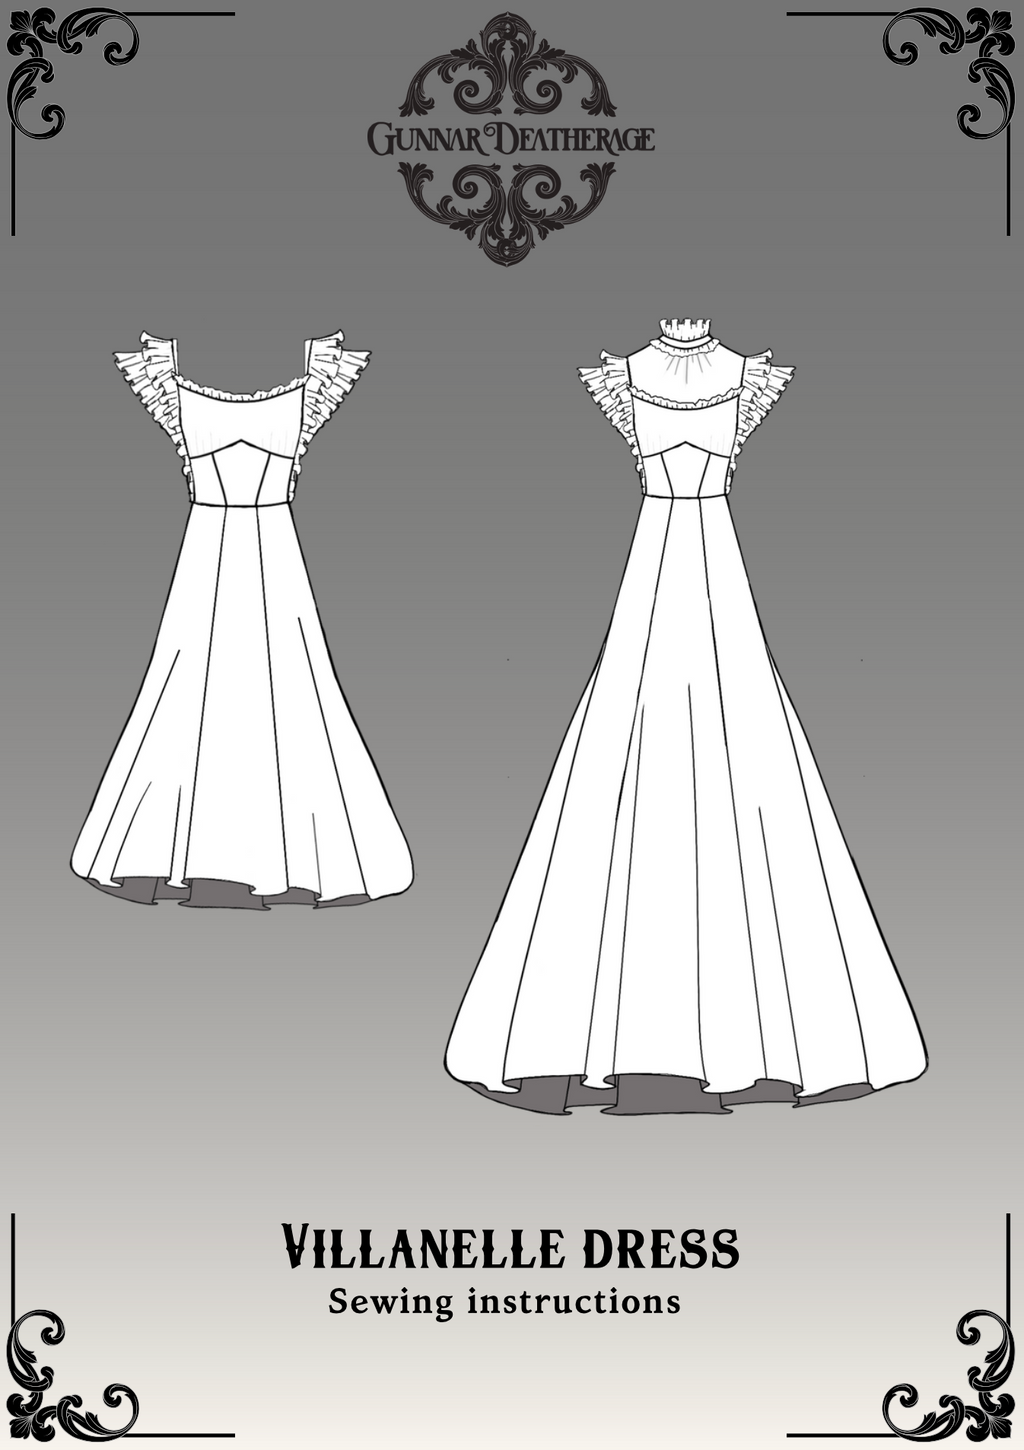
Introducing "Villanelle," a dress sewing pattern that gracefully intertwines the elegance of the Gilded Age with contemporary fashion sensibilities.
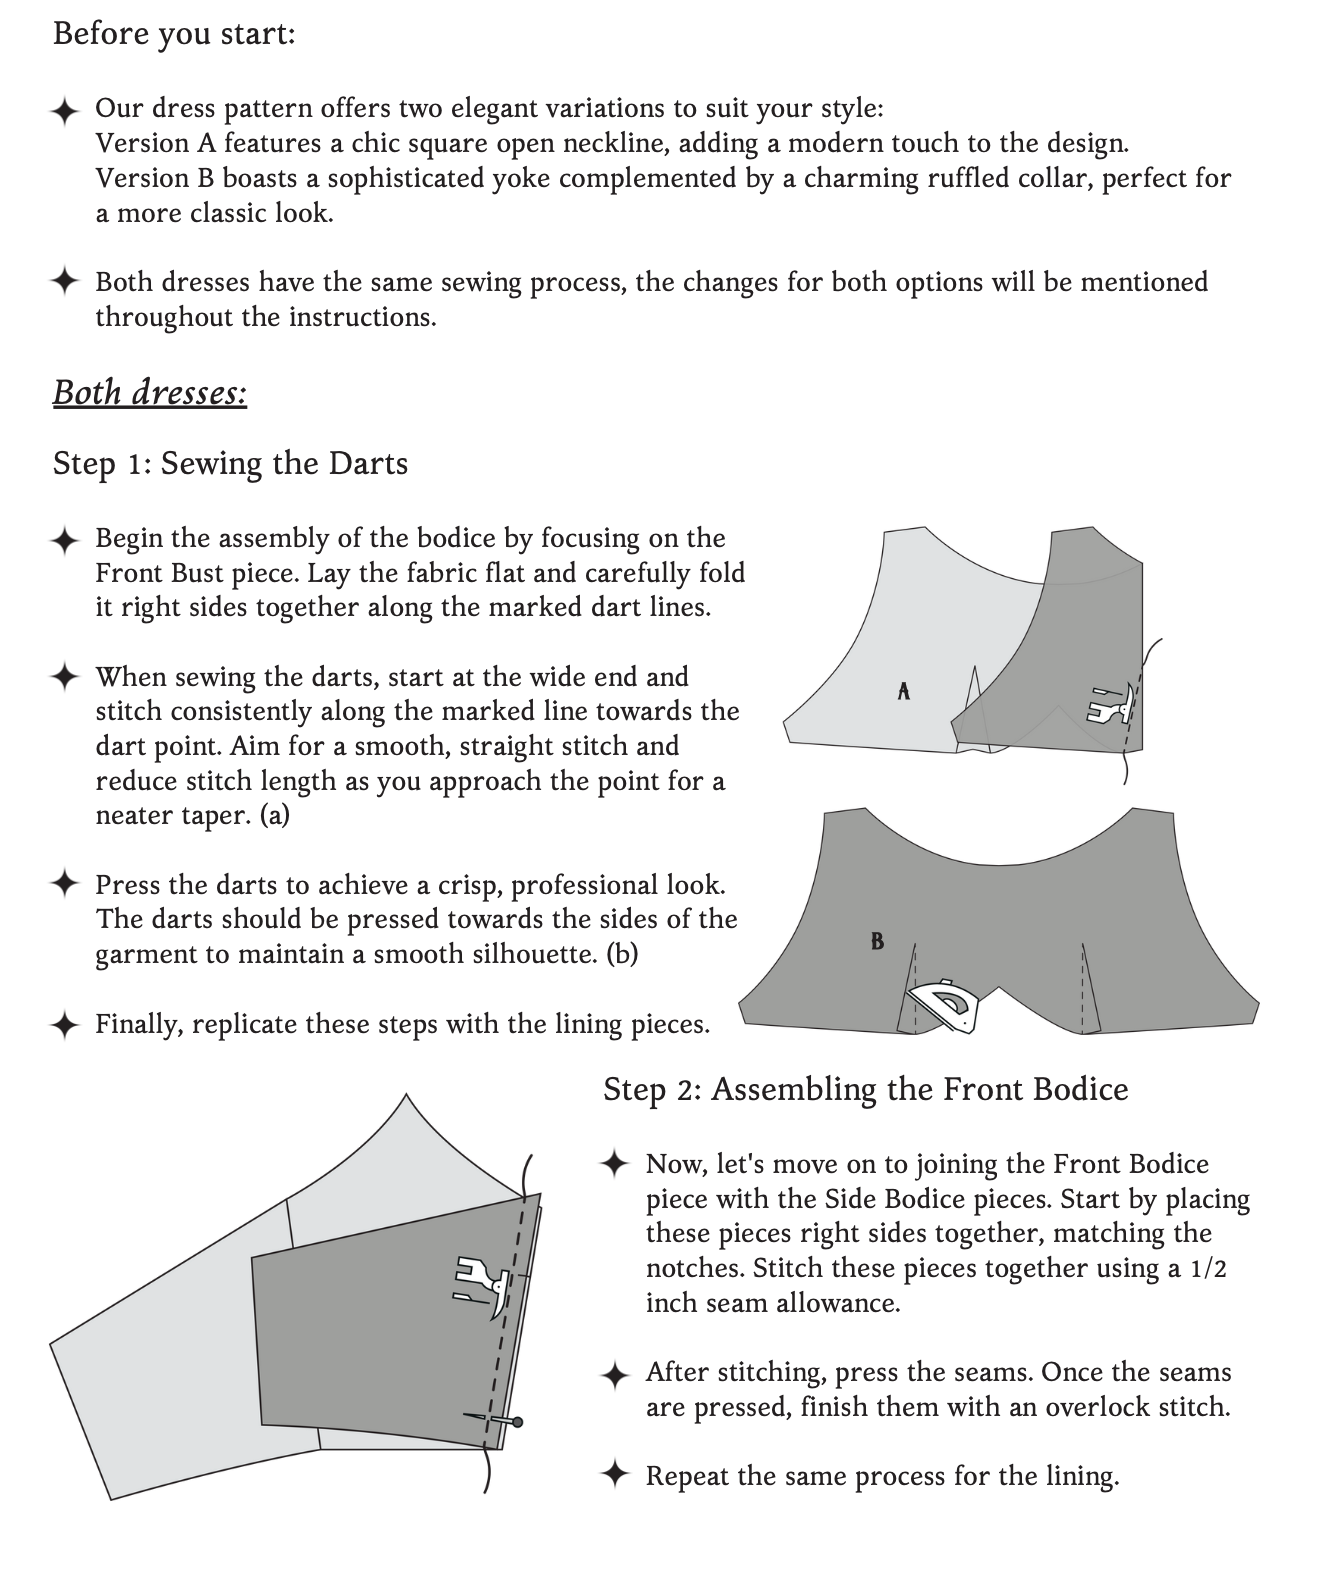
This exquisite design is available in two captivating versions: the first features a bold, open square neckline, offering a modern and chic interpretation, while the second boasts a sophisticated yoke, elegantly enhanced by a charming ruffled collar, reminiscent of a bygone era of opulence and grace.
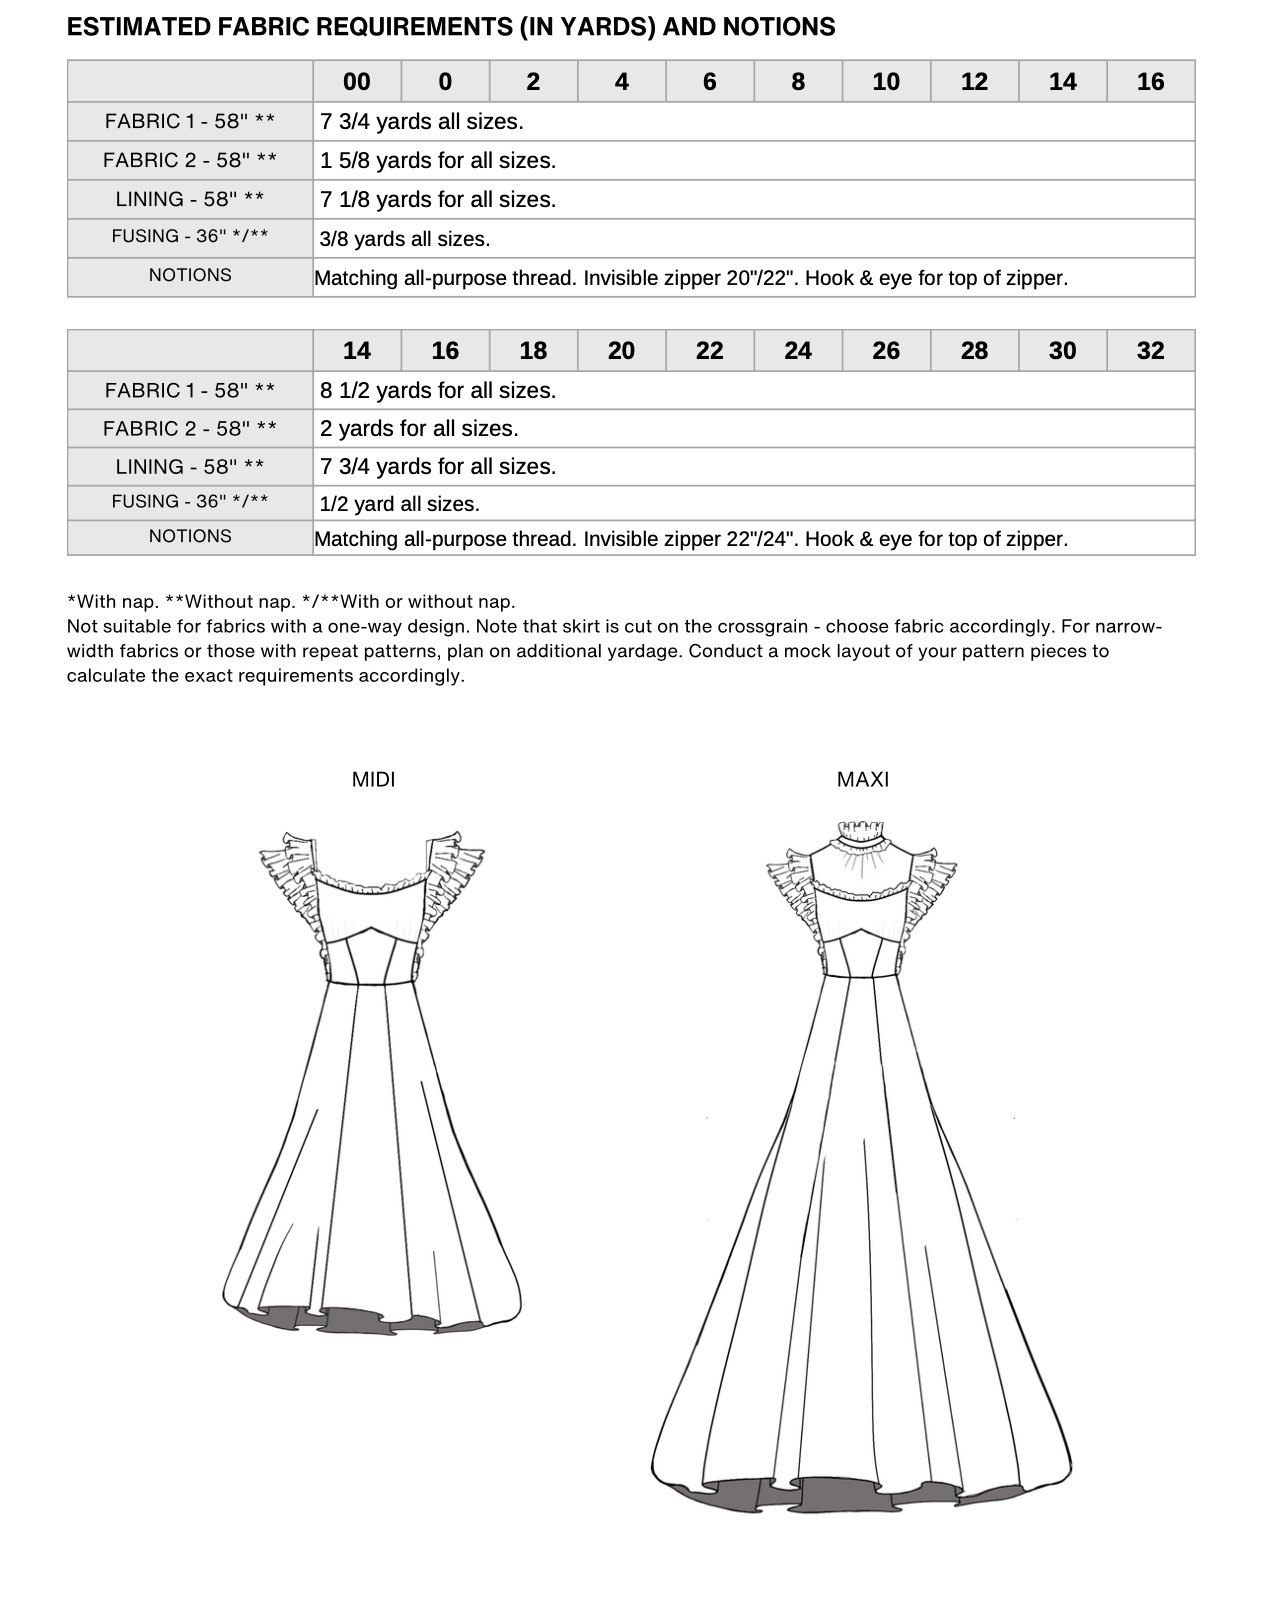
Both versions are adorned with an abundance of ruffles, adding a touch of romantic flair to the design. Villanelle also offers versatility in length, with options for both a graceful midi and a sweeping long version, allowing you to tailor the dress to your style and occasion. Whether channeling the grandeur of the Gilded Age or embracing a more contemporary look, Villanelle is sure to captivate and inspire.
Before You Get Started
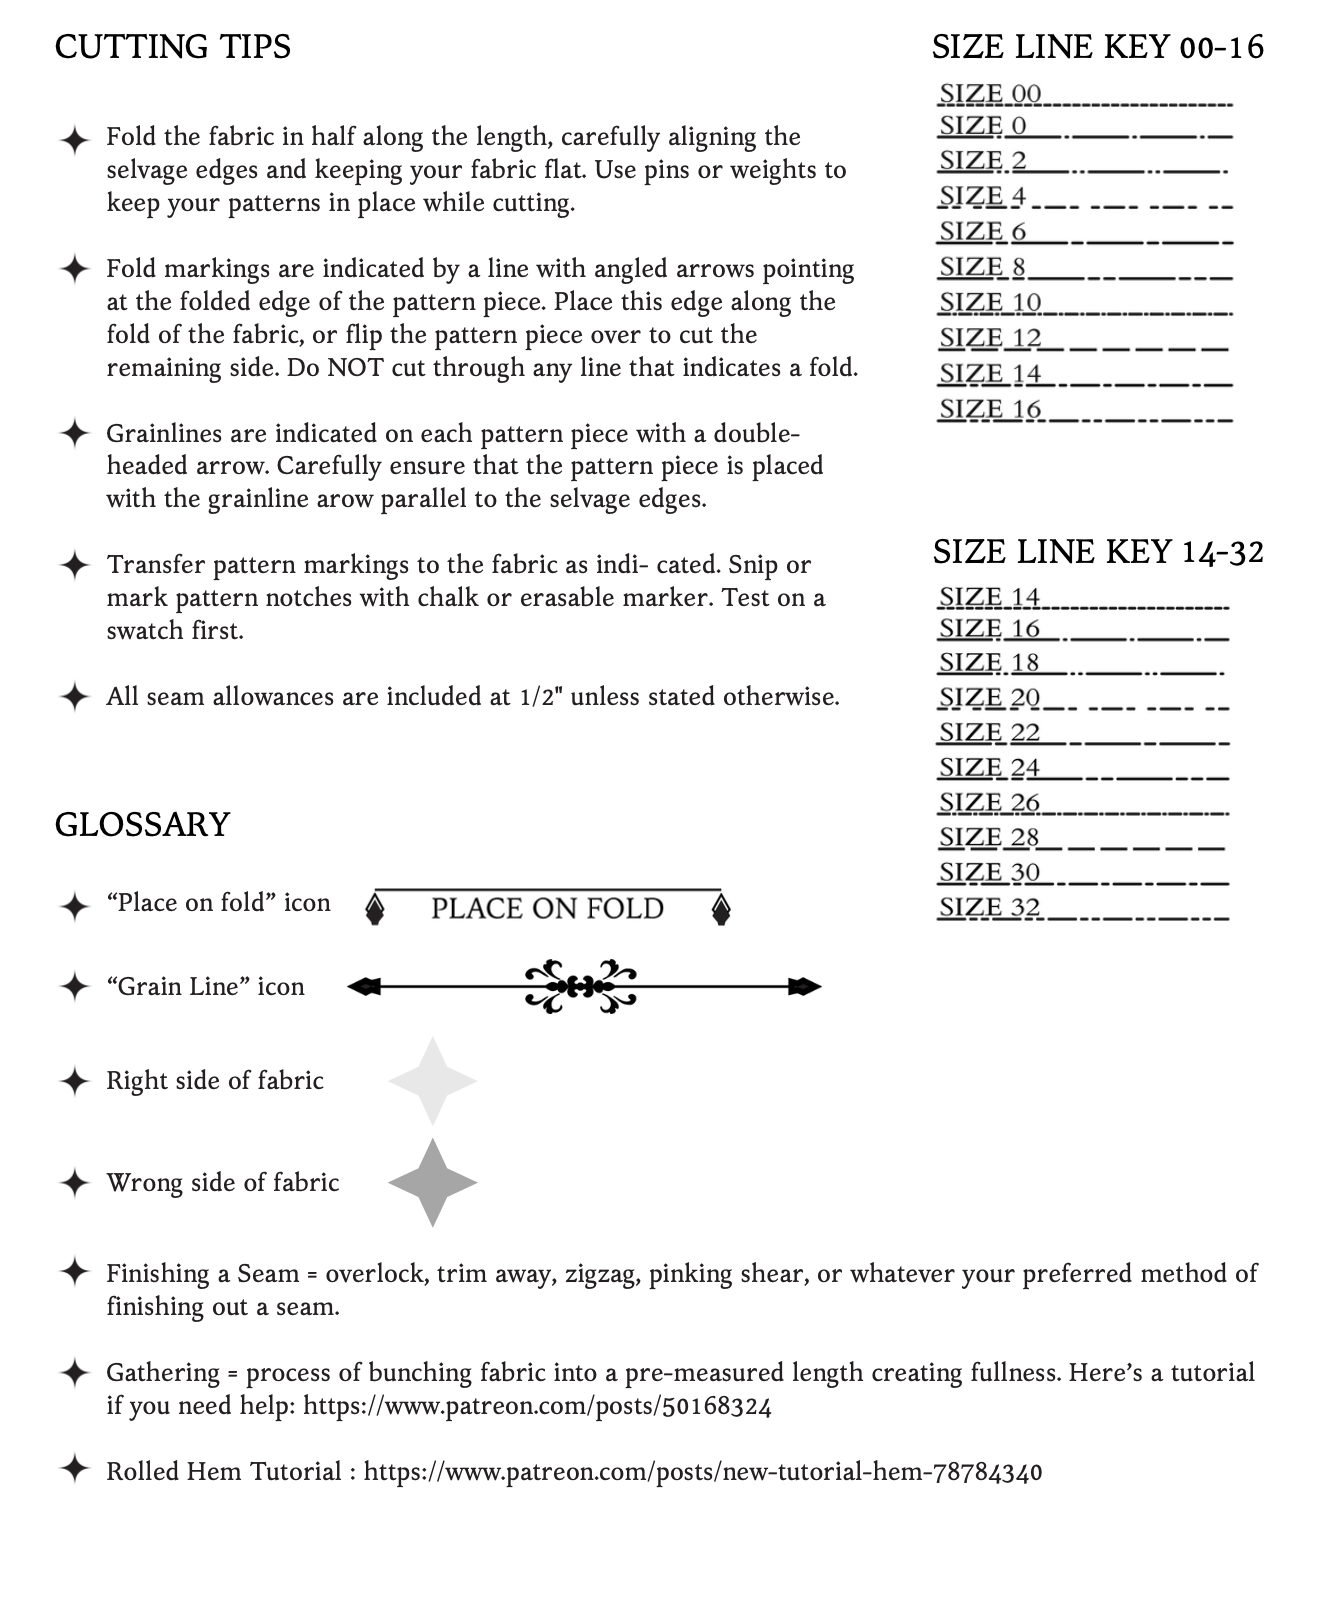
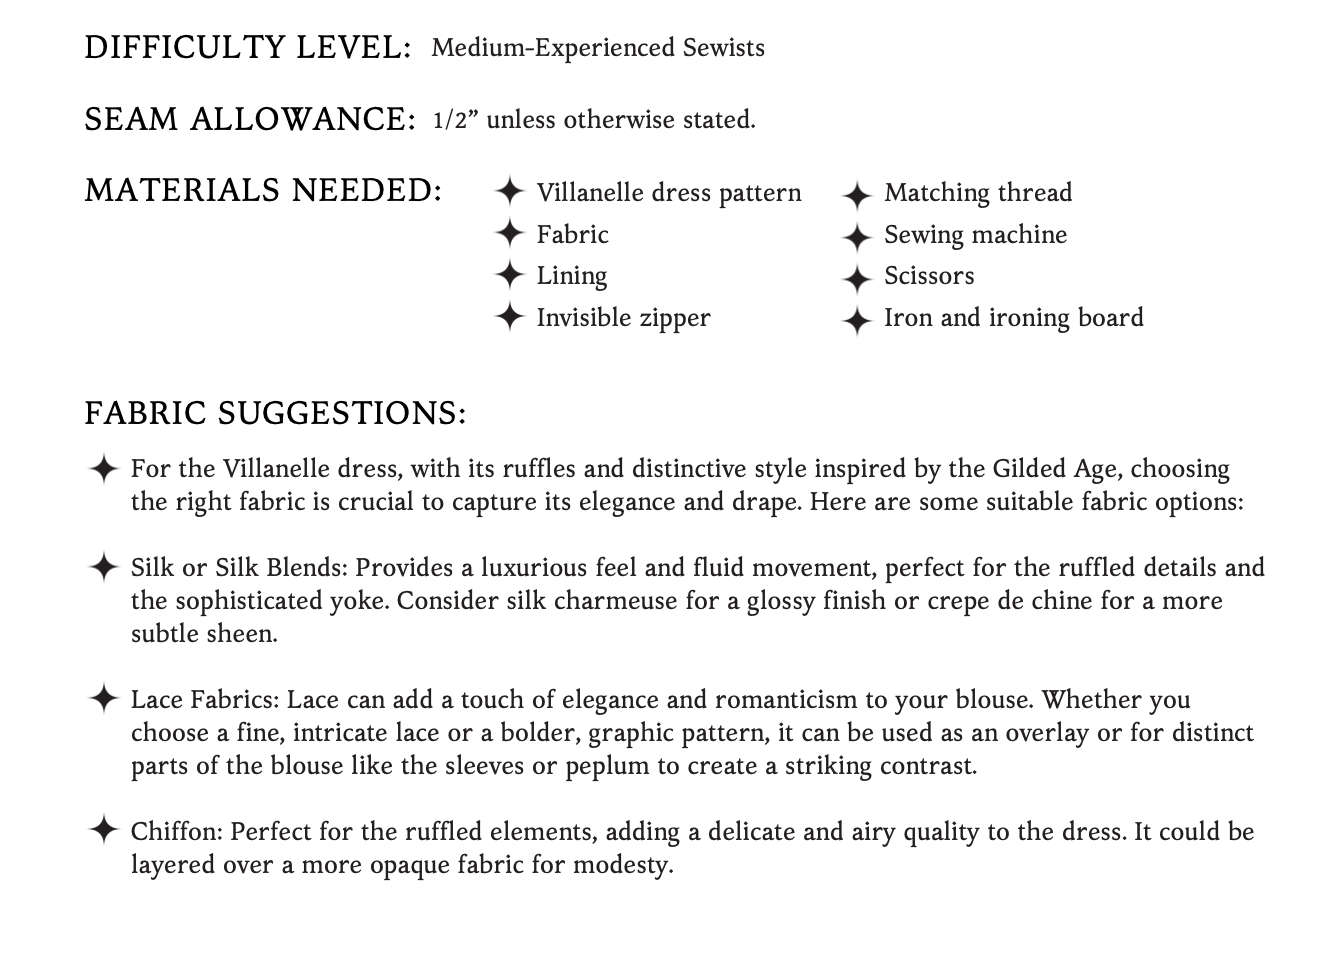
Please take note that the seam allowances on this pattern are 1/2” unless otherwise stated.
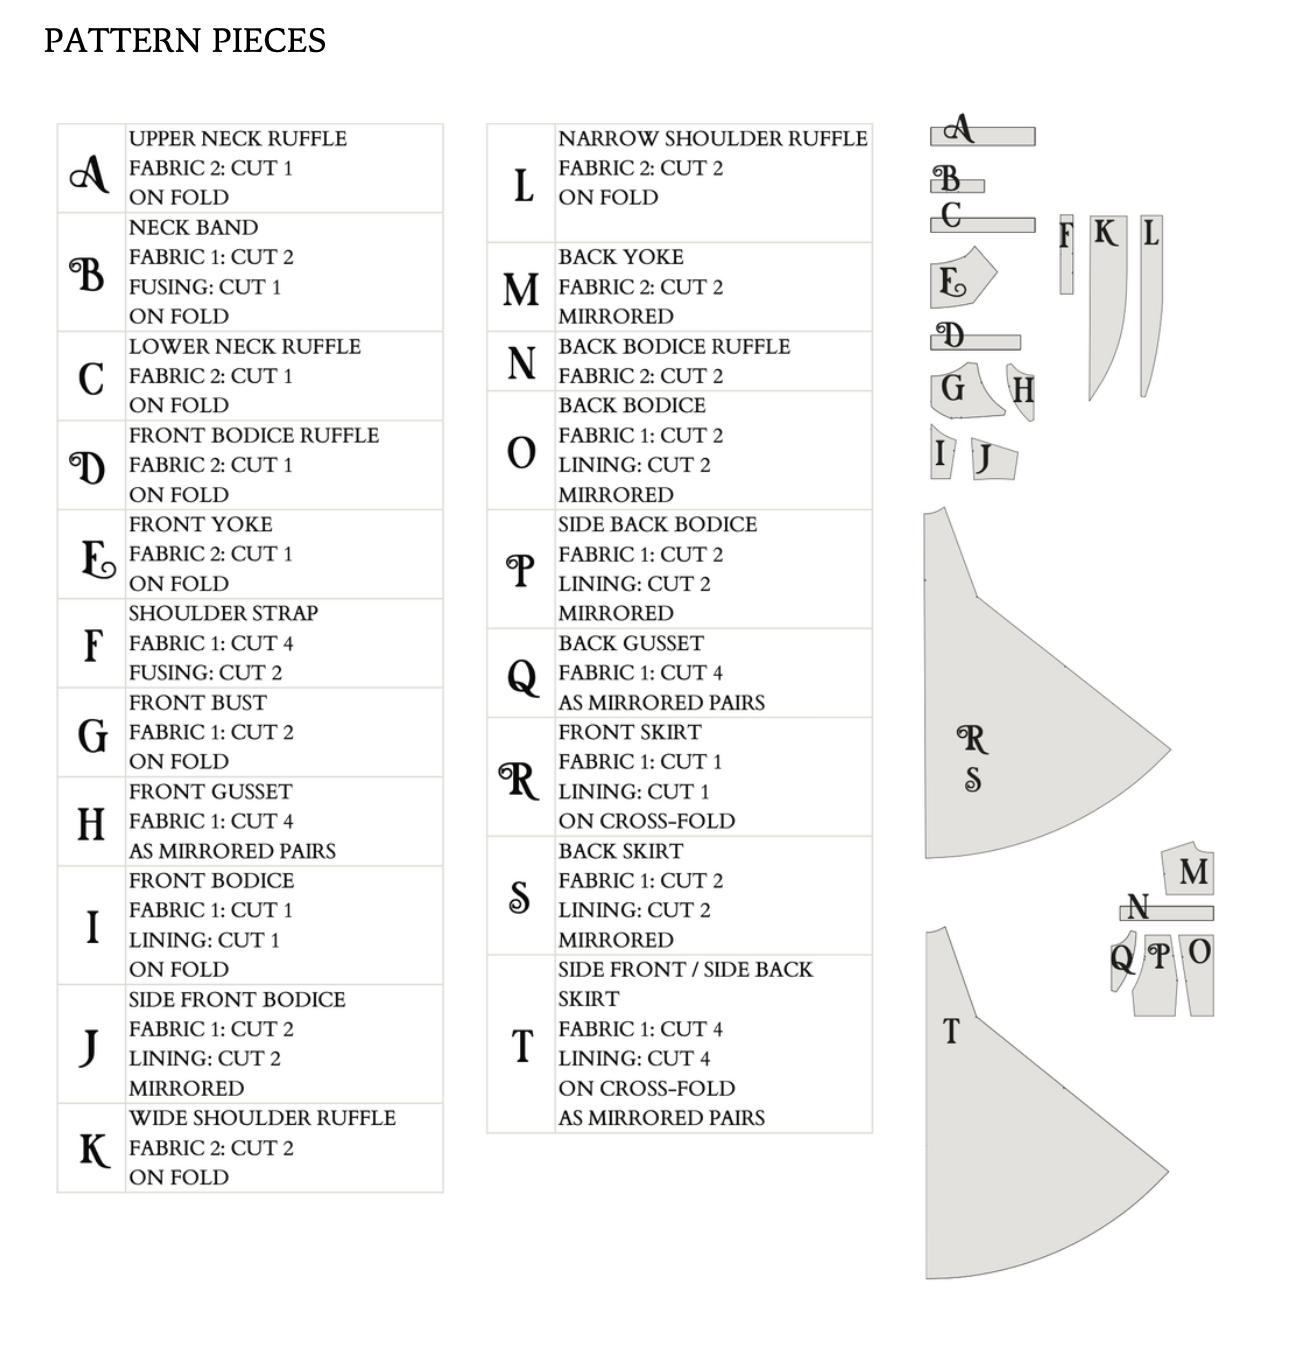
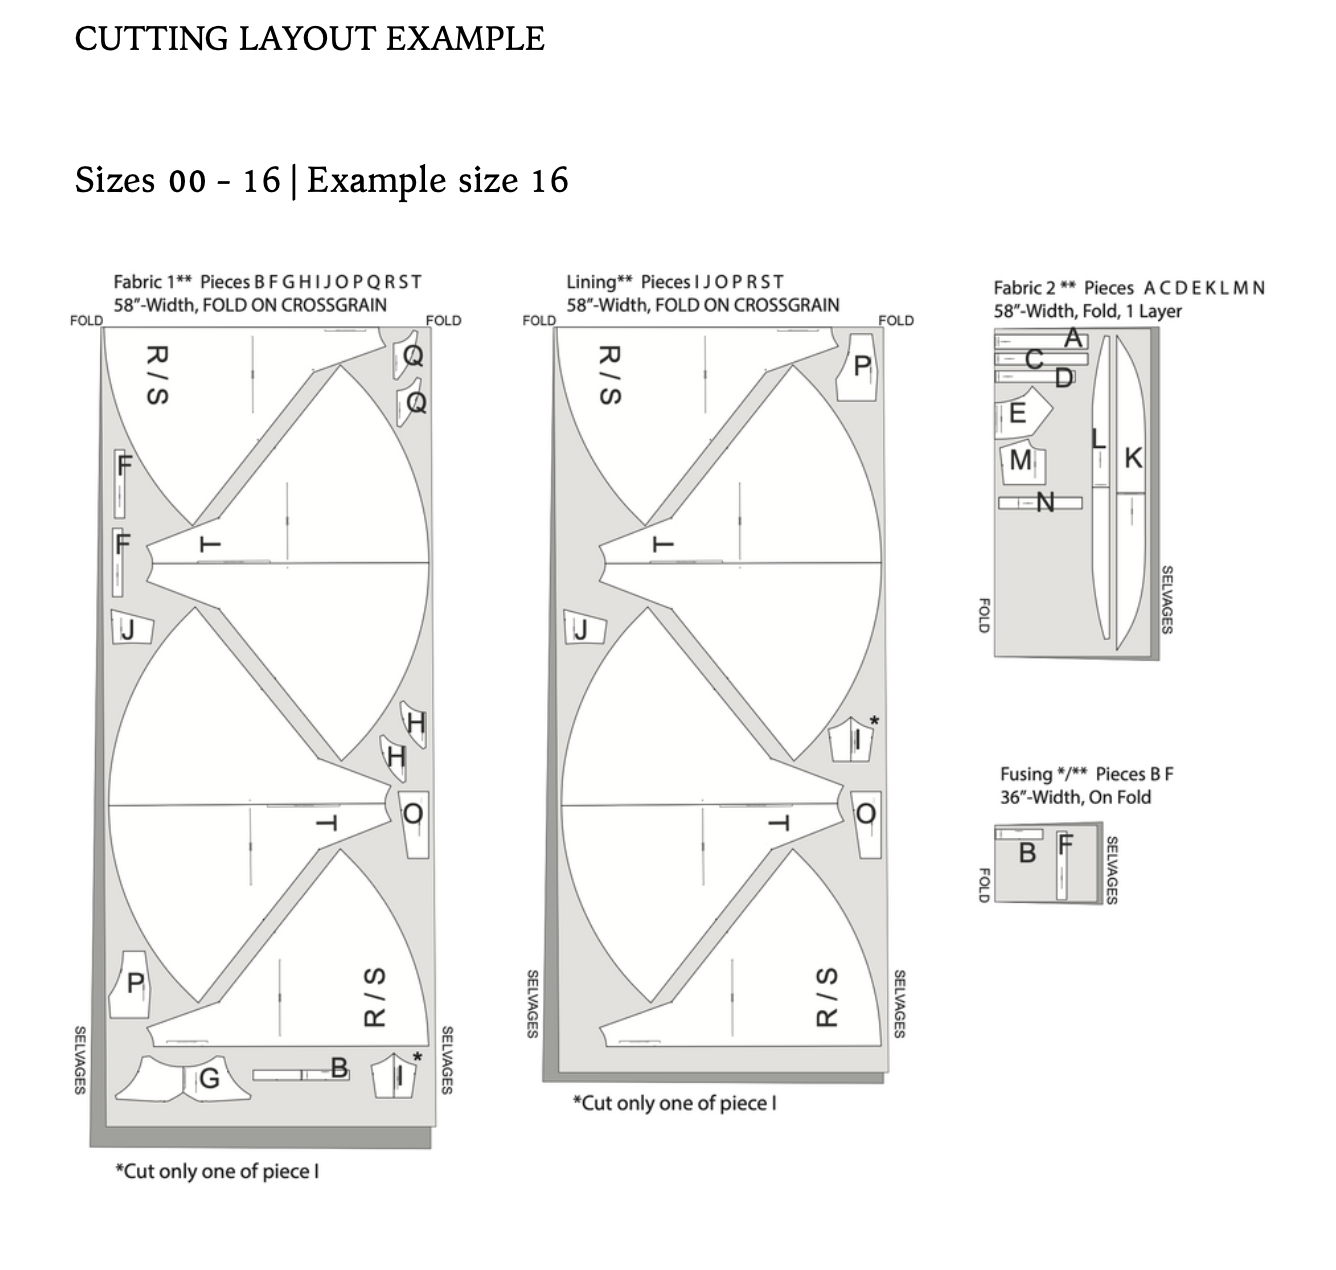
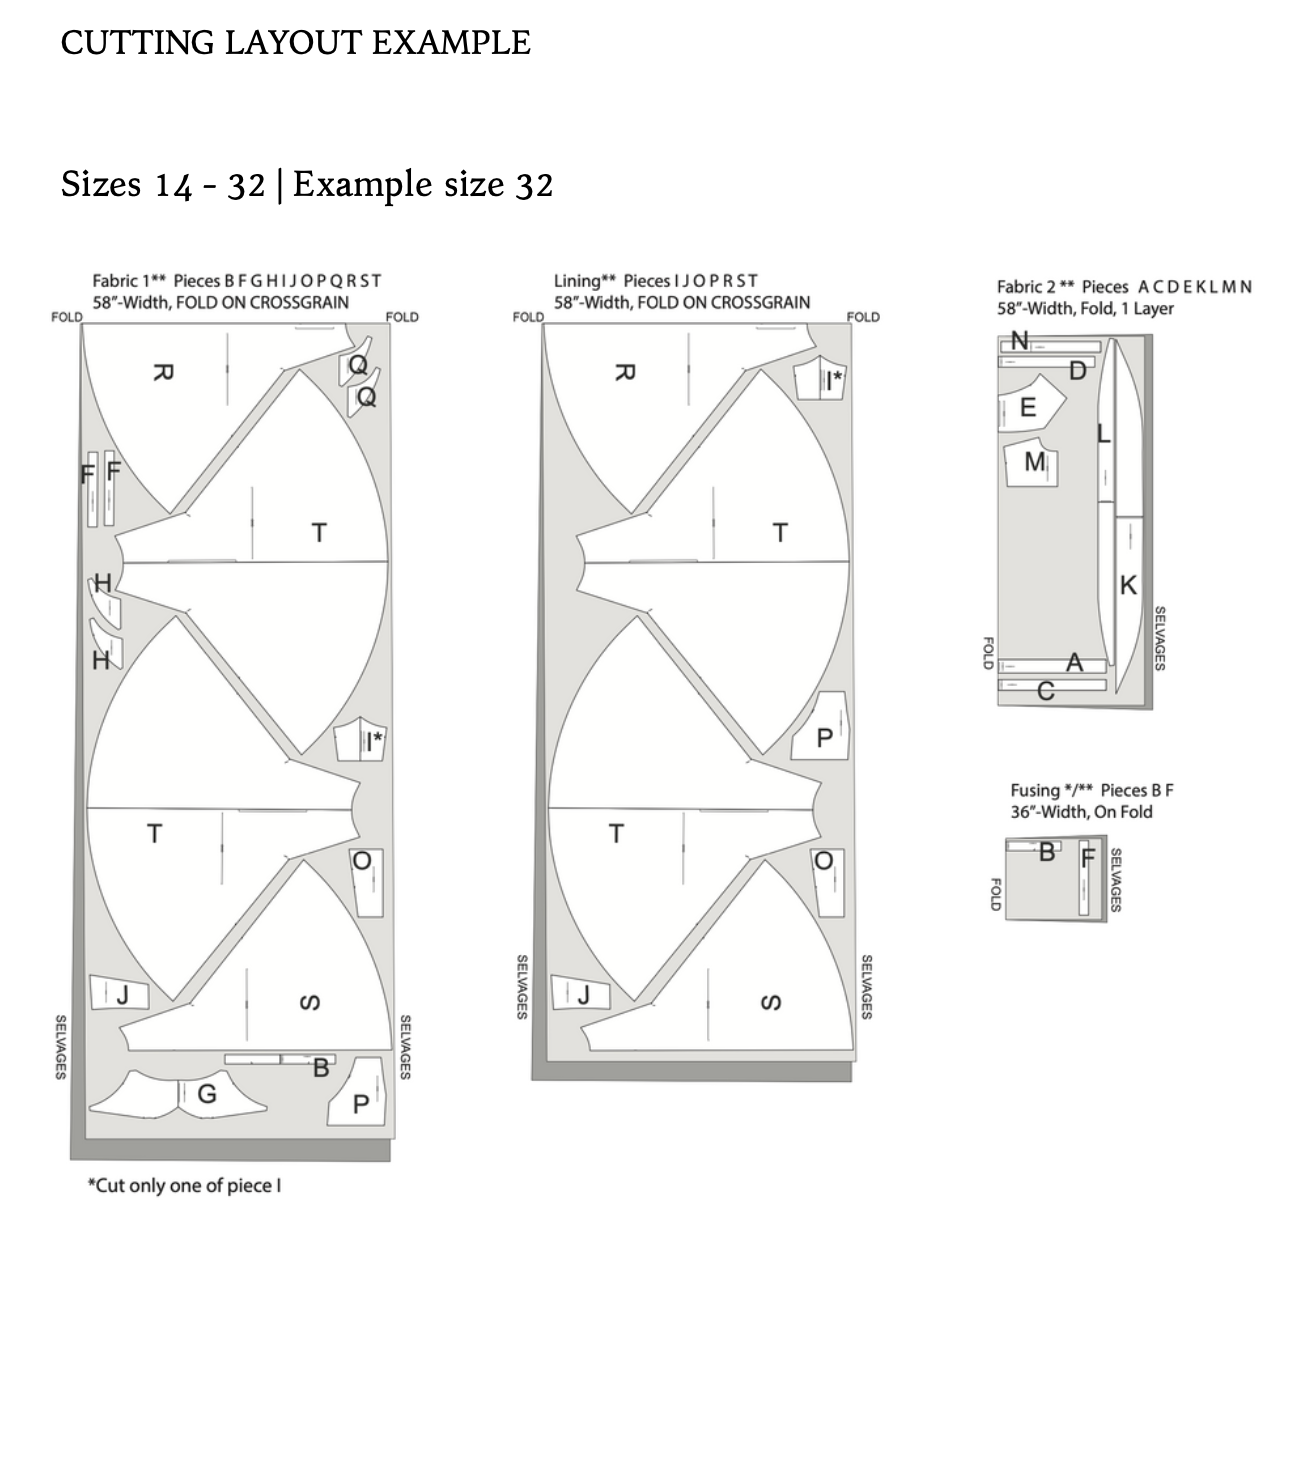
The Pattern will have all the notions and cutting layout you will need in the provided PDF files.
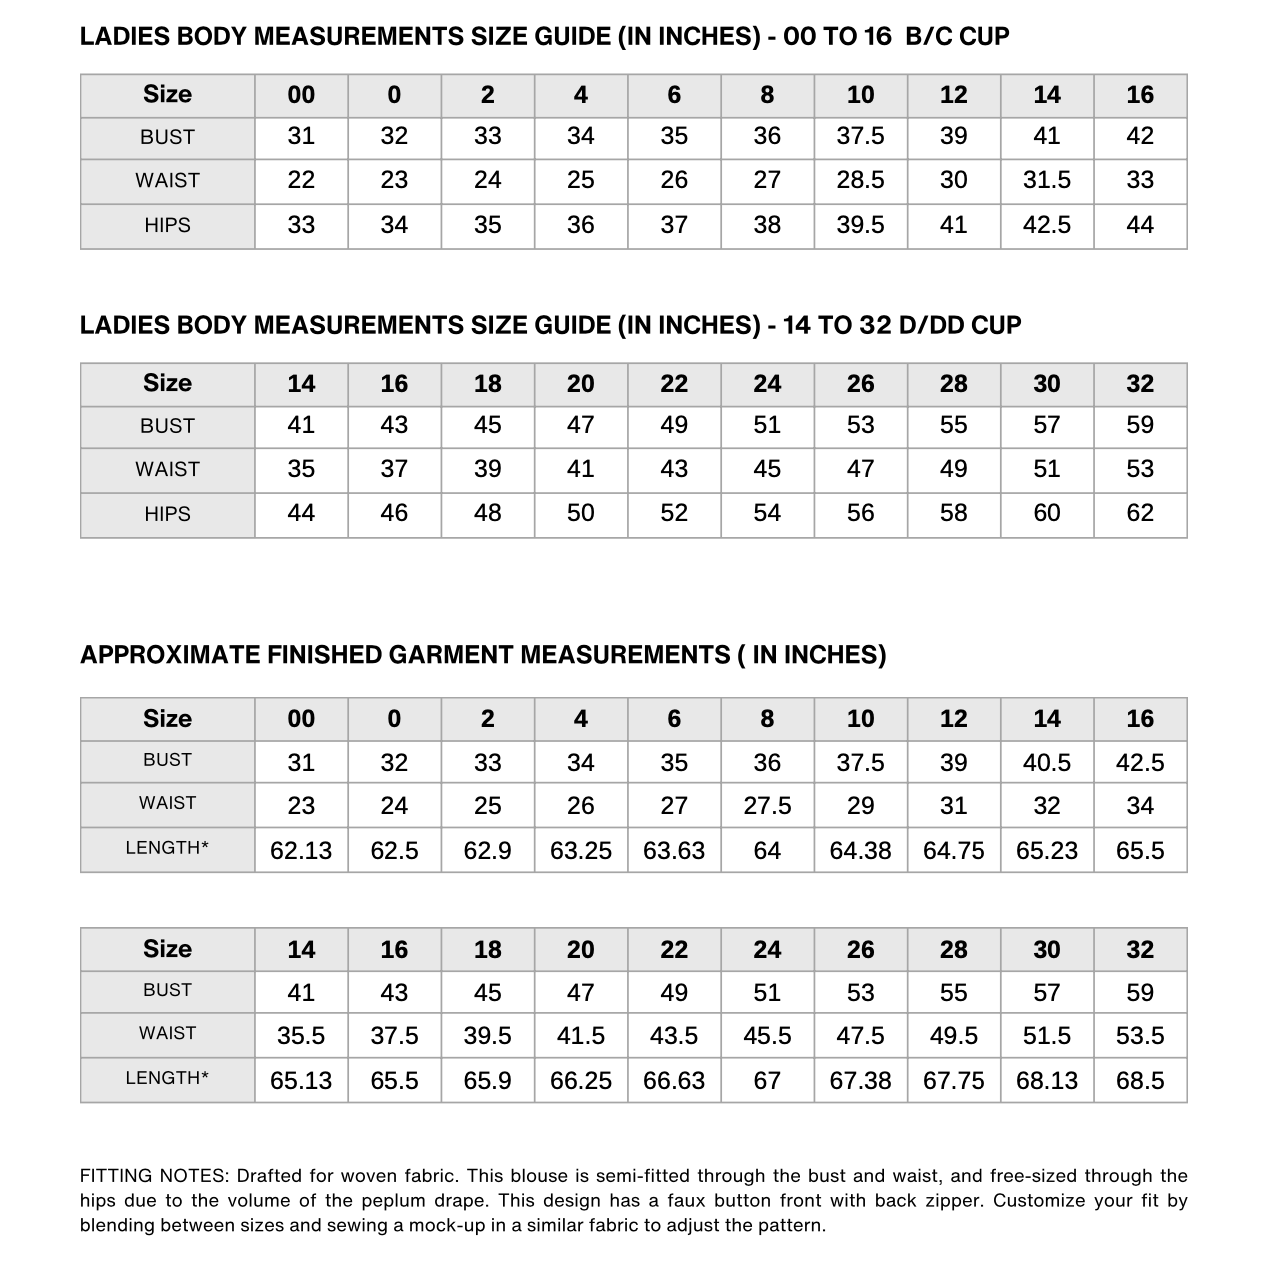
Size Charts, and Finished Garment Measurements
Yardage/ Fabric Consumption