The Laissez Faire Lounge Set Sewing Pattern Guide
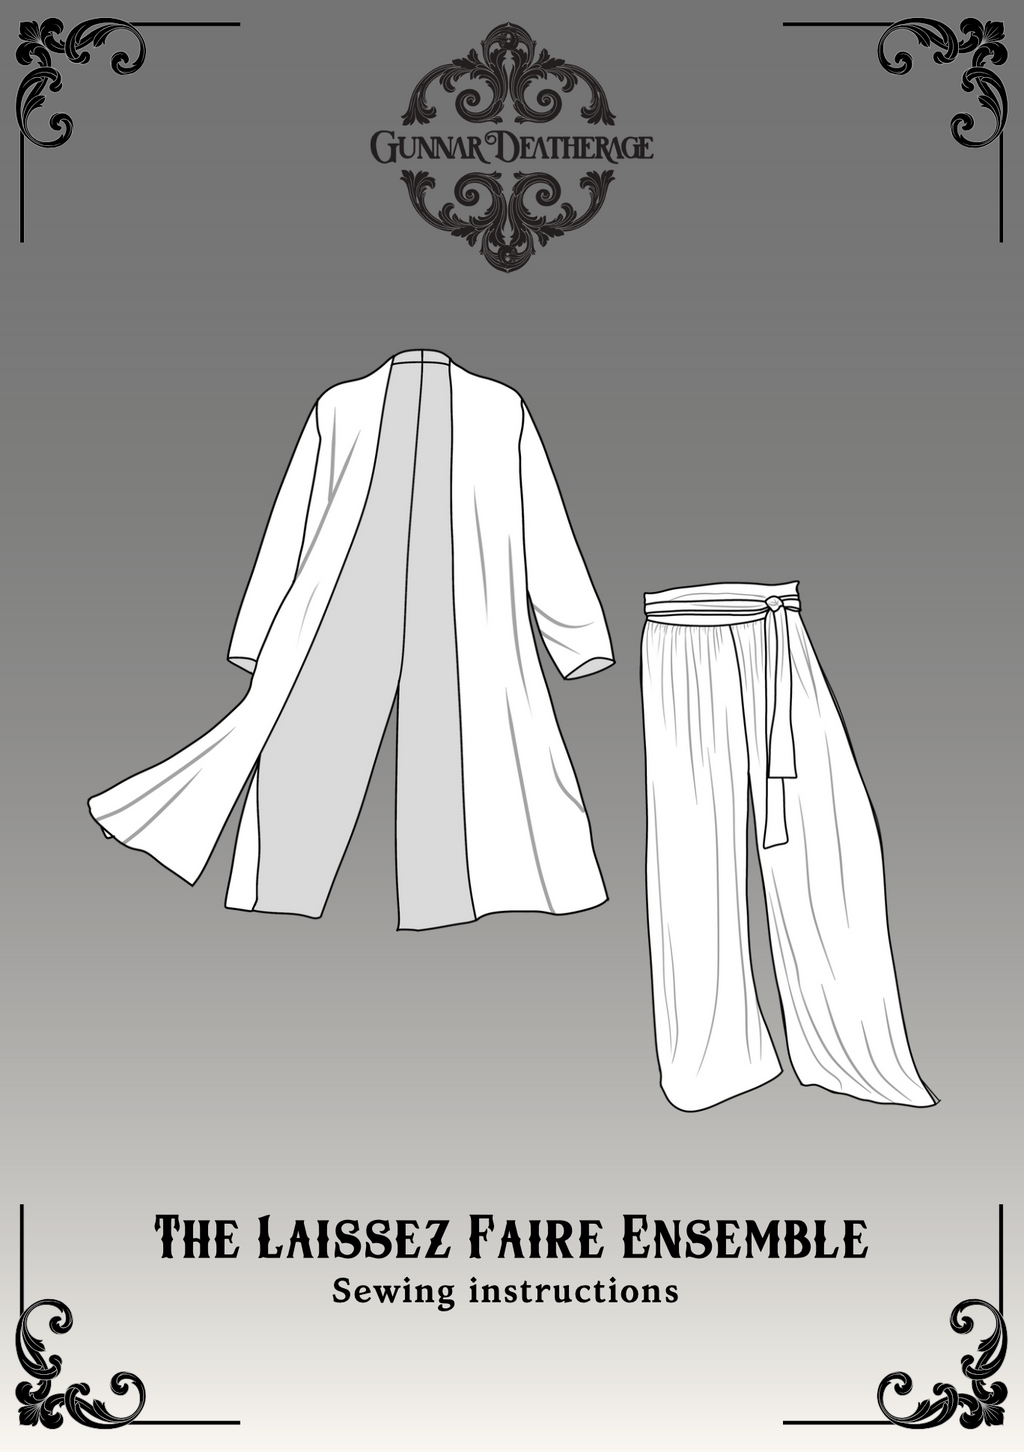
Introducing the Laissez Faire Set, a cozy yet elegant loungewear pattern that’s perfect for winter relaxation or effortlessly chic outings. This sewing set features draped, flowy pants with optional waist ties and hidden pockets, ensuring both comfort and practicality. Completing the ensemble is a statement jacket that flows beautifully with every step you take, perfect for making an impression wherever you go.
Designed with beginners in mind, the Laissez Faire Set is easy to make and offers versatile styling options. It's suitable for crafting in cozy materials for a relaxed day at home or in dressier fabrics for a boho-inspired look when you're out and about. Whether you’re lounging or lunching, this set ensures you do it in style, blending simplicity with a touch of elegance.
Before You Get Started
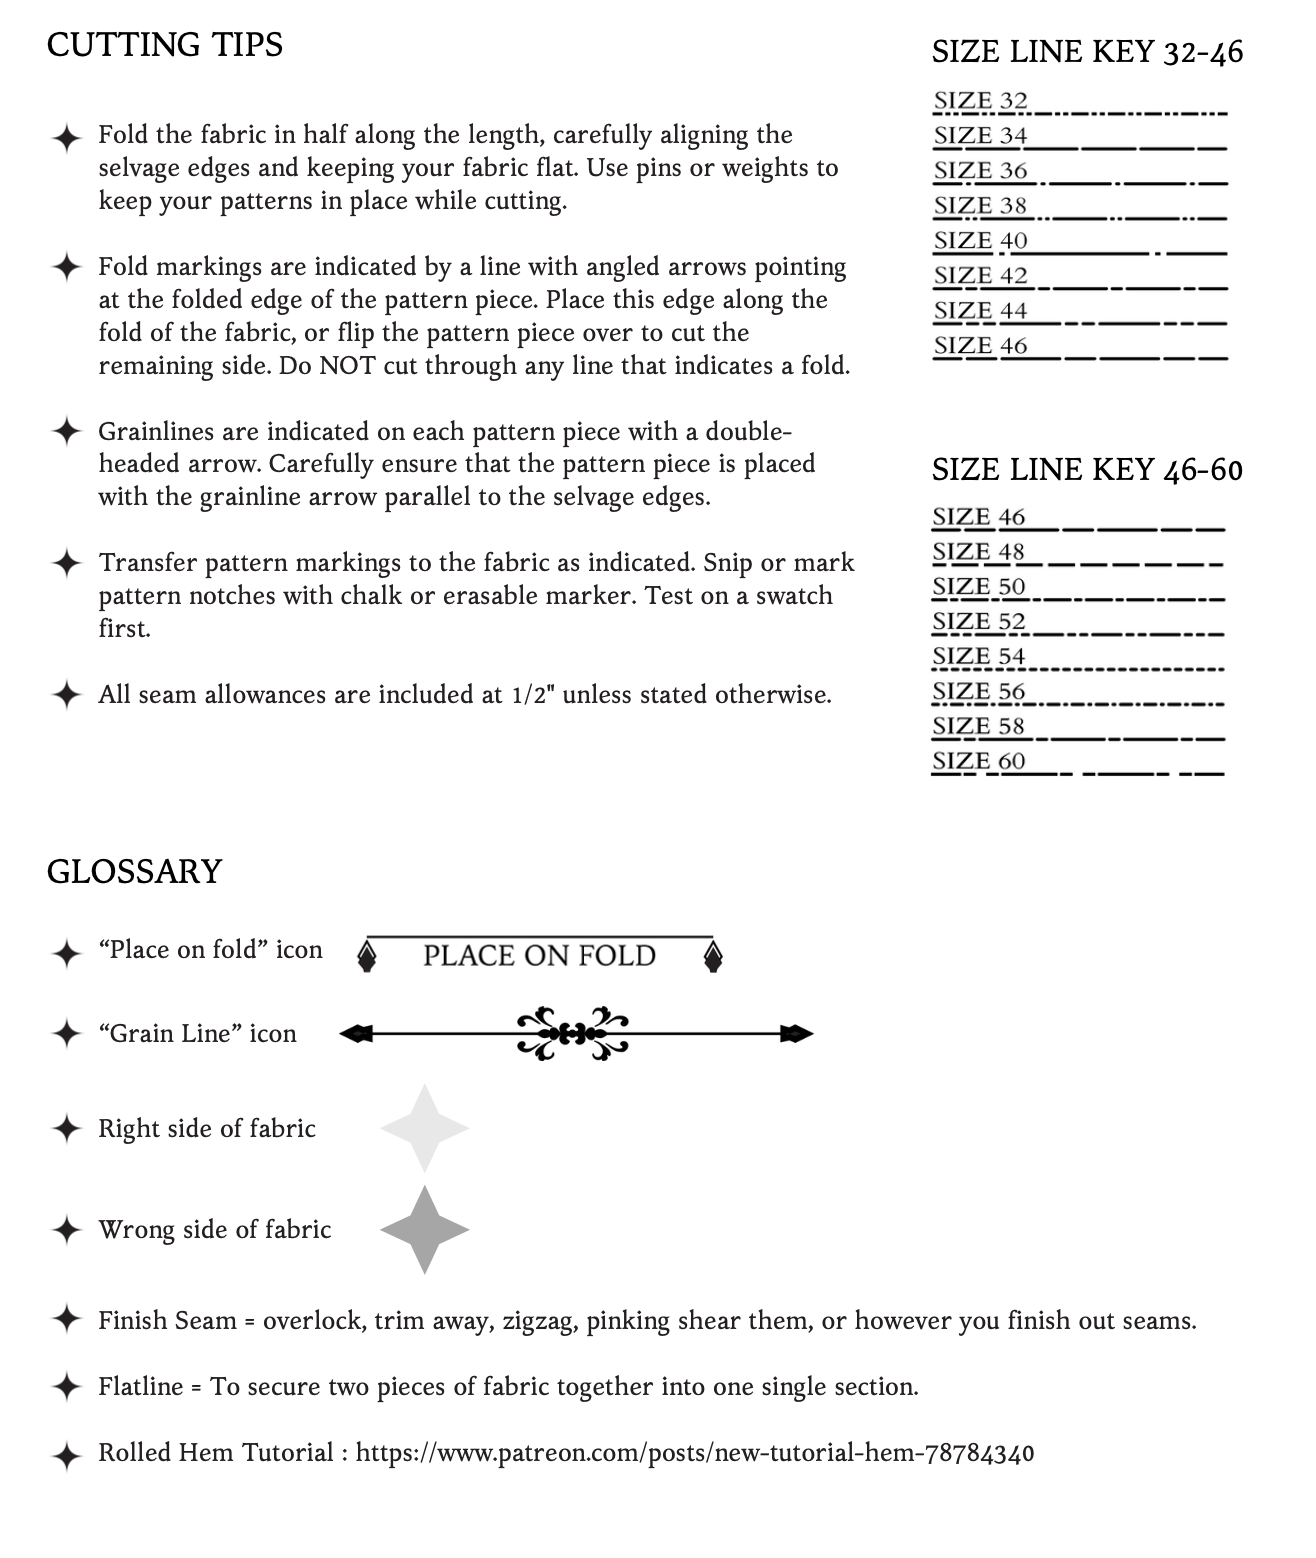
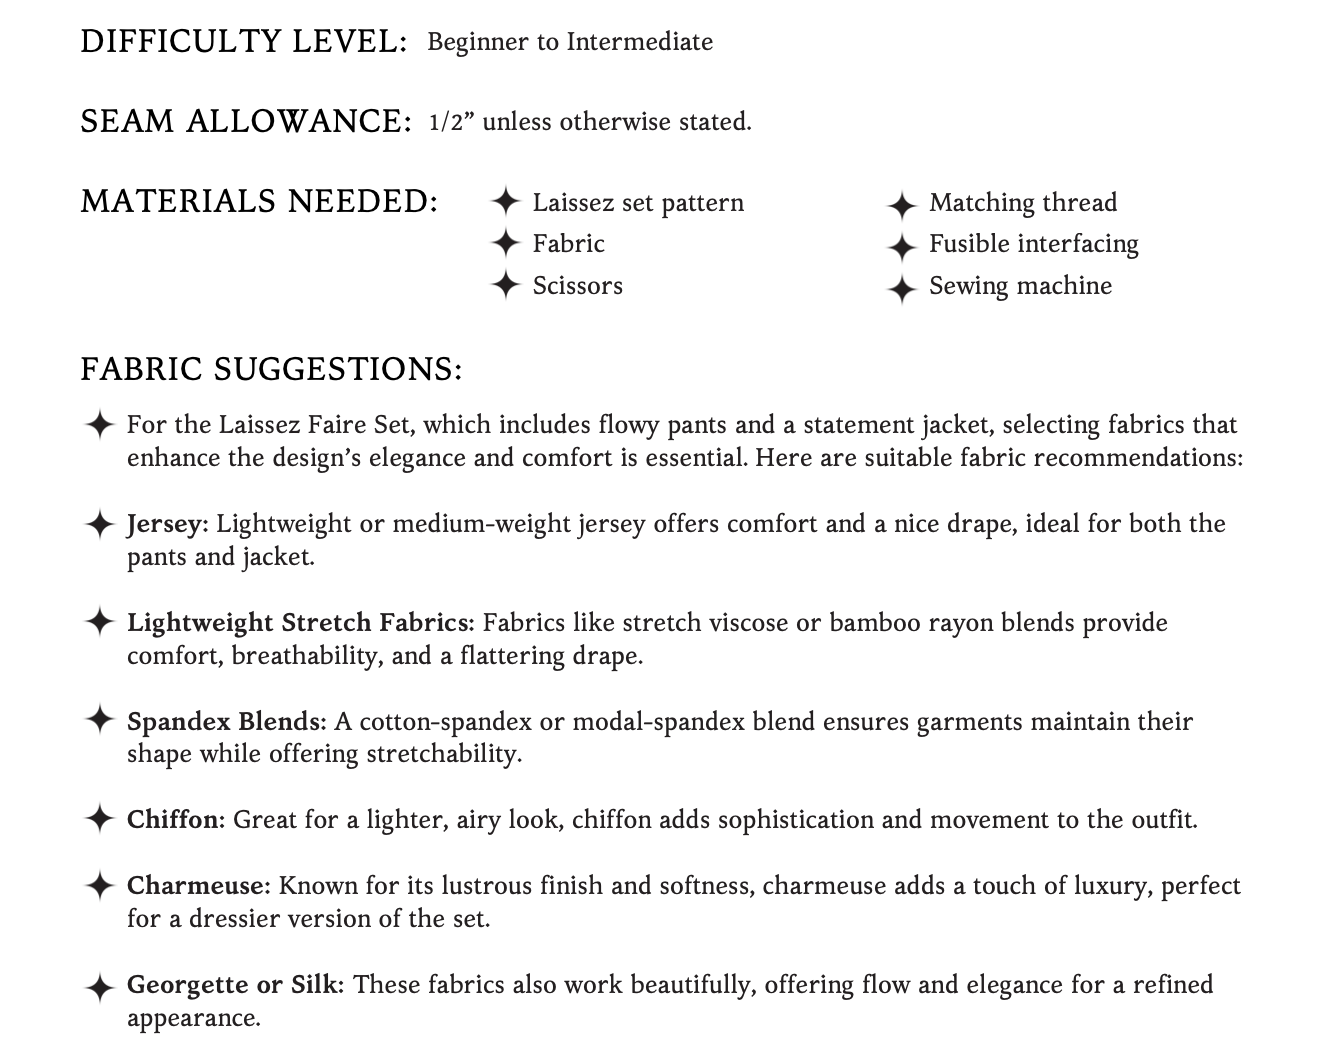
Please take note that the seam allowances on this pattern are 1/2” unless otherwise stated.
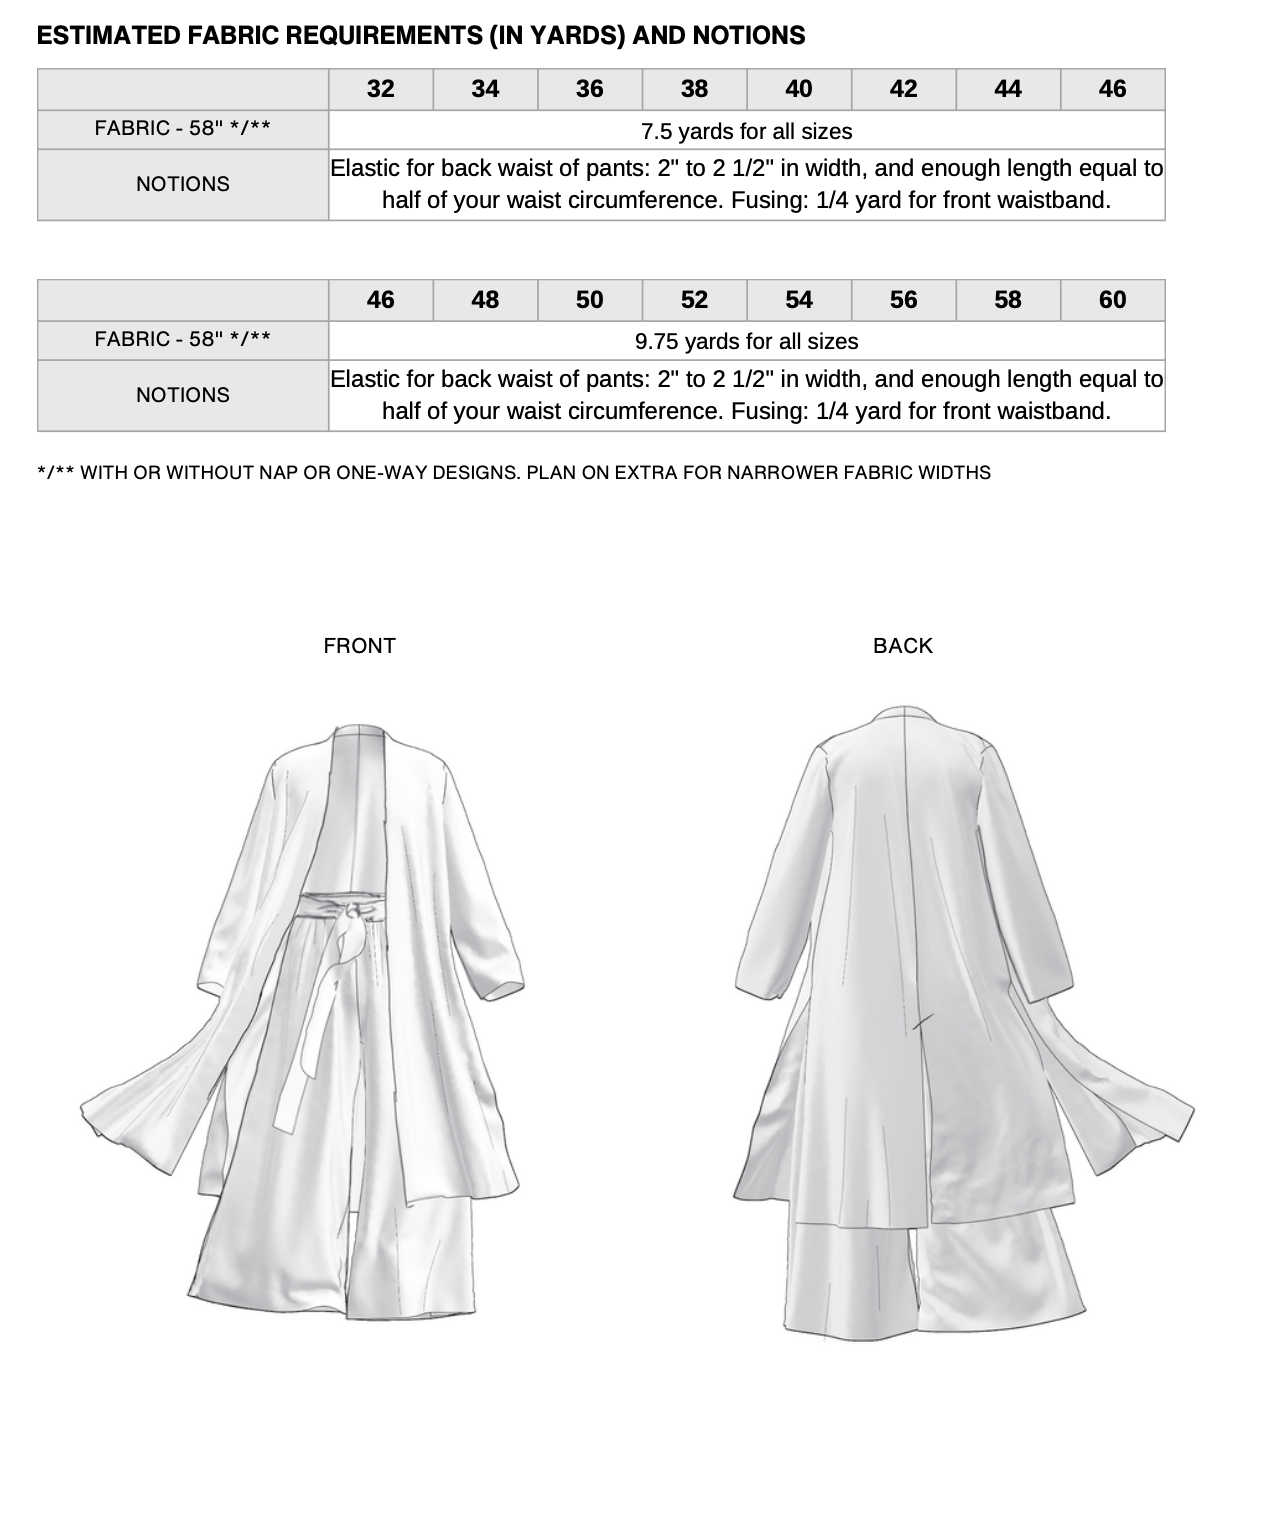
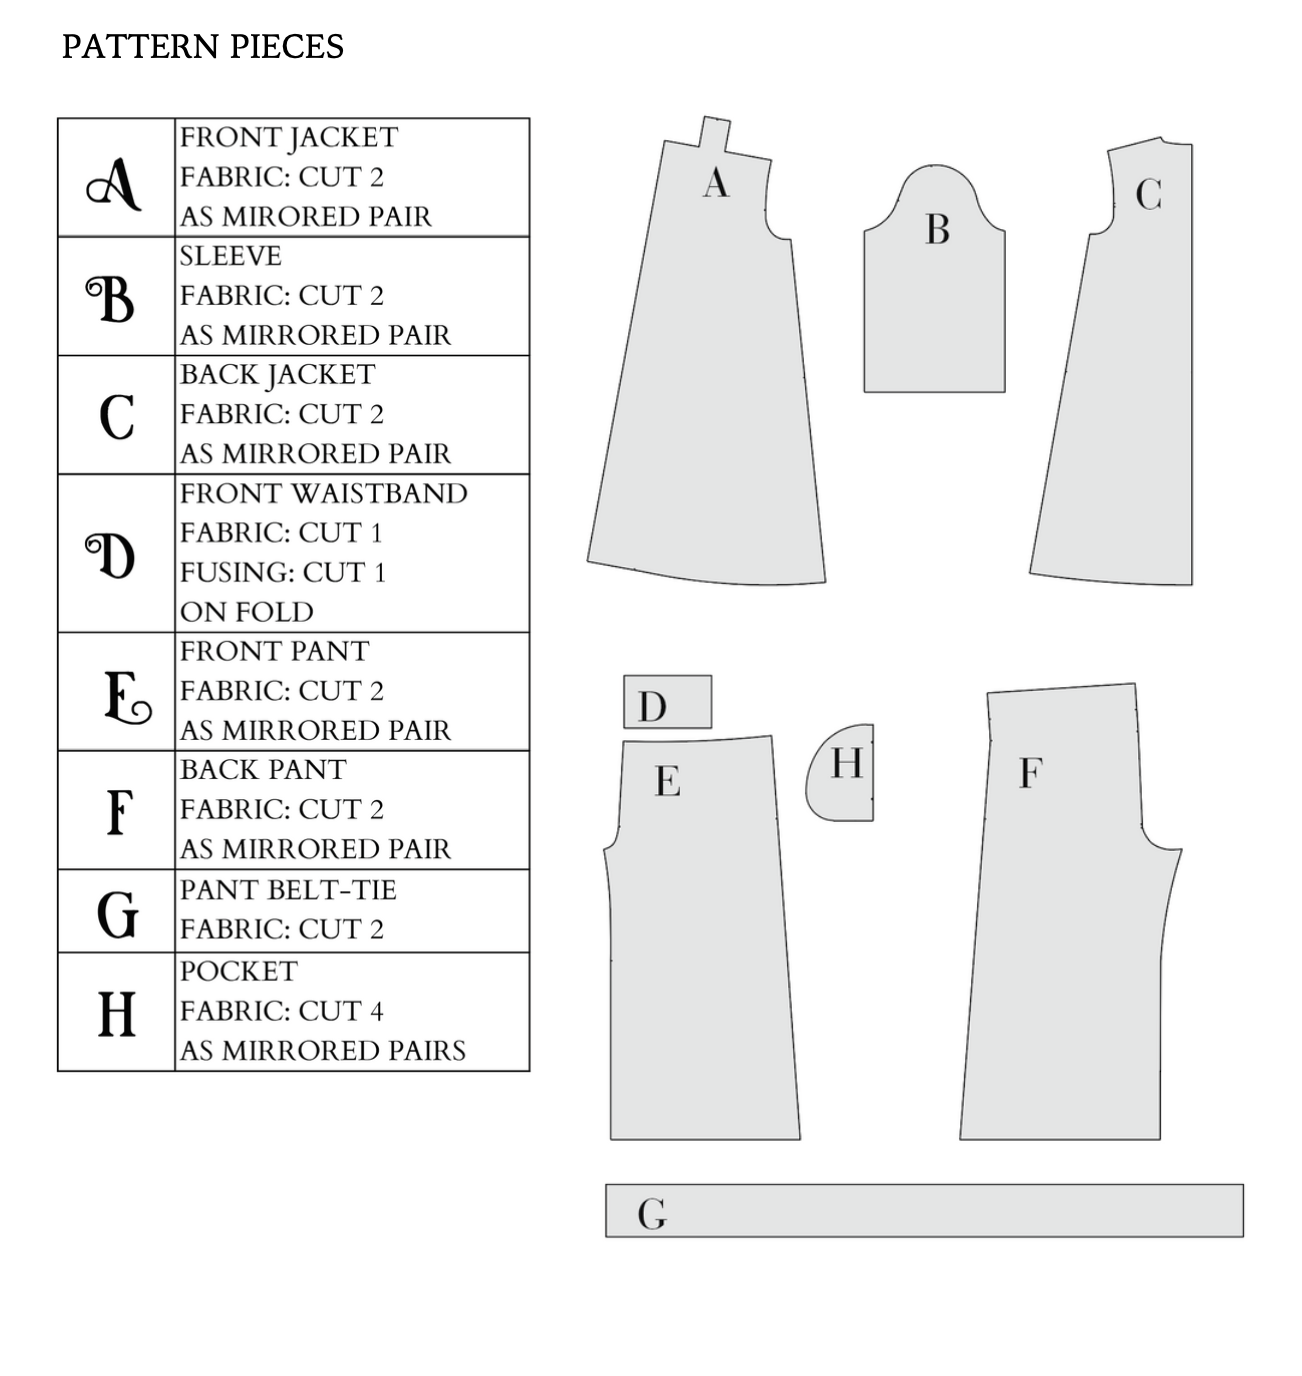
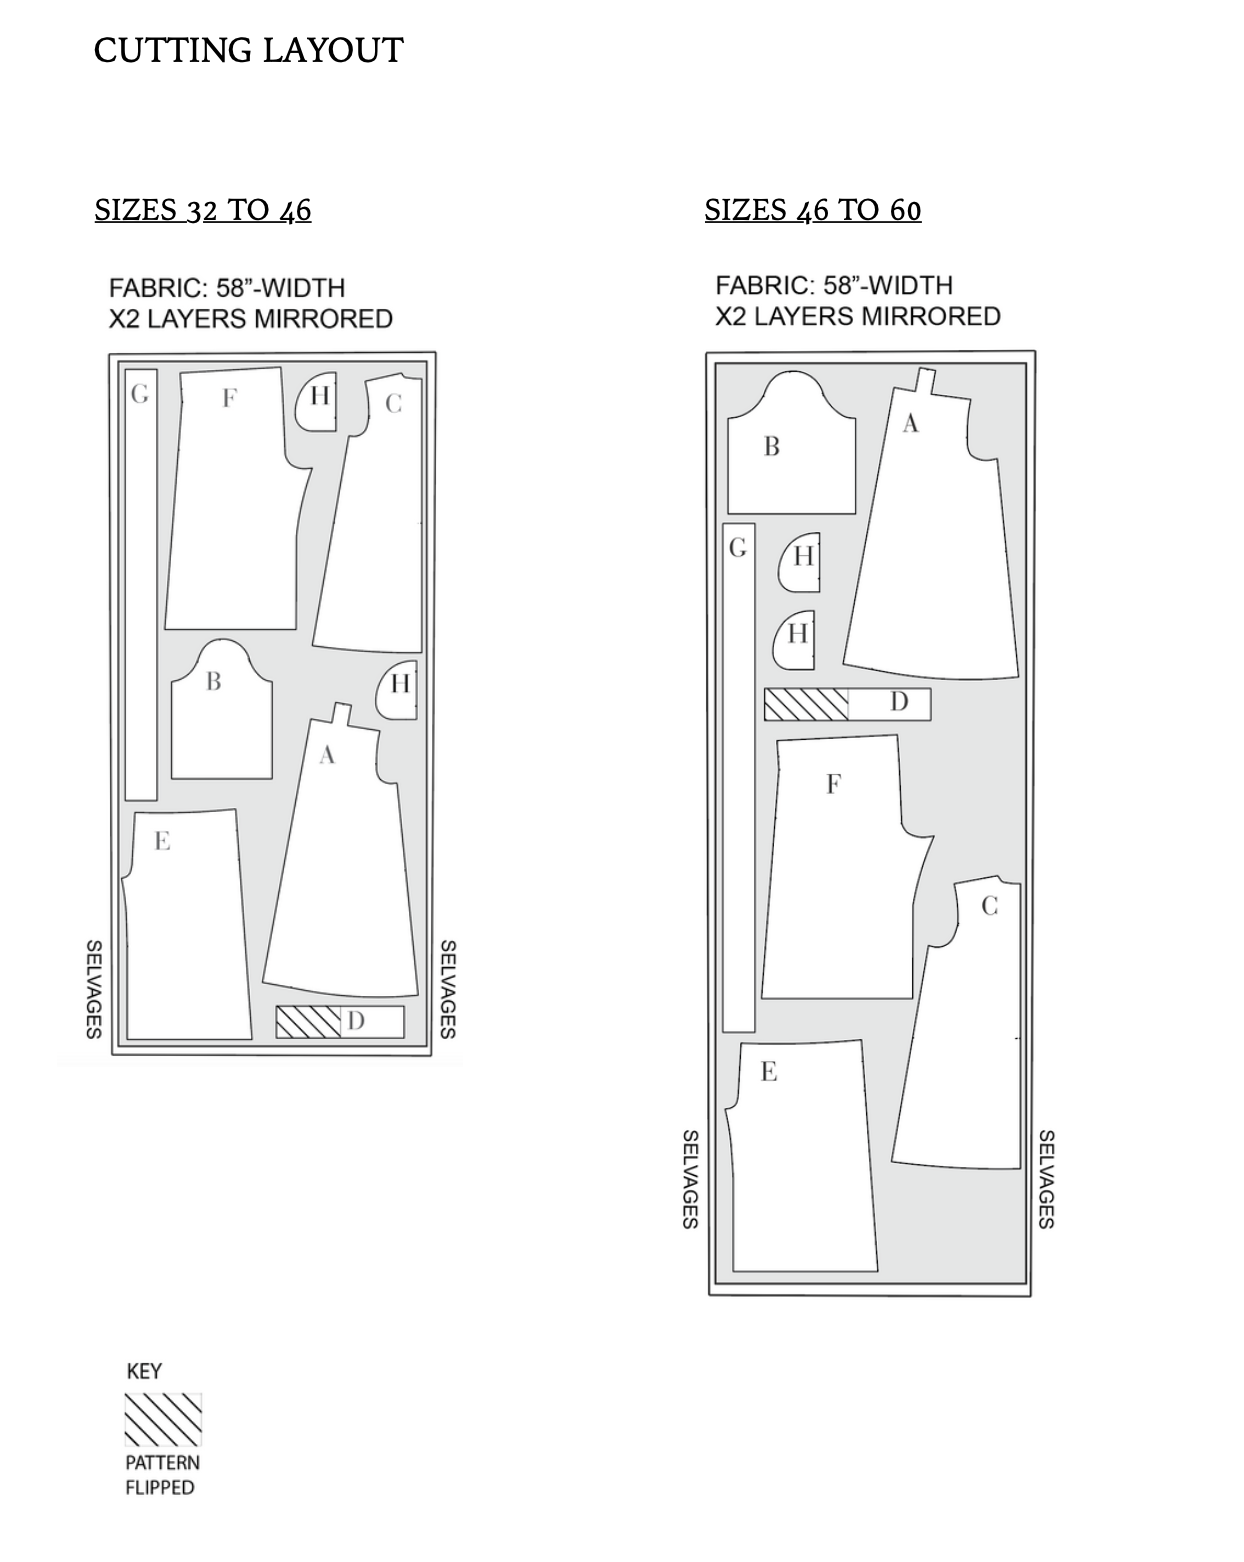
The Pattern will have all the notions and cutting layout you will need in the provided PDF files.
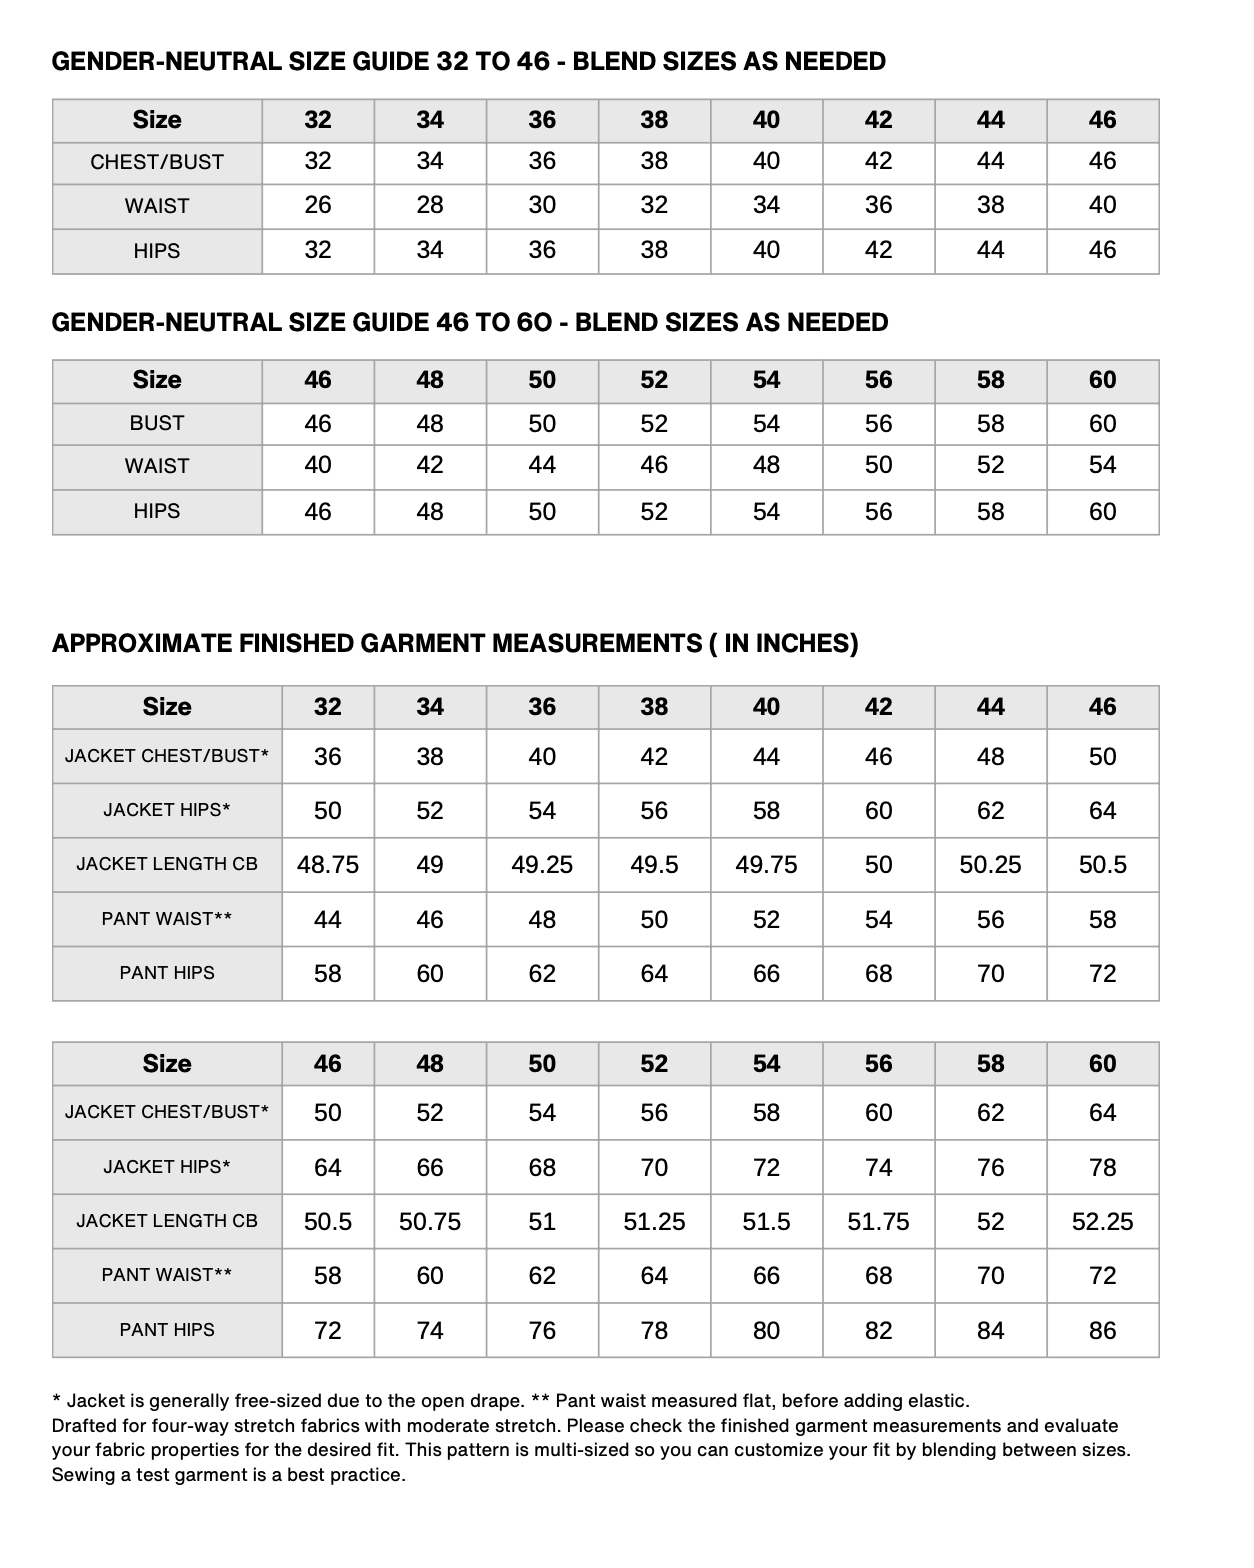
Size Charts, and Finished Garment Measurements
Yardage/ Fabric Consumption