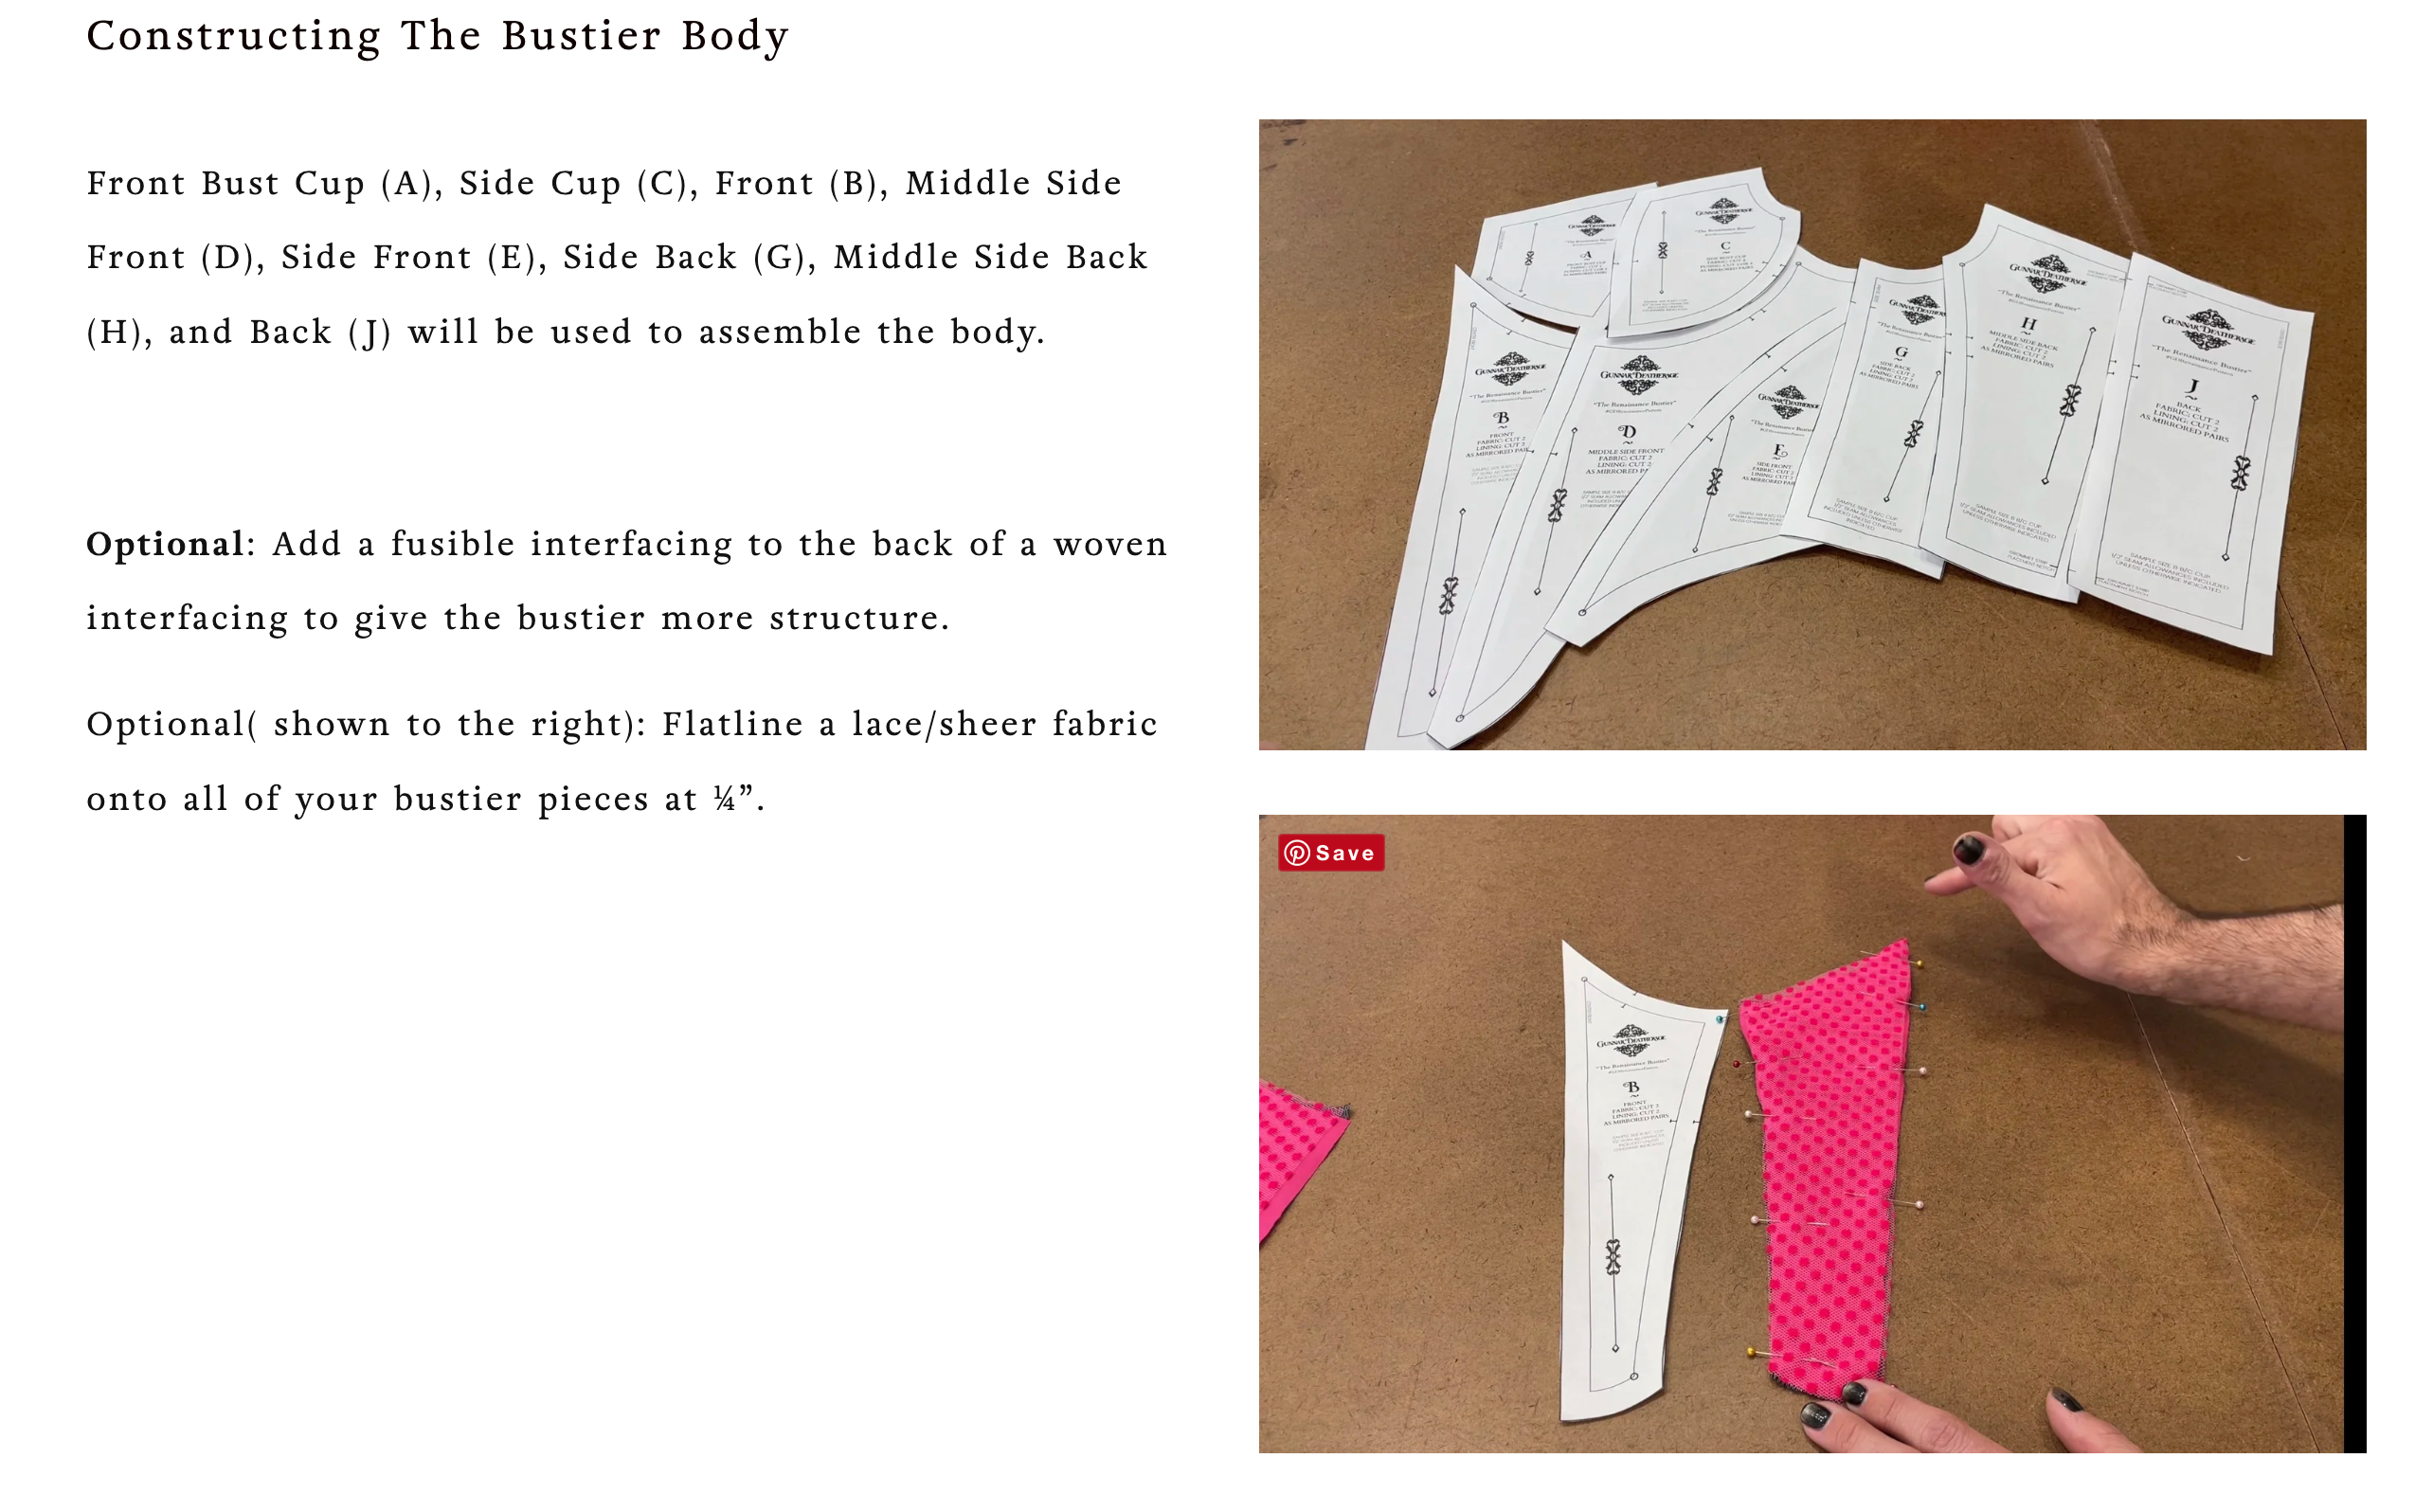
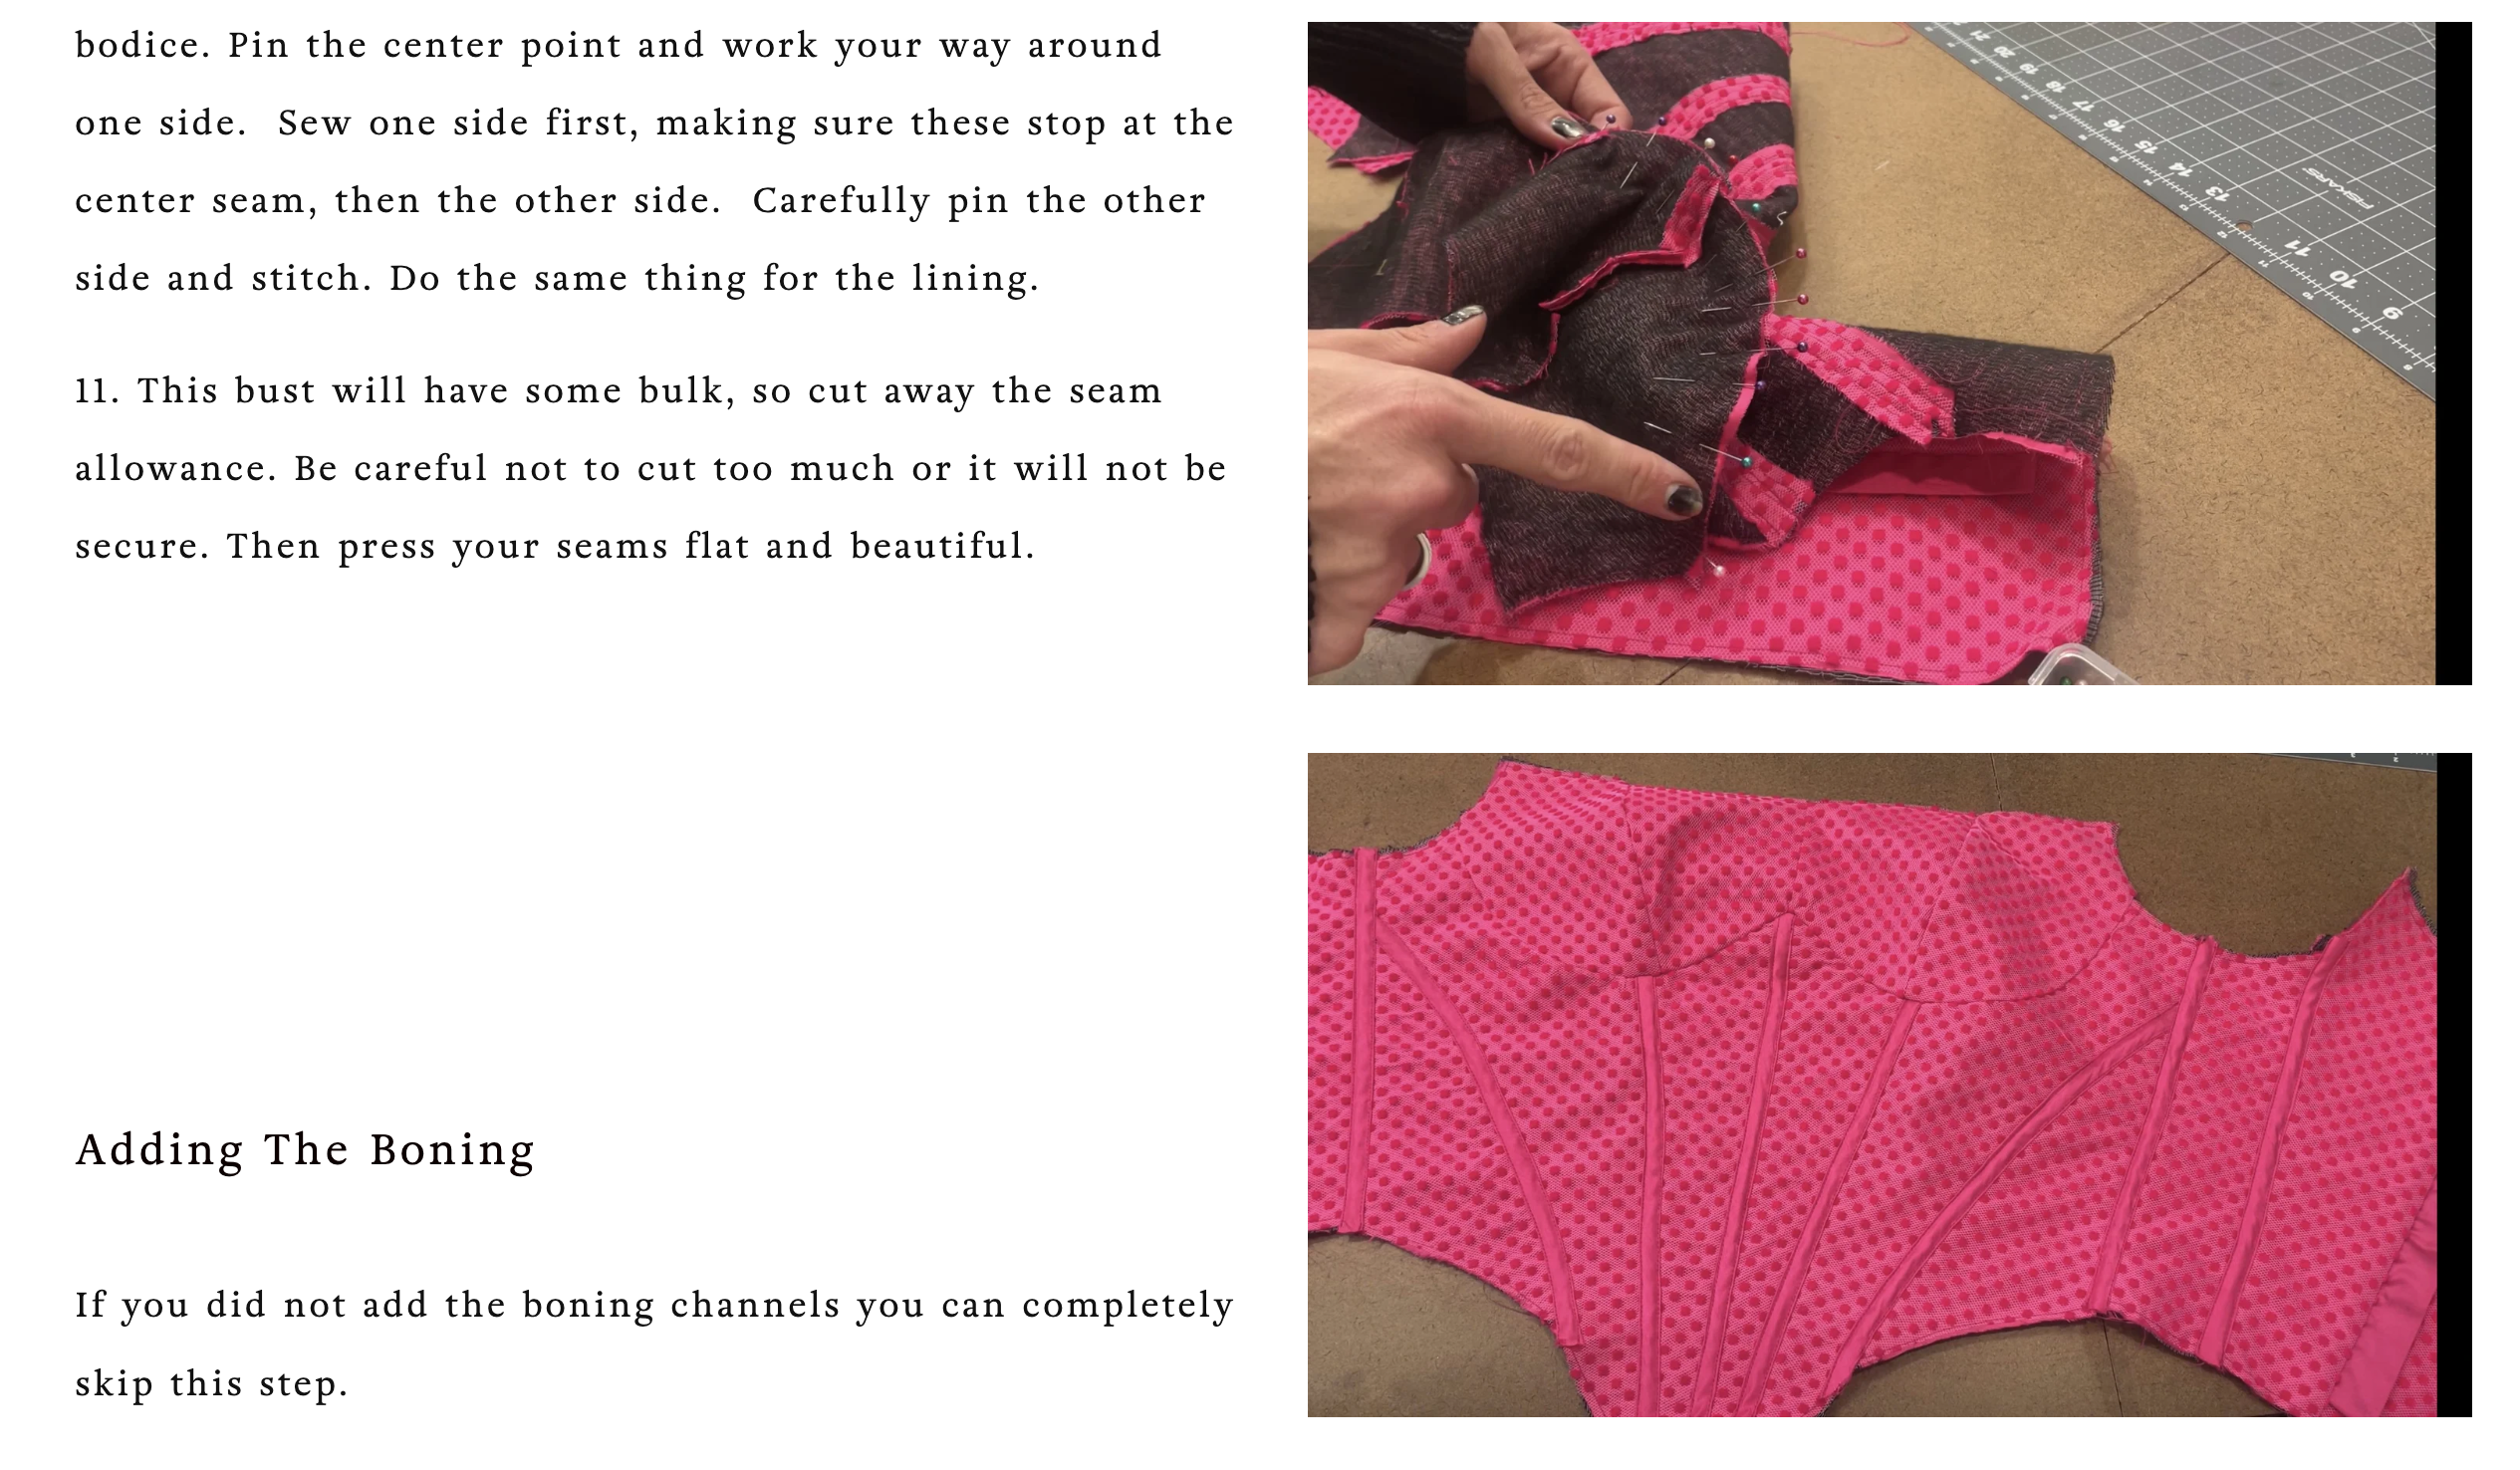
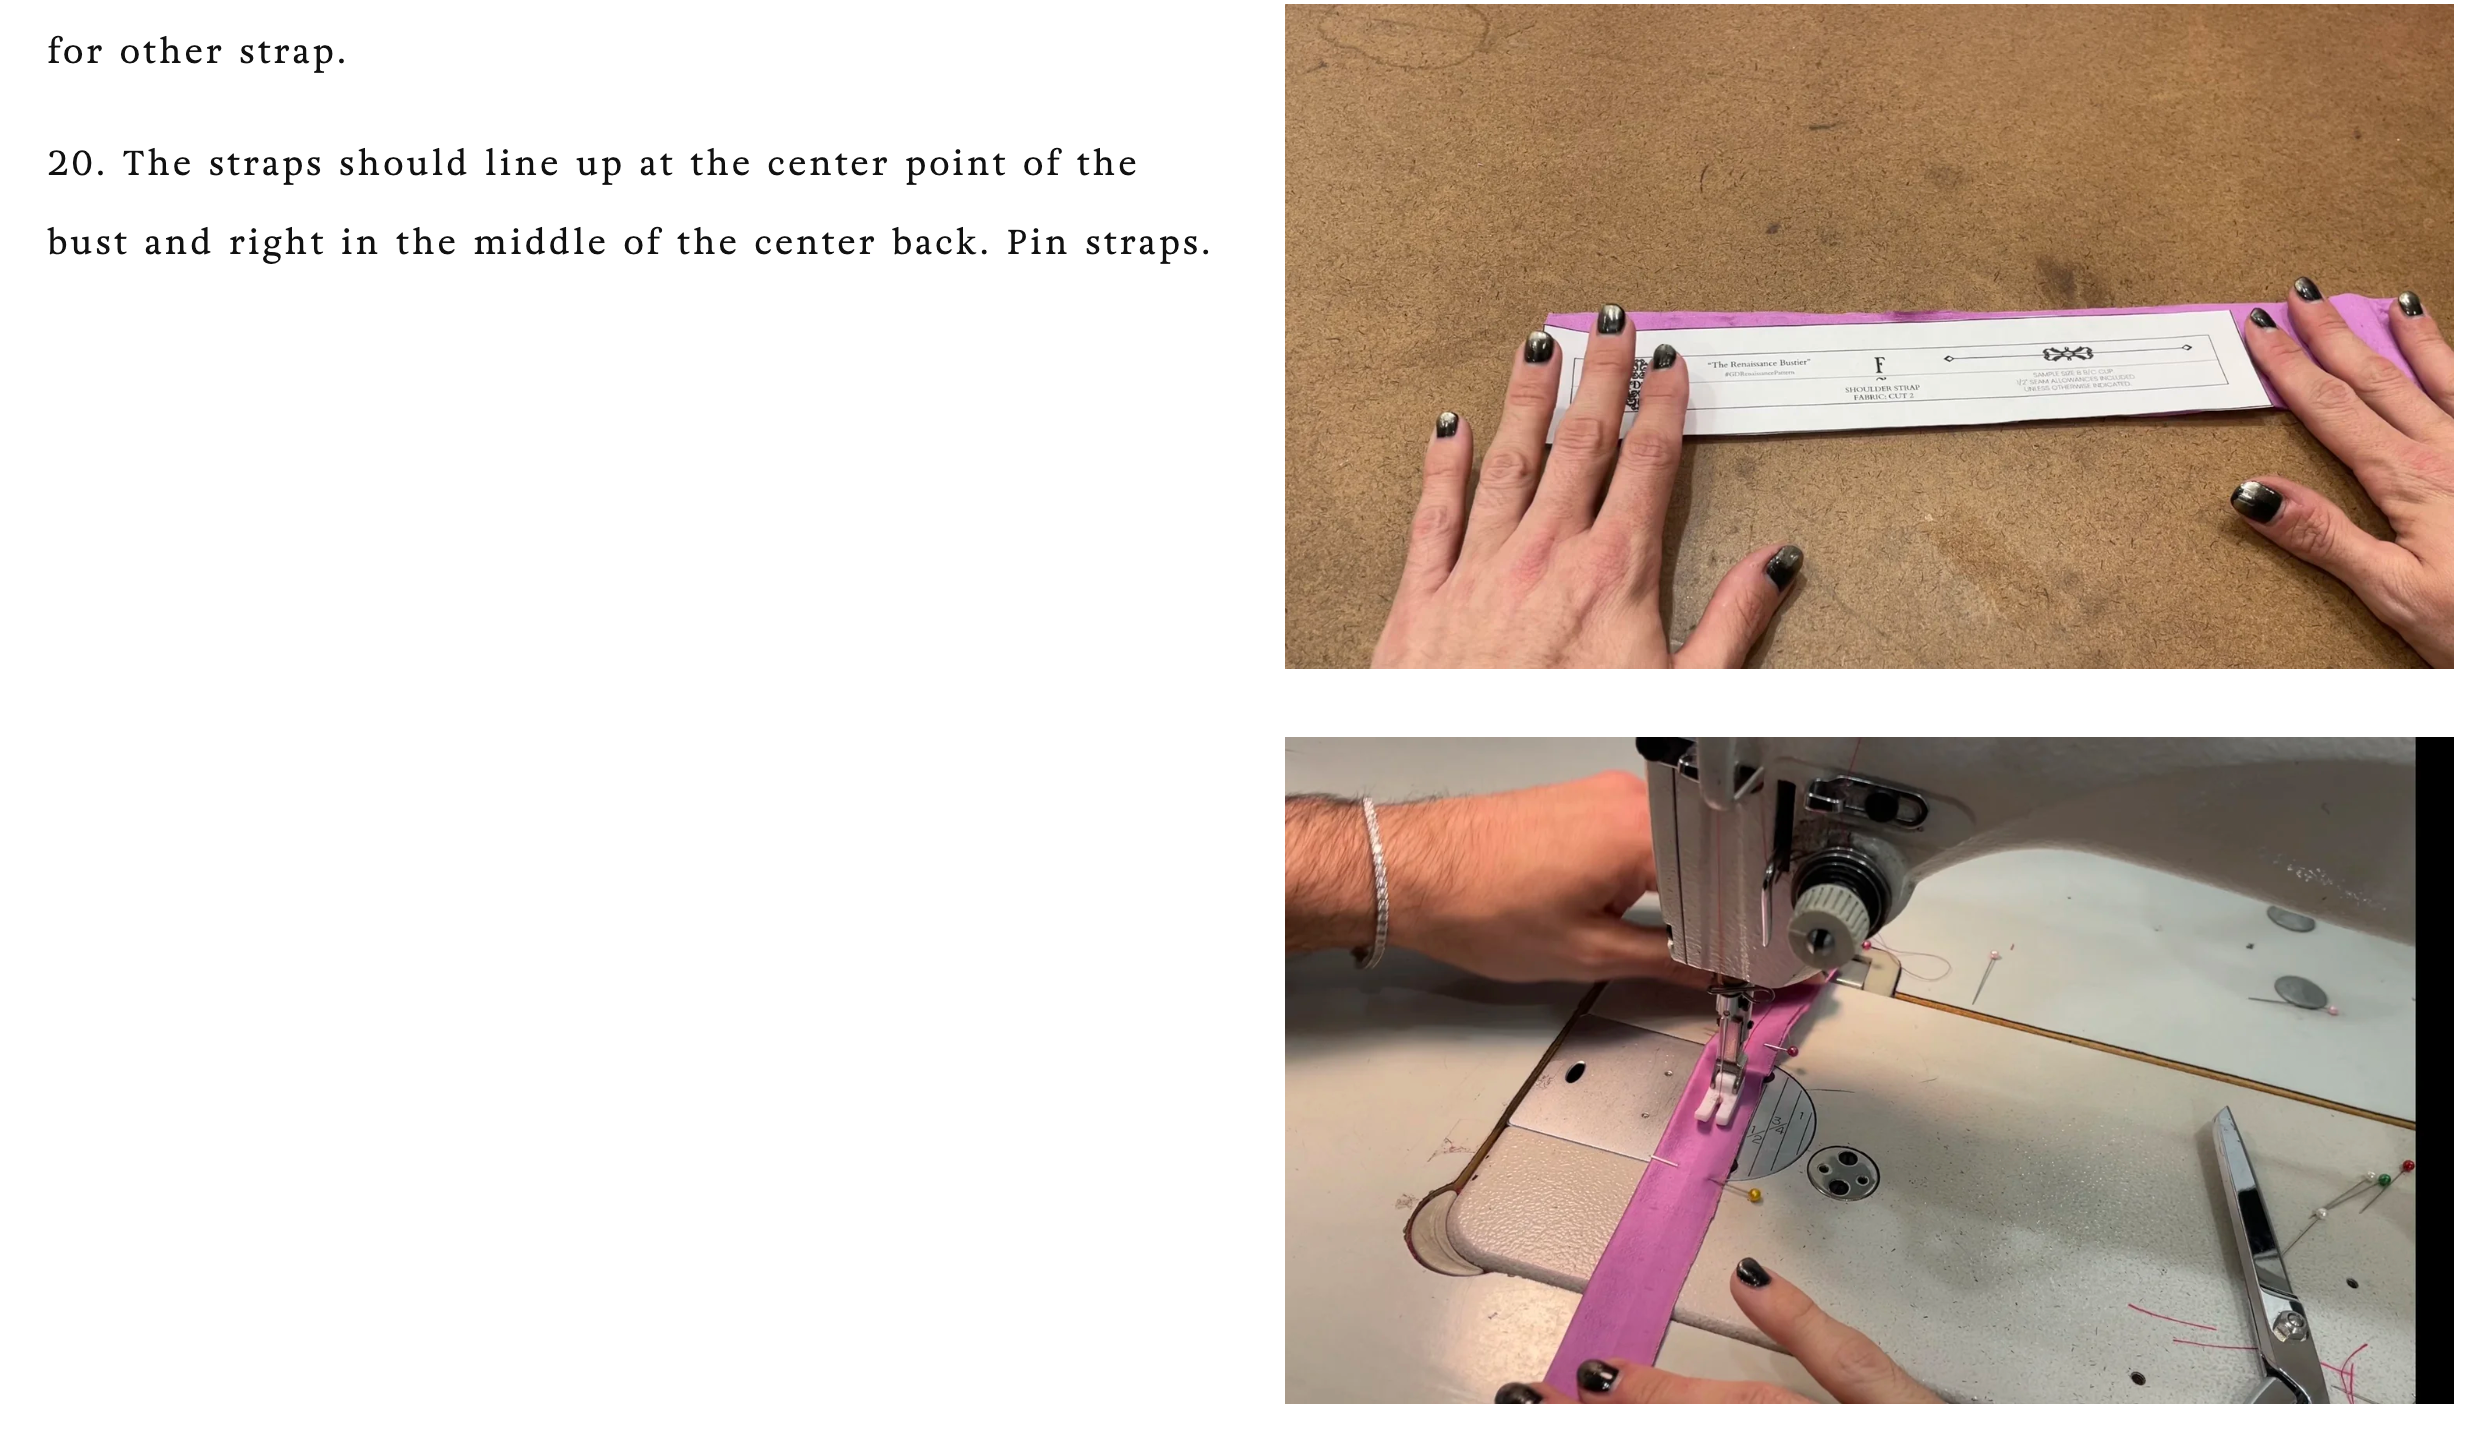
The Renaissance Bustier Sewing Pattern Guide

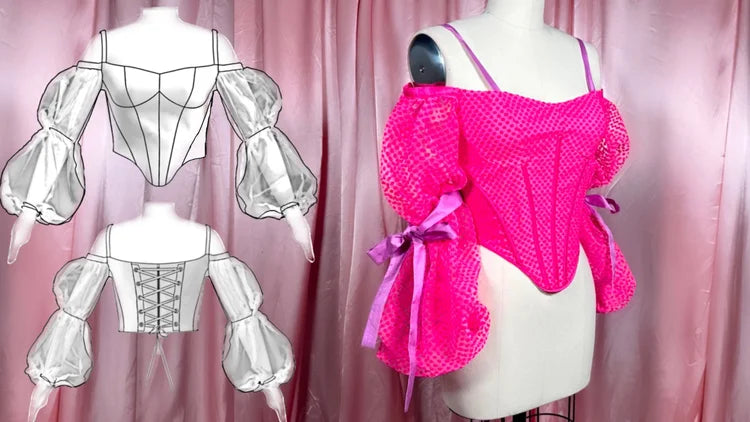
Hello, and welcome to The Renaissance Bustier! I wanted to capture the romantic essence of some of my favorite period piece films. This is such a fun project with a lot of drama. The bustier can easily be modified to fit your needs! If you’ve been hanging onto a fabric for a while, now the time to break it out!


Please also take note of the seam allowances on this pattern is 1/2” unless otherwise stated.

Now, let’s familiarize ourselves with the pattern! 

Things To Know

Fabrics to use: Woven and sheer/lace fabrics.

Difficulty: easy to intermediate.

The pattern will have all the notions and cutting layouts you will need. For any bustier or corset, I suggest making a muslin mockup just to make sure it fits you before you cut into your fabrics.

If you are wanting to use the modesty panel for the center back please note the specific instructions on 6C

Constructing The Bustier Body

Front Bust Cup (A), Side Cup (C), Front (B), Middle Side Front (D), Side Front (E), Side Back (G), Middle Side Back (H), and Back (J) will be used to assemble the body. 

Optional: Add a fusible interfacing to the back of a woven interfacing to give the bustier more structure.

Optional( shown to the right): Flatline a lace/sheer fabric onto all of your bustier pieces at ¼”.

1. Begin by stitching the center front line of the bustier together. Pin both Front (B) pieces together with right side facing and stitch. Do the same for the lining. Press your seams flat and beautiful.

2. Next attach the Middle Side Front (D) to Front (B) on both sides using the notches as guides. Repeat for the lining.

3. Attach Side Front (E) to the Middle Side Front (D) using the guides as notches to align. As this is on a curve, if you pin from one side to the other it will make pinning easier. Repeat for the other side and lining. Once sewn the fabric will curve. You can relieve the tension by clipping the curve. Then you can press open. It should be noted that the bottom should be pressed to one side so it creates a nice line.

4. Then attach the Side Back (G) to side created by D and E pieces. There are notches on the Side Back (G). The top notch meets up with the seam created by both D and E. Repeat on the other side and the lining.

5. Pin the Middle Side Back (H) with the right side facing. Repeat for the other side and lining. Then sew.


The Center Back and Modesty Panel

There’s a few ways that you could enclose the bustier to secure it on the body: zipper, zipper and grommet, or just use the grommet plackets with a modesty panel.


6a. Zipper option: Pin Back (J) to the Middle Side Back (H) with right sides facing then stitch.

6b. Zipper and Grommet Strip : Fold your Grommet Back (I) in half right sides facing. Stitch the sides. Trim off the seam allowance. Turn right side out. Place Grommet Back (I) in the center of Back (J) and pin. Then attach to the back of Bustier back stitching all the way down to heavily secure. Repeat this to the other side and the lining.

6c. Modesty Panel: fold away the right seam allowance on The pattern piece which is the Back (J). Then cut that piece on the fold. When sewing the modesty panel lining to the modesty panel, stitch all the way around leaving one side open, clip away seam allowance, flip right side out, press corners out, and turn edges in ½” then hand stitch closed. Pin the Grommet Back (I) to each side of the back Bustier.

-If you are working with a stretch fabric do a security (stay) stitch on the bust cup area.

At this point you should have your bodice and bodice lining completed (besides your bust cups). If you do not have these done please return to the previous steps and complete those.

The Boning Channels

Adding Boning Channels are completely optional!

It should be noted that the diagonal seam created by D and E should be placed on first before attaching the seam created by F.


7. Create a bias tape for all the boning channels (these go over the seams). Carefully attach boning channels to the bodice leaving enough space to slip in boning.

The Bust Cups

8. Pin Front Bust Cup (A) with right side facing and stitch together.

9. Next step is attaching the Side Bust Cup (C), making sure to use the notches as indicators to where these pieces line up. Depending on how big or small you want these you may have to do some customization. These are a prominent part of the garment and need to be handled as such. Clip the seam allowance to relieve tension. Then repeat for the lining.

10. Don’t let this next step intimidate you. You got this! Show that fabric who’s boss! After you complete your bust cups we will be attaching them to the center front of the bodice. Pin the center point and work your way around one side. Sew one side first, making sure these stop at the center seam, then the other side. Carefully pin the other side and stitch. Do the same thing for the lining.

11. This bust will have some bulk, so cut away the seam allowance. Be careful not to cut too much or it will not be secure. Then press your seams flat and beautiful.

Adding The Boning

If you did not add the boning channels you can completely skip this step.

Something to note, if you are using plastic boning the curved boning channel will be hard to slide that in. So you could choose not to bone this seam or you can bone at a straight angle.

Gunnar Tip: If you are using metal boning (like in the tutorial) you can add a bit of hot glue (or plastidip) to the ends to prevent the metal boning from snagging on the fabric while sliding it in. Be careful to not add too much cause you want it to still fit.


12. Measure your boning for each channel. Keep in mind that you have to stop the boning ½” from the top and bottom to allow for the seam allowance. Insert your boning.

The Sleeves

On Sleeve (L) there is a notation that says “Gather or add elastic for upper arm”. If you end up just gathering make sure to have enough space so your bicep can move. In the tutorial I’m using ¼” elastic.

13. Mark where you are going to gather with pins, chalk, or tracing paper. Do whichever you feel most comfortable with. Measure around your biceps and give yourself an extra inch for the ½” seam allowance on both sides. Gather if not using elastic. If using elastic, fold it in half and mark the center point. Pin the elastic to the center of the fabric, and pin the edges to the side of the fabric. Start by doing a backstitch on the elastic holding from the back for more control. If you are using small elastic take your time - do not rush! If you have more fabric before you get to the center, gather the fabric evenly and stitch through. Follow to the other end and backstitch. Repeat to the other sleeve.

14. Next we are working on the hem of the sleeve. Pin the hem 1” up (same on the pattern piece) and stitch. If not using elastic, the sleeve will look like a bell sleeve with a gather. If using elastic, measure your wrist and give yourself an additional 1”. Insert the elastic inside the hem and pin the elastic securely on both ends. Back stitch on both sides to hold the elastic in place.

15. Fold the sleeve in half with right sides facing. Pin the sleeve matching where the elastic and wrist areas are. Then stitch closed. When you get to the elastic back stitch for extra security.

16. Now the Sleeve Band (K) is a recommended size adjust if needed. We will be gathering the top of the sleeve to fit within the measurements. Do a gather stitch at ¼” (Click Here for Gather Tutorial on Patreon) and then gather evenly leaving the ½” seam allowance on each side.

17. Start your sleeve band by pinning right sides facing at ½” away, all the way across. Now, stitch this together and backstitch at the end. Repeat this on the other sleeve.

18. Essentially ,we are going to create a bias tape for the sleeve. Fold the fabric down ½” all the way across and fold again matching on the other side. Pin all the way across. Iron it flat before you topstitch the two layers. 

The Straps

19. Measure the strap out to the size you need. Shoulder Strap (F) is just a good base to get started. Fold the strap in half, pin, and stitch all the way down. Trim away the seam allowance to reduce bulk. Turn right side out. Repeat for other strap.

20. The straps should line up at the center point of the bust and right in the middle of the center back. Pin straps.

Attaching The Lining

The lining should match up perfectly with the bodice. One thing to note is that the arm holes will not get sewn.


21. Pin the lining to the bodice with right sides facing. I will be closing the bottom of the bustier with bias tape. If you do not want to do this, you will also stitch the bottom closed. Pin and sew the top and sides( and bottom if you won’t be using a bias tape to close.) When sewing the busts make sure to stop in the center and pivot. You want that to be nice and sharp. A few more things to note: when sewing over the strap and the back make sure to double stitch. The back has to hold a lot of tension due to the grommets and lacing. 

22. Trim away seam allowance. Then flip right side out making sure all points are pushed out. Press flat and beautiful.

Adding Bust Cups

This step is completely optional. If you do not plan on adding any you can skip.

23. Position the cup where you want in the garment. Pin as much as needed. Do a whip stitch to attach.

Attaching The Sleeves

24. Once the garment is right side out, Pin the outer shell to the lining in the arm hole. Pin the sleeve band on with right sides facing so all the raw edges are together. The curve should match up. Sew the curve and backstitch at the edges. Repeat for the other sleeve as well .

25. Finish the arm hole. If you do not have an overlock machine you can trim away the edge and zigzag stitch or use a bias binding. You just want to make sure this area is comfortable since it goes under the arm.

26. Hand tack at the back of the armband to keep it in. Don’t let this show to the outside.

Closing The Bottom

27. If using a bias binding to finish the edge. Pin the lining to the outer shell. Make sure when pinning that the lining and the outer shell match up. Take your time with this. Stitch this at a ¼” at the bottom. Make sure your boning is pushed to the top to prevent breaking a needle. 

28. Pin your bias tape down using as many pins as needed. Sew across the bottom taking your time especially around the curve. You can use a narrow zipper foot so you can get right next to the boning.

29. Trim away half of the seam allowance. Make sure it’s cleanly done. This will show through the bias tape.

30. Fold the bias tape to the other side making sure to fold the seam allowance in and pin. You don’t want to use too much pressure when folding so that it begins to distort the bias tape. Then hand stitch closed.

Adding Grommets & Sleeve Ties

31. Evenly measure the space for the grommets with tailor chalk. Then punch the holes and add the grommets.

32. Modesty Panel: If you created the modesty panel, pin and hand tack it to one side of the bustier.

33. Optional: On the very back of the sleeve, hand tack the ribbon and tie into bow.


CONGRATULATIONS YOU COMPLETED THE RENAISSANCE BUSTIER! PLEASE TAG ME WITH #GDRENAISSANCEBUSTIER


.

.

.