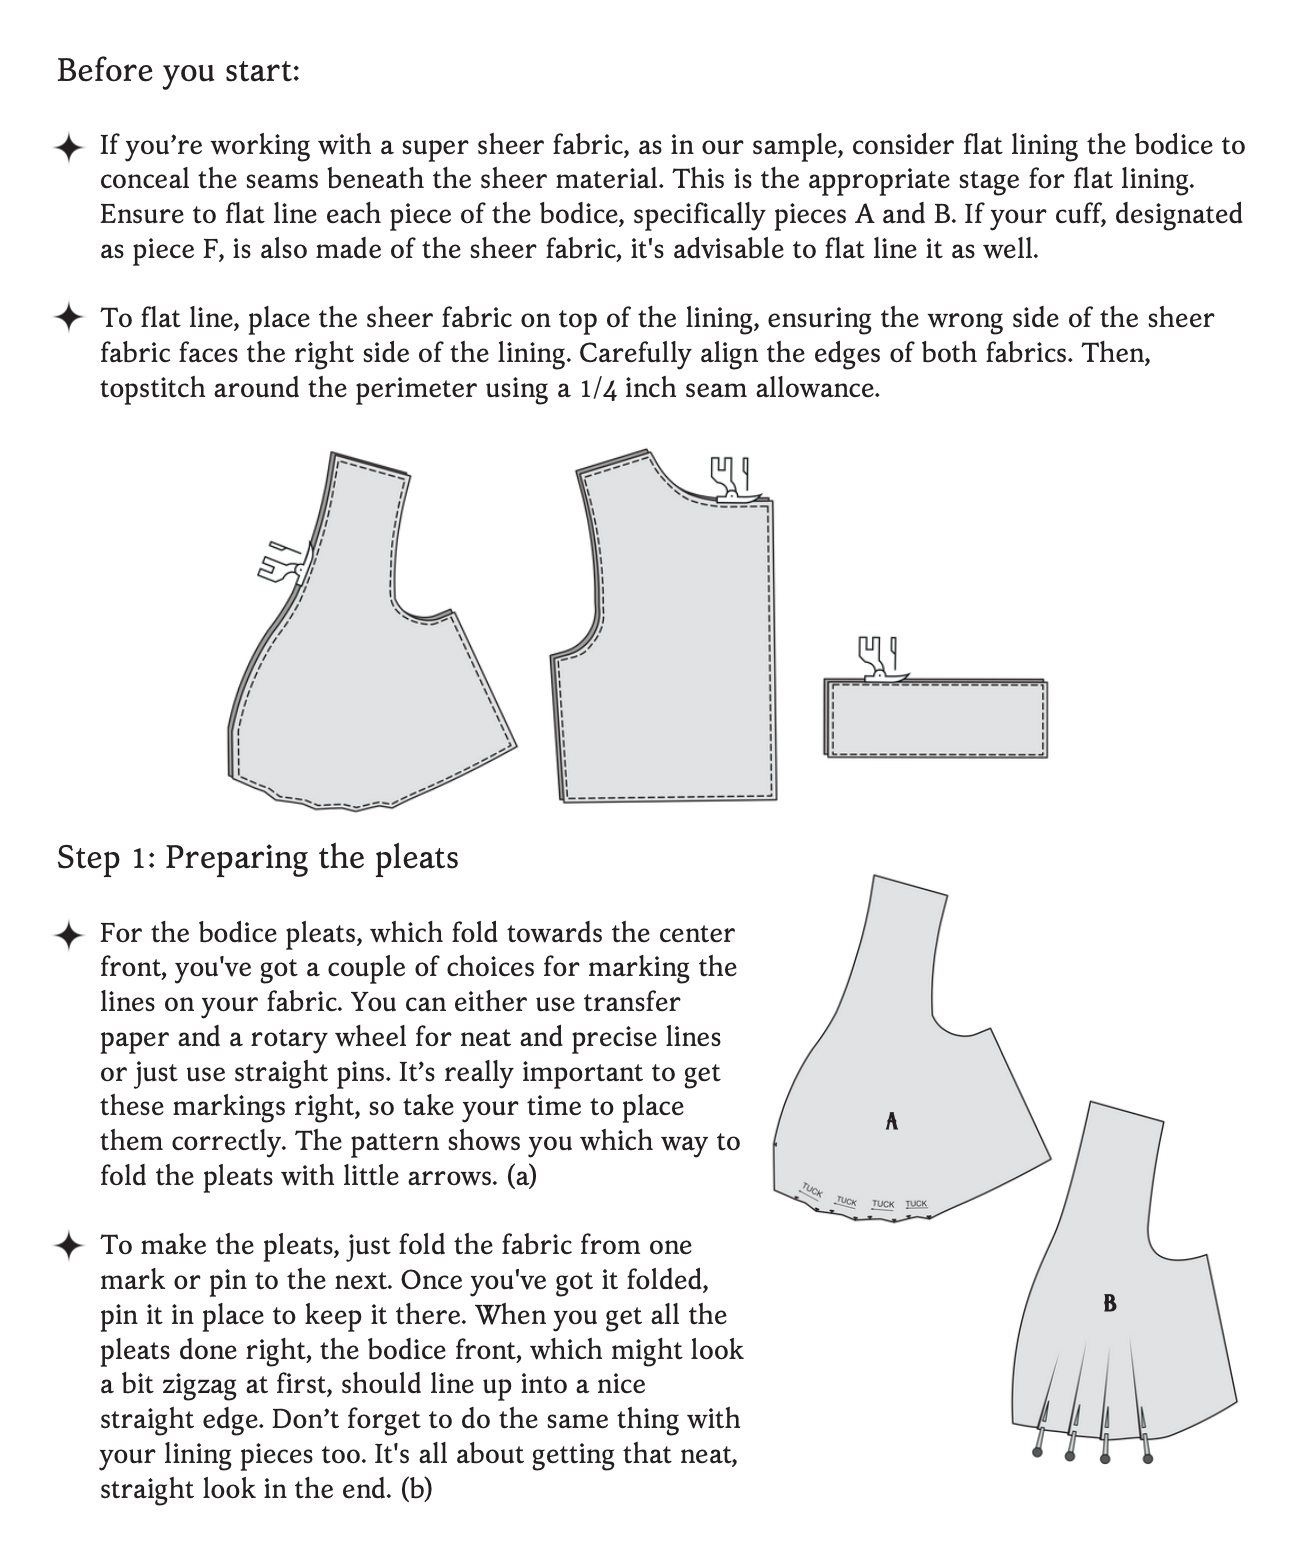
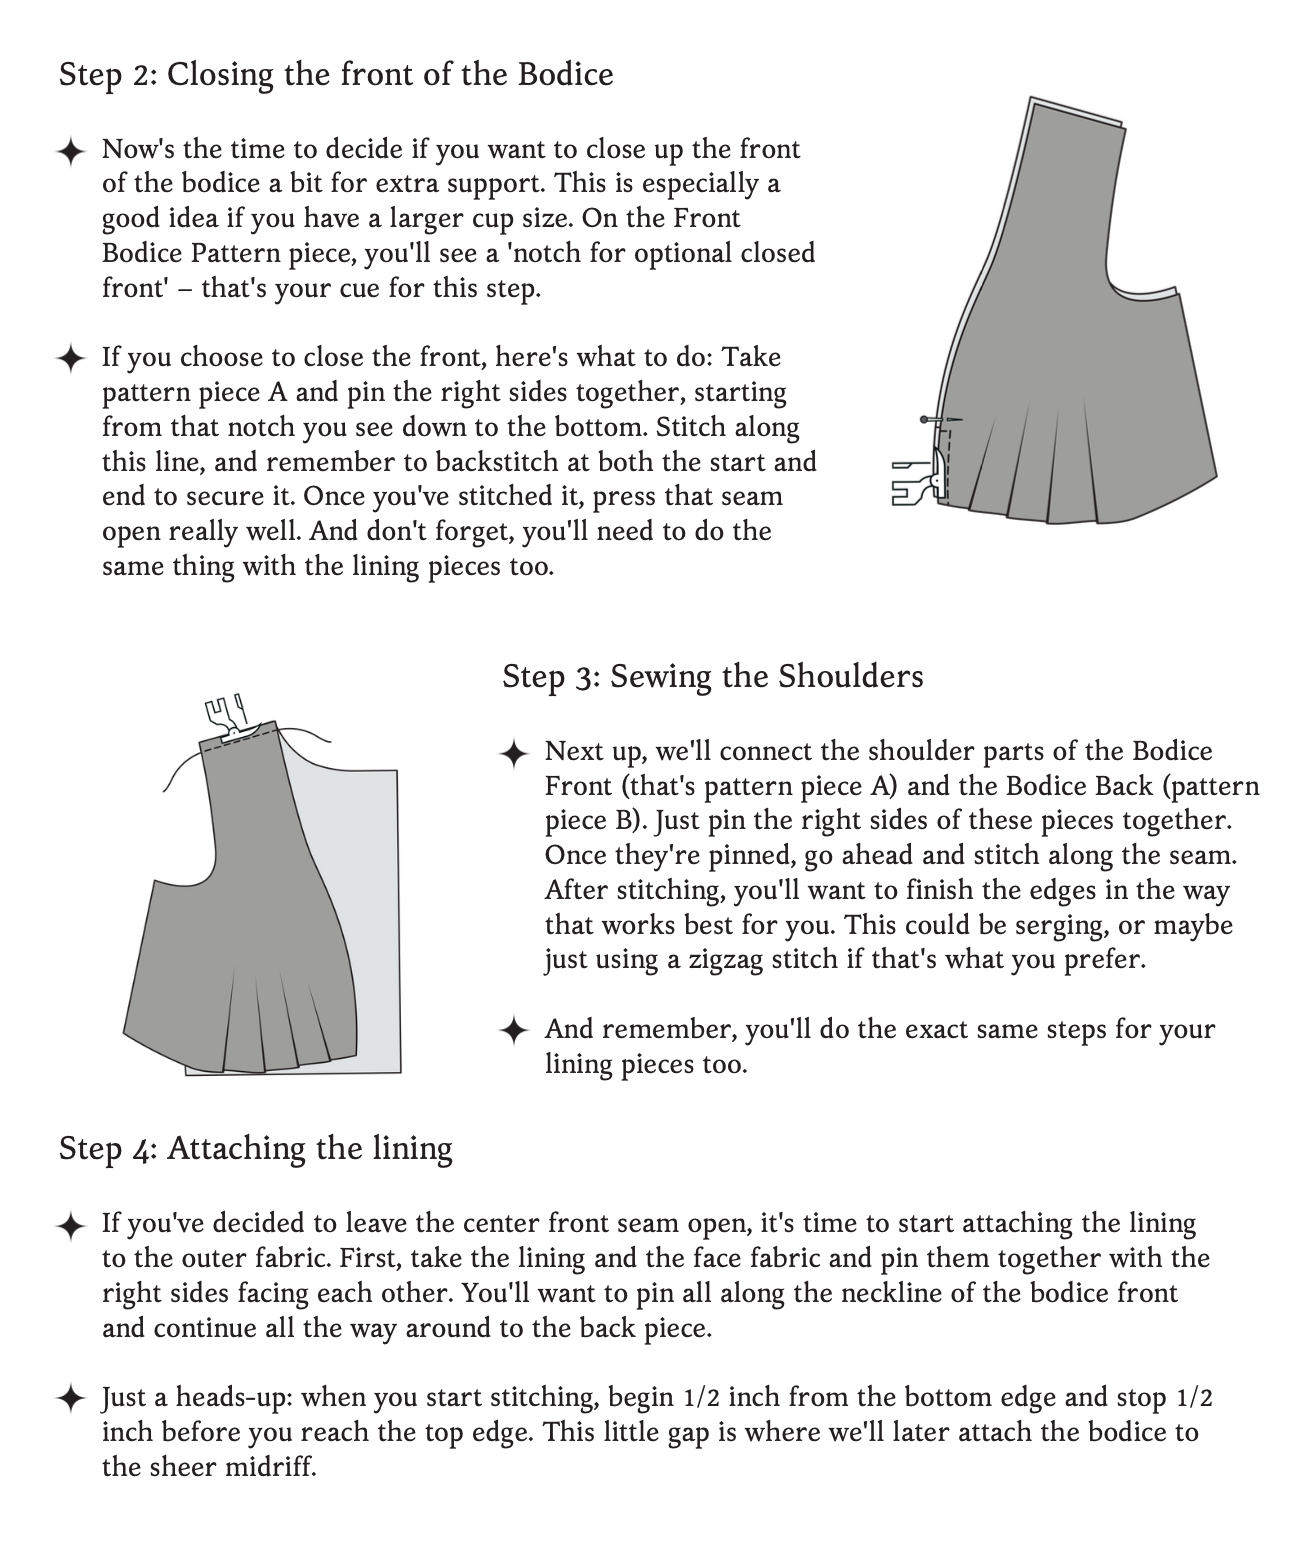
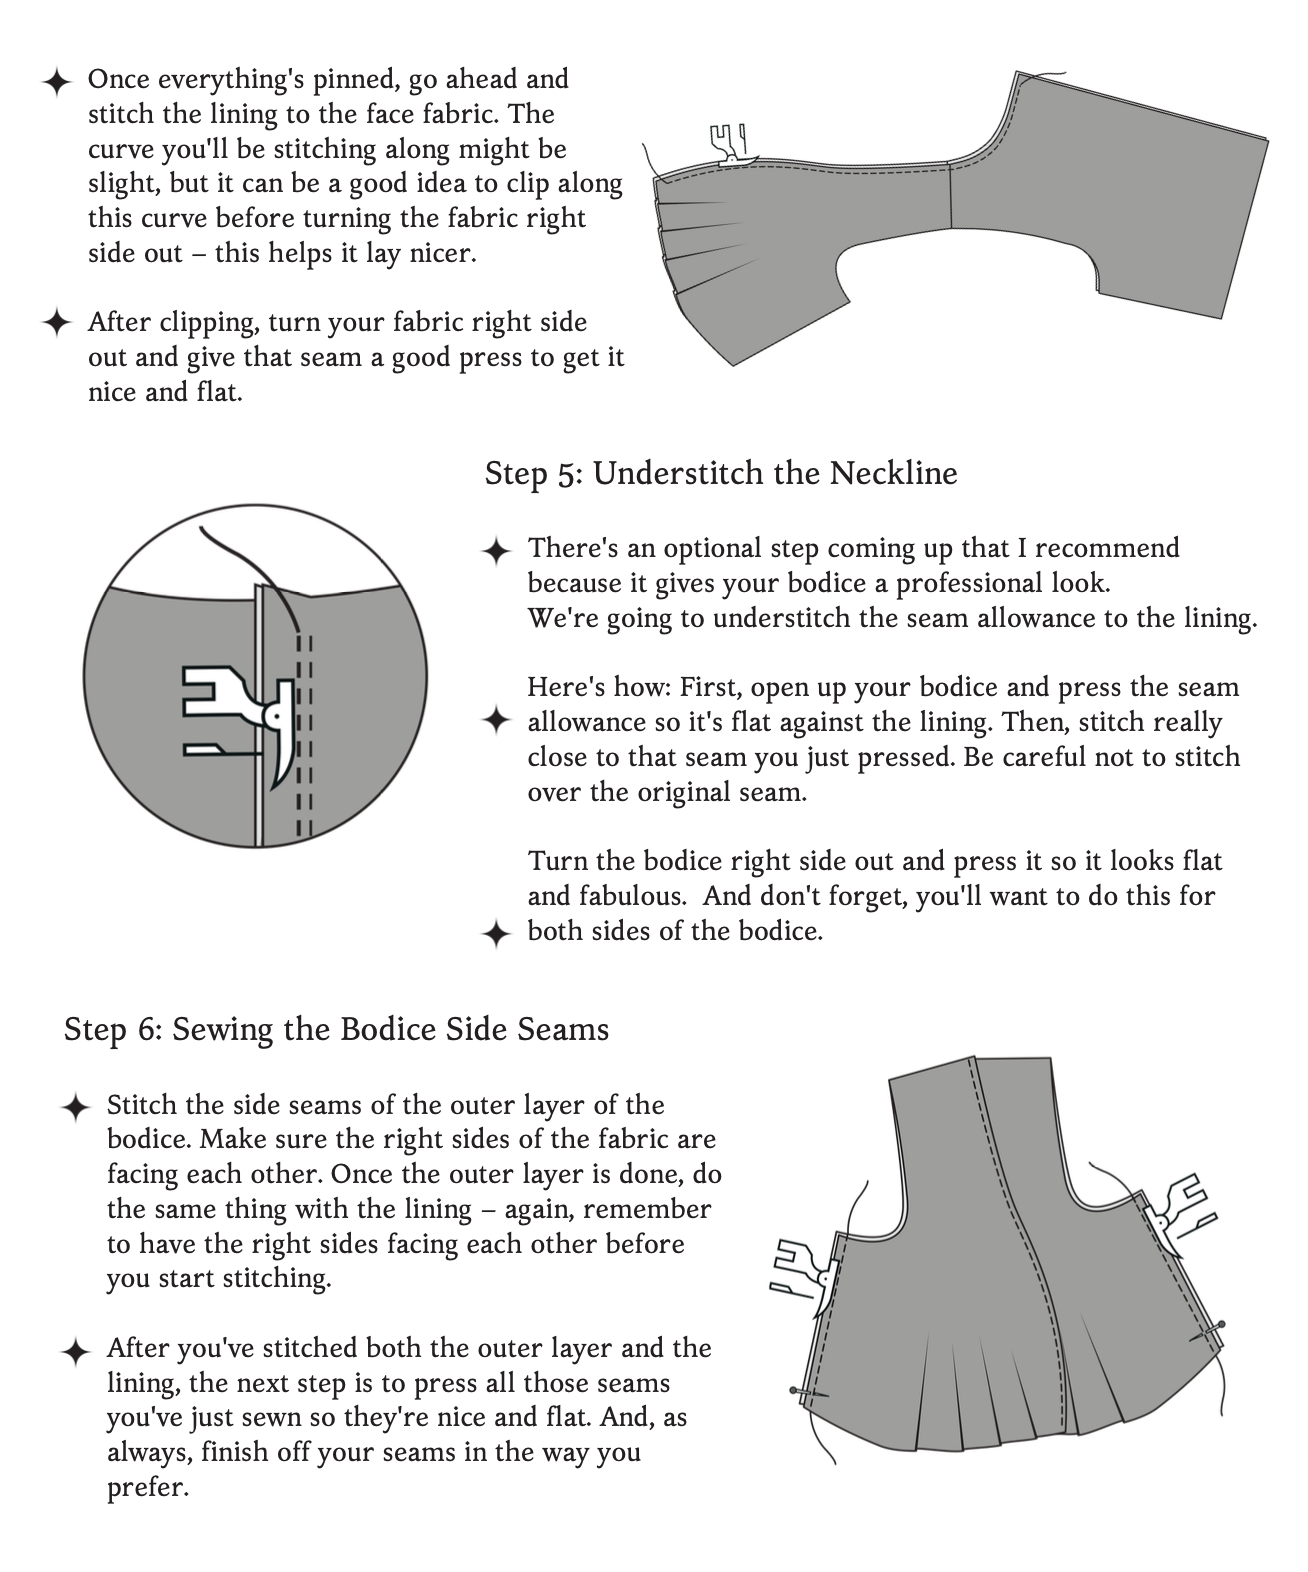
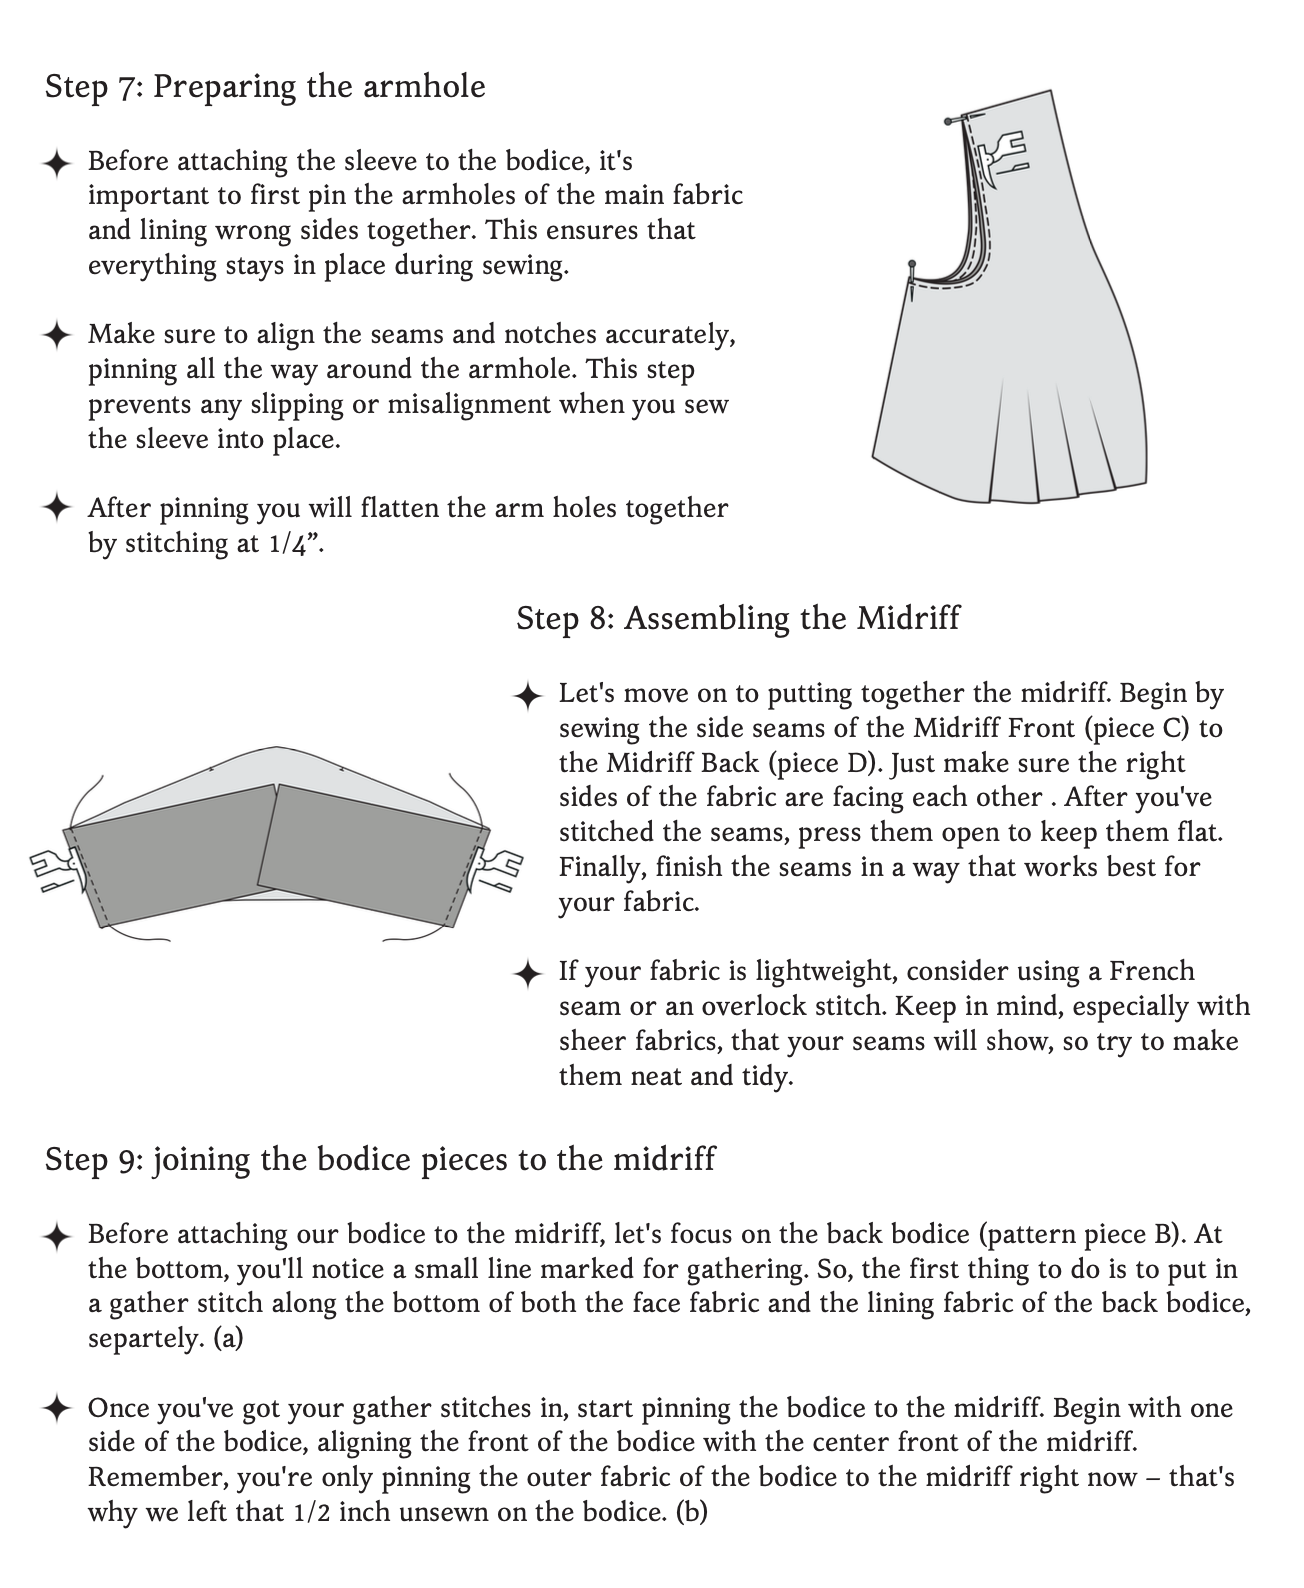
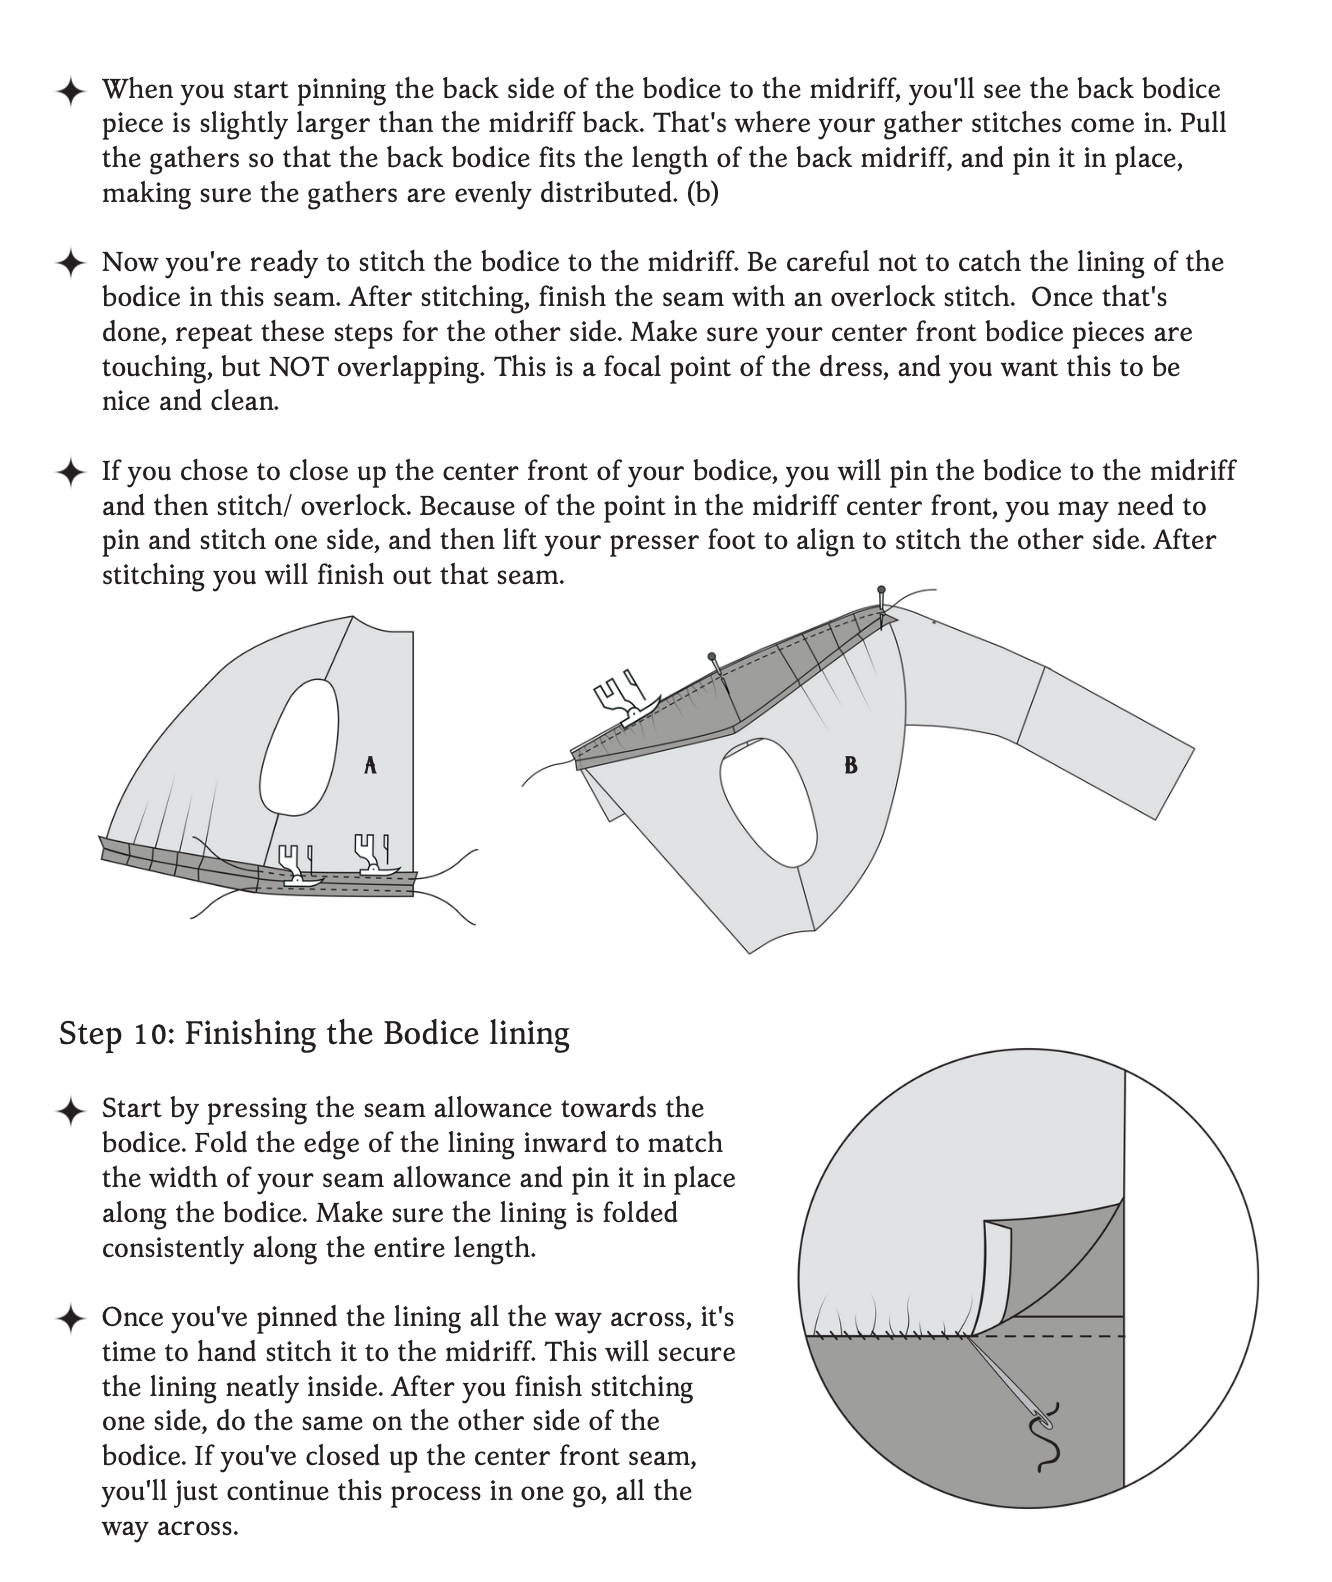
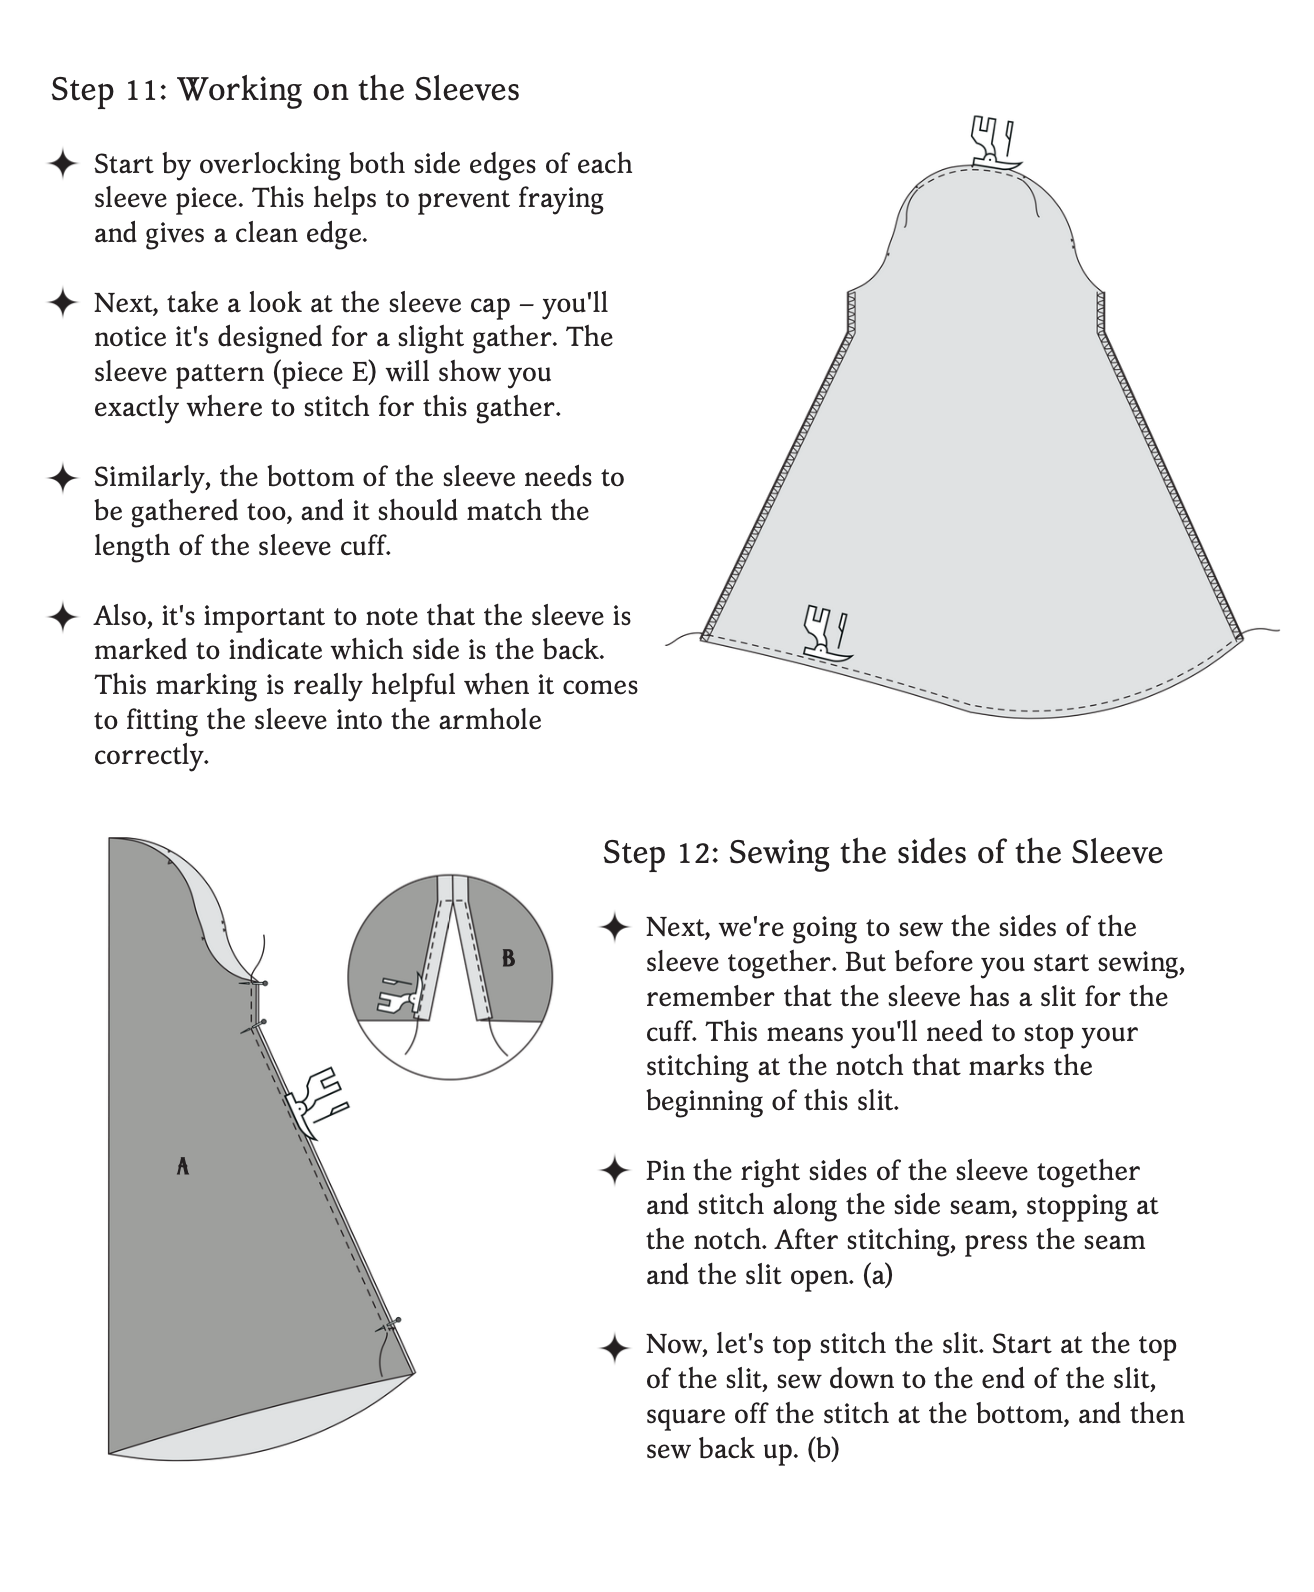
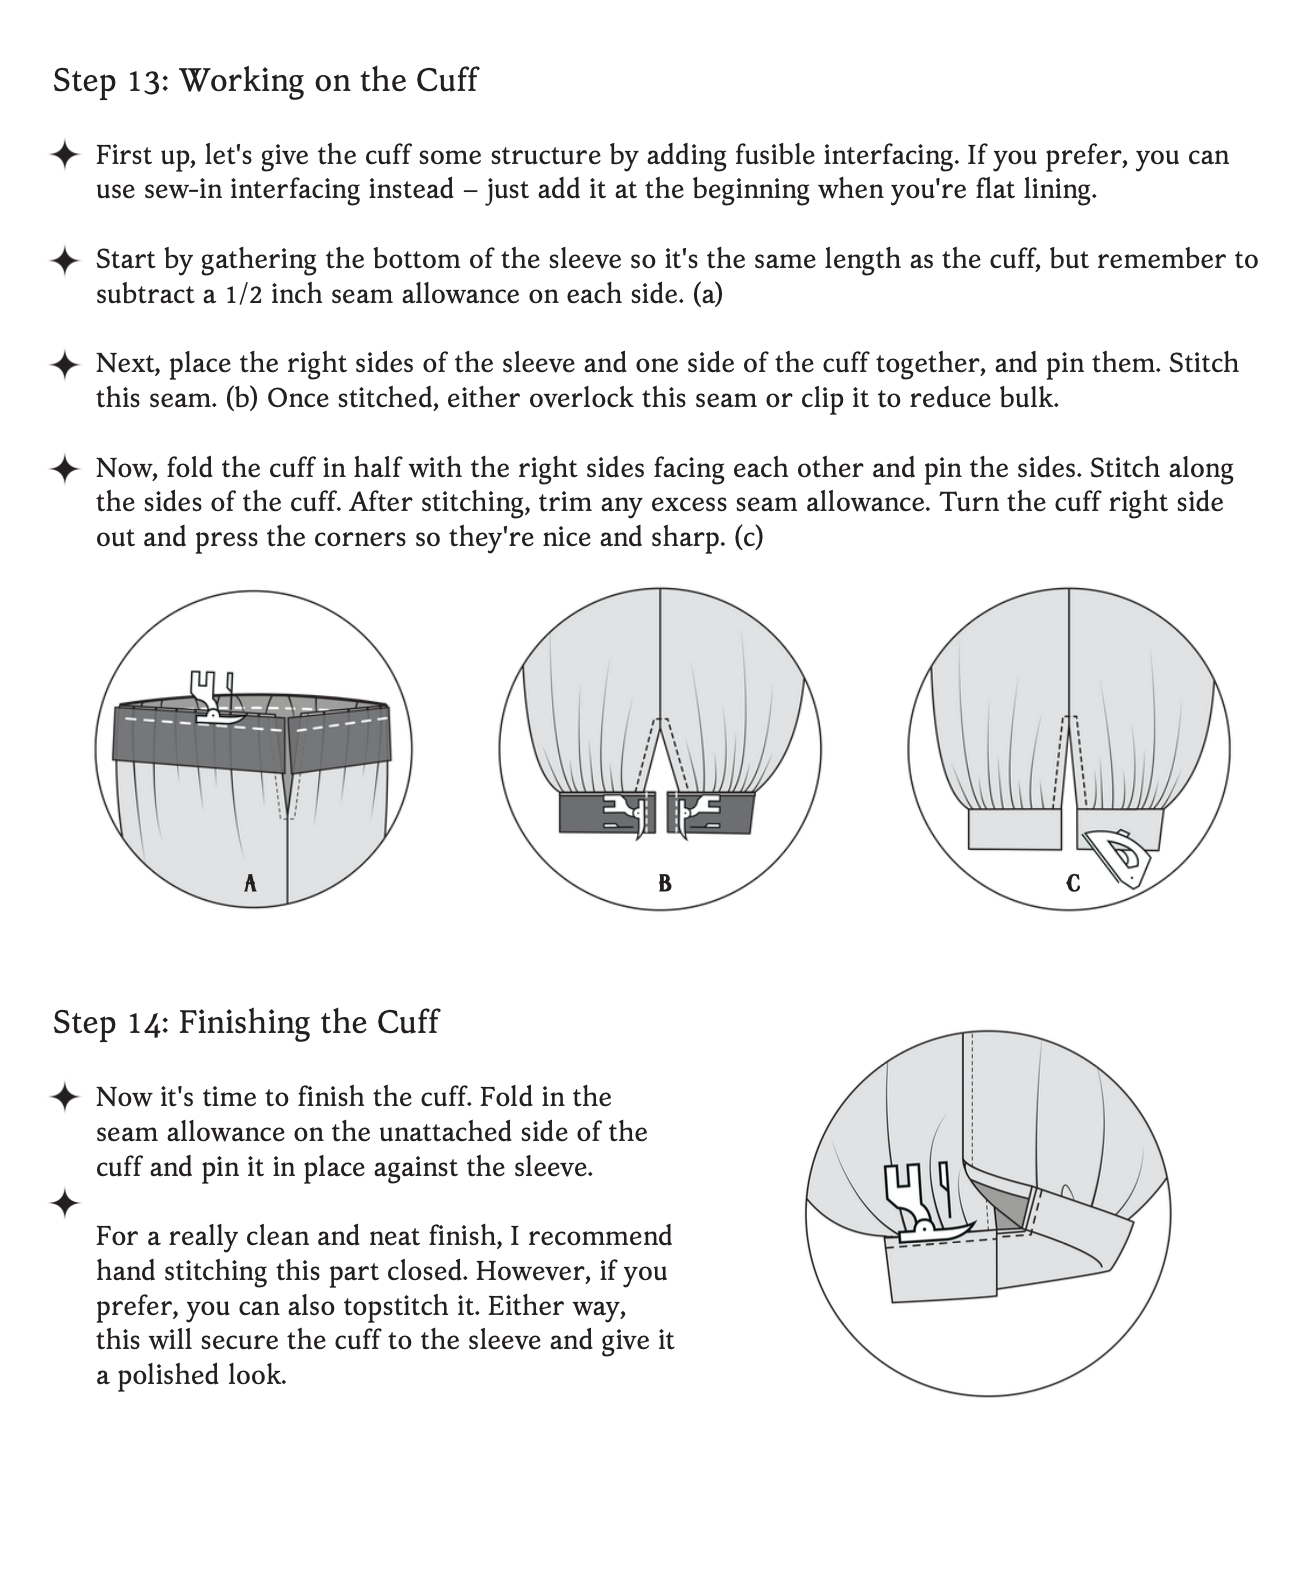
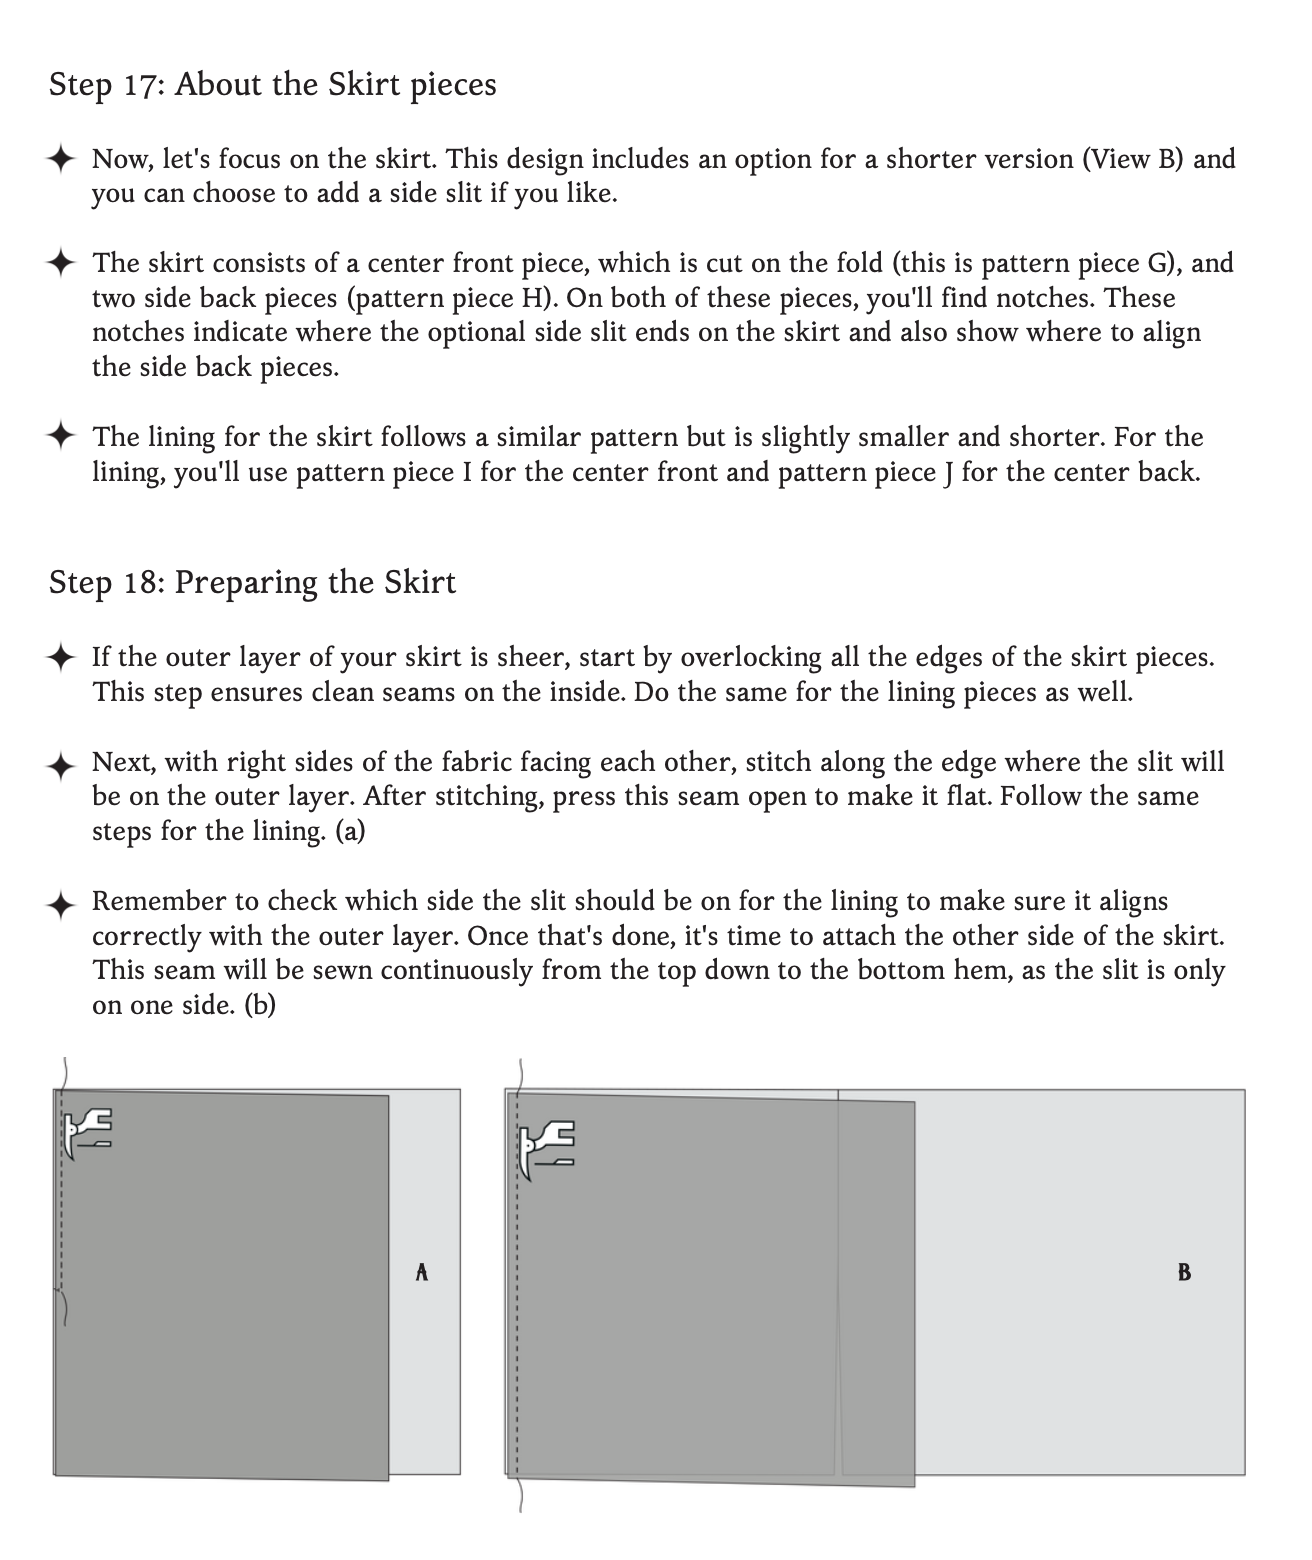
The Calliope Dress Sewing Pattern Guide
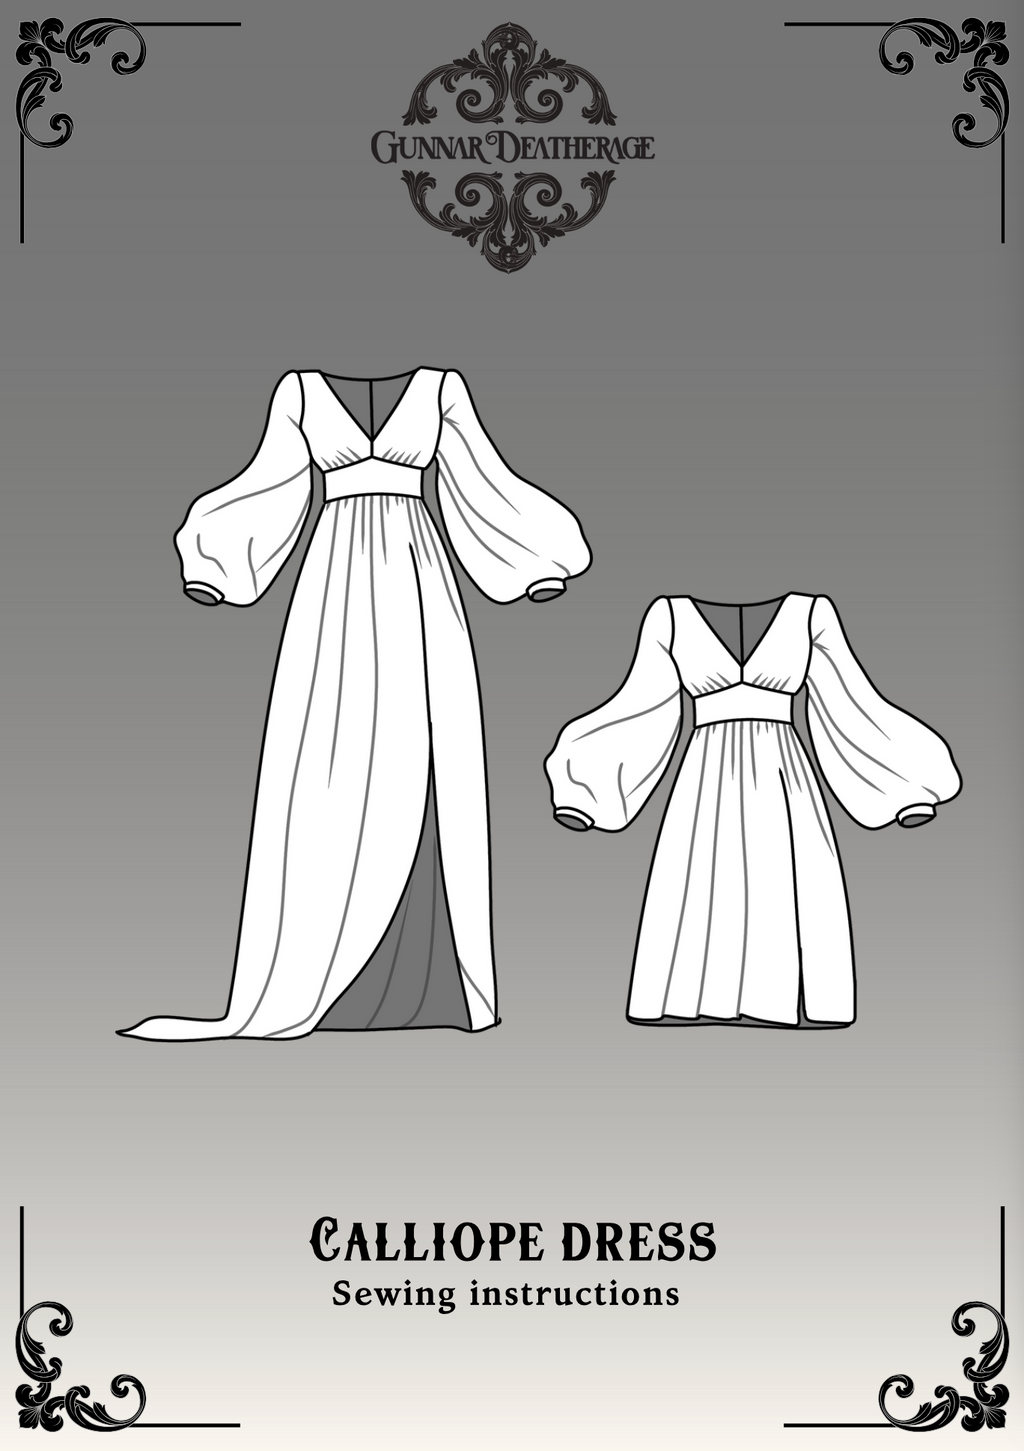
Introducing the Calliope Dress, a sewing pattern that embodies the essence of elegance and versatility. Named after Calliope, the muse of epic poetry in Greek mythology, this dress exudes a poetic charm and romantic flair, making it a dreamy addition to any wardrobe. The Calliope Dress is a masterpiece of design, featuring a flirtatious high slit and a graceful V-shaped neckline with an option to add extra support if desired. Its giant bishop sleeves, ending in delicate small cuffs, add a touch of dramatic sophistication.
The dress offers versatility with the option of a sheer midriff, allowing for a subtle yet enchanting allure. Tailor it to your style by choosing between a breathtaking longer train for a bold, dramatic statement, or opt for Look B with a shorter skirt that provides a more casual, yet equally stunning, appearance.
Before You Get Started
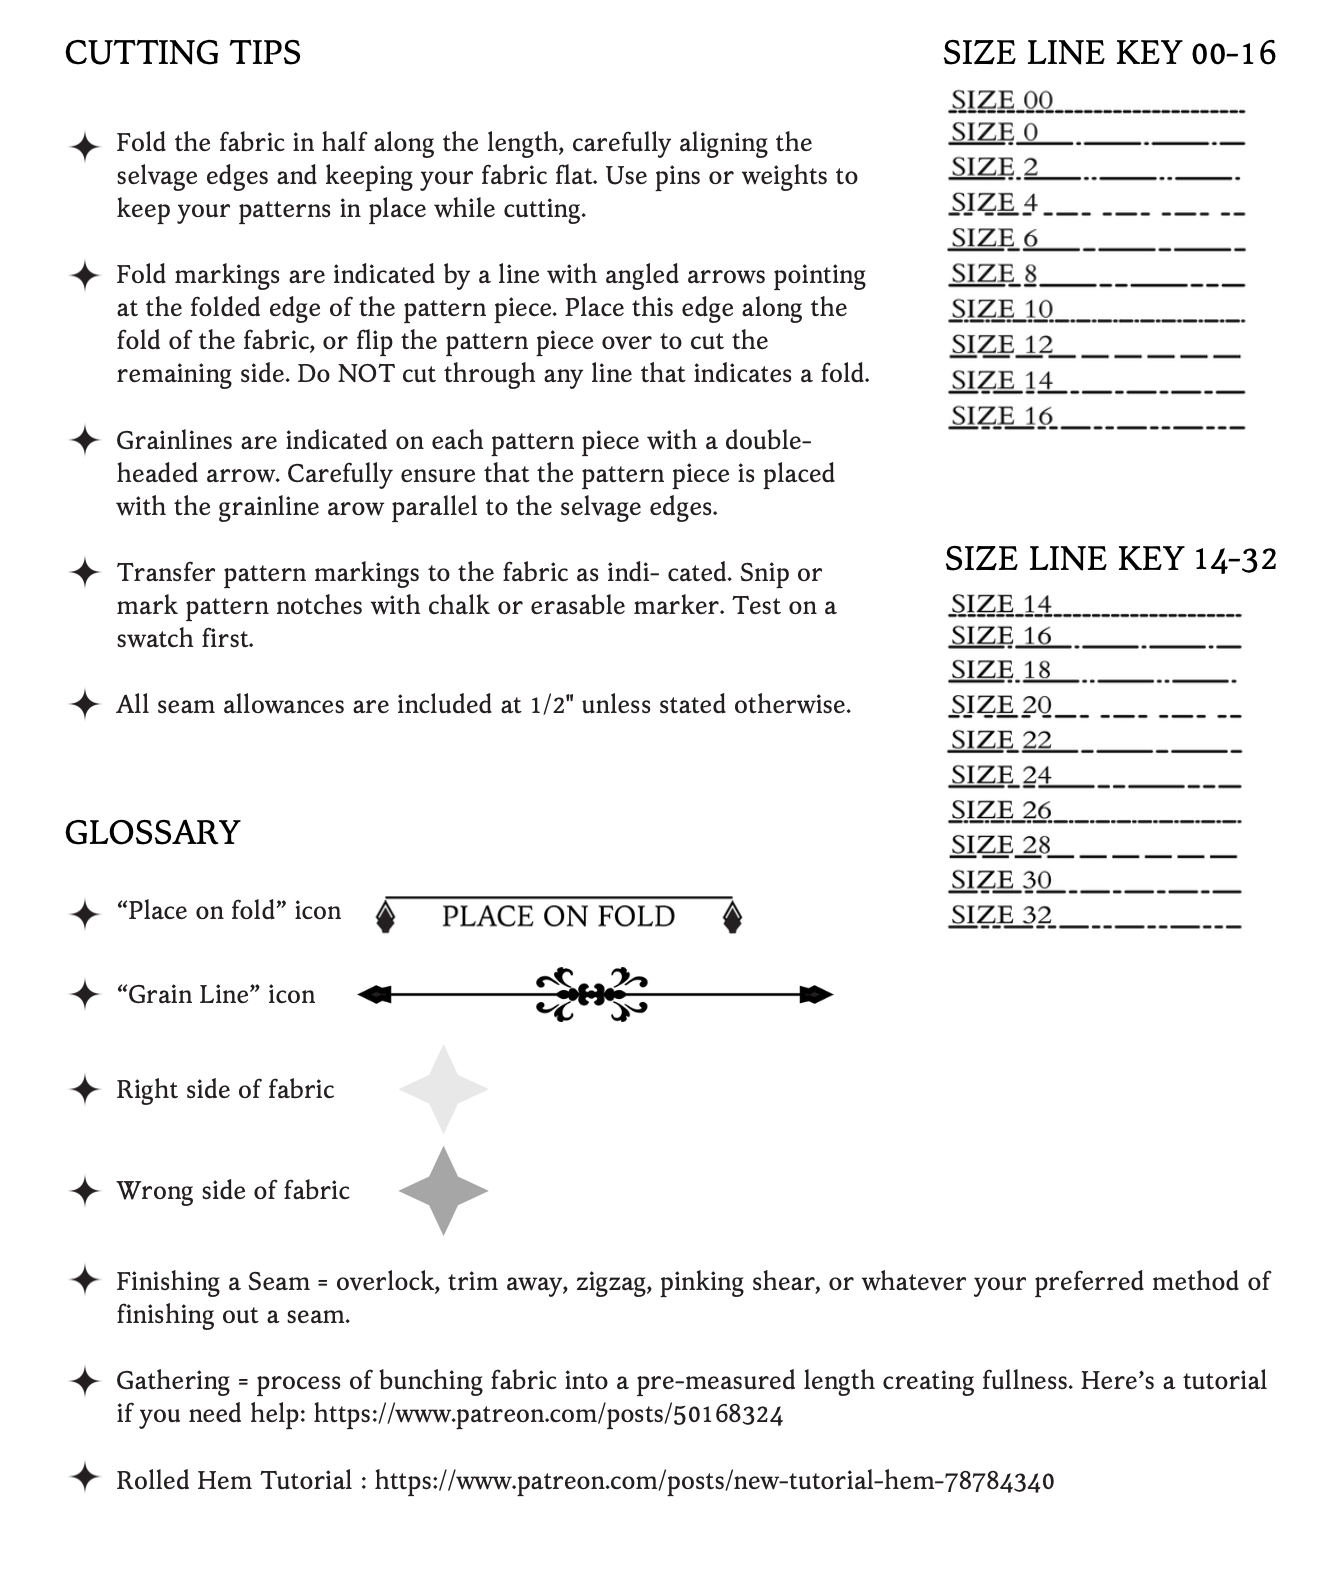
Please take note that the seam allowances on this pattern are 1/2” unless otherwise stated.
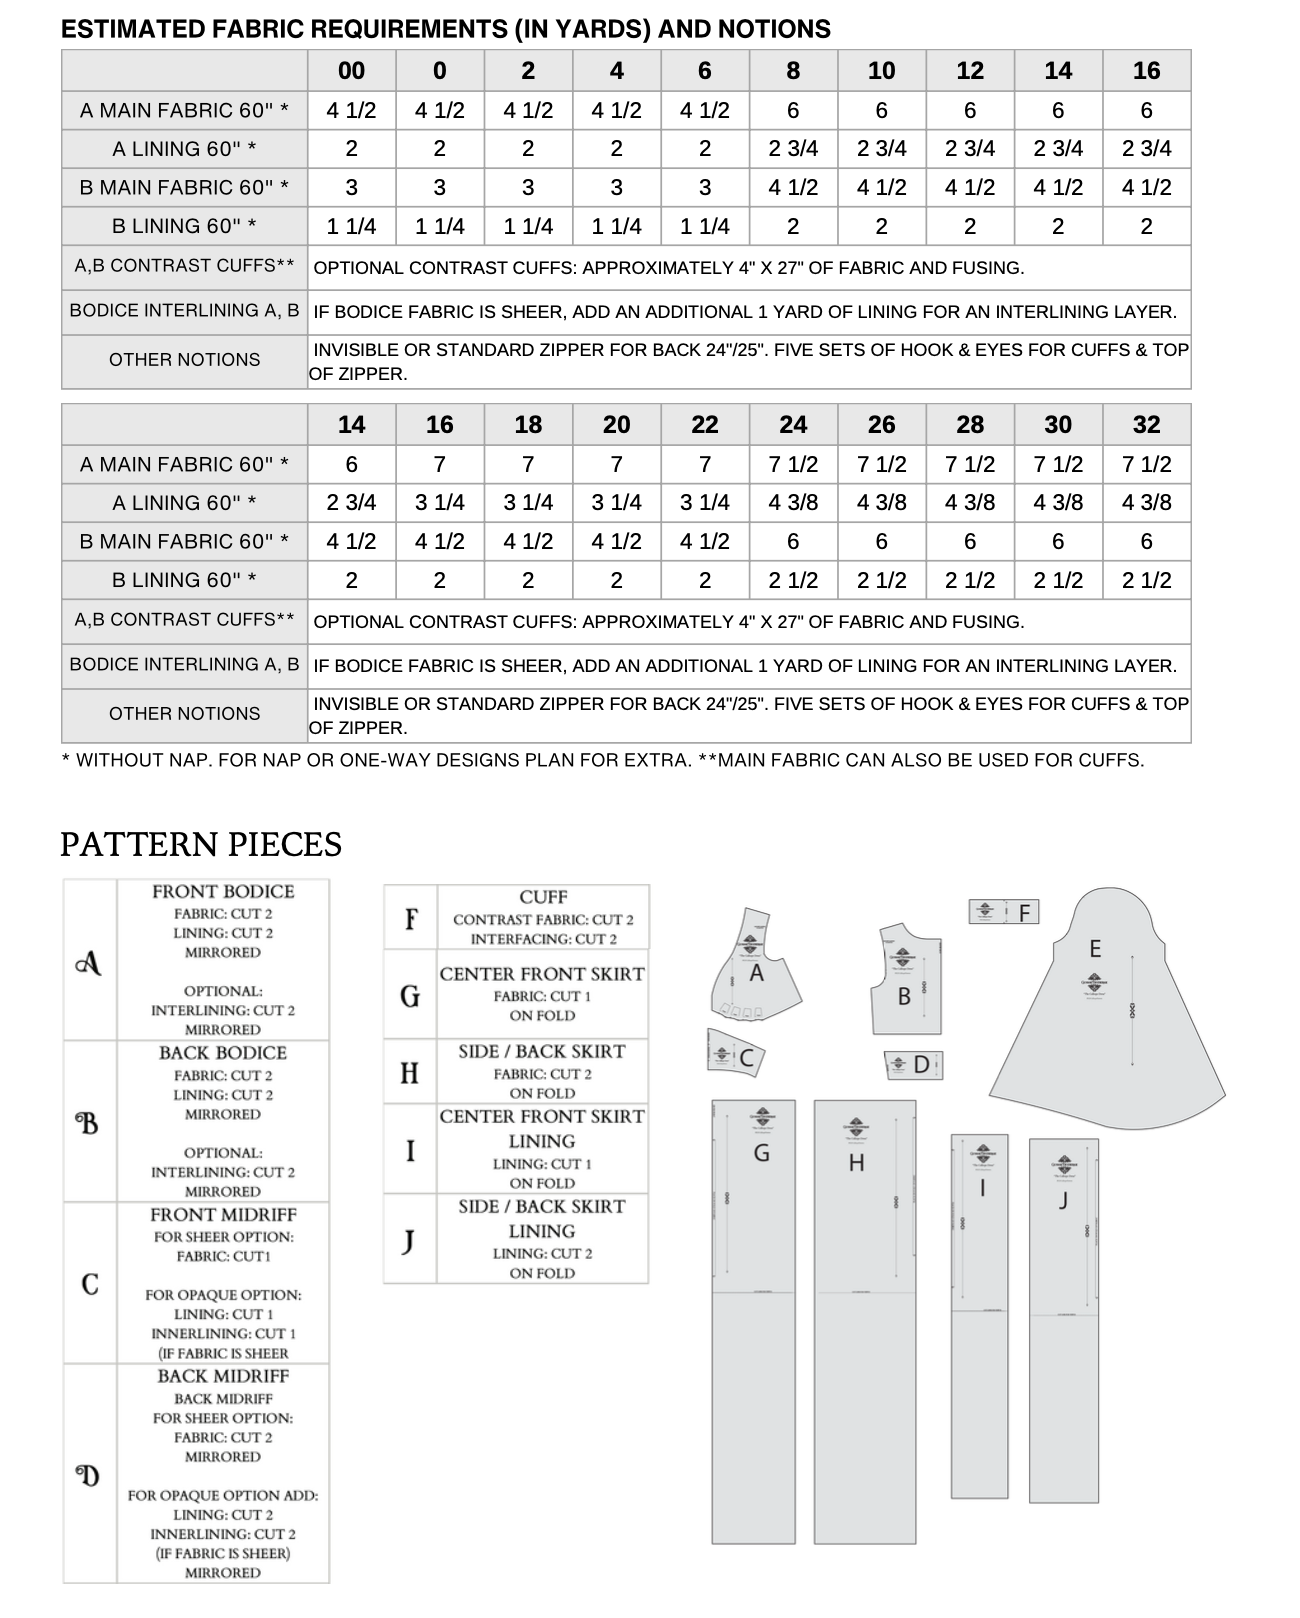
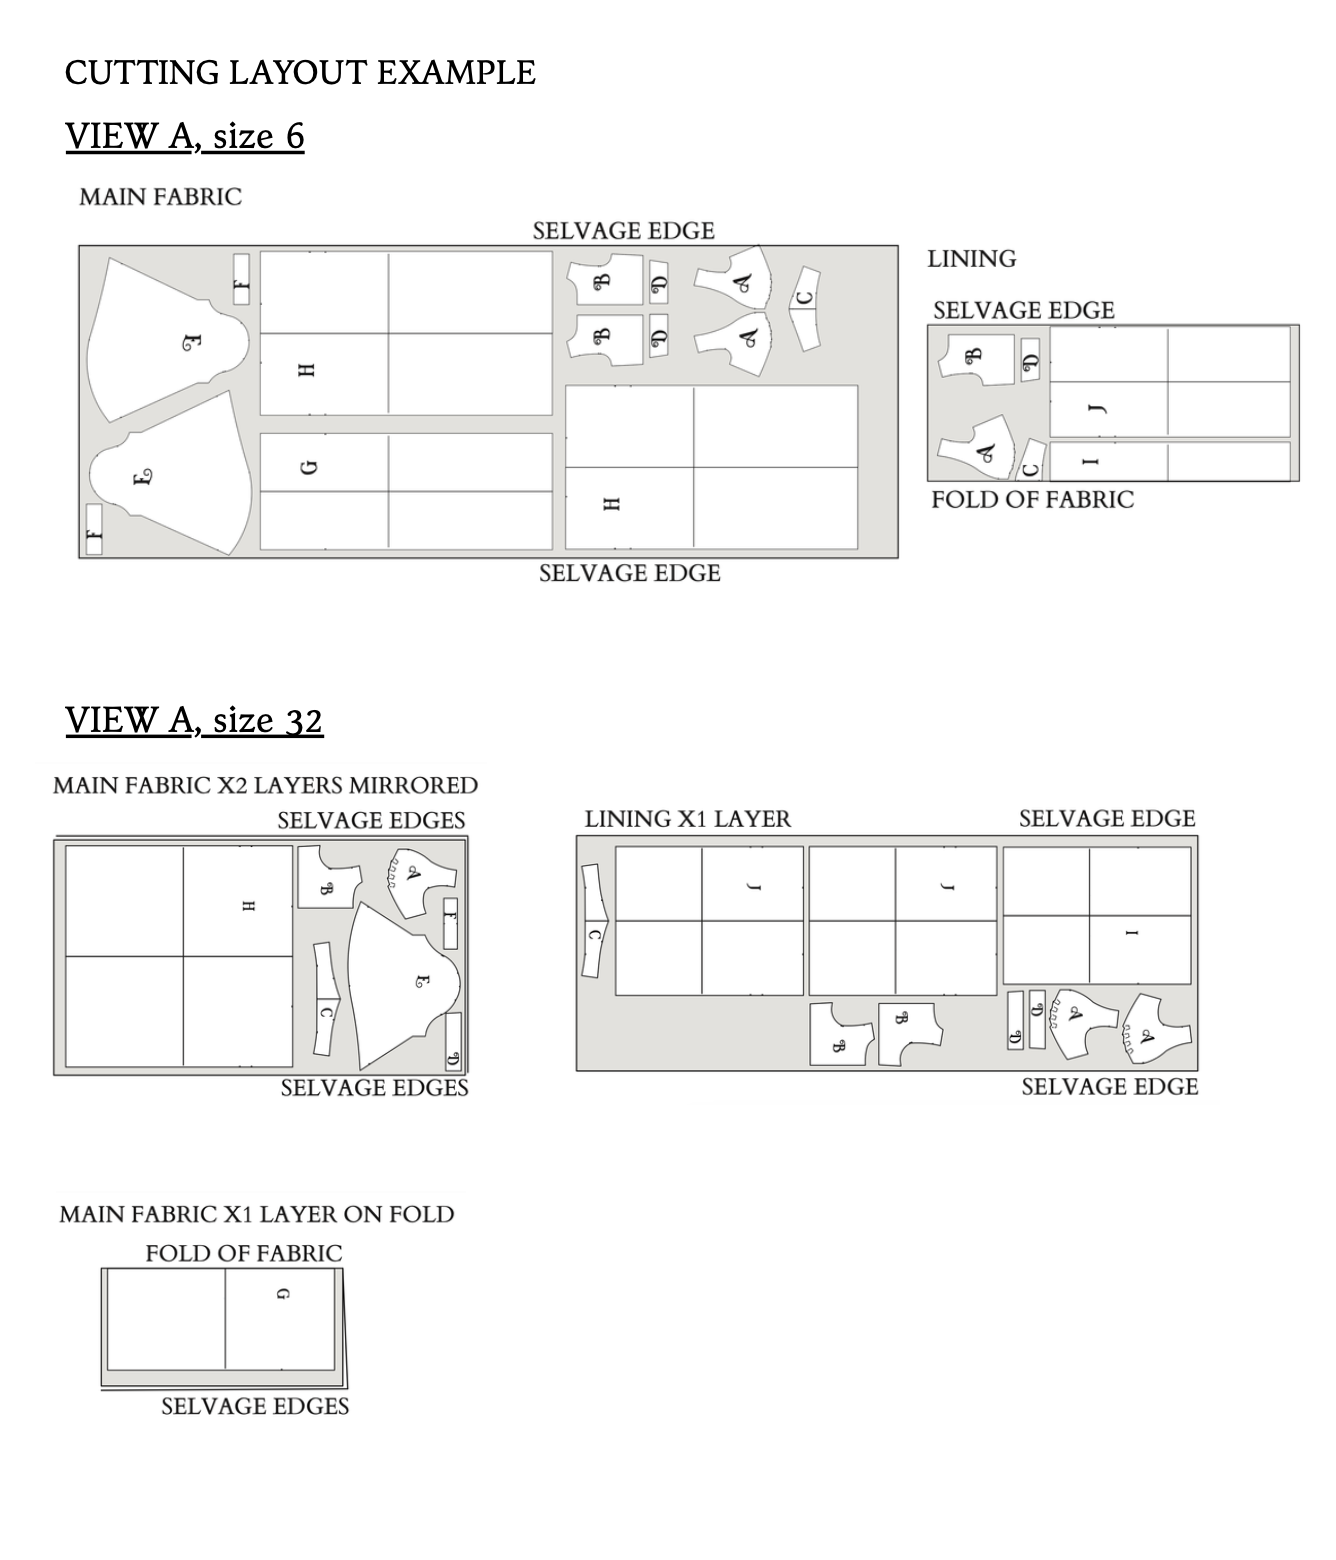
The Pattern will have all the notions and cutting layout you will need in the provided PDF files.

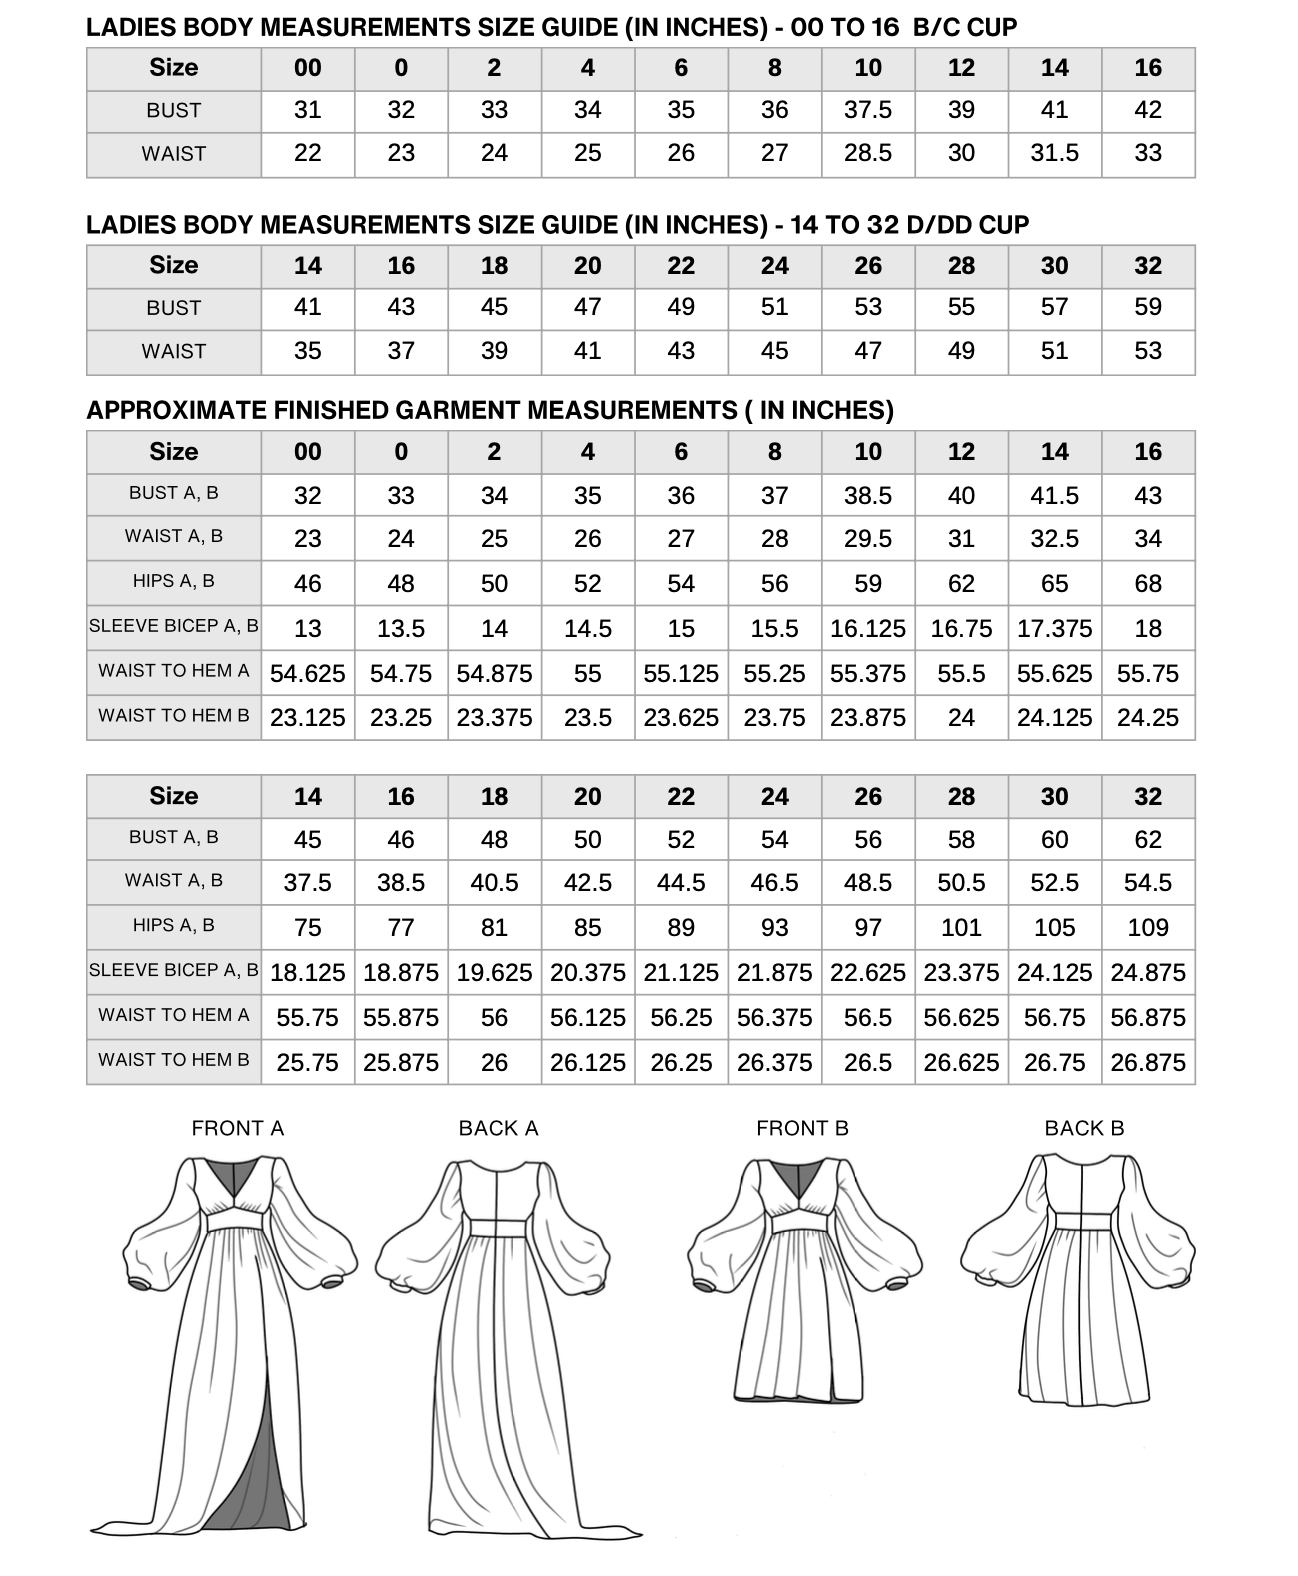
Size Charts, and Finished Garment Measurements