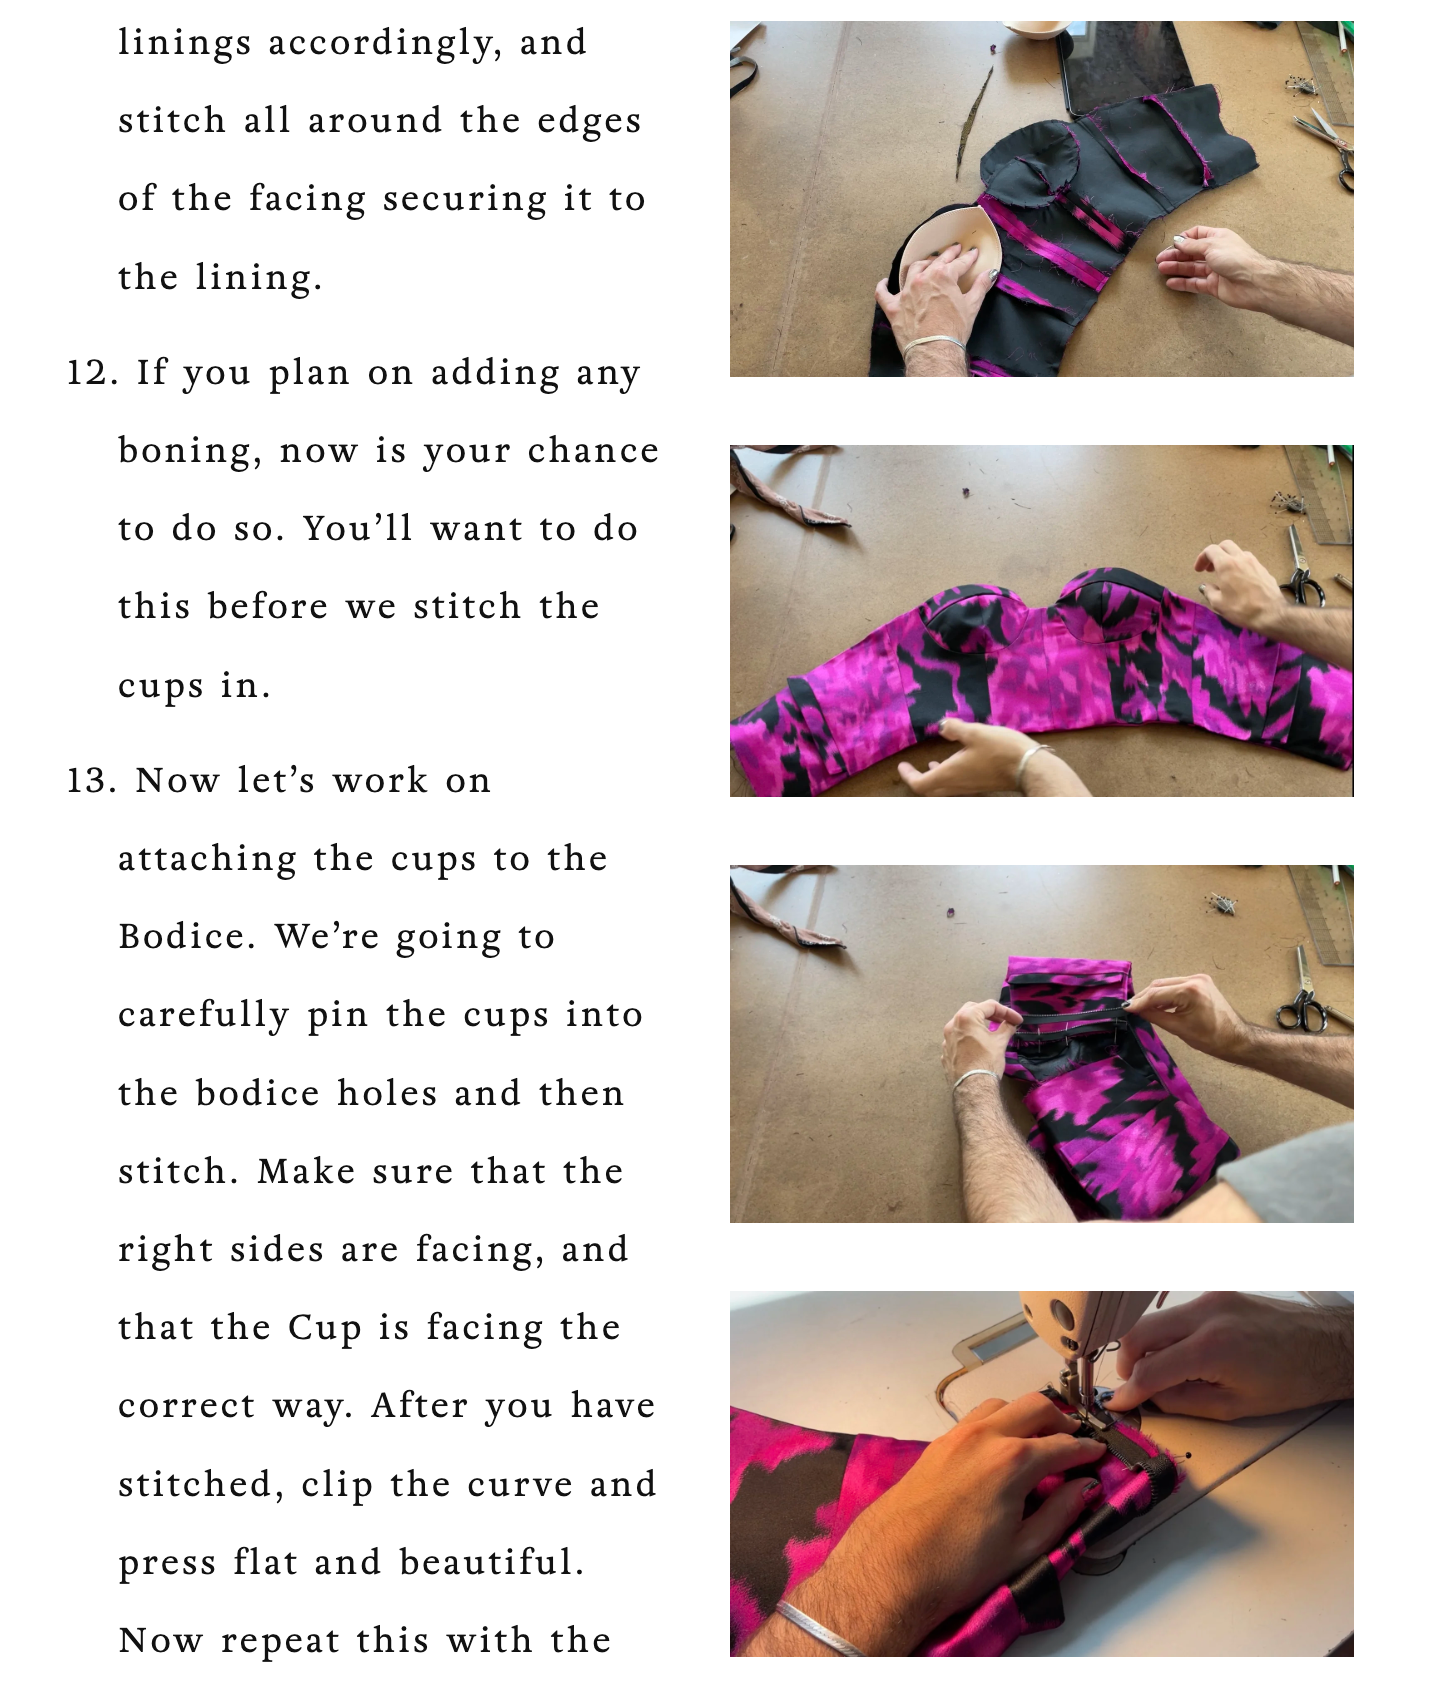
La Farfalla Bustier Sewing Pattern Guide

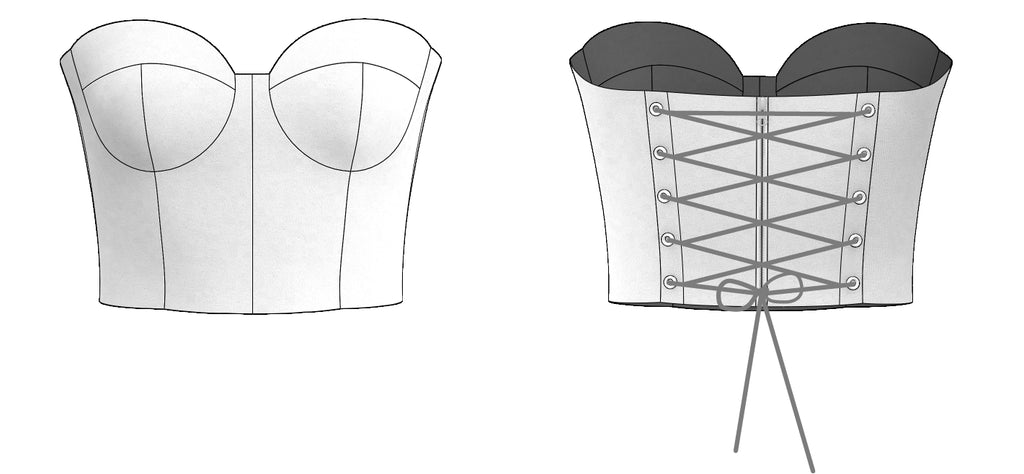
Hello, and welcome to the La Farfalla Bustier! This bustier is really beginner friendly, and truly such a classic style! I suggest using fabric with a little sturdiness, maybe taffetas, cottons, or fabrics that respond well to a fusible interfacing.

. As always I HIGHLY suggest making a cotton Muslin mock-up! You want to make sure you don’t need to make any alterations before hopping into your real fabric.

The pattern will have a cutting layout, and a list of fabrics and notions needed. If you like a bust cup, Size it accordingly before stitching it in. Also , boning is not required, but does make a world of difference in the body of the bustier.


Please also take note of the seam allowances on each pattern piece as they are slightly different for each piece.

Now, let’s familiarize ourselves with the pattern! 


This pattern has 13 pattern pieces and they are as follows

Upper Bust Cup

Side Front Bust Cup

Center Front Bust Cup

Side front Neckline Facing

Front Neckline Facing

Side Front Bodice

Front Bodice

Front Waist Facing

Back Neckline Facing

Side Back Bodice

Side Back Insert

Back Bodice

Back Waist Facing

Before you hop into the Sewing, please note that the seam allowances are noted on the sewing pattern. The body of the bustiers is all at half of an inch seam allowance, and the top bottom, and bustier cups are at 3/8 of an inch seam allowance. 

We will also be adding a facing into the bustier, but this will not be necessary to make the bustier. I just find that it’s the more professional way of finishing out the bodice. You will also see that the pattern pieces show you how much fabric and how much lighting to cut, as well as interfacing. For this video, I am using a Dutchess satin and a heavyweight satin for the lining. The fusible interfacing I’m using on the inside has a little structure but is not too heavy. I will also be adding additional boning to the inside lining, to help with the structure of the bodice. The step is not necessary, but you could absolutely do it. You could also choose to do exposed boning on the outside of this bodice, and it would look gorgeous. This bodice does have an optional placket for the side back seam that allows you to lace up the bustier. You can also choose to add a center-back zipper. You would just need to attach a separating zipper rather than a closed zipper.

I highly recommend making a muslin mock-up to determine whether you need to make any alterations to the pattern!

  1. Let’s begin by assembling the body of the bustier. To begin, let’s stitch the front bodice at the center front seams...Pin with right sides facing and then stitch. After stitching press open flat and beautiful. Now repeat with the linings.

  2. The next step is to stitch the side front Bodice to the front bodice. With right side facing pin and then stitch. Afterward, press open. Now repeat his steps with the linings.

  3. Next up, let’s stitch the side back Bodice to the side front bodice at the side seam. With right sides facing, pin and then stitch. Afterward, press open. Now repeat the steps with the linings.

  4. Before we hop into attaching the back to the side back, you need to decide whether or not you are going to create the insert which will double as a placket if you’re planning to do grommets for the lace-up feature. If you are choosing to do this, we need to address the insert. Start by folding the insert in half and pinning at the top and the bottom. We are now going to stitch the top and the bottom closed at three eights of an inch seam allowance. Afterward, we’re going to turn it right side out and press it flat. Do this to both pieces. This will then get sewn into the side back and back seam.

  5. If you are including the side back insert, we will now be putting this in between the side back and the back bodice, with the right side facing in so all the raw edges will be next to each other. Now we will pin and stitch this together. Now we can repeat this on the other side. Afterward, let’s stitch the side back lining and the Back Lining together.

  6. Now that we have the body of the bodice together and the body of the lining together, let’s set both of these aside and start working on the cups. To begin stitch the center front cup to the side front cup matching your notches to make sure that the curve is correct. Now repeat this to the other side. Afterward, we’re going to do this to the linings as well. After you have stitched the curve, add a few clips if you like so that when you press them out, they press nice and clean.

  7. Now that the best cups and the bust cup linings are stitched together, we can attach the upper bust cups. Begin by pinning the upper bust cup to the lower bust cups with the right sides facing. You can also match the notches if you need help lining everything up. The wider side of the upper bust cup should be pointing to the outer cup.

  8. Now that the bust cups are finished, and the lining bust cups are finished, we can set them aside and start working on the facings. The facing is going to act as a little bit of structure for the top of the garment, as well as an aesthetic feature. To begin I am going to stitch my side front neckline facing to my back neckline facing at the side seam .you will see that the seam allowance here is half of an inch. With right side facing pin and stitch afterward press open. Now repeat this to the other side.

  9. We will now stitch the front waist facing to the back waist facing at the side seams. With right side facing pin and then stitch. afterward, press open flat and beautiful

  10. Now I am going to over-lock the parts of the facing that are going to be shown on the inside of the garment, so this means that I am going to over-lock the top of the waist facing, and the bottom of the neckline facing. If you don’t have an Overlock machine, you could just use a zigzag stitch over the edge.

  11. Now, pin the facing to the linings accordingly, and stitch all around the edges of the facing securing it to the lining.

  12. If you plan on adding any boning, now is your chance to do so. You’ll want to do this before we stitch the cups in.

  13. Now let’s work on attaching the cups to the Bodice. We’re going to carefully pin the cups into the bodice holes and then stitch. Make sure that the right sides are facing, and that the Cup is facing the correct way. After you have stitched, clip the curve and press flat and beautiful. Now repeat this with the bodice lining and cup lining.

  14. Now that we have the bodice and the bodice lining fully assembled, we can now stitch the bodice lining to the bodice. Pin with the right side facing, and pin across the top and the bottom of the bodice. We will not be sewing the side back seams together, as this is where we will turn the garment right side out after sewing together, and where we will be attaching a Zipper.

  15. If you want to sew in bust cups, now would be when I would do this step. You can tack them to the seam allowance.

  16. Turn the bodice right side out and then press. Now we can attach the zipper to the center back seams.

  17. Now that we have attached the zipper, We can add grommets to the side back insert if you chose to use it. Insert your grommets, and then your bustier is ready to wear. You can lace it up using your grommets, or you can just zip it up.

  18. If you make the bustier, please send me photos on my Instagram or email. I get so much joy seeing the gorgeous creations you all make!