The Odyssey Coat Sewing Pattern Guide
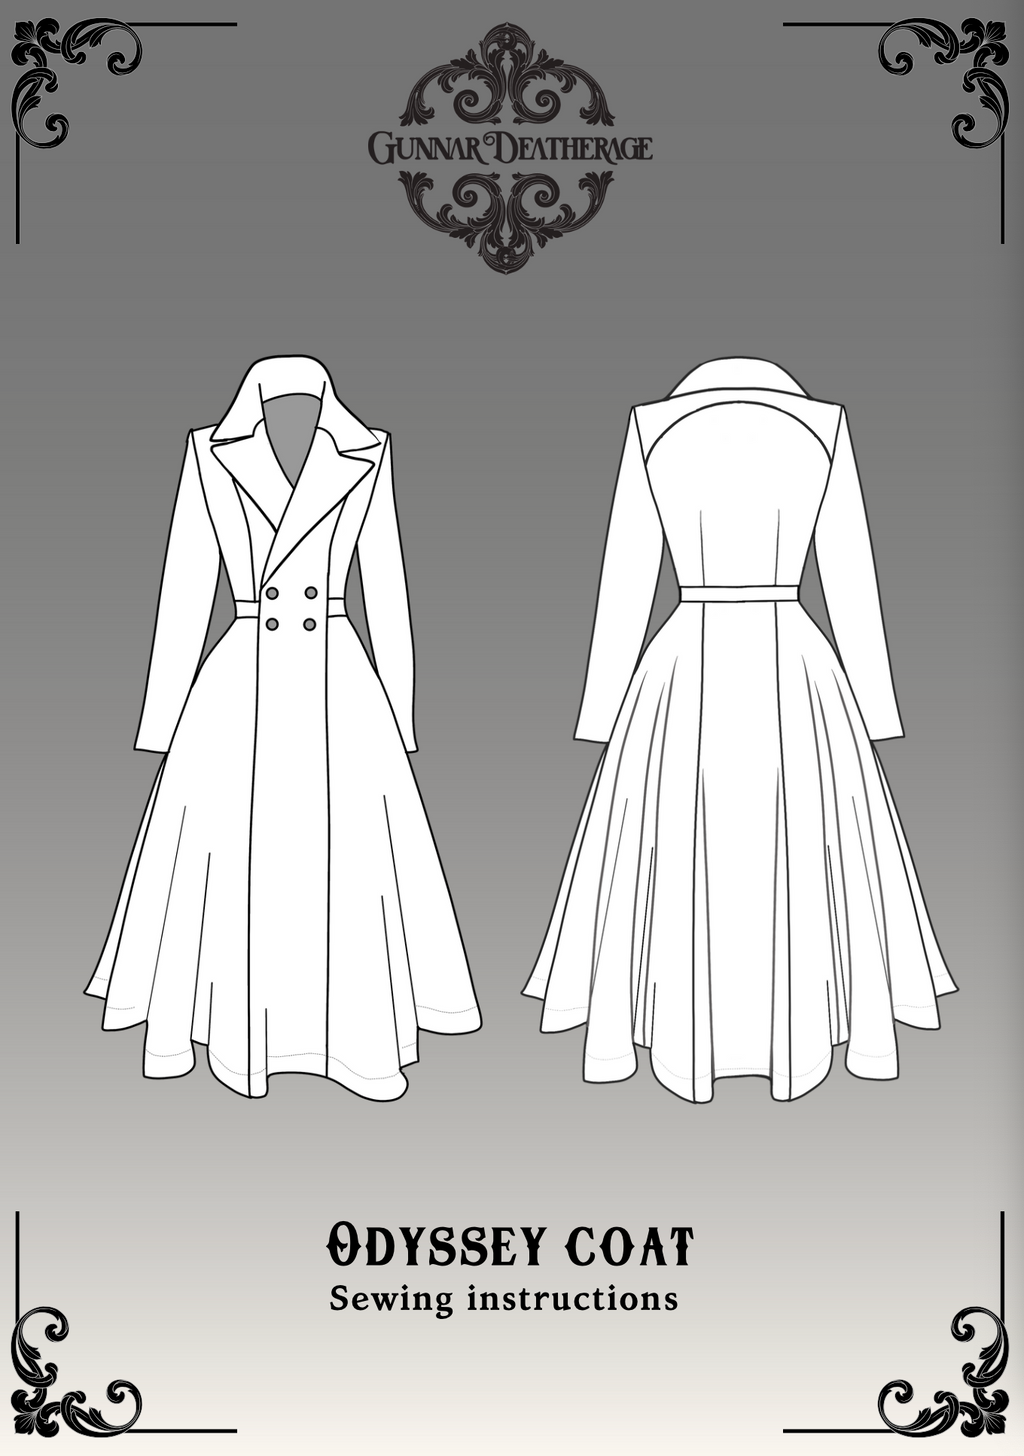
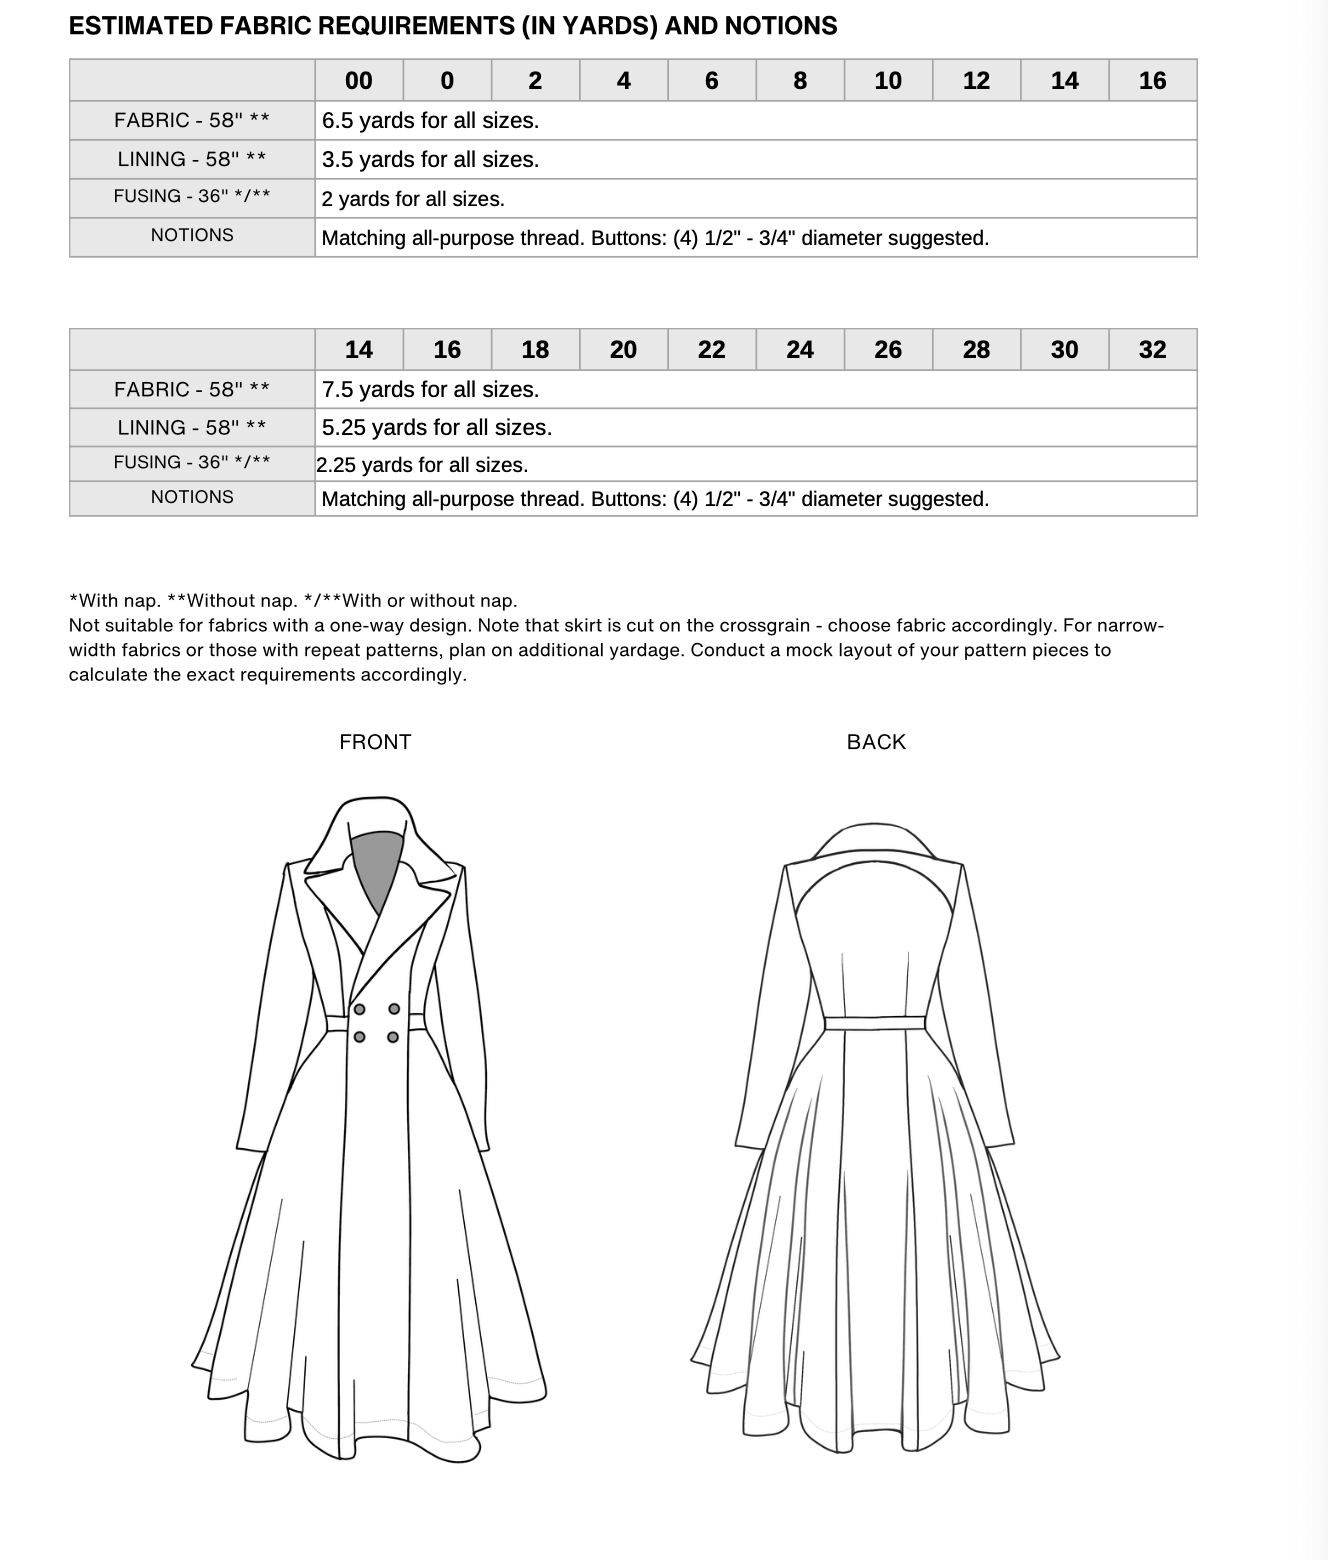
Introducing the Odyssey Coat: a stunning sewing pattern that brings together timeless elegance and modern style. This midi-length coat is expertly designed to flatter the figure, featuring a beautifully fitted waist that gracefully transitions into a flared skirt, creating a silhouette that exudes both sophistication and femininity.
The inclusion of side pockets adds practicality without compromising the coat's sleek lines, offering a perfect blend of form and function. The design is completed with a lapel collar, adding a touch of classic charm to this contemporary piece. Whether you're looking to create a statement piece for your wardrobe or a versatile coat for everyday elegance, the Odyssey Coat sewing pattern is your canvas for creativity and style.
Before You Get Started
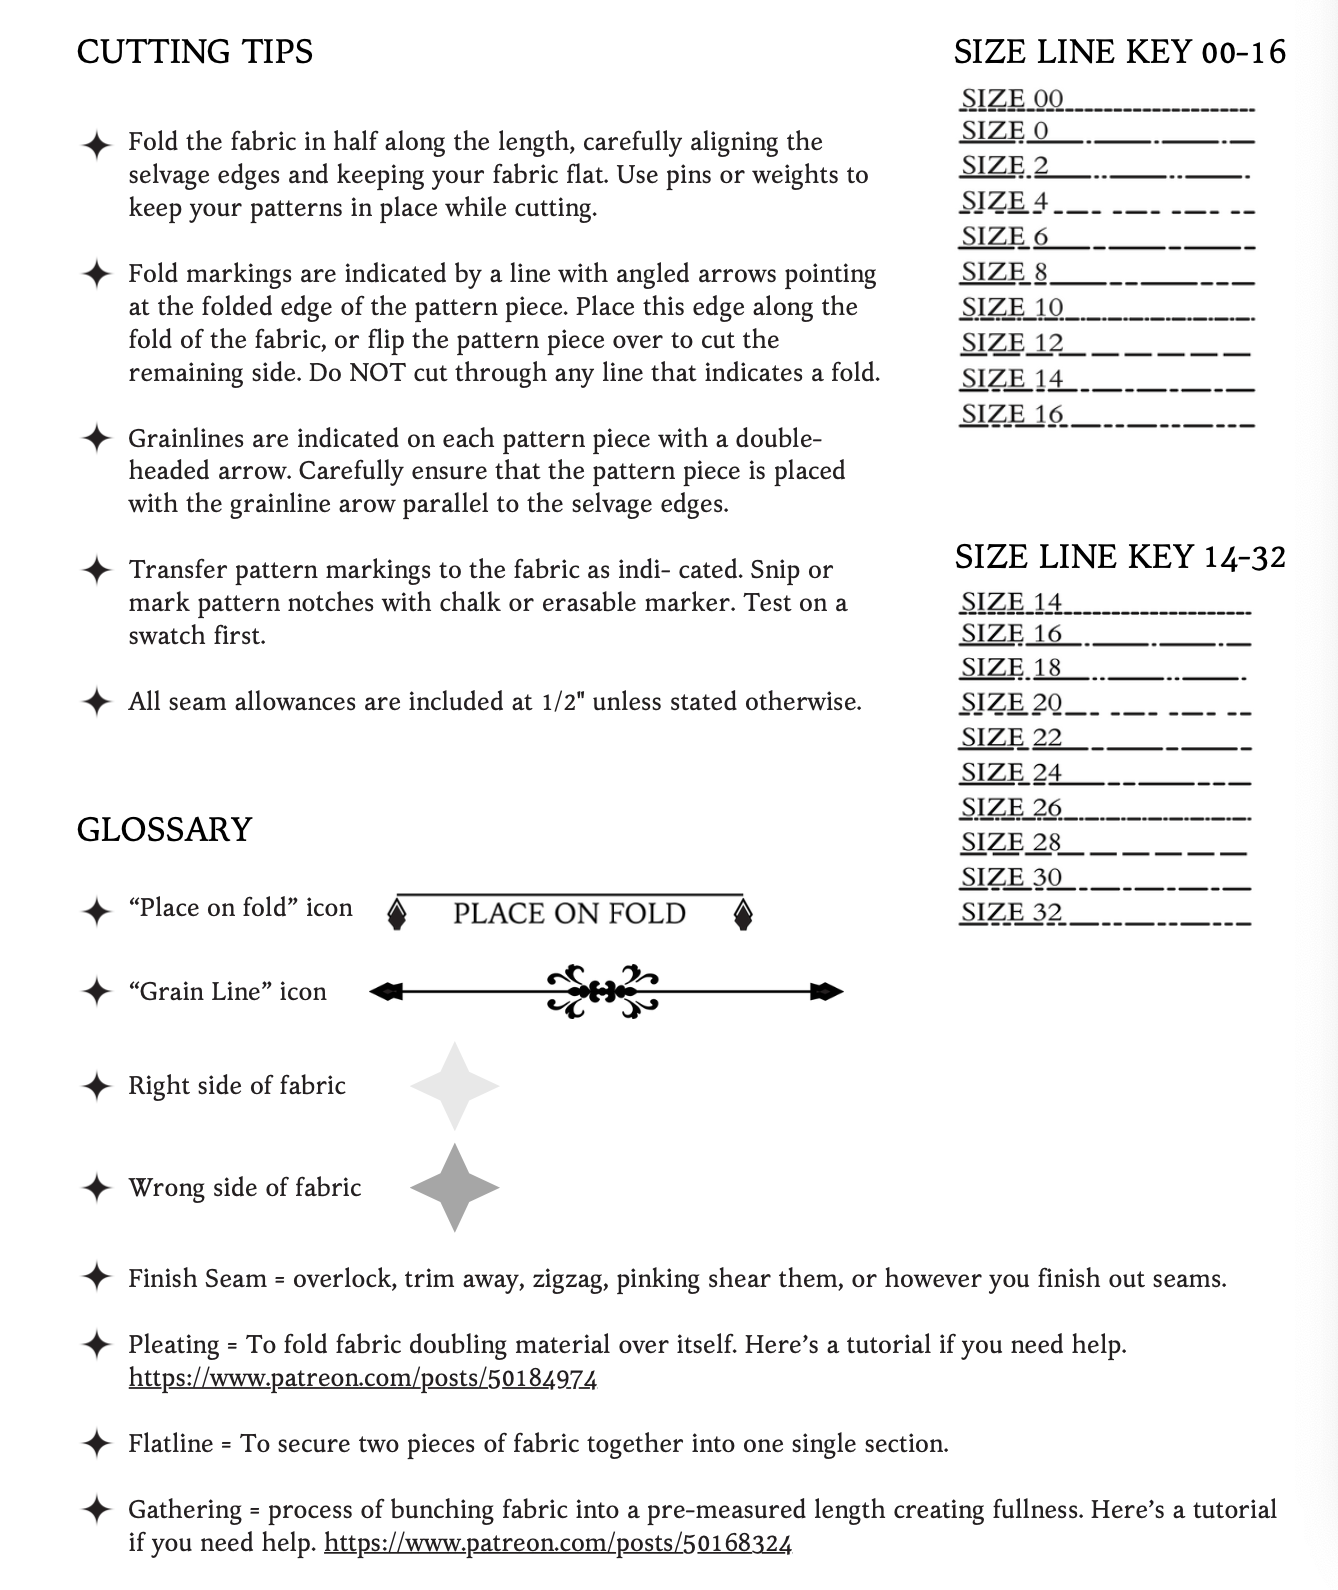
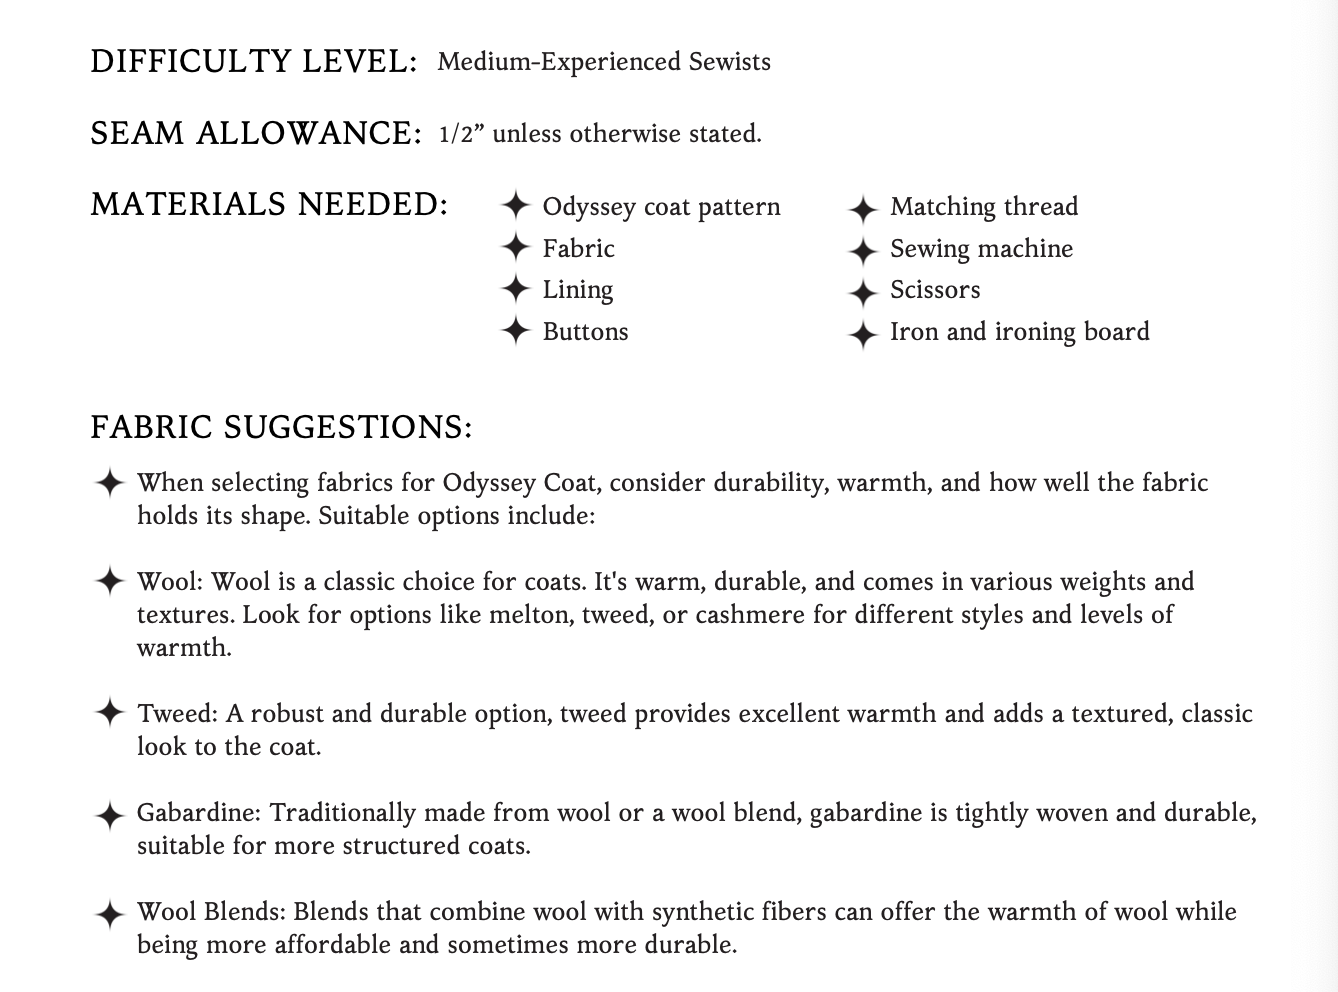
Please take note that the seam allowances on this pattern are 1/2” unless otherwise stated.
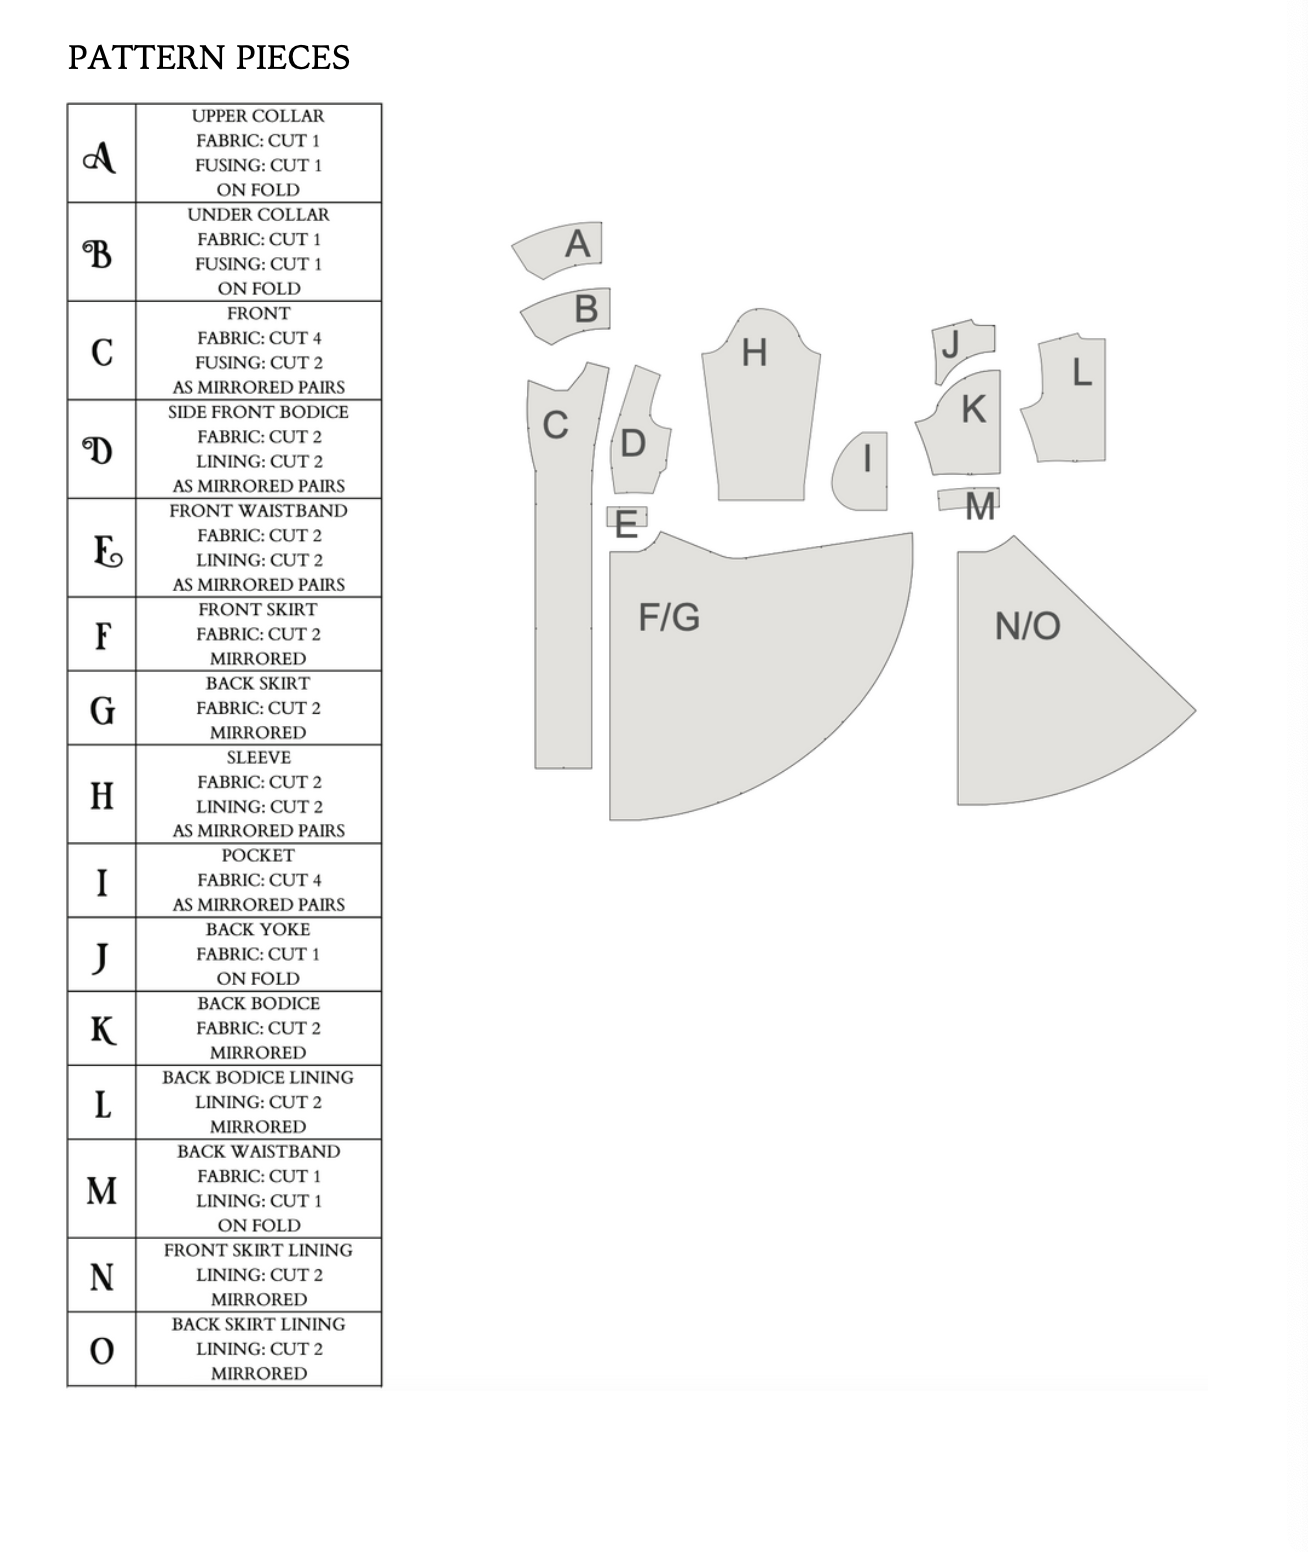
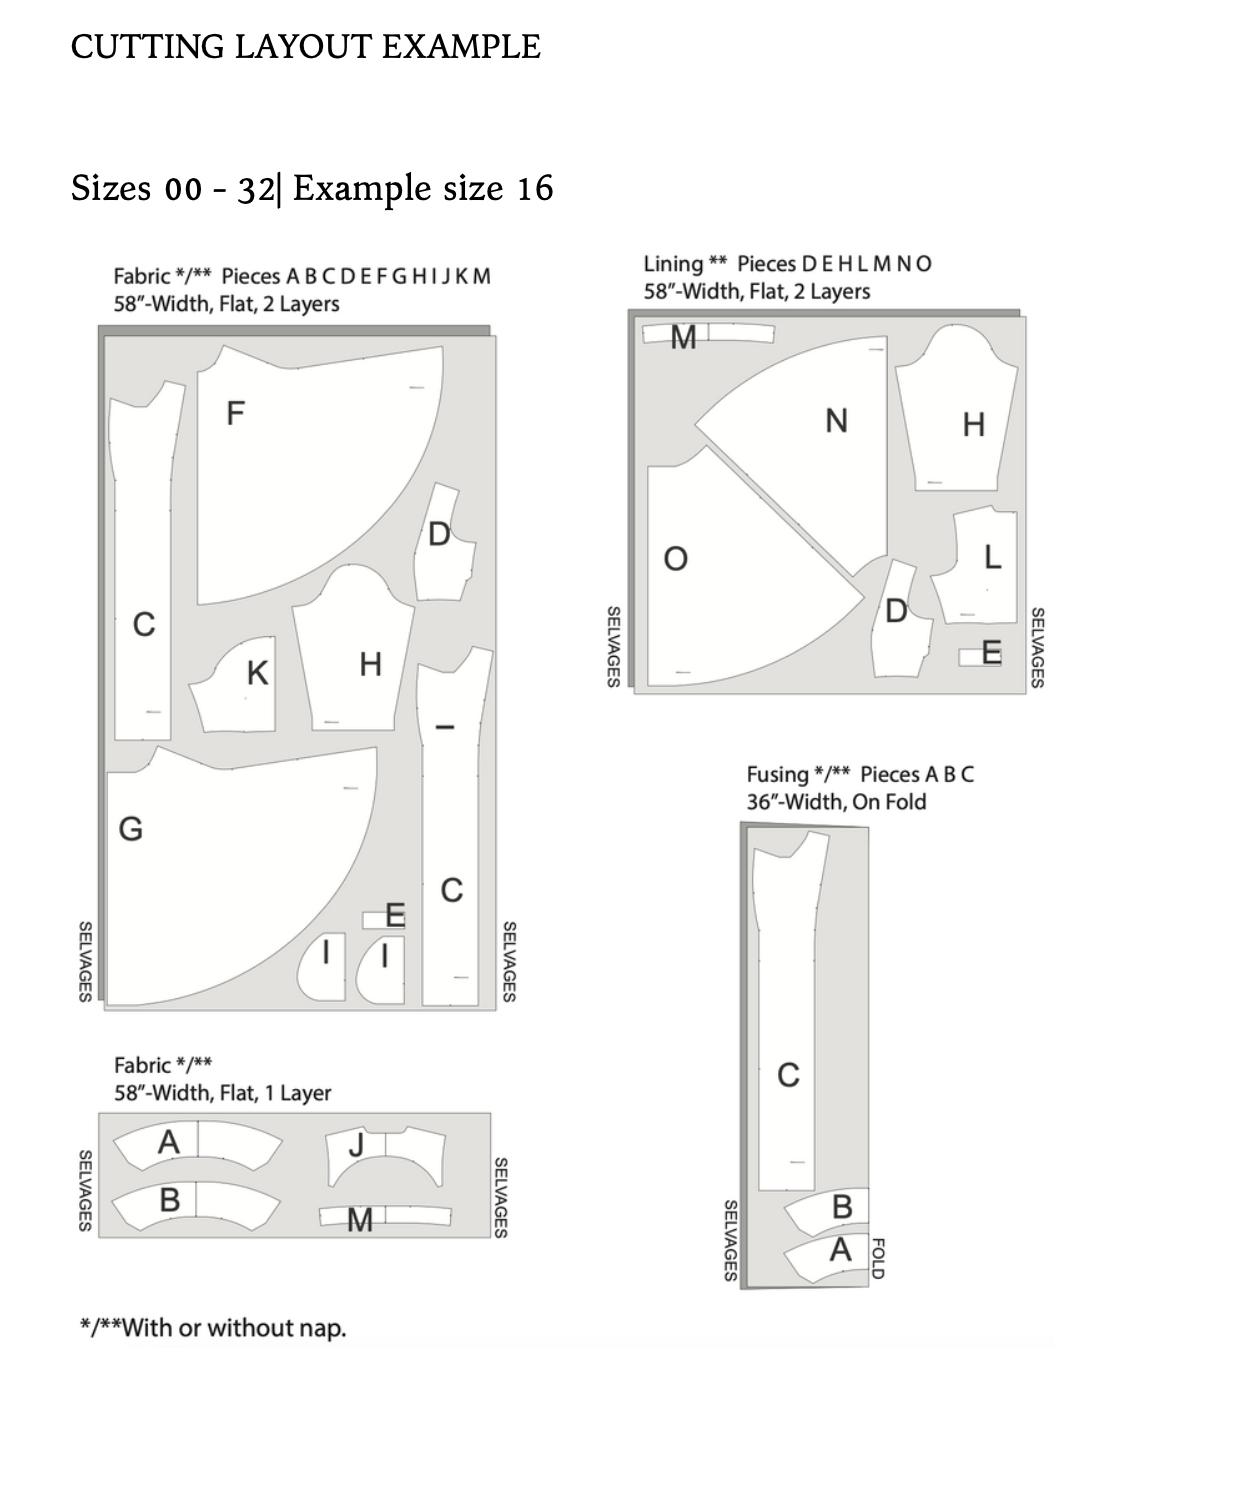
The Pattern will have all the notions and cutting layout you will need in the provided PDF files.
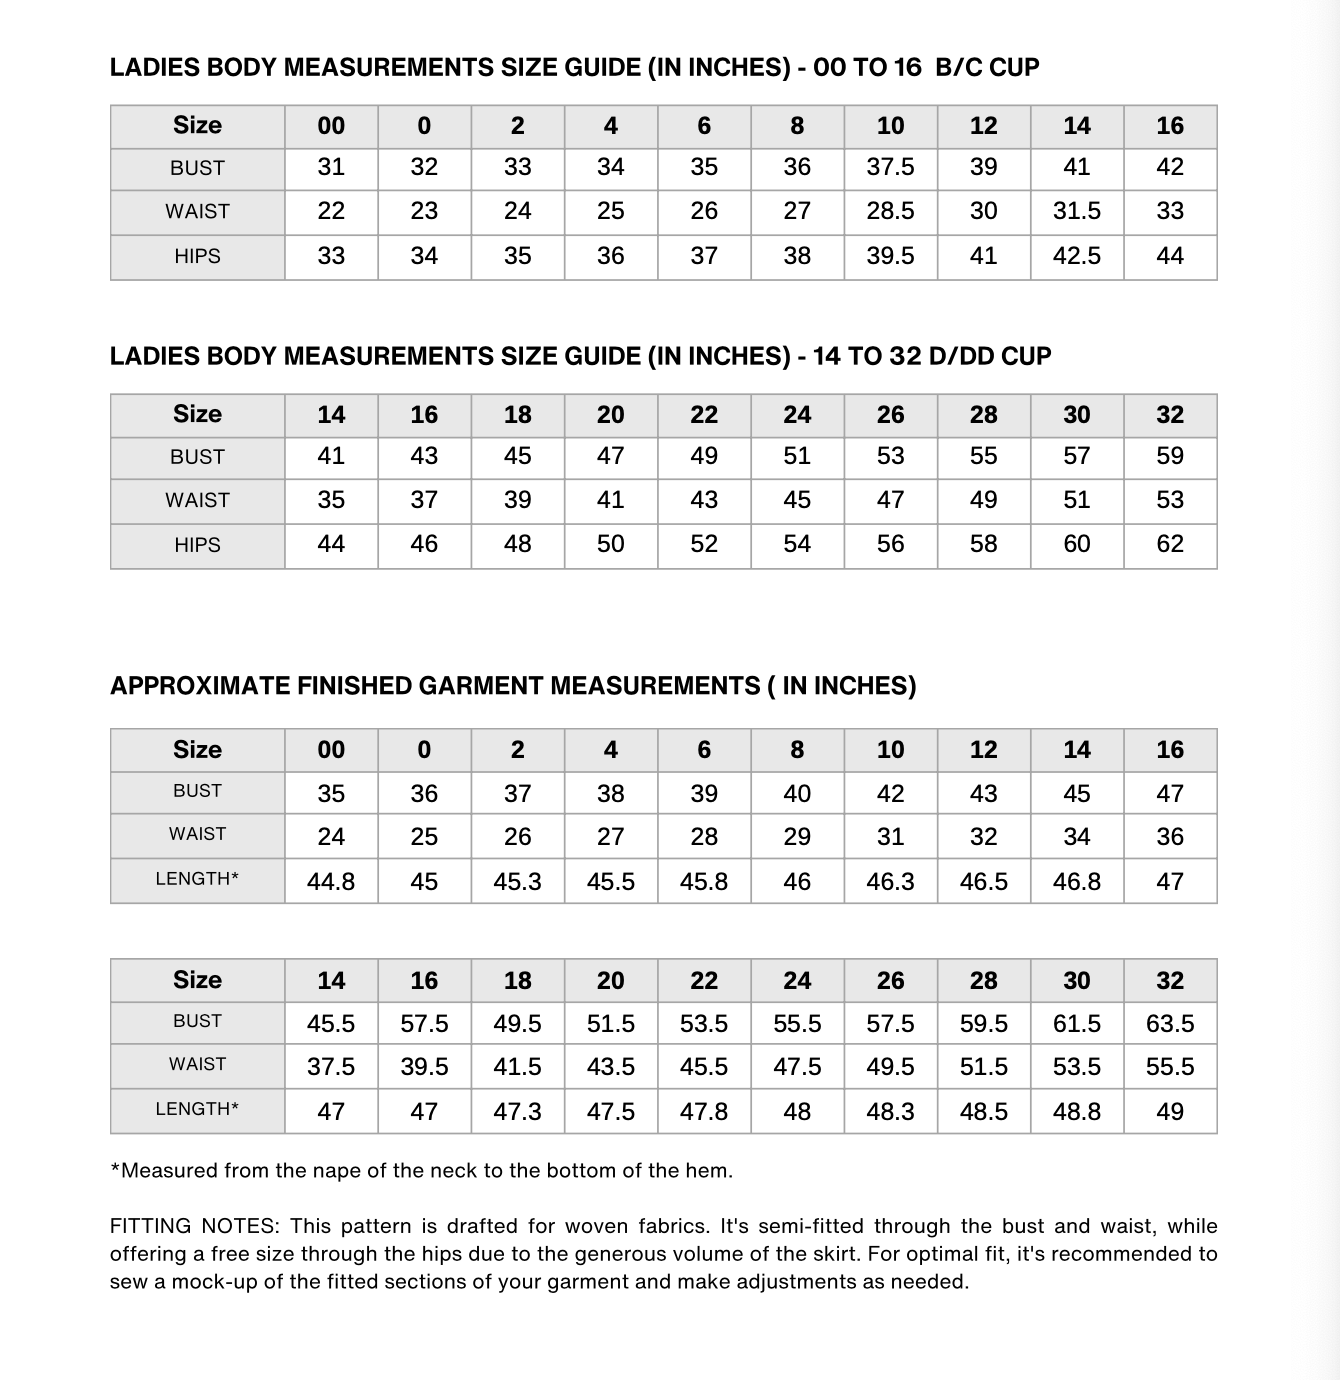
Size Charts, and Finished Garment Measurements
Yardage/ Fabric Consumption