The Persephone Dress Sewing Pattern Guide
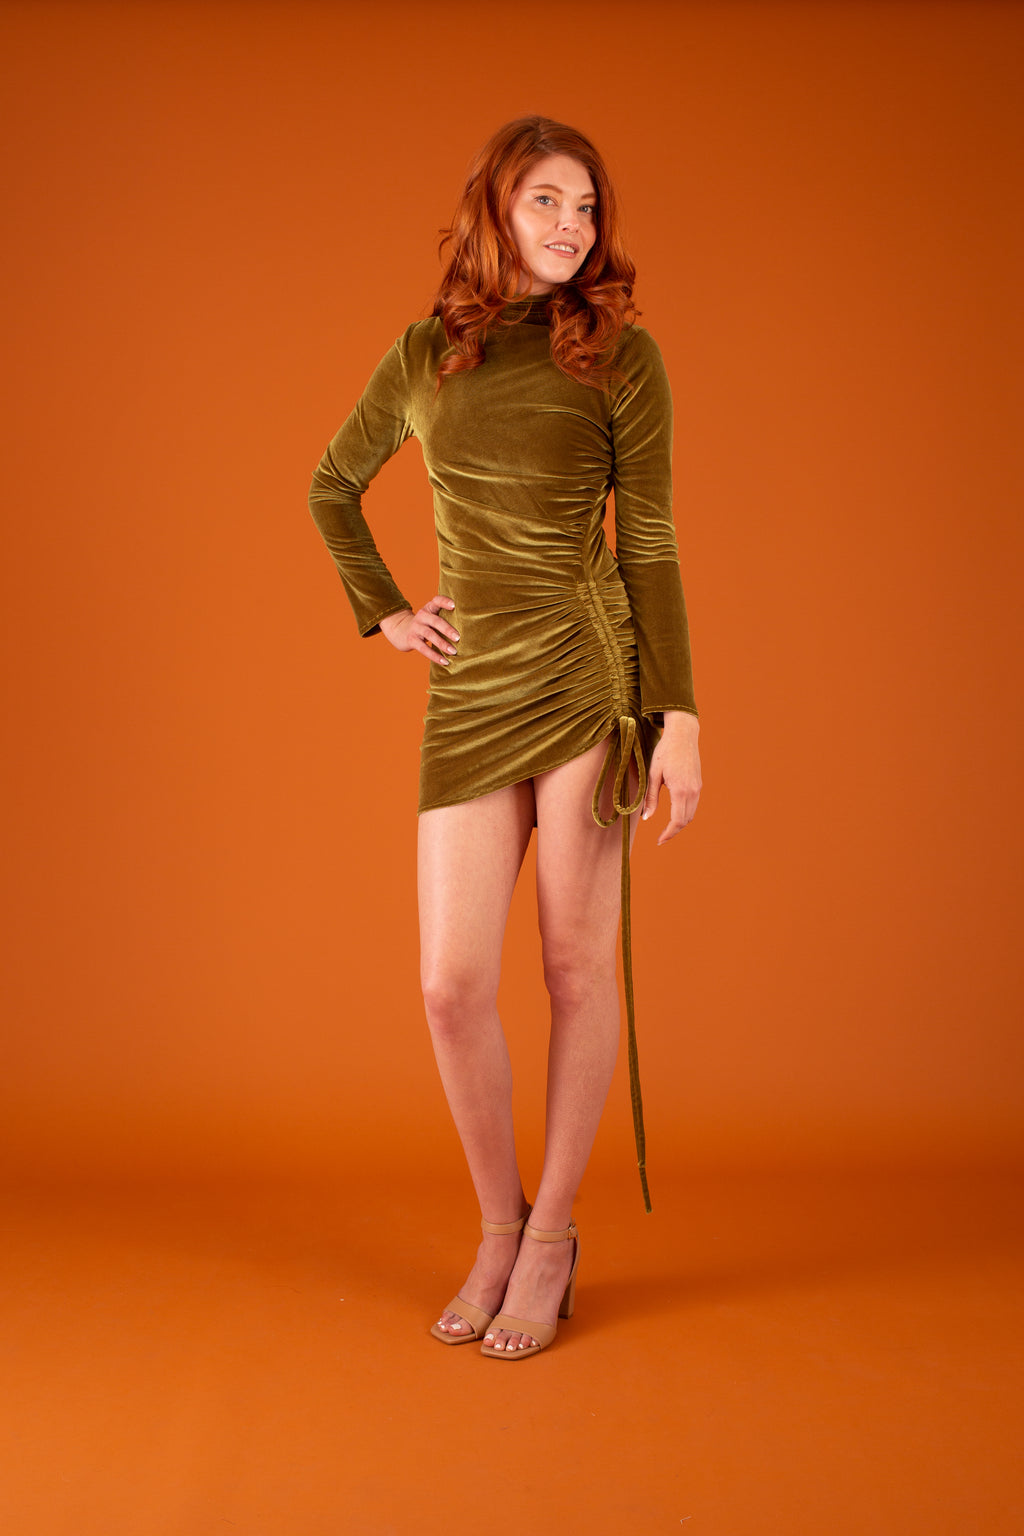
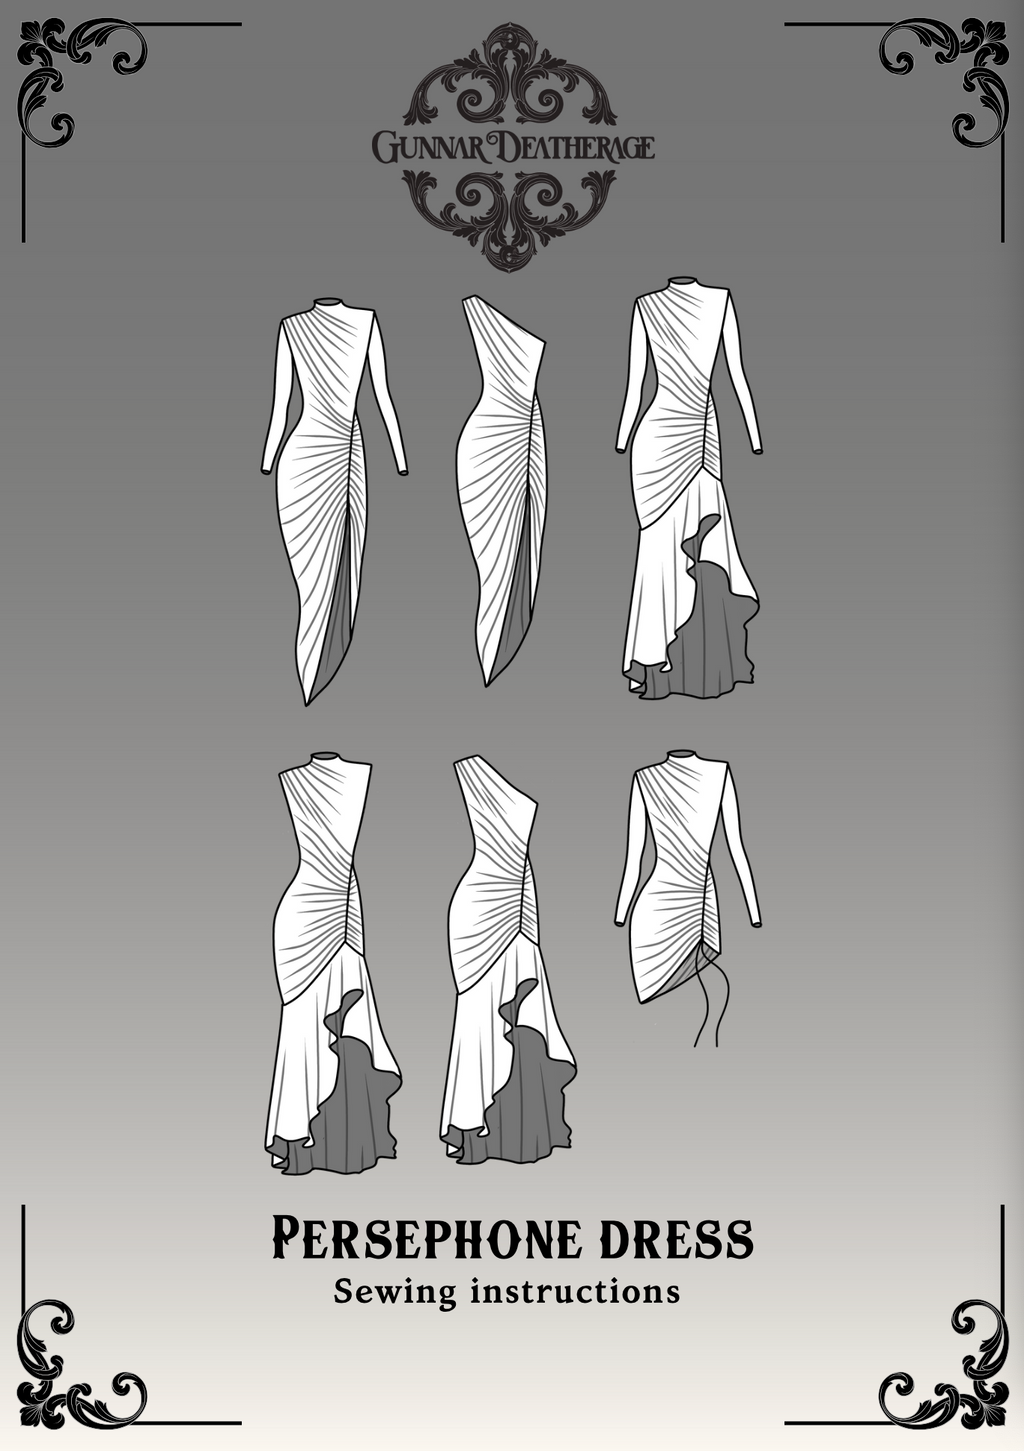
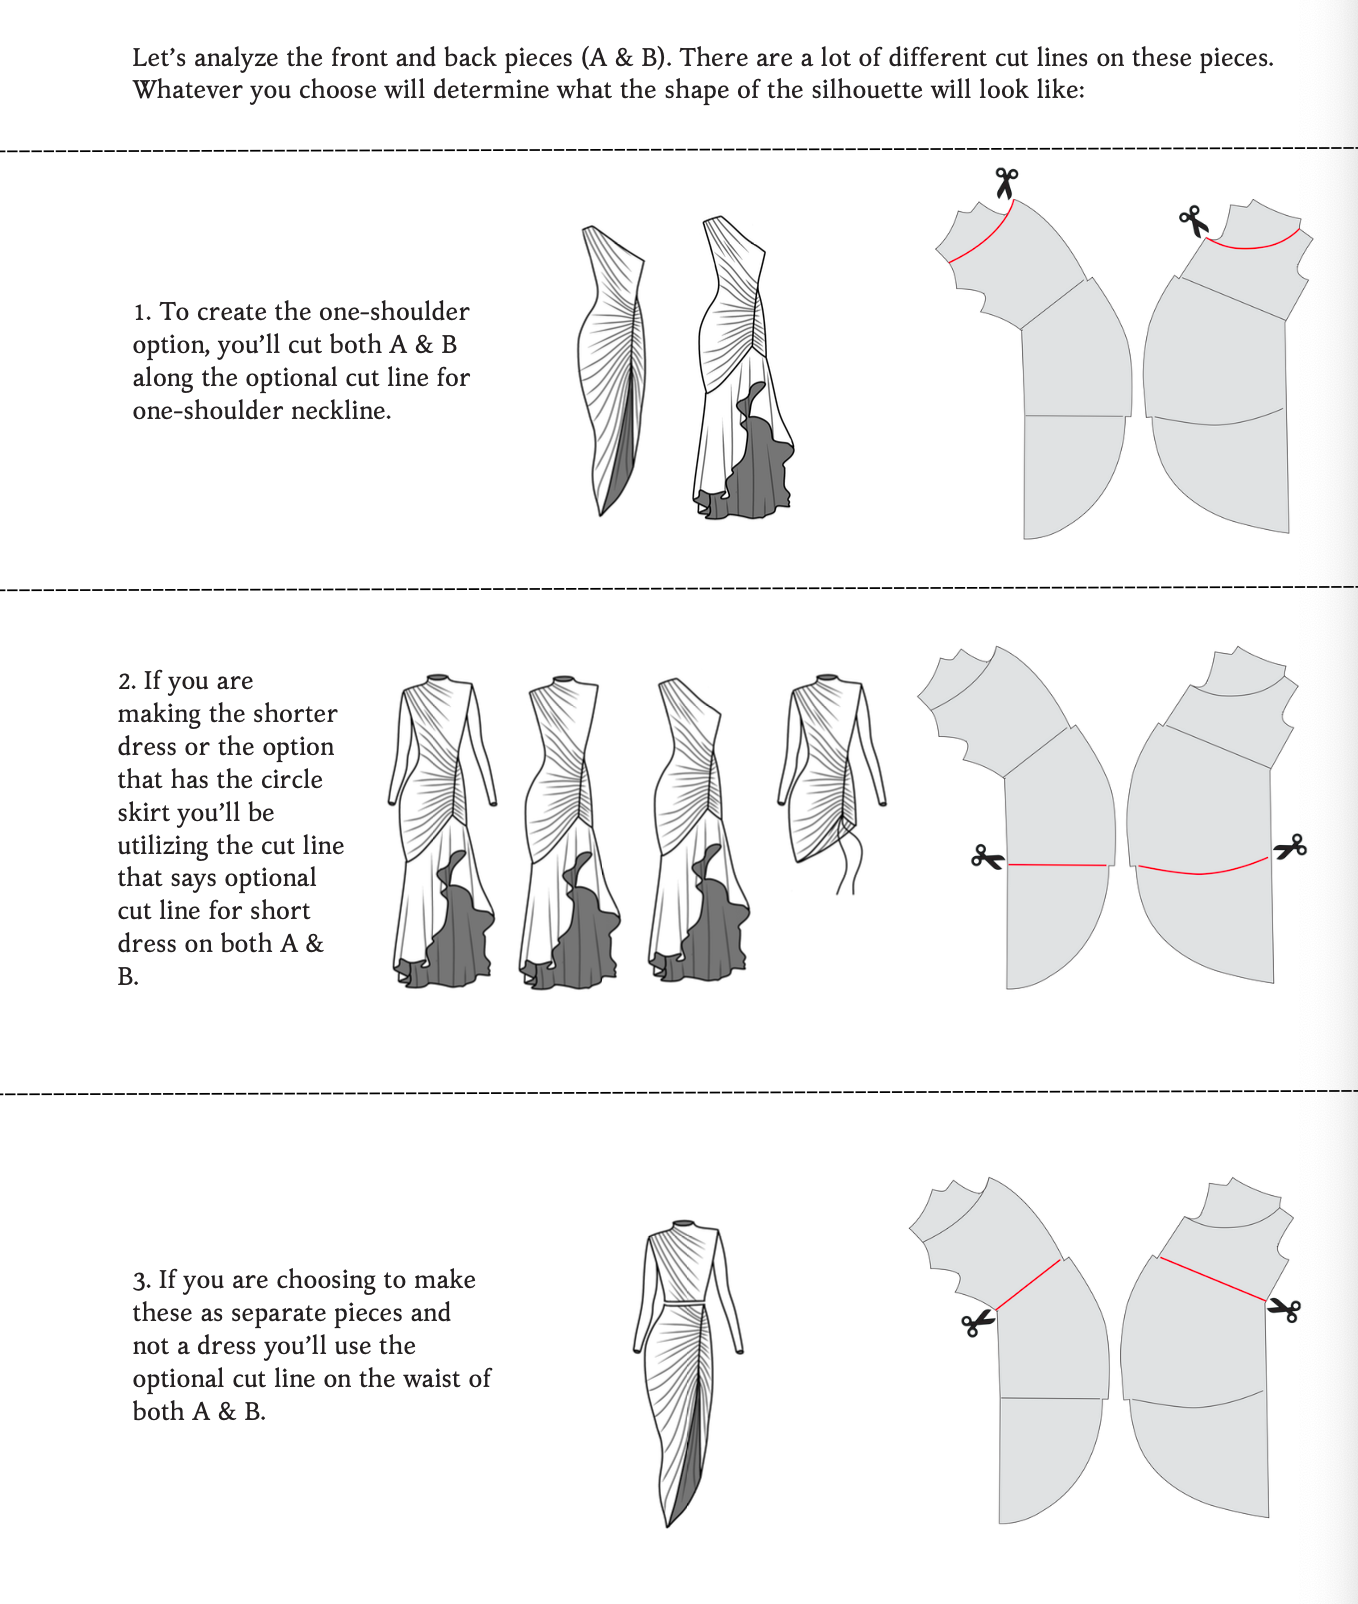
Welcome to Persephone, an enchanting dress pattern that celebrates the beauty of choice and adaptability in fashion. With six customizable options, Persephone allows you to express your style uniquely. Opt for a classic look with or without sleeves, embrace elegance with a one-shoulder design, or vary the length with a captivating long version or a playful mini. For those who relish creativity, the two-piece option adds a contemporary twist. Additionally, the pattern includes an option to add a flounce, perfect for those who love a touch of whimsy.
Crafted specifically for four-way stretch fabrics, Persephone guarantees not only a stunning silhouette but also ensures comfort and ease of movement. Explore the myriad possibilities with Persephone and let your creativity blossom in every stitch.
Before You Get Started
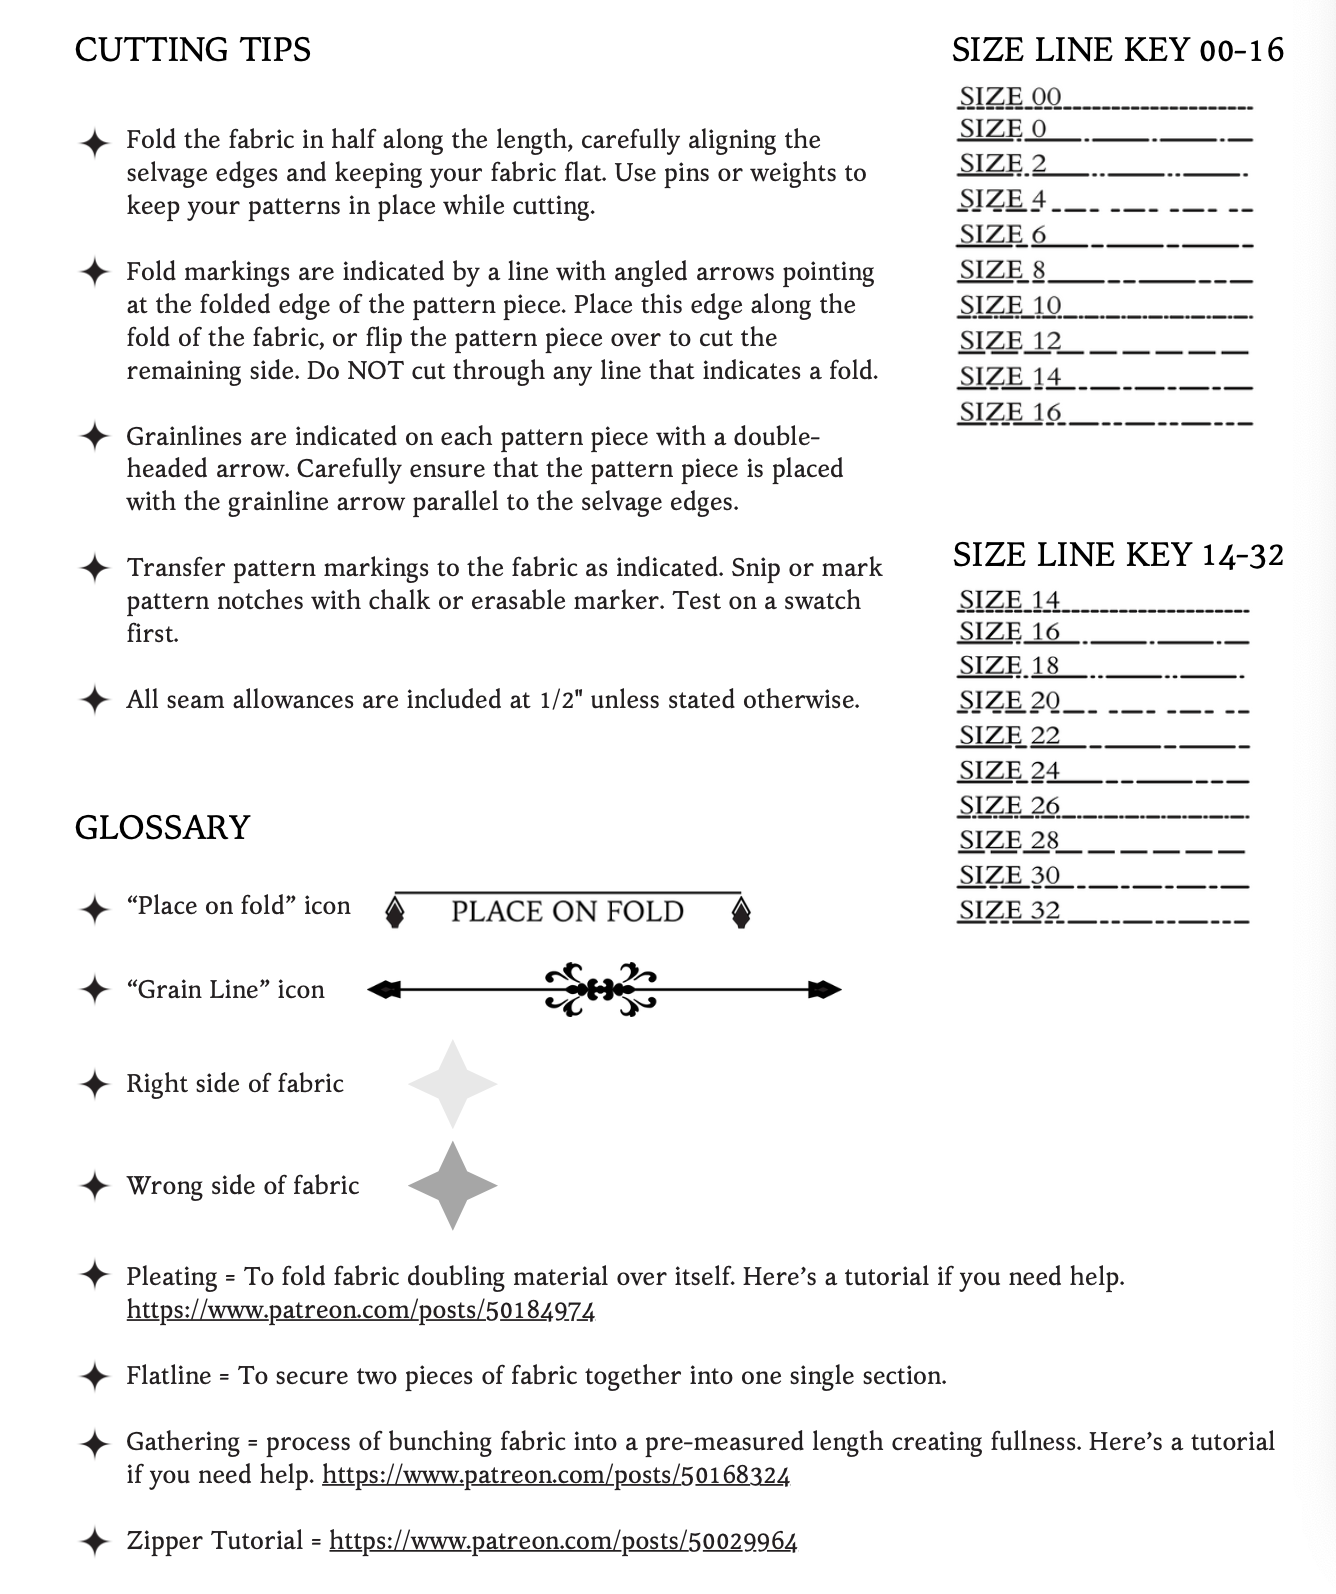
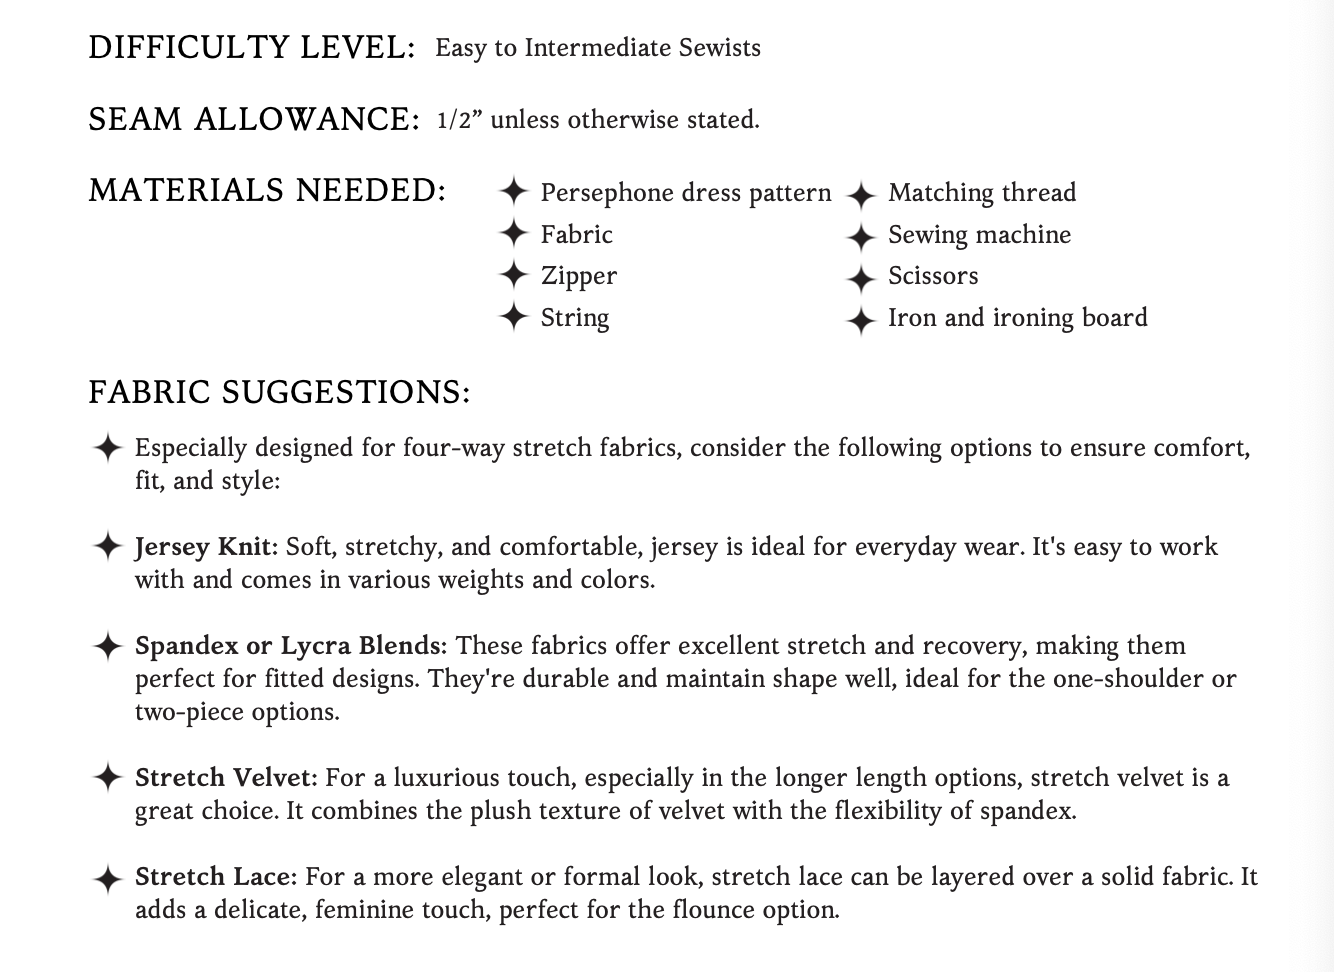
Please take note that the seam allowances on this pattern are 1/2” unless otherwise stated.
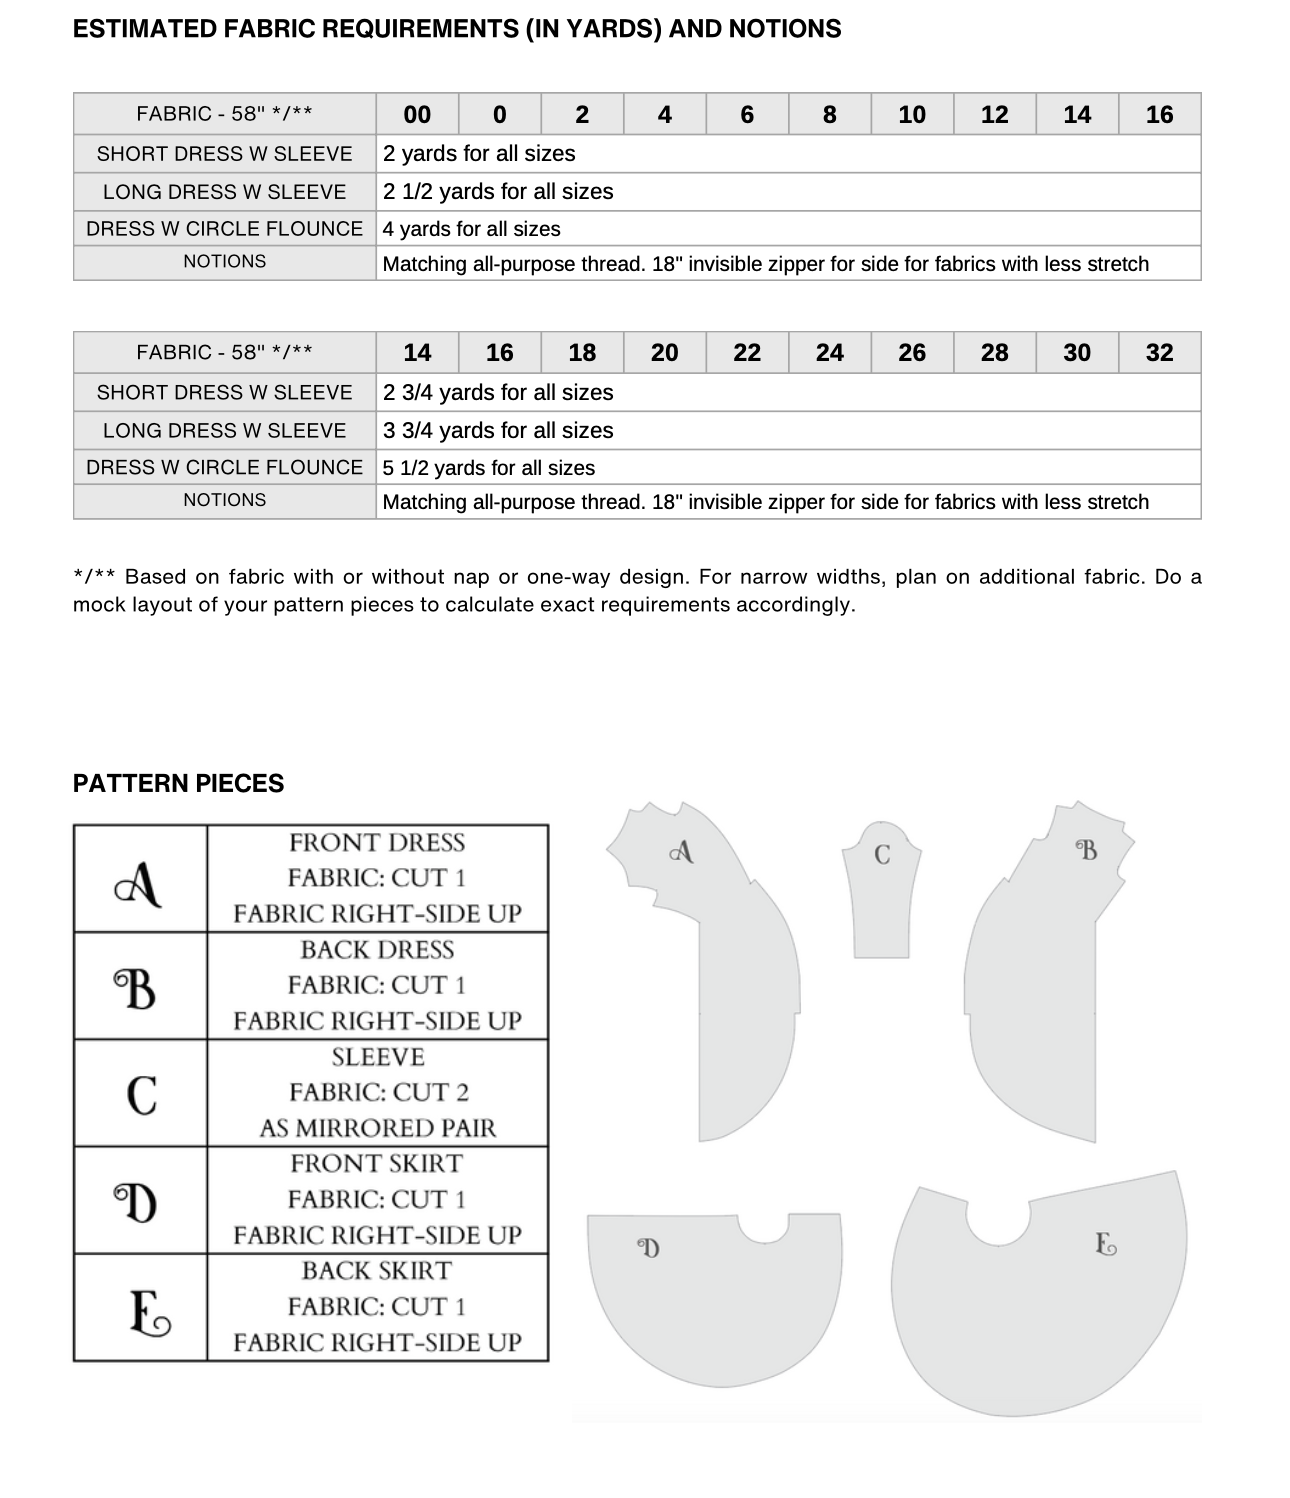
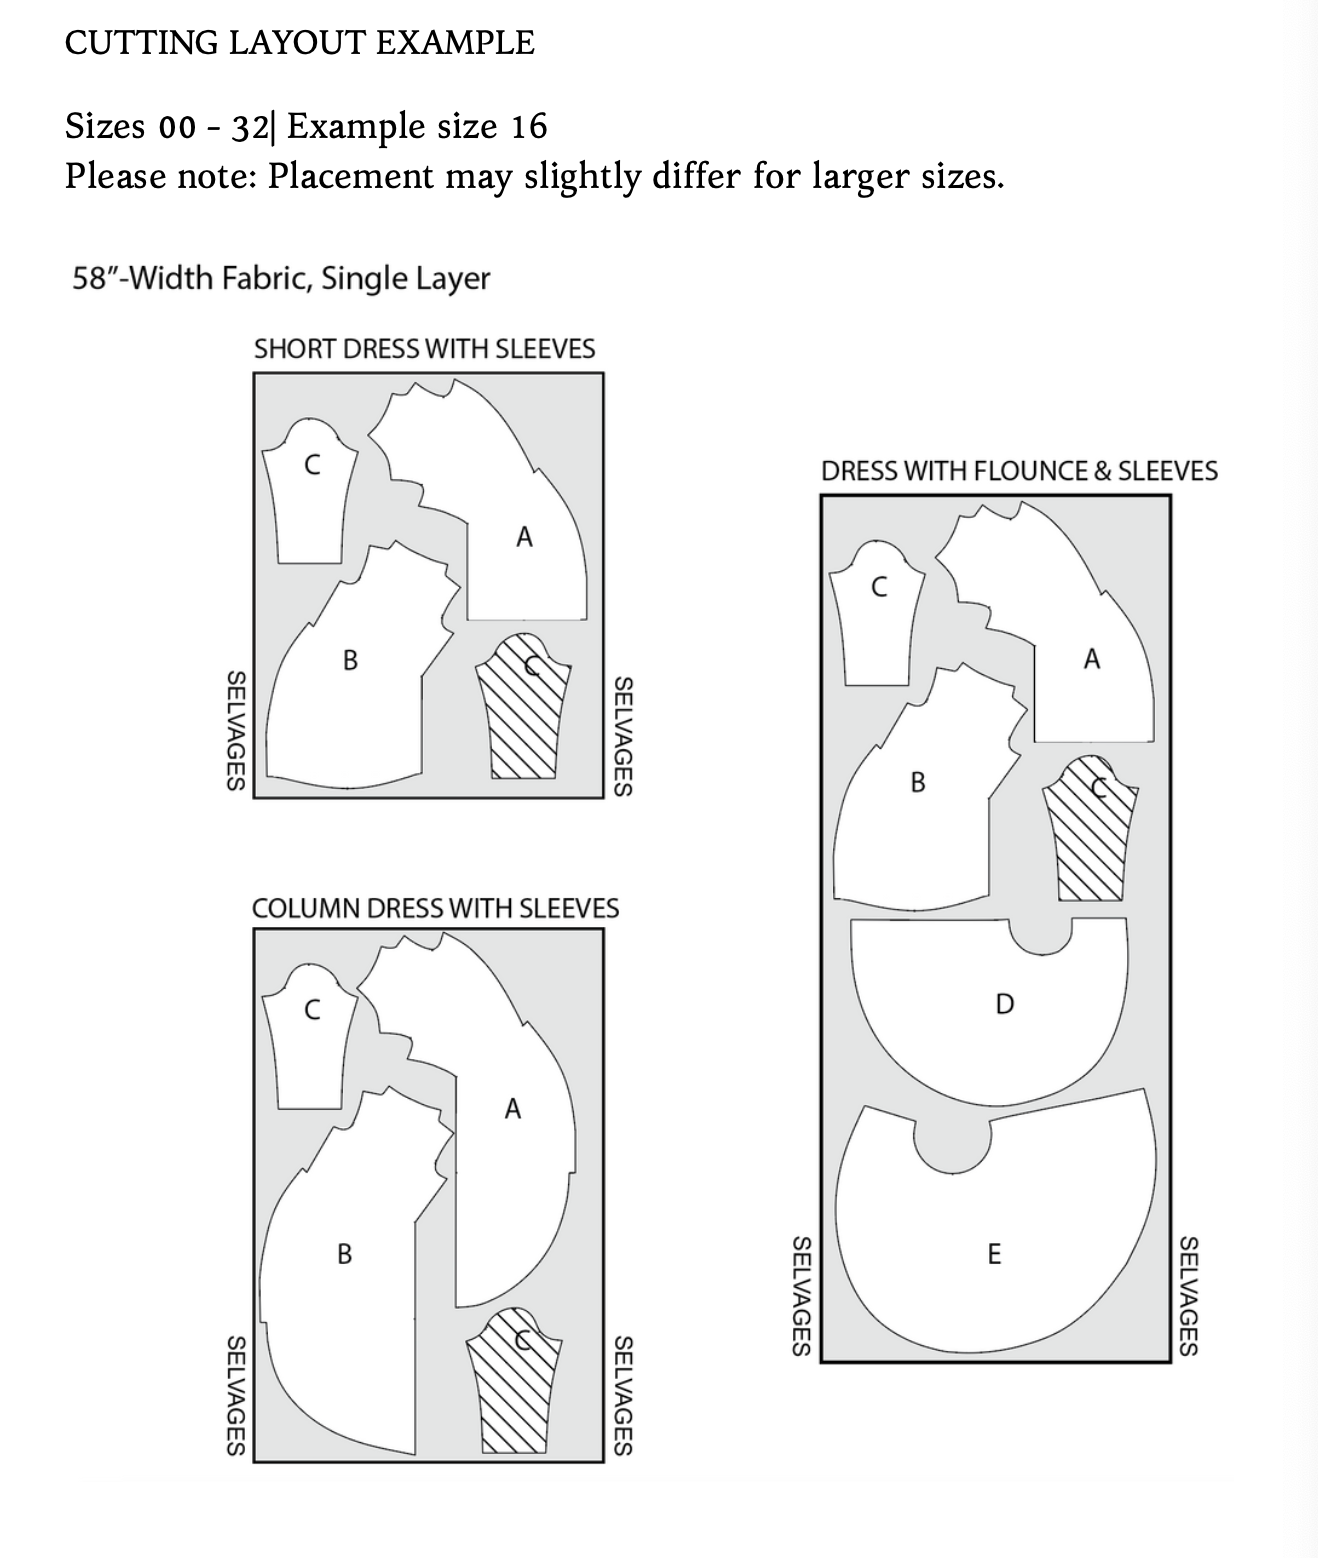
The Pattern will have all the notions and cutting layout you will need in the provided PDF files.
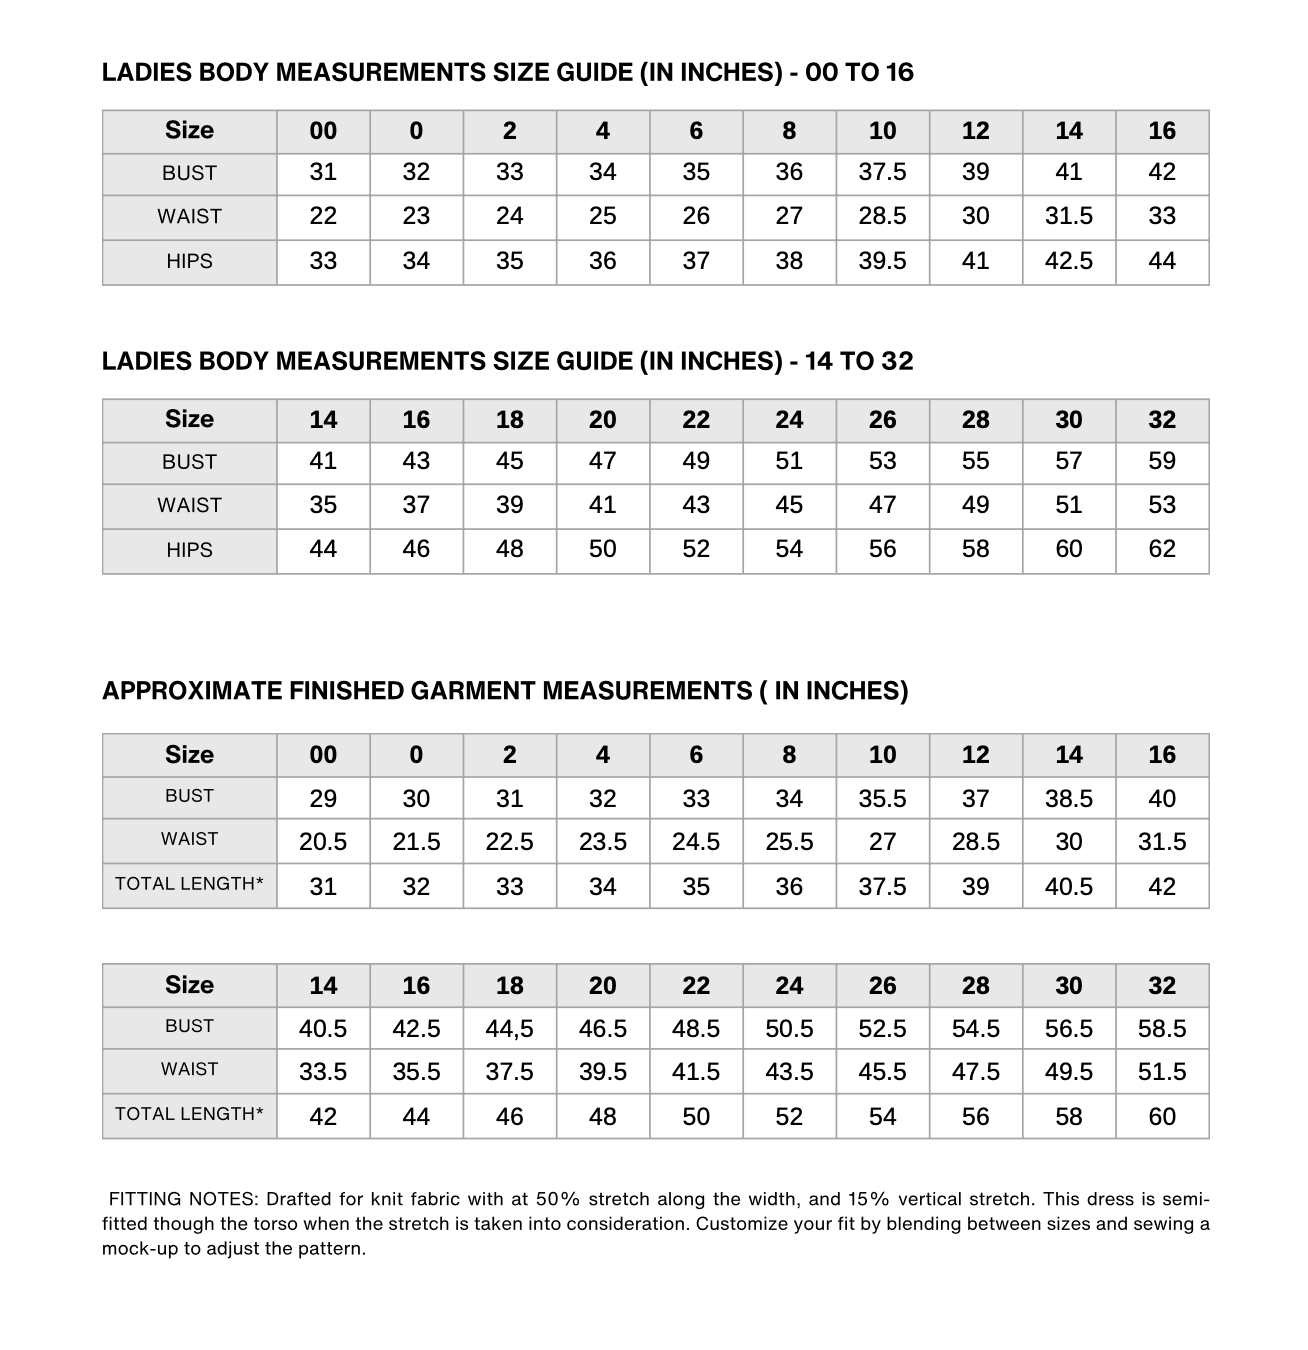
Size Charts, and Finished Garment Measurements
Yardage/ Fabric Consumption