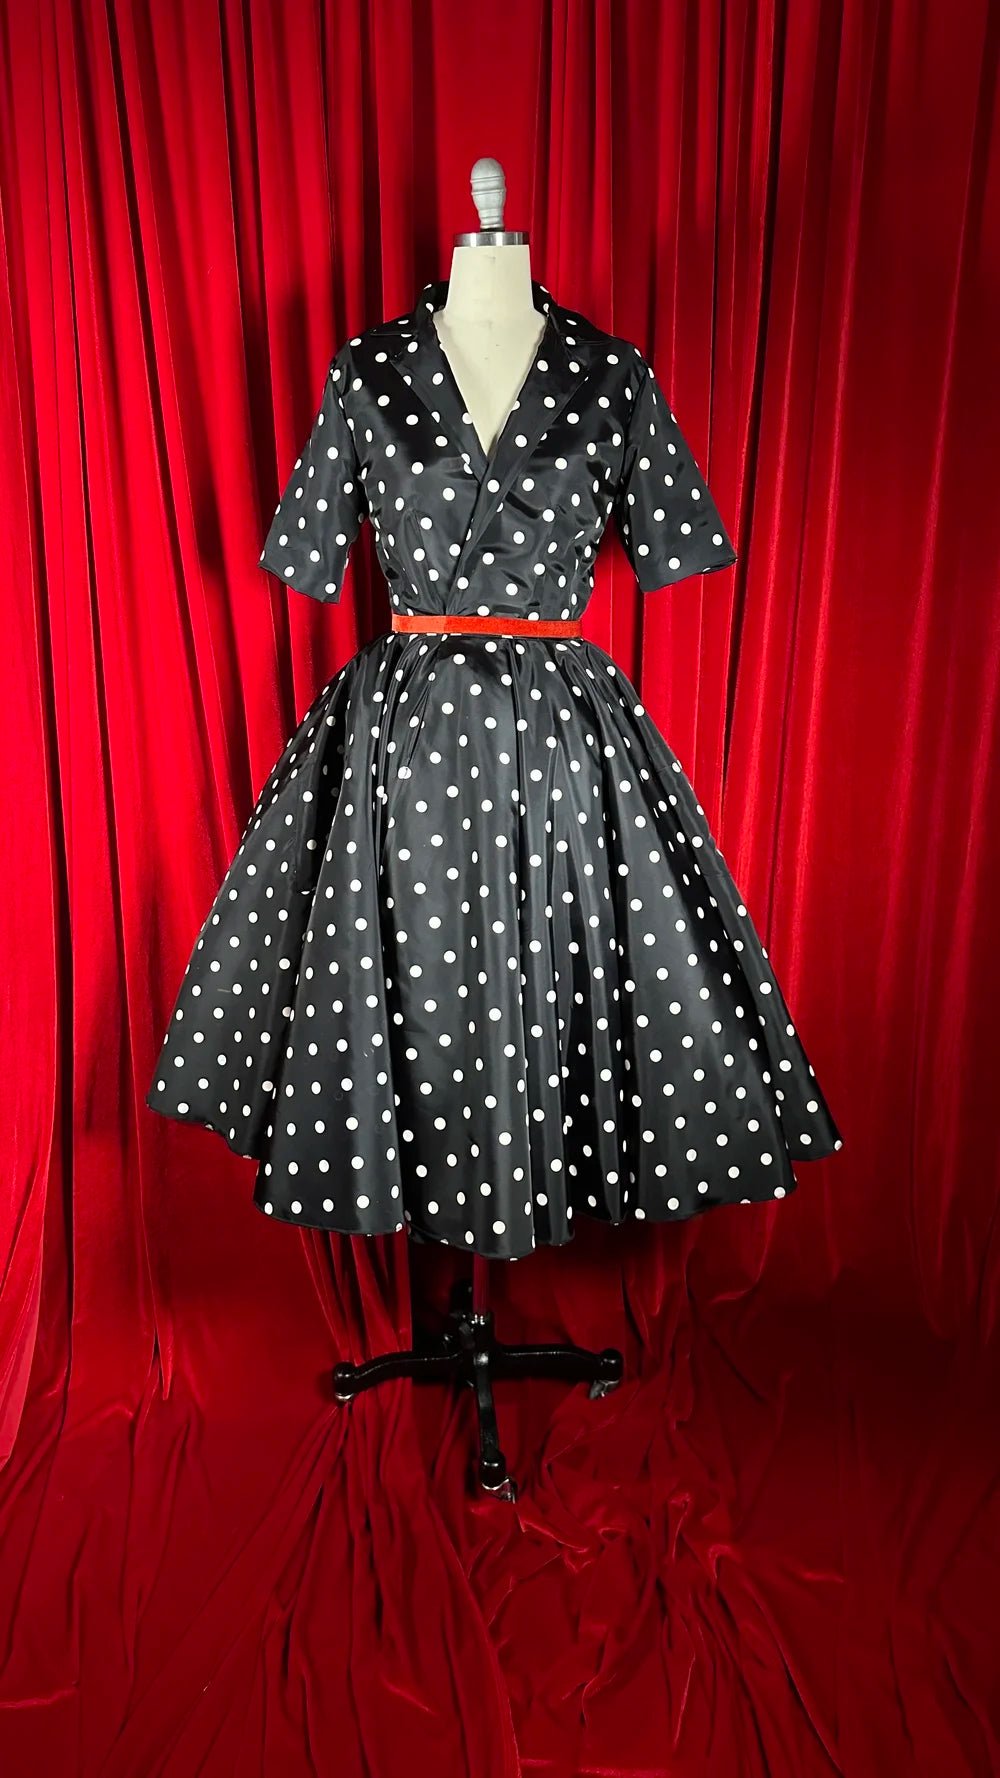
The September Dress Sewing Pattern Guide

Hello and welcome to The September Dress Sewing Guide!


Before You Get Started

Please take note that the seam allowances on this pattern is 1/2” unless otherwise stated.

The Pattern will have all notions and cutting layout you will need.

This guide will assume you’re creating both the Outer Shell and the Lining at the same time! Just know to repeat everything for the lining even if it doesn’t say specifically to do so.

Difficulty: Beginner

Fabrics: womens like cottons, taffeta, satins…

Sharing: If you created something with a Gunnar Deatherage pattern, PLEASE give us a review, and post a photo! Gunnar loves to see your creations, and your reviews really help our little shop grow!


Glossary

RSF = Right Side Facing

RSO = Right Side Out

WSO = Wrong Side Out

Finish Seam = overlock, trim away, zigzag, pinking shear them, or however you finish out seams.

Pleating = To fold fabric doubling material over itself. Here’s a tutorial if you need help. https://www.patreon.com/posts/50184974

Flatline = To secure two pieces of fabric together into one single section.

Gathering = process of bunching fabric into a pre-measured length creating fullness. Here’s a tutorial if you need help. https://www.patreon.com/posts/50168324

Zipper Tutorial = https://www.patreon.com/posts/50029964

Rolled Hem Tutorial = https://www.patreon.com/posts/new-tutorial-hem-78784340


Take note of the different lines on the Front Skirt (K). The longer side of the skirt indicates the front. The Press/Crease is optional.

Assembling The Bodice

1. Trace out darts (tracing paper or tailors chalk) on the front, back, and back lining pieces. Pin then stitch darts. Press dart toward the side seam.

2. With RSF match shoulder seams of front and back bodice pieces and side seams. Stitch seams.


The Sleeves


Sleeve A

3. With RSF place Sleeve A (F) and Sleeve A Facing (G) together. Mark were the Stitch Line For Slit and pin across the bottom. When stitching you’ll go from one side, go up to the apex of the slit, back down, and continue across the sleeve bottom. Repeat to other sleeve.

4. Trim about half of seam allowance away and into the slit. Turn RSO. Push points out

5. Fold top of Sleeve A Facing down ½”, press, fold 1”, and press again.

6. Top stitch Sleeve A Facing to the sleeve. Fold Sleeve A Facing up and press then pin down

Sleeve B

7. With RSF stitch the sleeve and the lining together at the bottom. Stitch.

8. Fold in half horizontally and pin the top. Stitch.

9. Match lining and sleeve at the arm hole and pin. 


Lining


10. Mark the darts and stitch on Front Bodice Lining (D)

11. With RSF pin the Front Bodice Facing (C ) and Front Bodice Lining (D) all the way down. Stitch.

12. RSF lay Front Lining to the Back Lining pinning the shoulder and side seams. Stitch.


The Skirt


13. Sew the center back of the skirt together with RSF. Press then finish the seam.

14. Stitch the front to the back on the outer skirt. Pin the side seam then stitch. Press then finish the seam.

15. Repeat to other side


The Pockets

Pockets are optional


16. Fold the top of the pocket down. Press. Roll ½” under and press again. Top stitch.

17. Fold all the seam allowance ½” on the pocket and press.

18. Place the pocket central over the side seams. Pin. Top stitch around the sides leaving the top open.


The Skirt Lining


19. Pin and stitch one side from the center point to the bottom. Finish seam.

20. Add on the skirt facing with the skirt lining. With RSF pin and stitch the facing to the front skirt lining. Finish seam and press.

21. At the side seam, with RSF place the front skirt lining to the back skirt. Pin and stitch.


Attaching The Bodice To The Skirt


22. RSF pin the bodice to the skirt at waist seam. Stitch. 


The Collar


23. Place the two pieces with RSF and pin the two sides and the long side. Leave the bottom open. Stitch. Trim away half the seam allowance. Turn RSO. Push corners out nice and pointy. Press flat.

24. Mark center of collar and center back of neck hole. Pin collar to the outer shell first (there will be extra on the side. It acts like a lapel). Pin lining, collar, and outer shell all together working your way from one side to the other. Pin the lining and the outer shell from the neck line to all the way down the sides. Stitch.

25. Trim away half of seam allowance around neck line. Turn RSO. Push corners out nice and pointy.

26. Fold Sleeve A in half. Pin and stitch. 

27. Treat the lining and outer shell around the arm hole as one. Pin all the way around arm hole. Line up the side seam of the dress and sleeve and pin with RSF all the way around. Finish out seam.

28. Execute a rolled hem on the skirt.


Buttons and Belt


29. The buttons can be placed where you want. Mark where the bottom of the lapel is. Evenly space buttons below the lapel.

30. With RSF stitch the two pieces of the belt creating a center seam. Fold in half long ways and pin all the way down. Stitch from one end and stop 2” or 3” from the center seam and start again the same distance from the center seam and continue to the other side. It’ll be easier to turn it RSO from the center point.

31. Cut away half the seam allowance. Turn RSO pushing the sides towards the center seam. Hand stitch the opening on the belt.


CONGRATS YOU COMPLETED THE SEPTEMBER DRESS