The Diamond Dress Sewing Pattern Guide
Introducing the Diamond Dress Sewing Pattern: a timeless tribute to the elegance of a bygone era, inspired by the iconic styles showcased in the classic film "Breakfast at Tiffany's". This vintage-style pattern captures the essence of 1960s glamour, making it perfect for those who adore retro fashion with a modern twist.
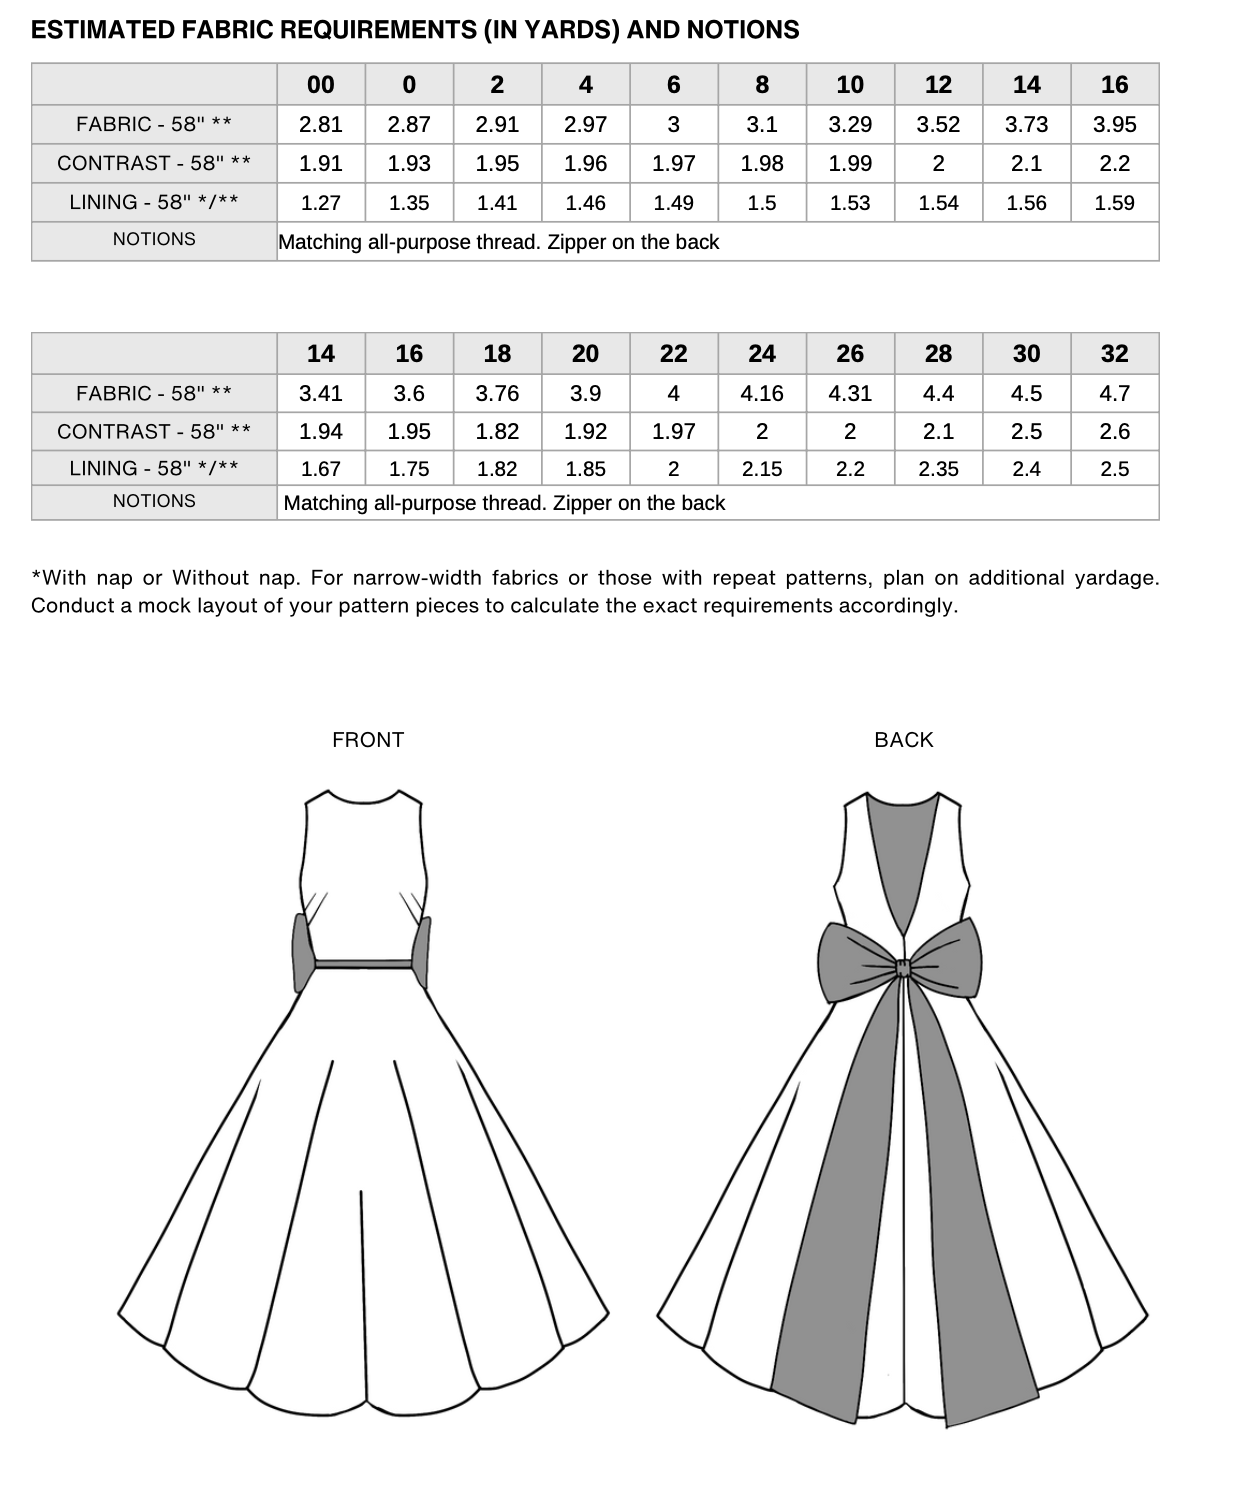
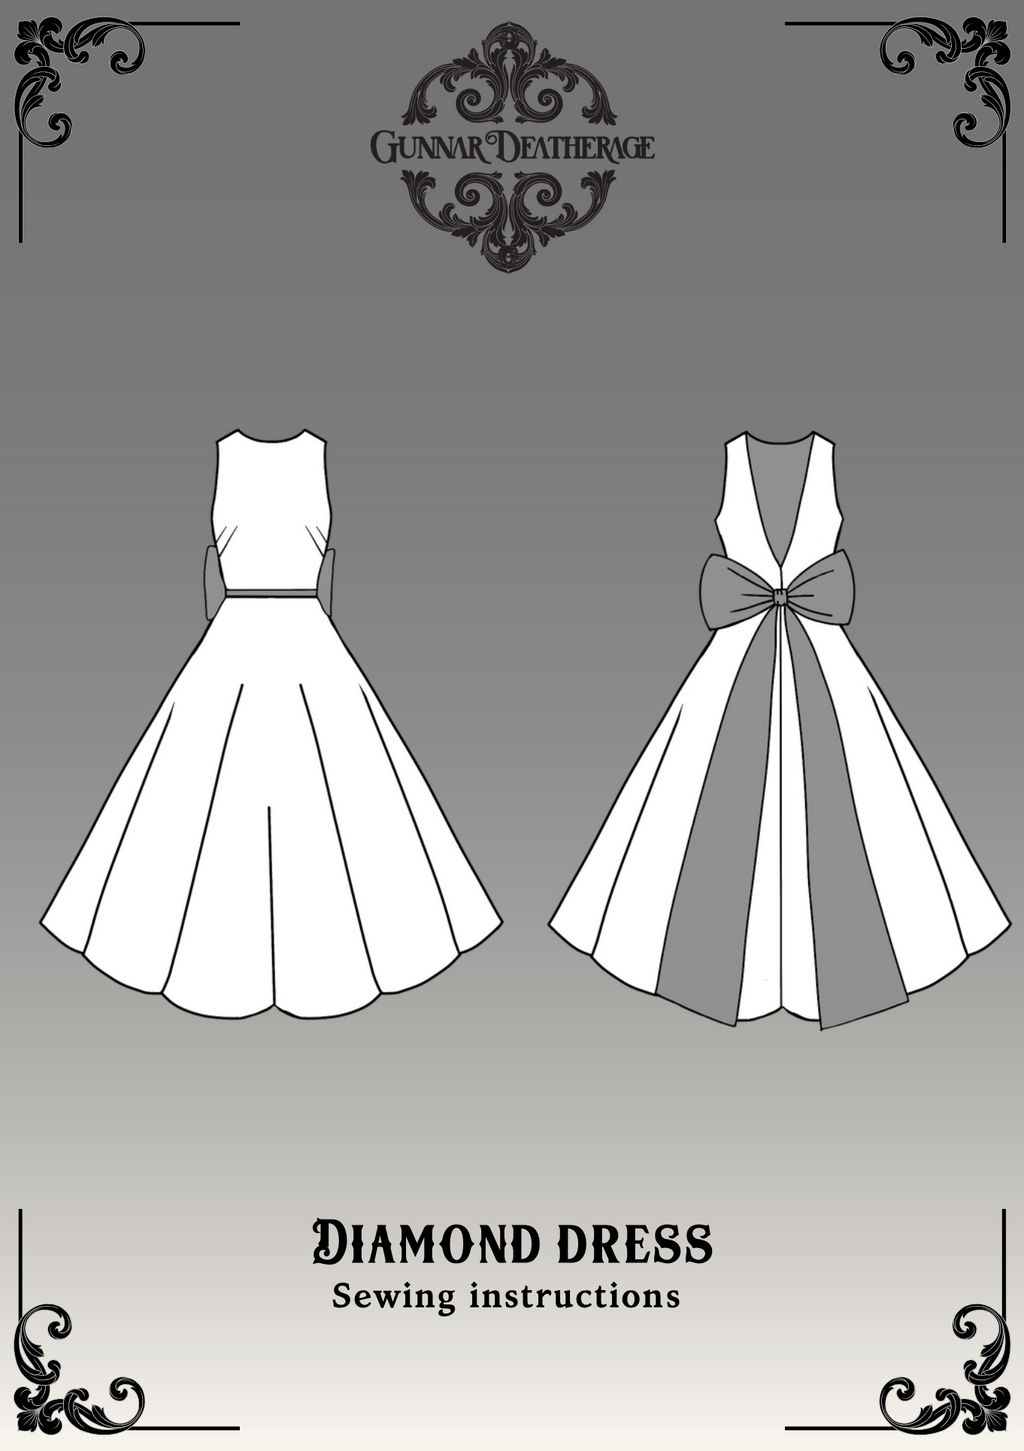
The Diamond Dress features a charming round front neckline paired with a striking deep V-neck at the back, offering a blend of sophistication and allure. Its midi length and flared silhouette provide a flattering fit for all figures, while the standout feature – a beautifully crafted bow adorning the back – adds a touch of whimsical charm. Whether you're attending a special event or simply wish to add a piece of classic elegance to your wardrobe, the Diamond Dress is your perfect sewing project.
Before You Get Started
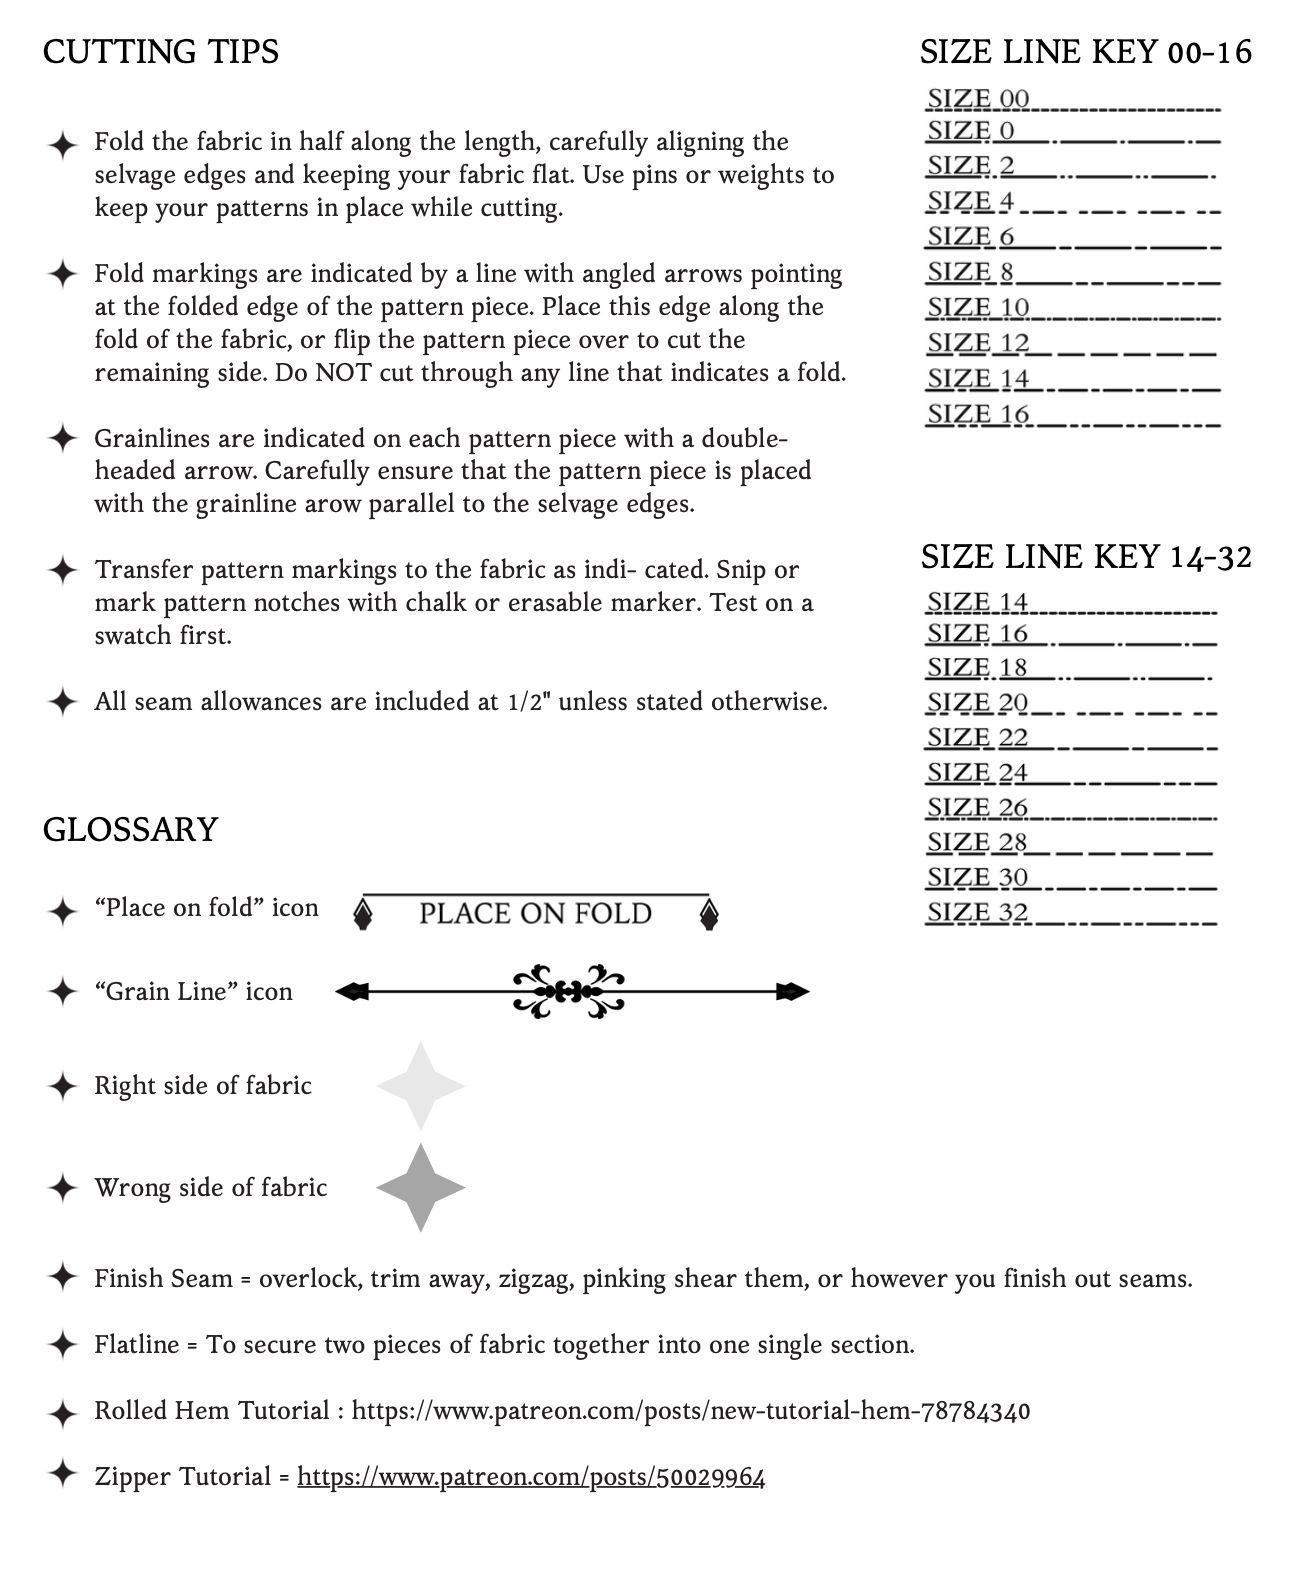
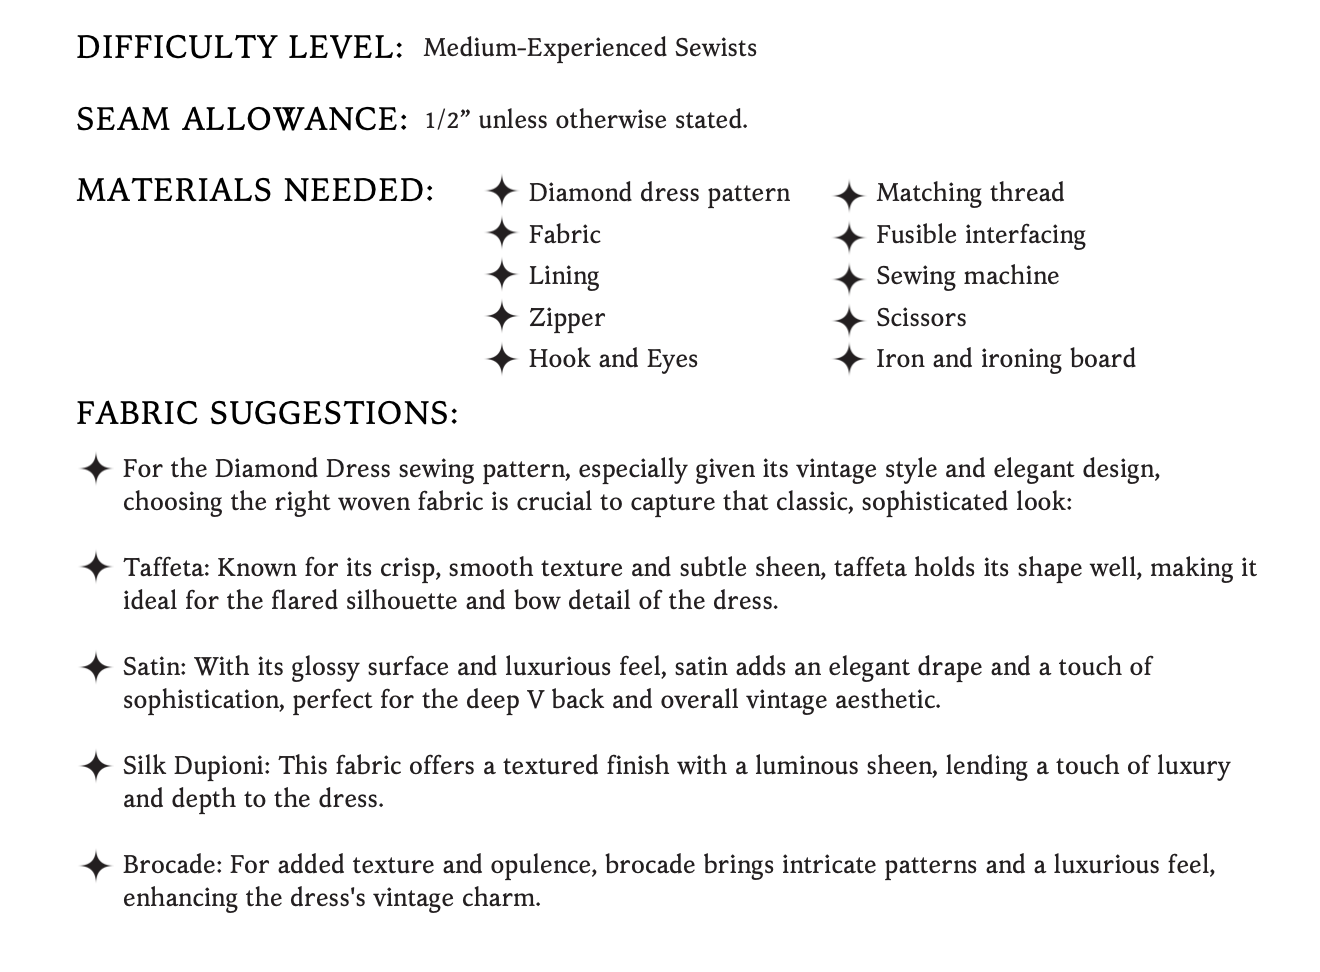
Please take note that the seam allowances on this pattern are 1/2” unless otherwise stated.
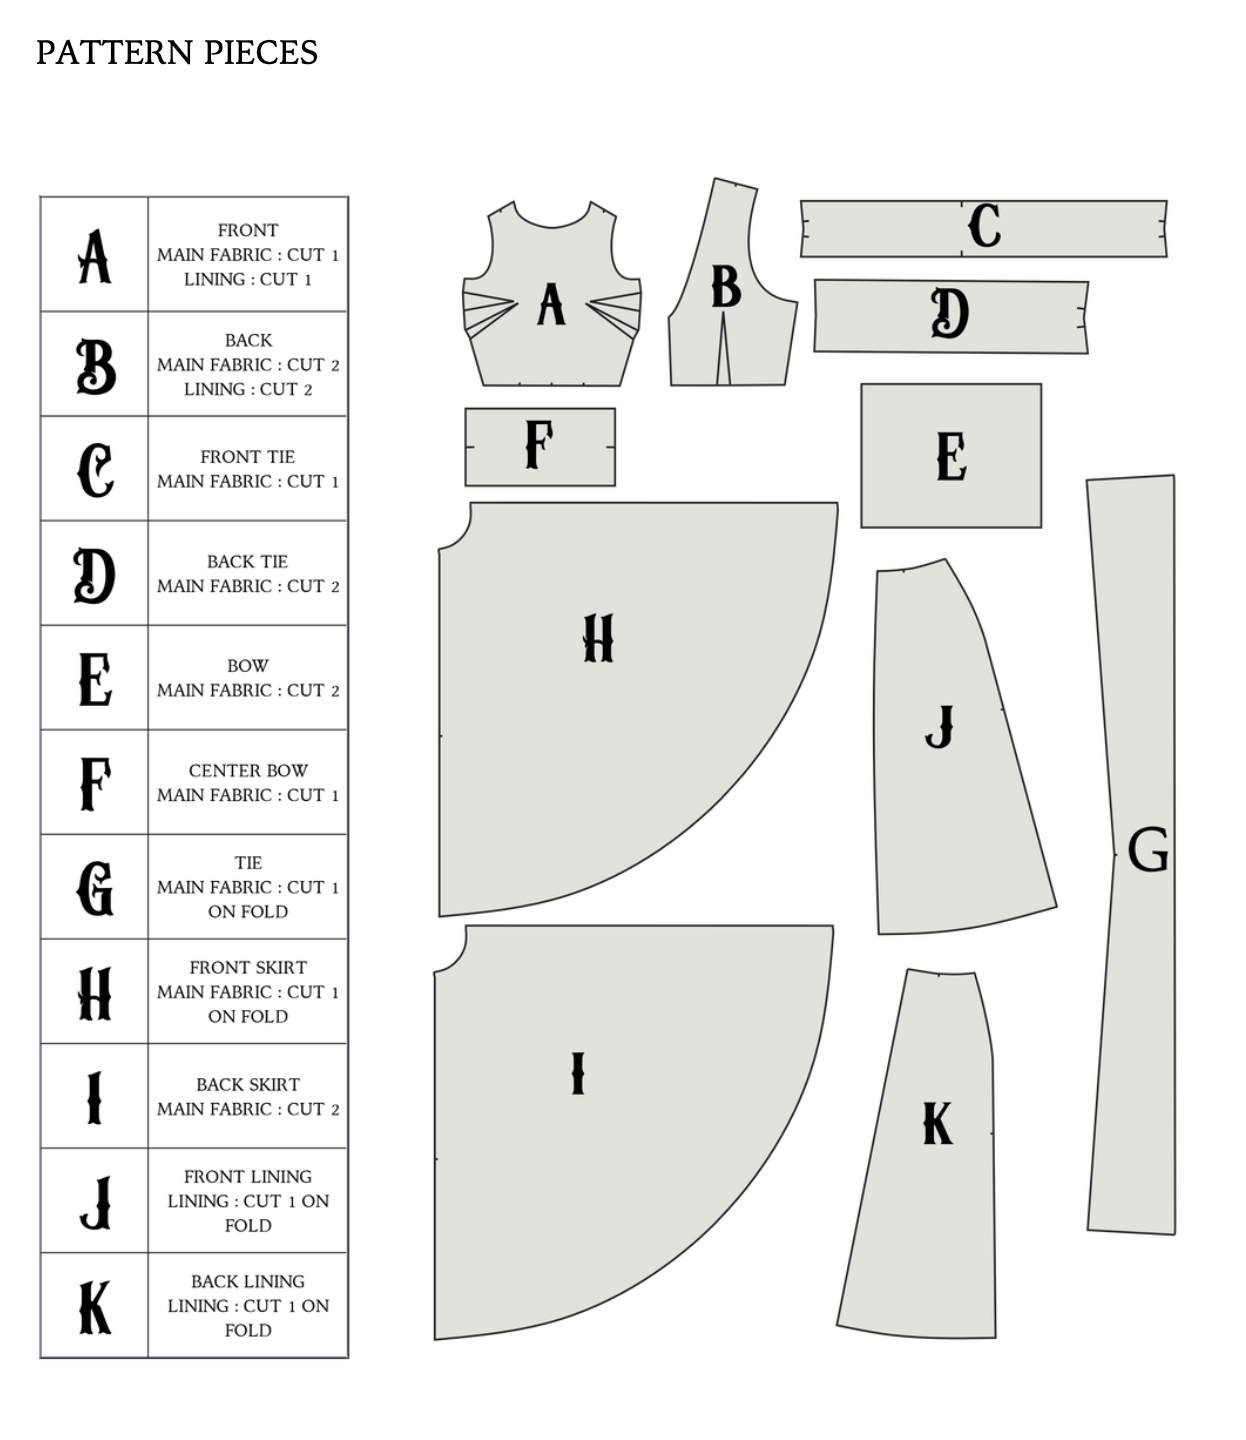
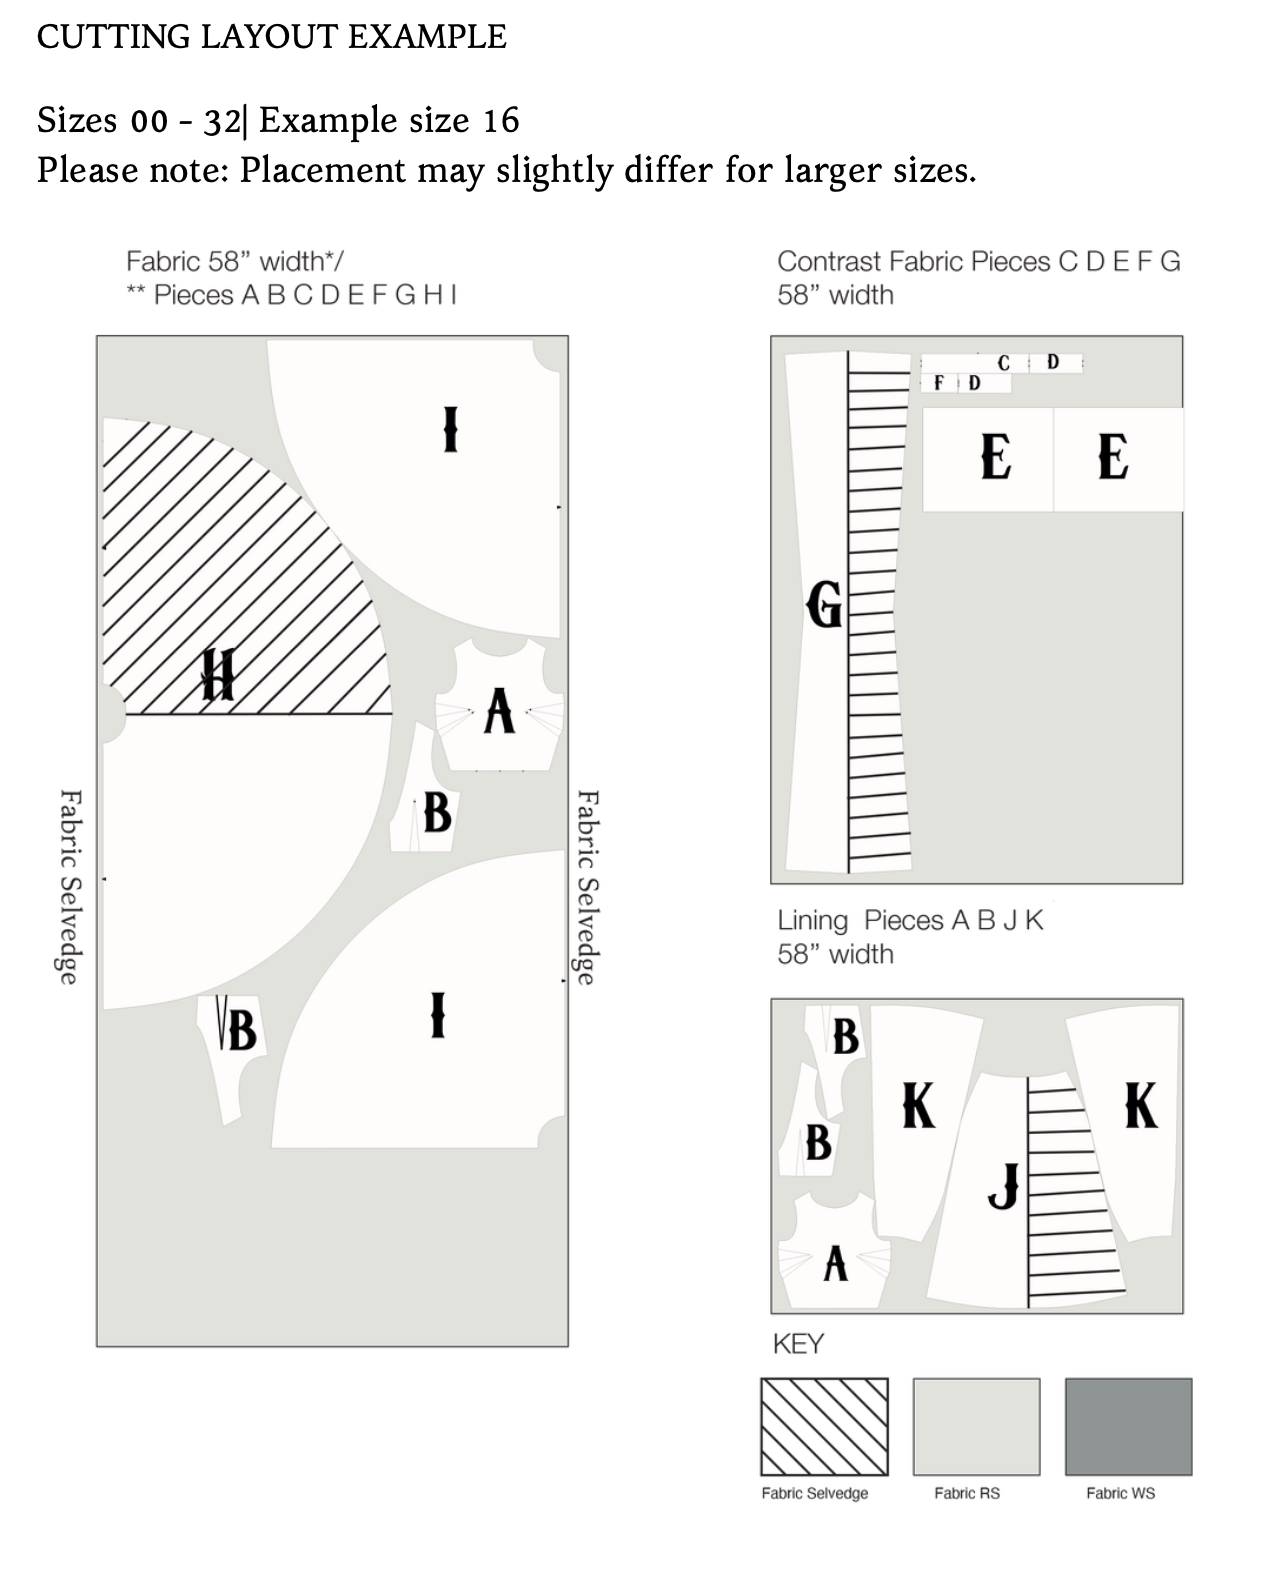
The Pattern will have all the notions and cutting layout you will need in the provided PDF files.
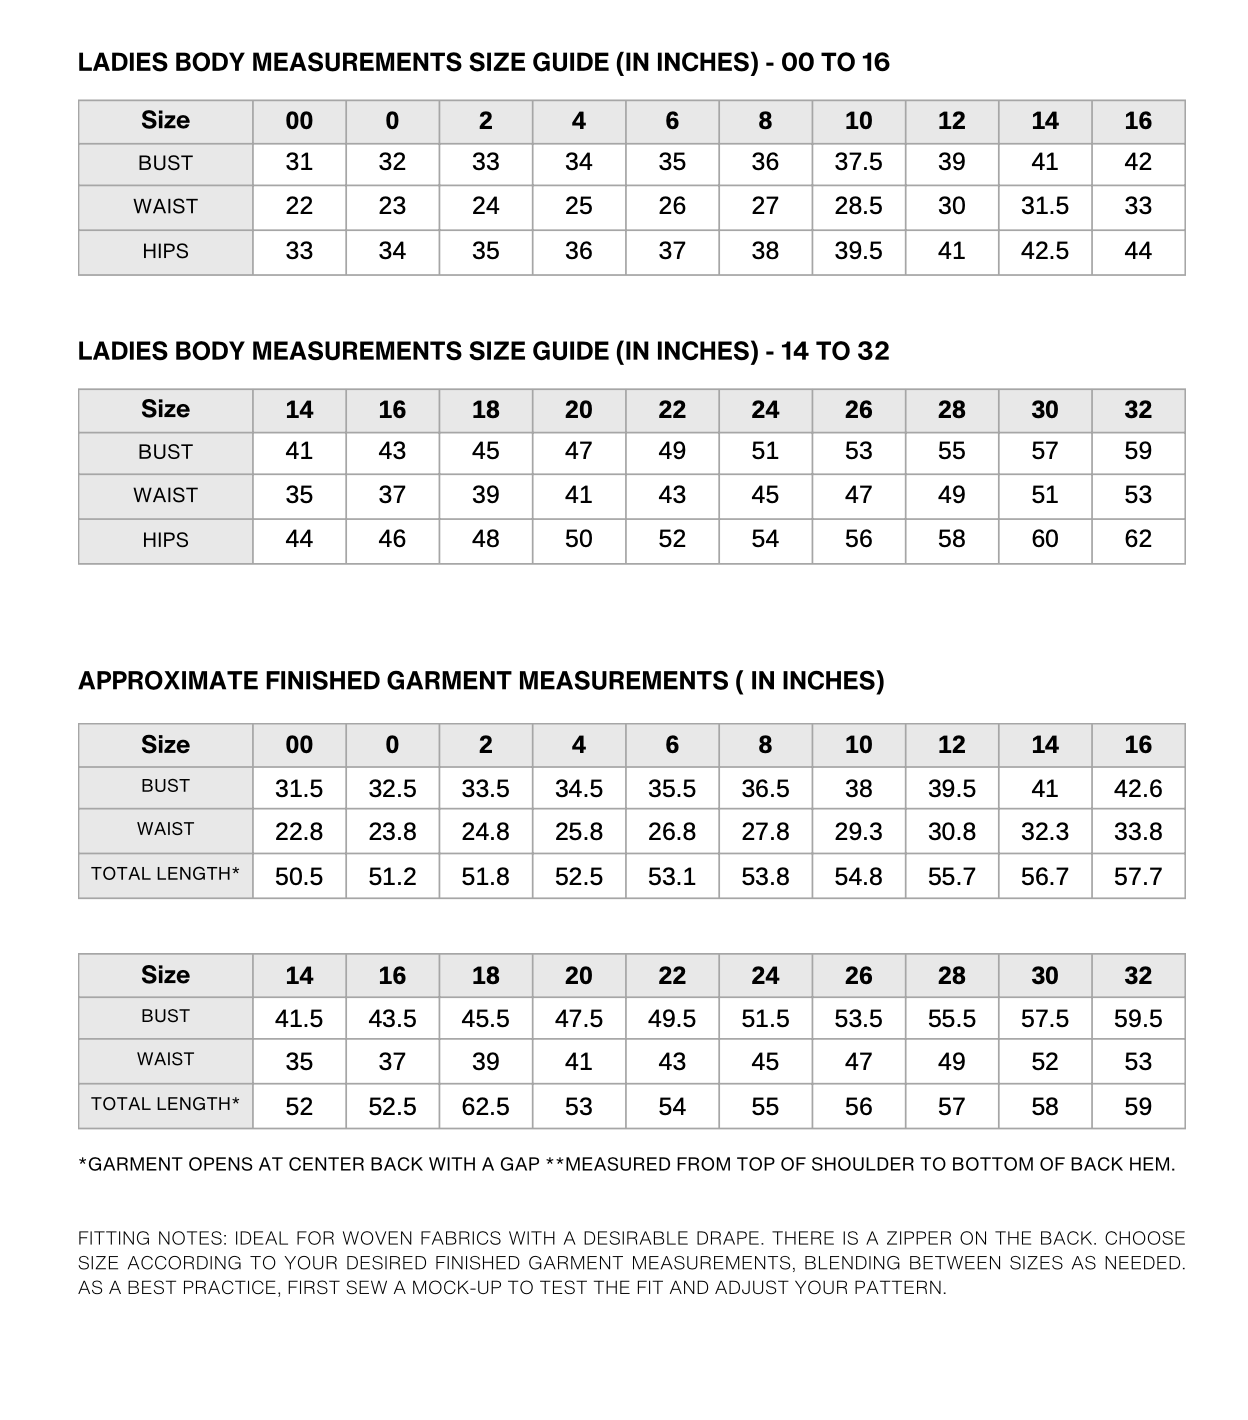
Size Charts, and Finished Garment Measurements
Yardage/ Fabric Consumption