The Starcrossed Shirt Sewing Pattern Guide
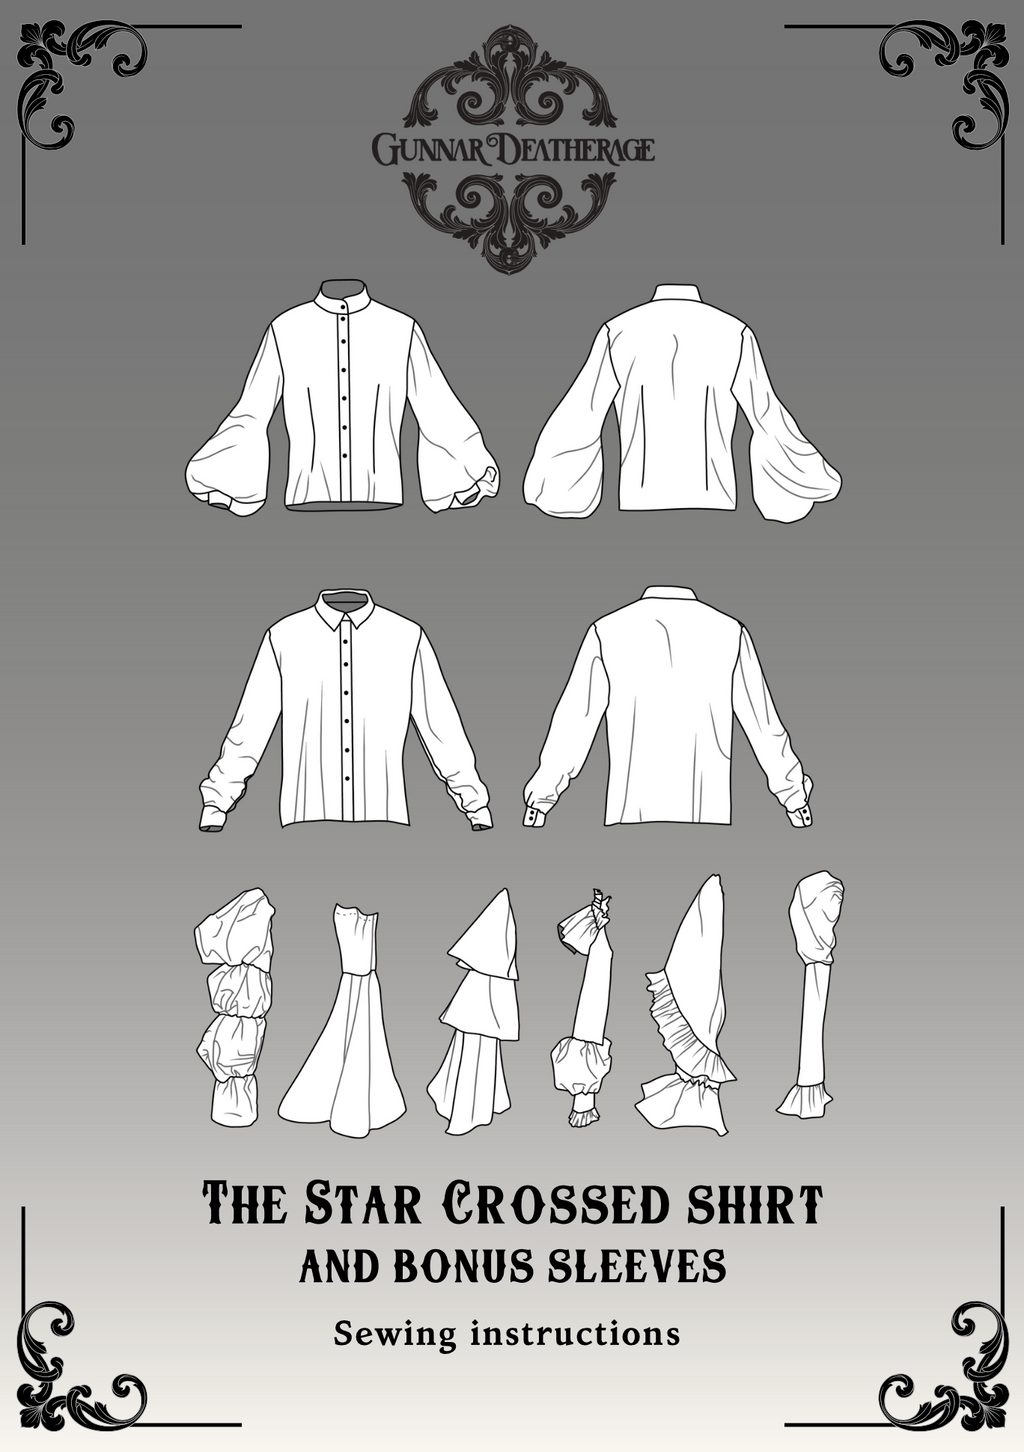
This versatile shirt pattern offers endless customization options to suit your style. With two collar choices—a classic collar with a collar stand and a sleek mandarin collar—you can create looks that range from traditional to contemporary. The pattern also features a pack of eight unique sleeve designs, including both timeless styles and bold, dramatic flares, giving you the freedom to mix and match.
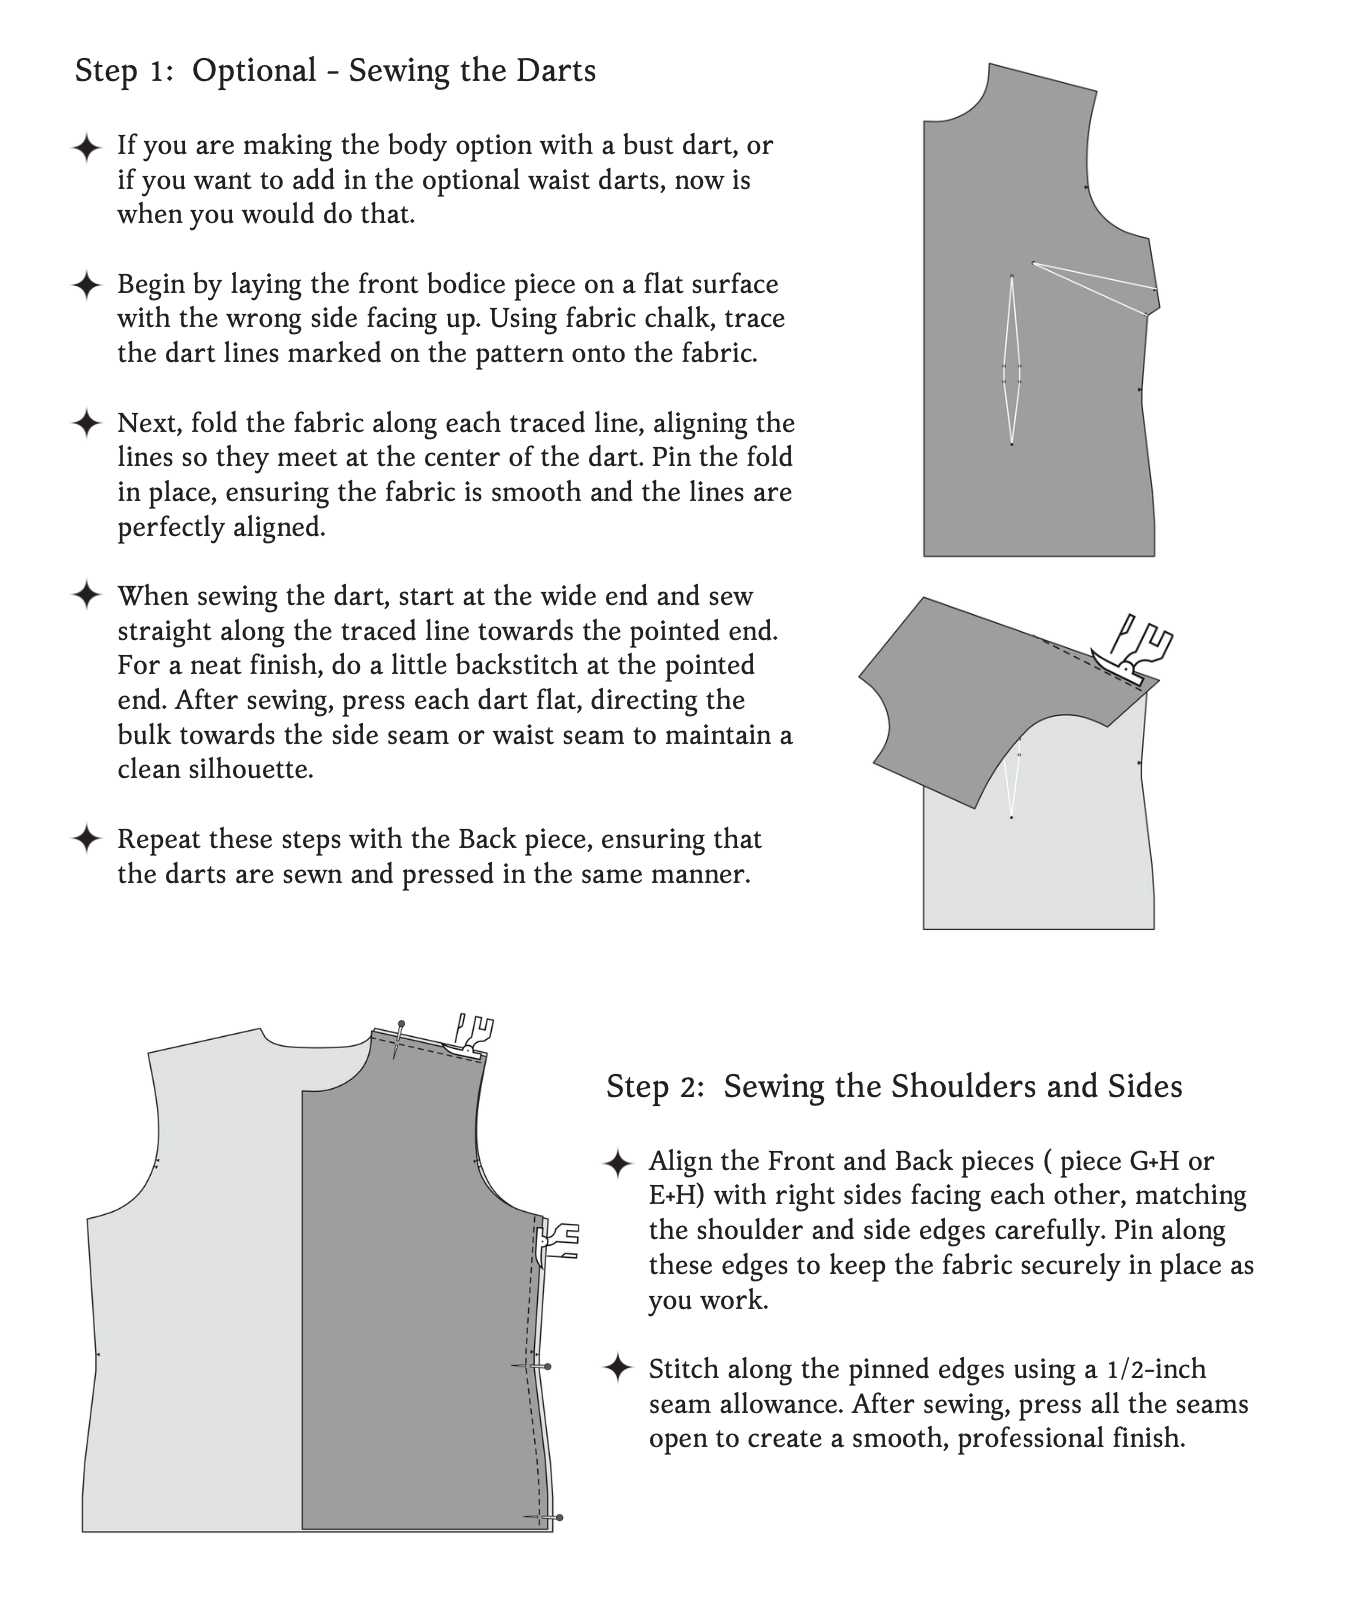
For the body, you can choose between a straight, classic silhouette or opt for added shaping with optional waist darts. We’ve also included a variation with bust darts for a more tailored fit around the chest. Whether you're going for a relaxed or fitted look, the Star Crossed Shirt has you covered!
Before You Get Started
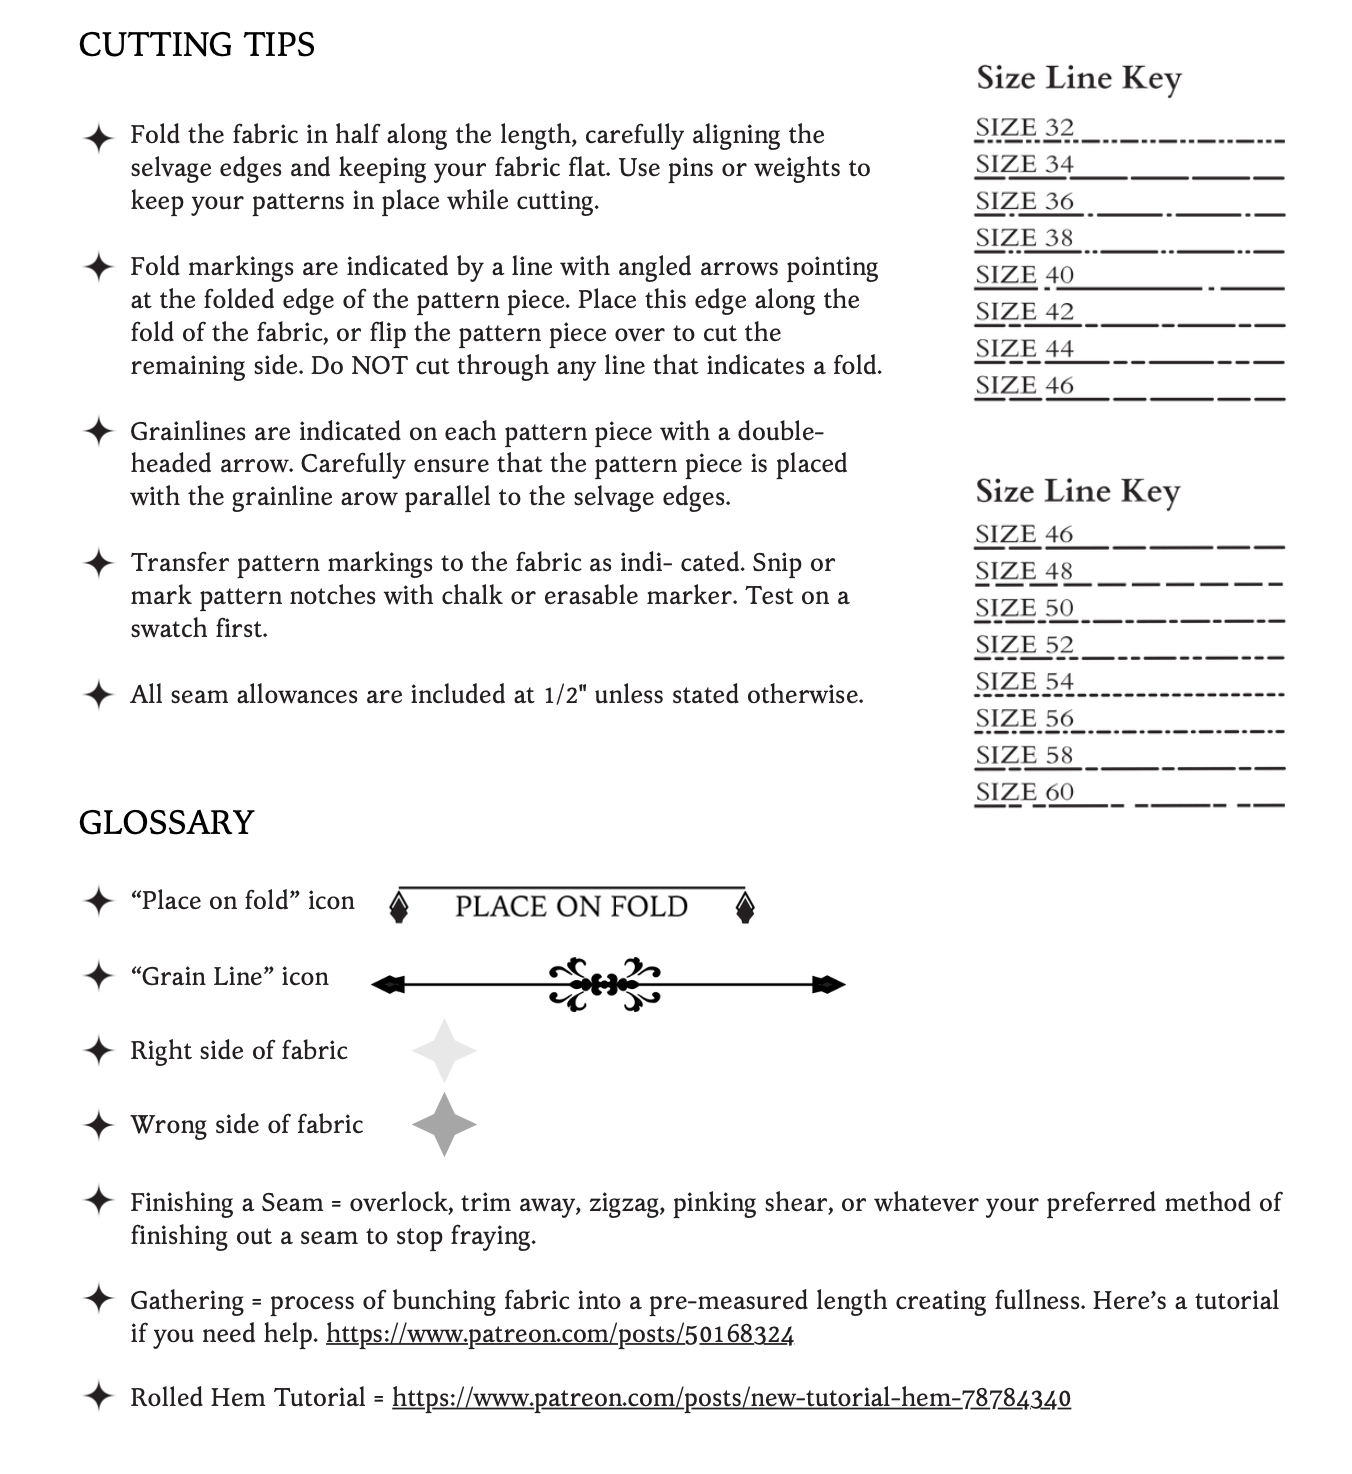
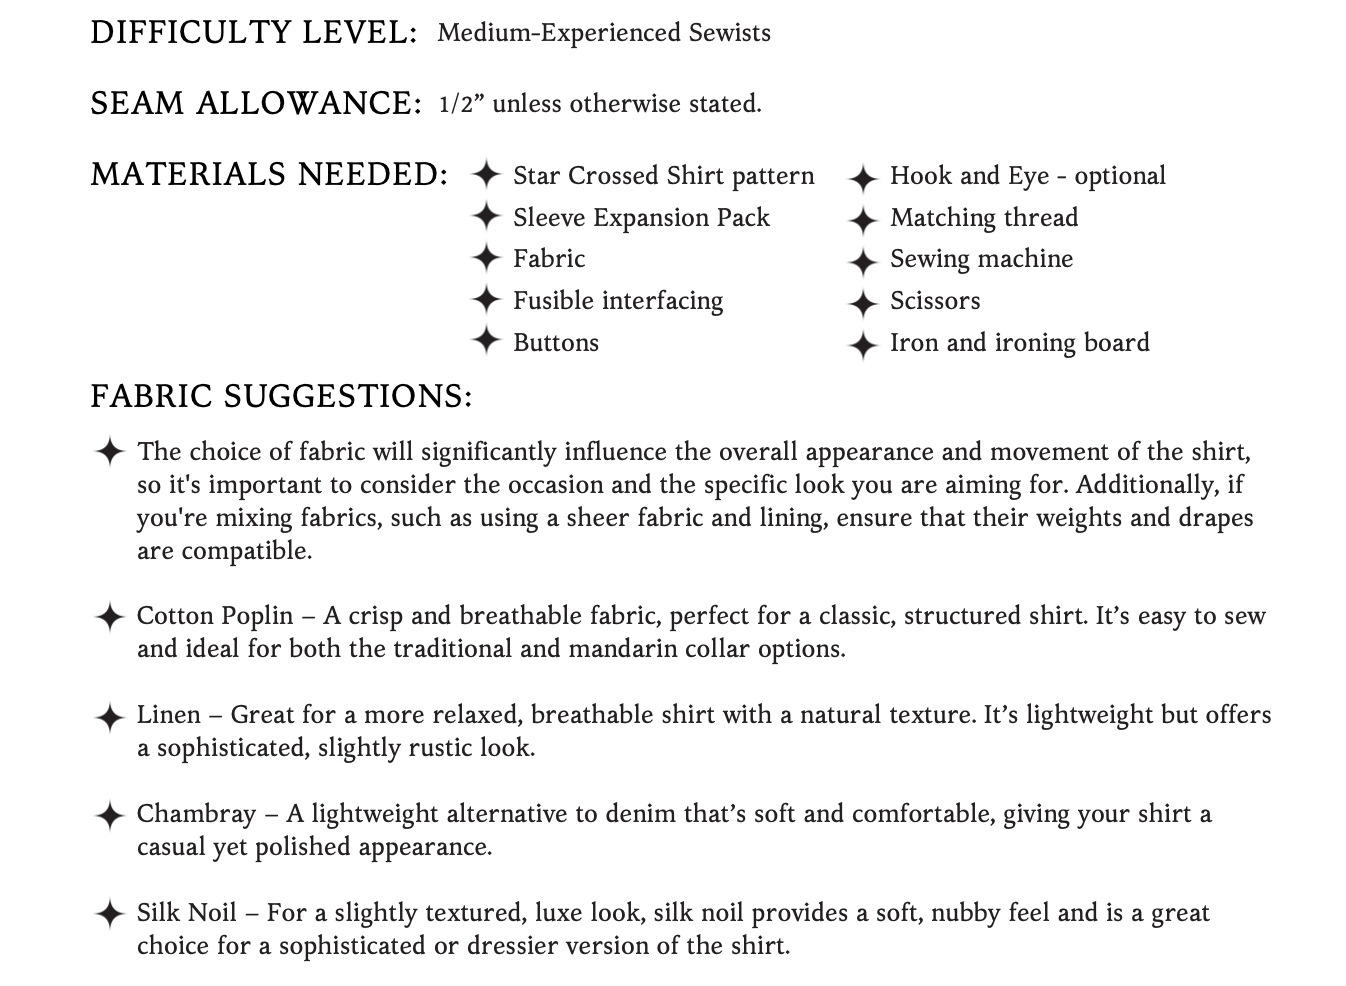
Please take note that the seam allowances on this pattern are 1/2” unless otherwise stated.
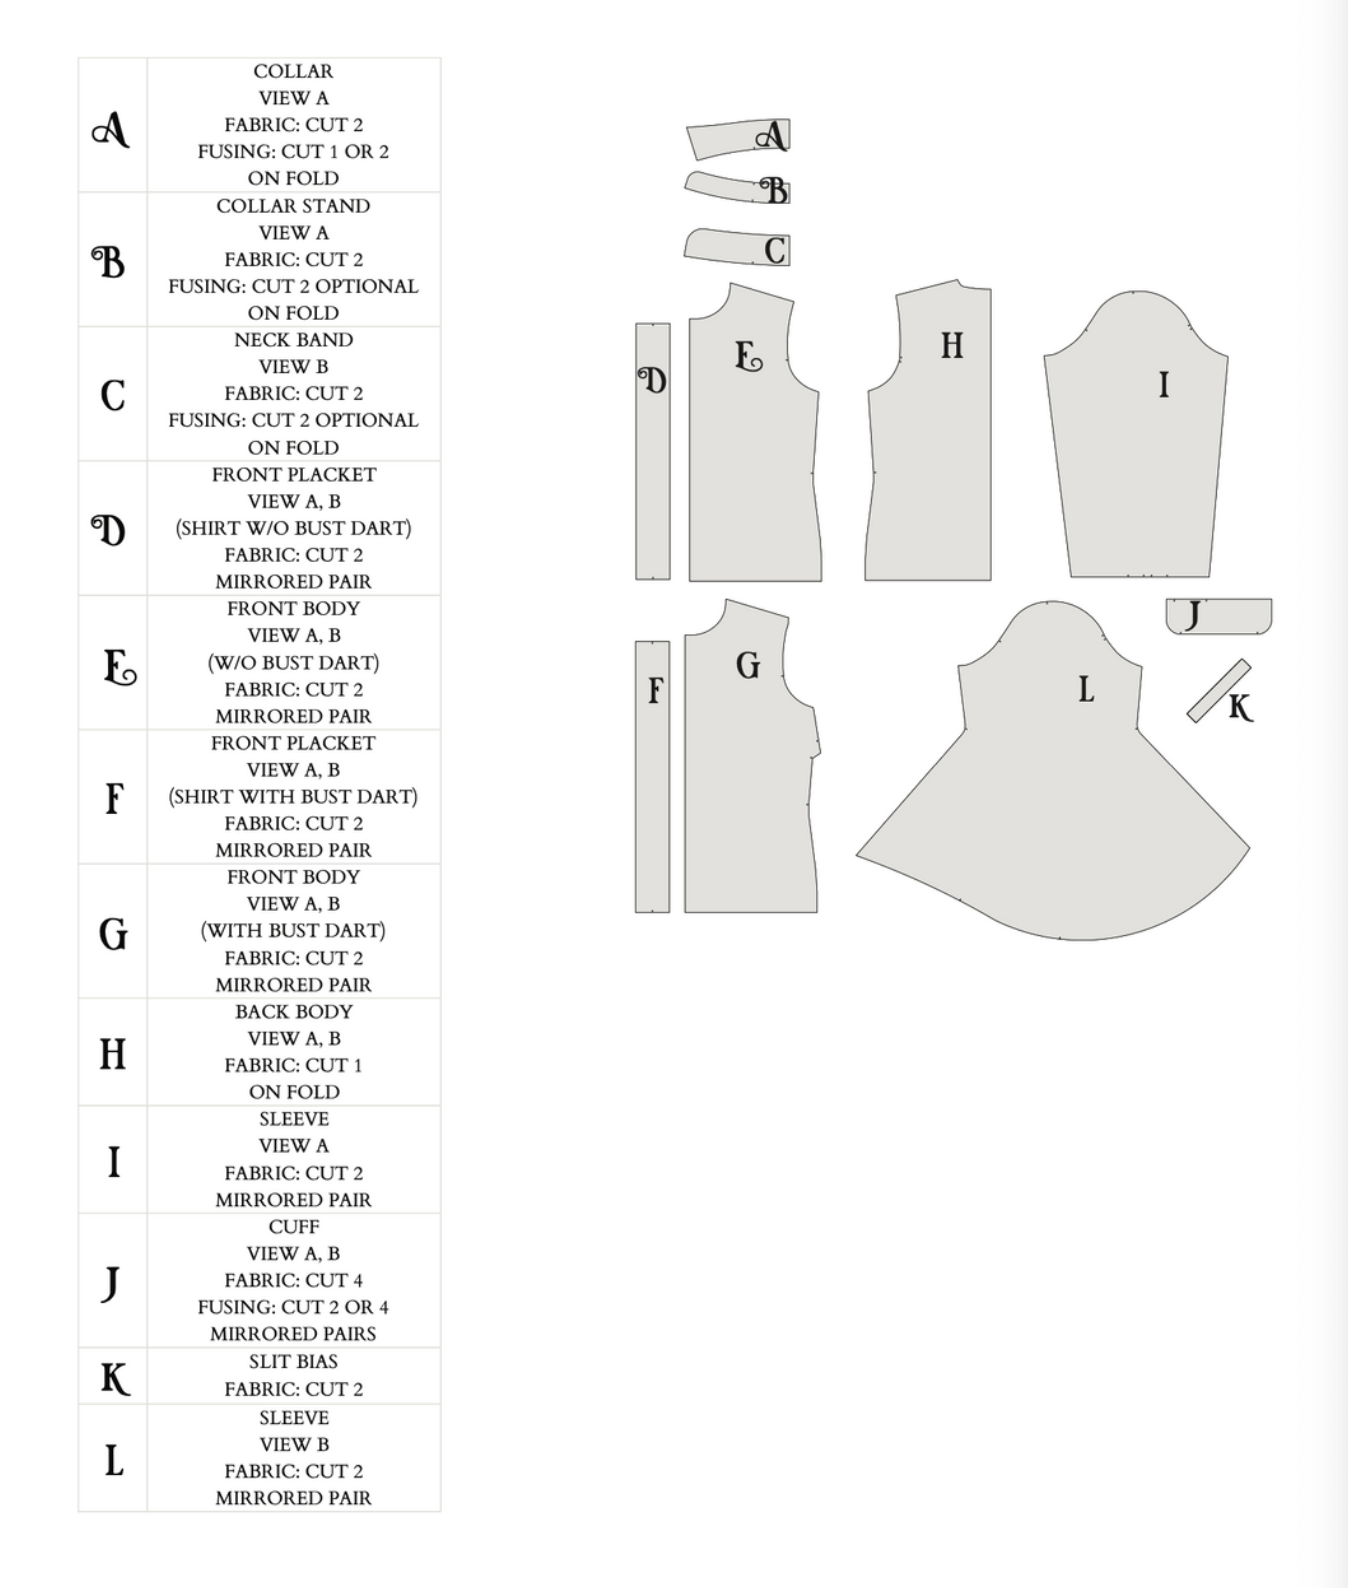
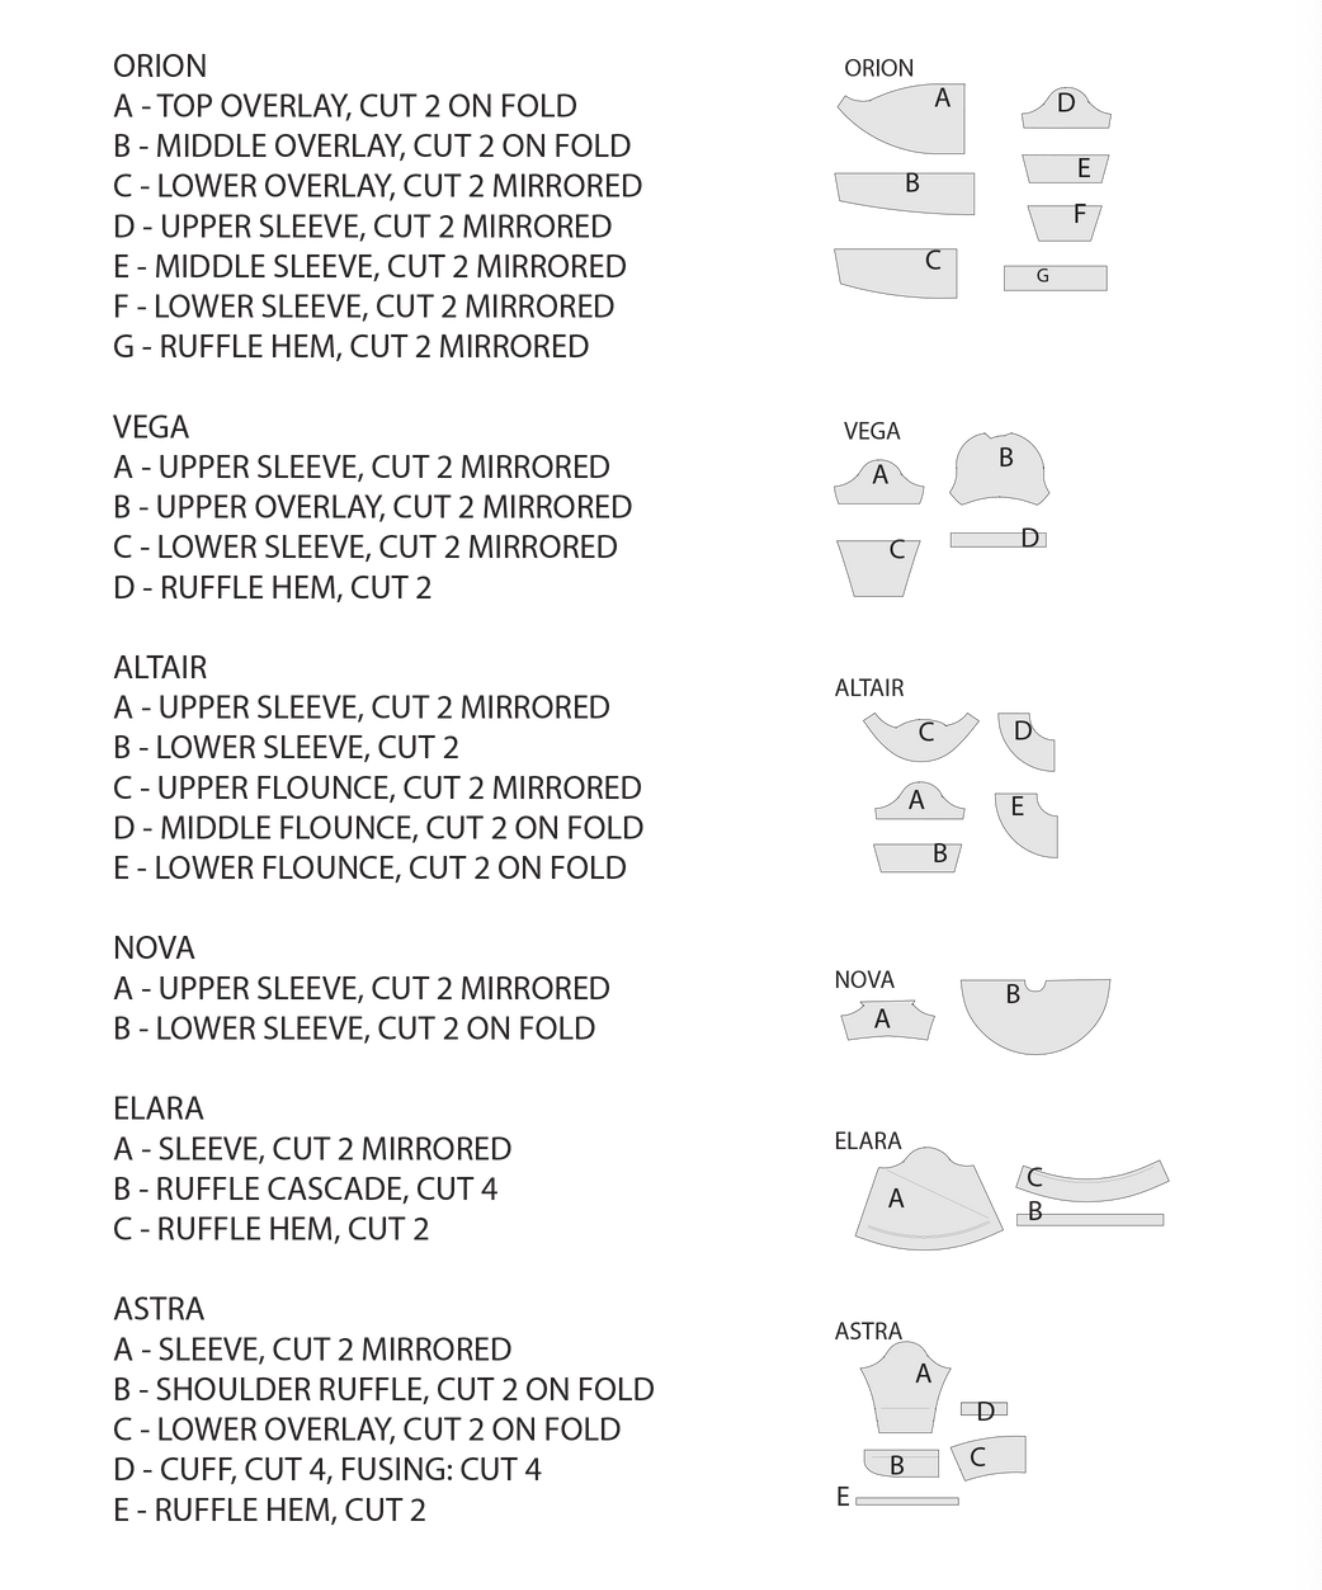
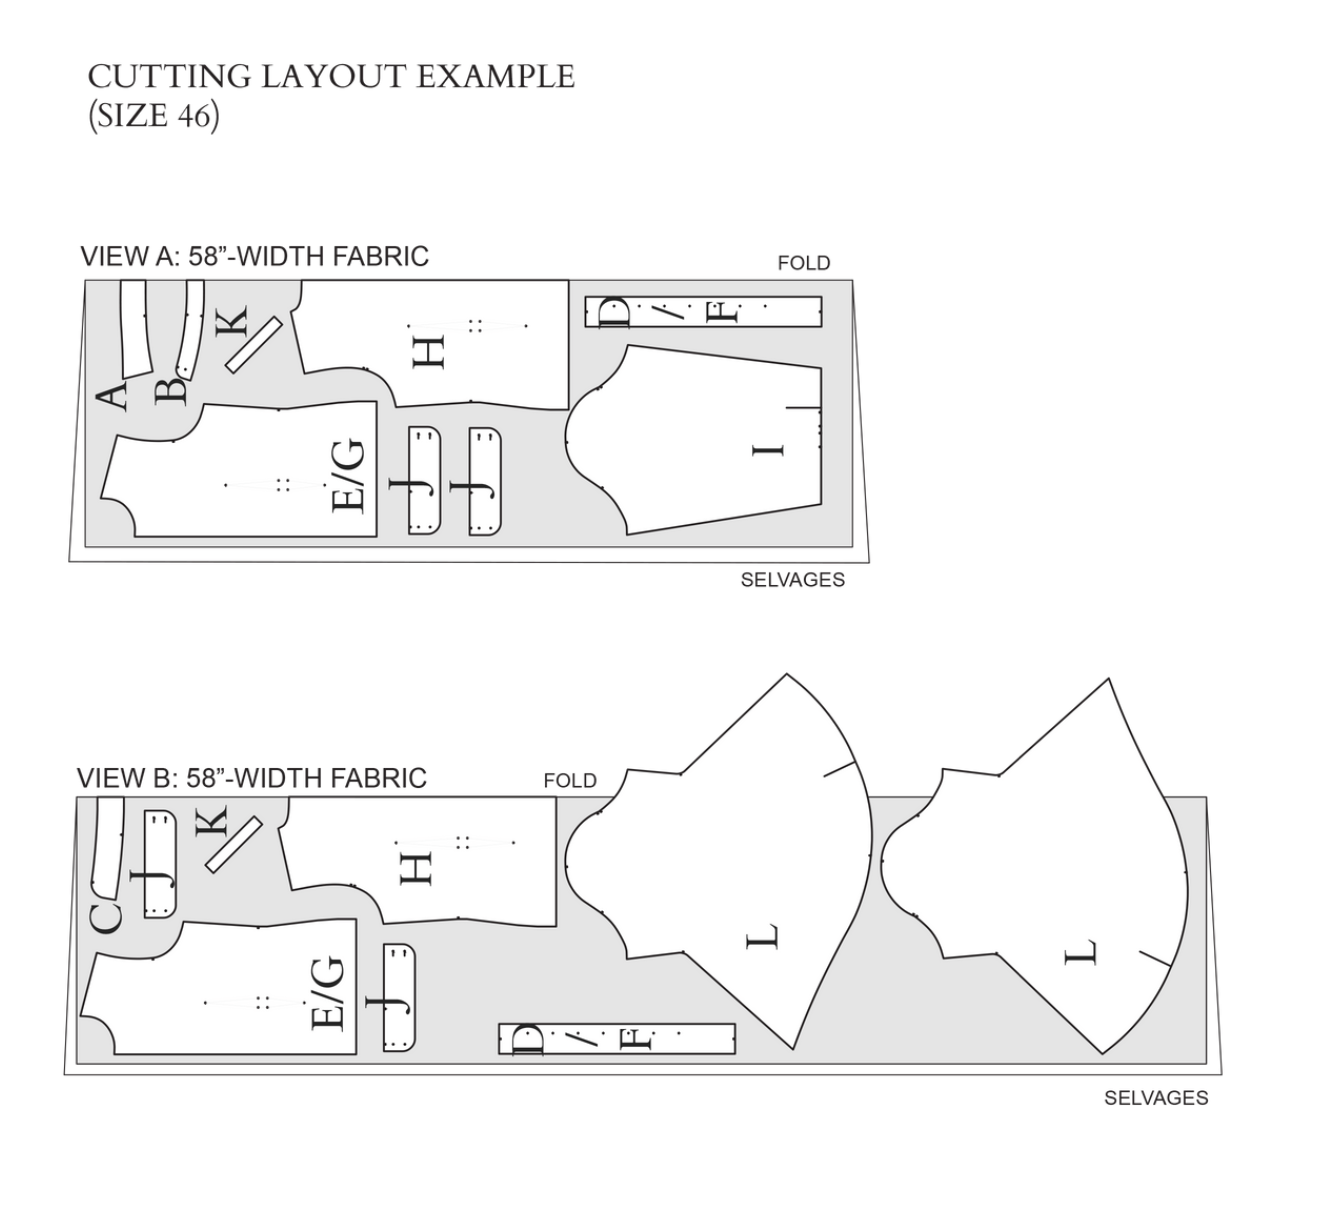
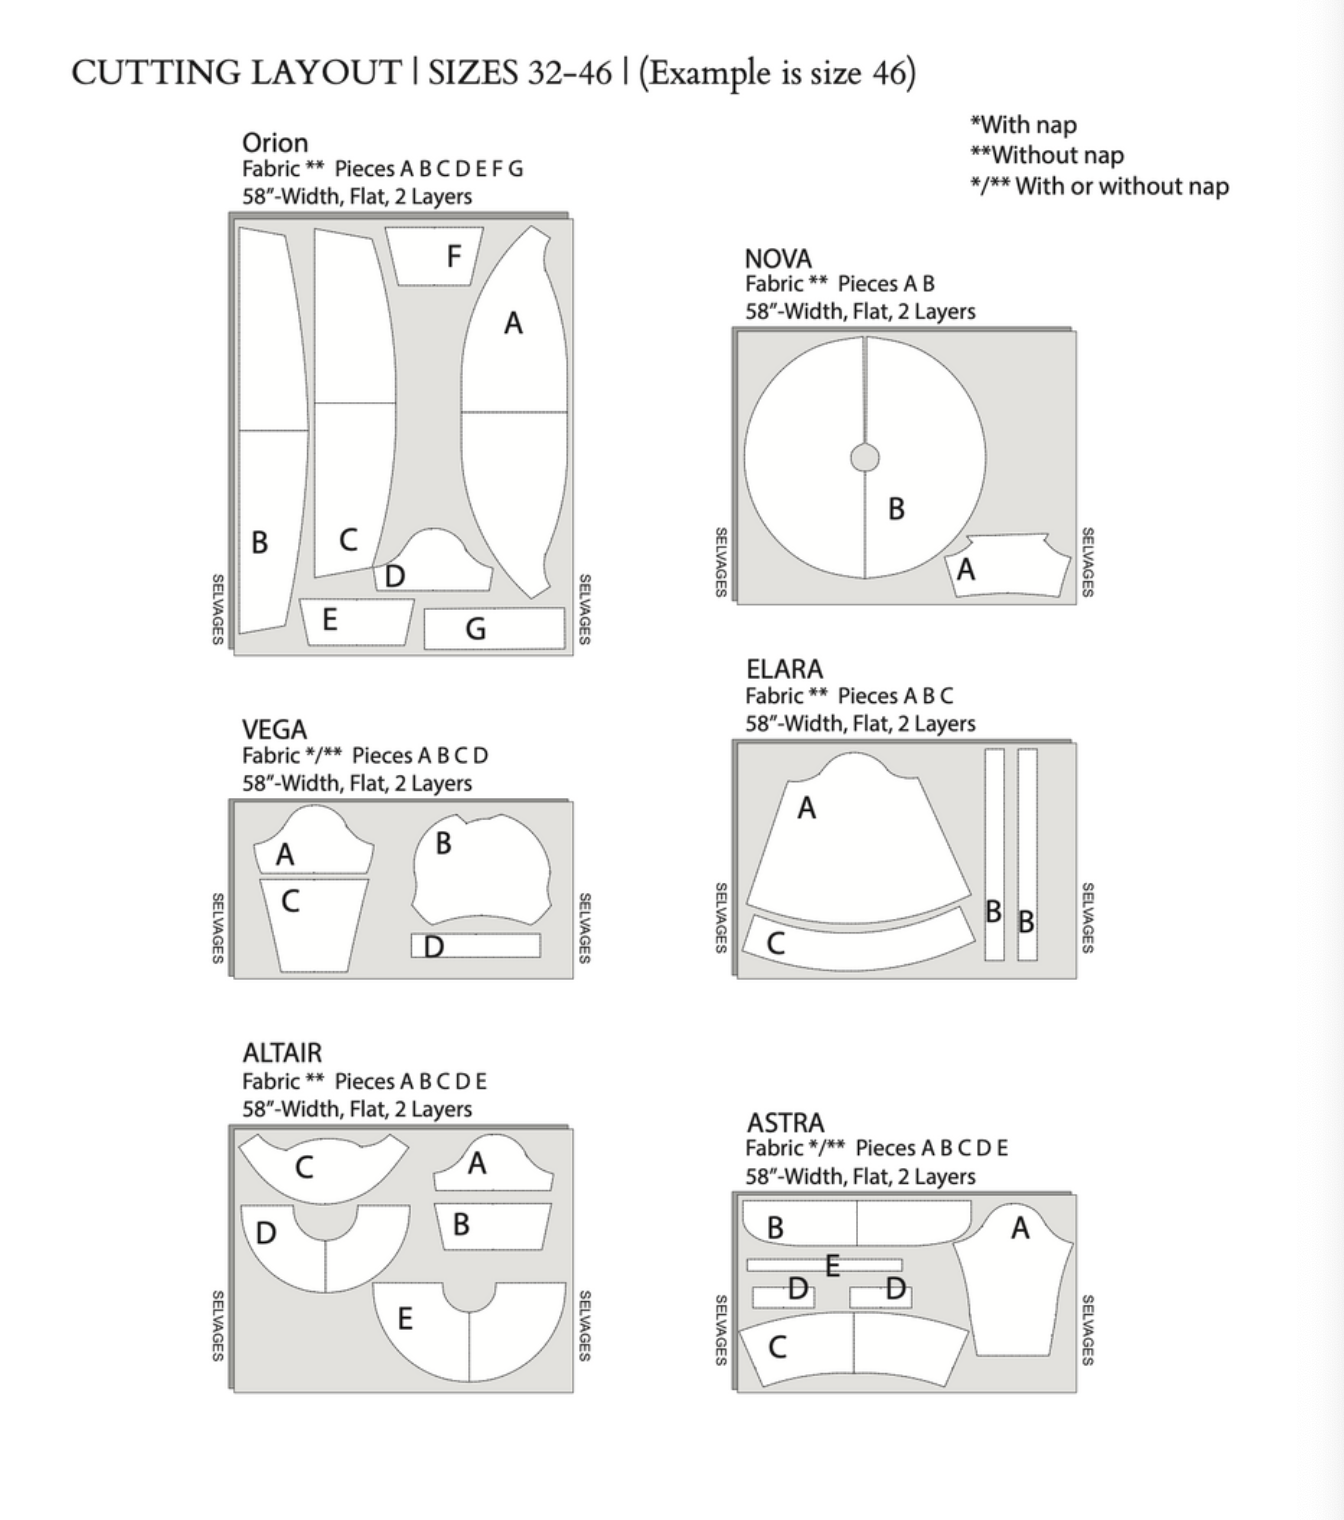
The Pattern will have all the notions and cutting layout you will need in the provided PDF files.
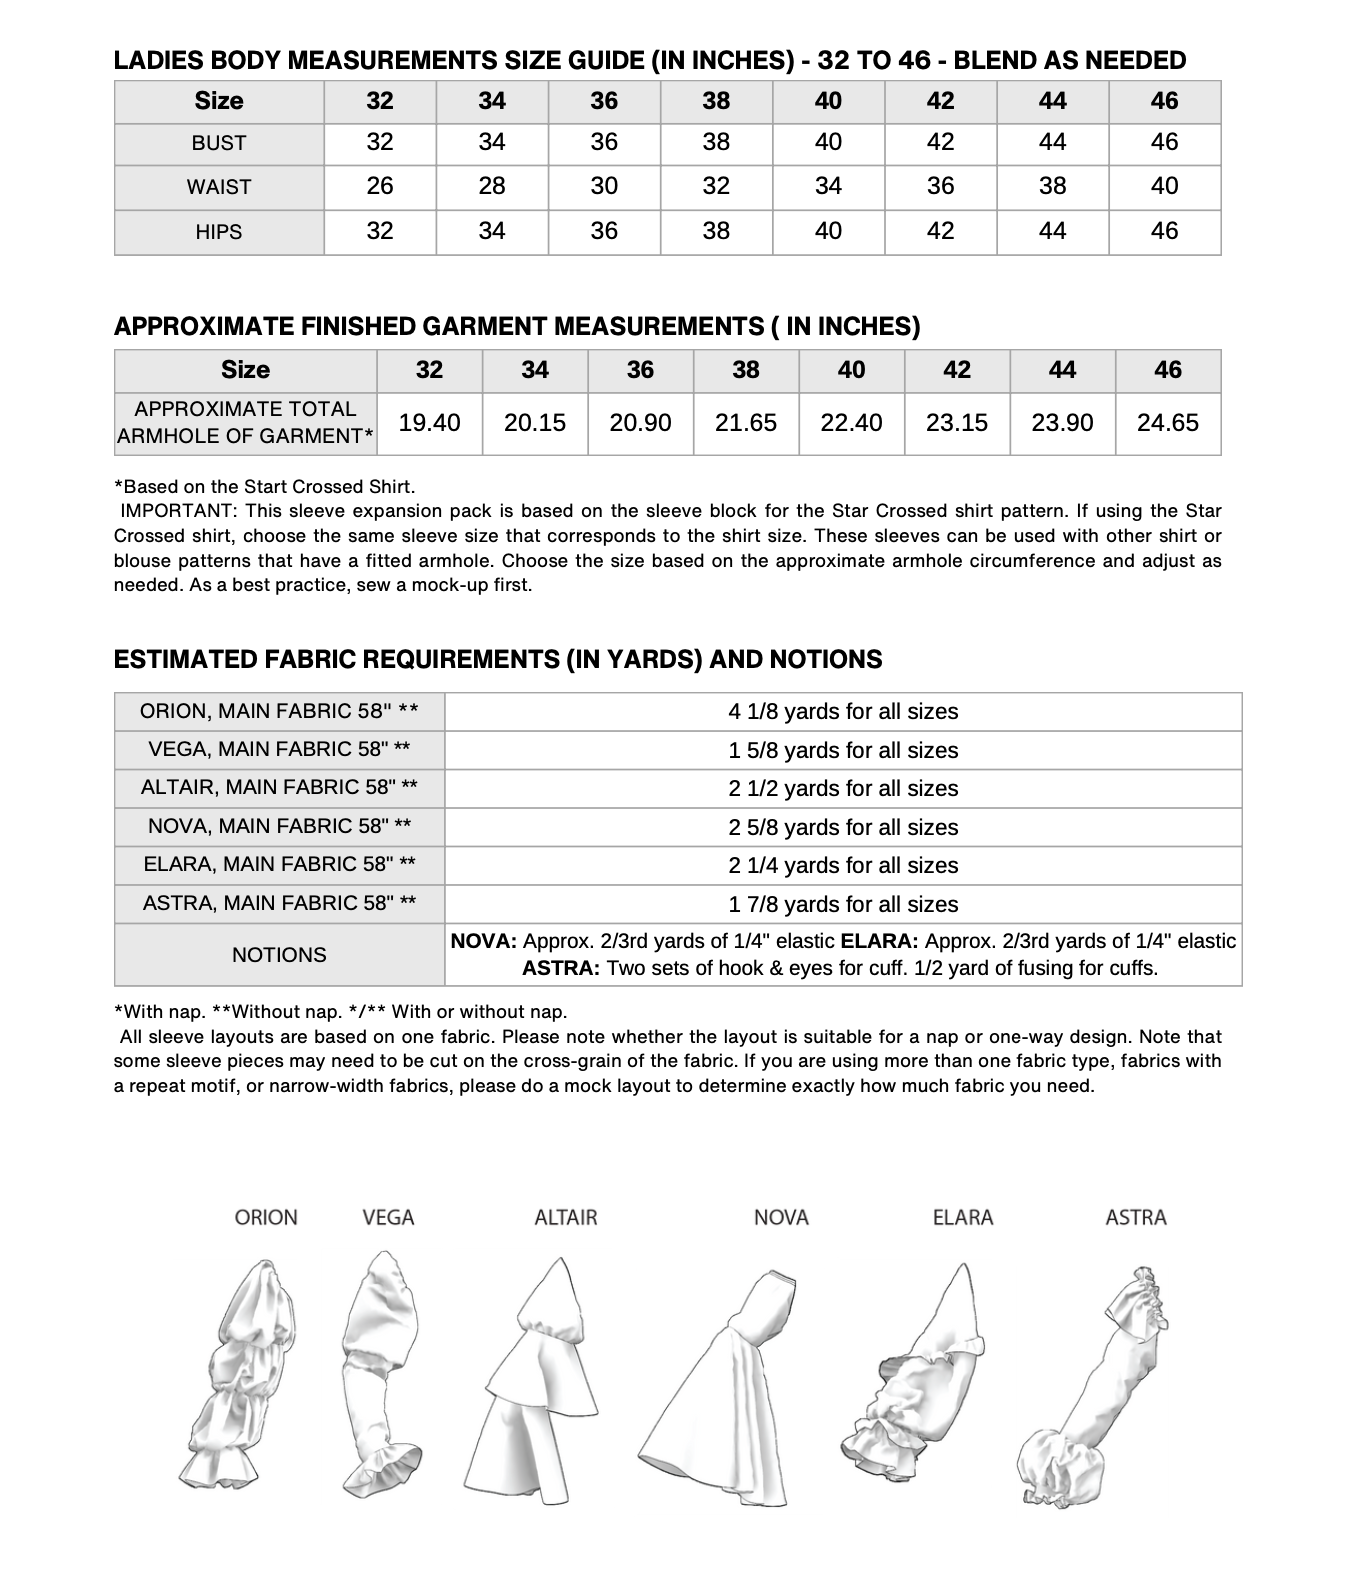
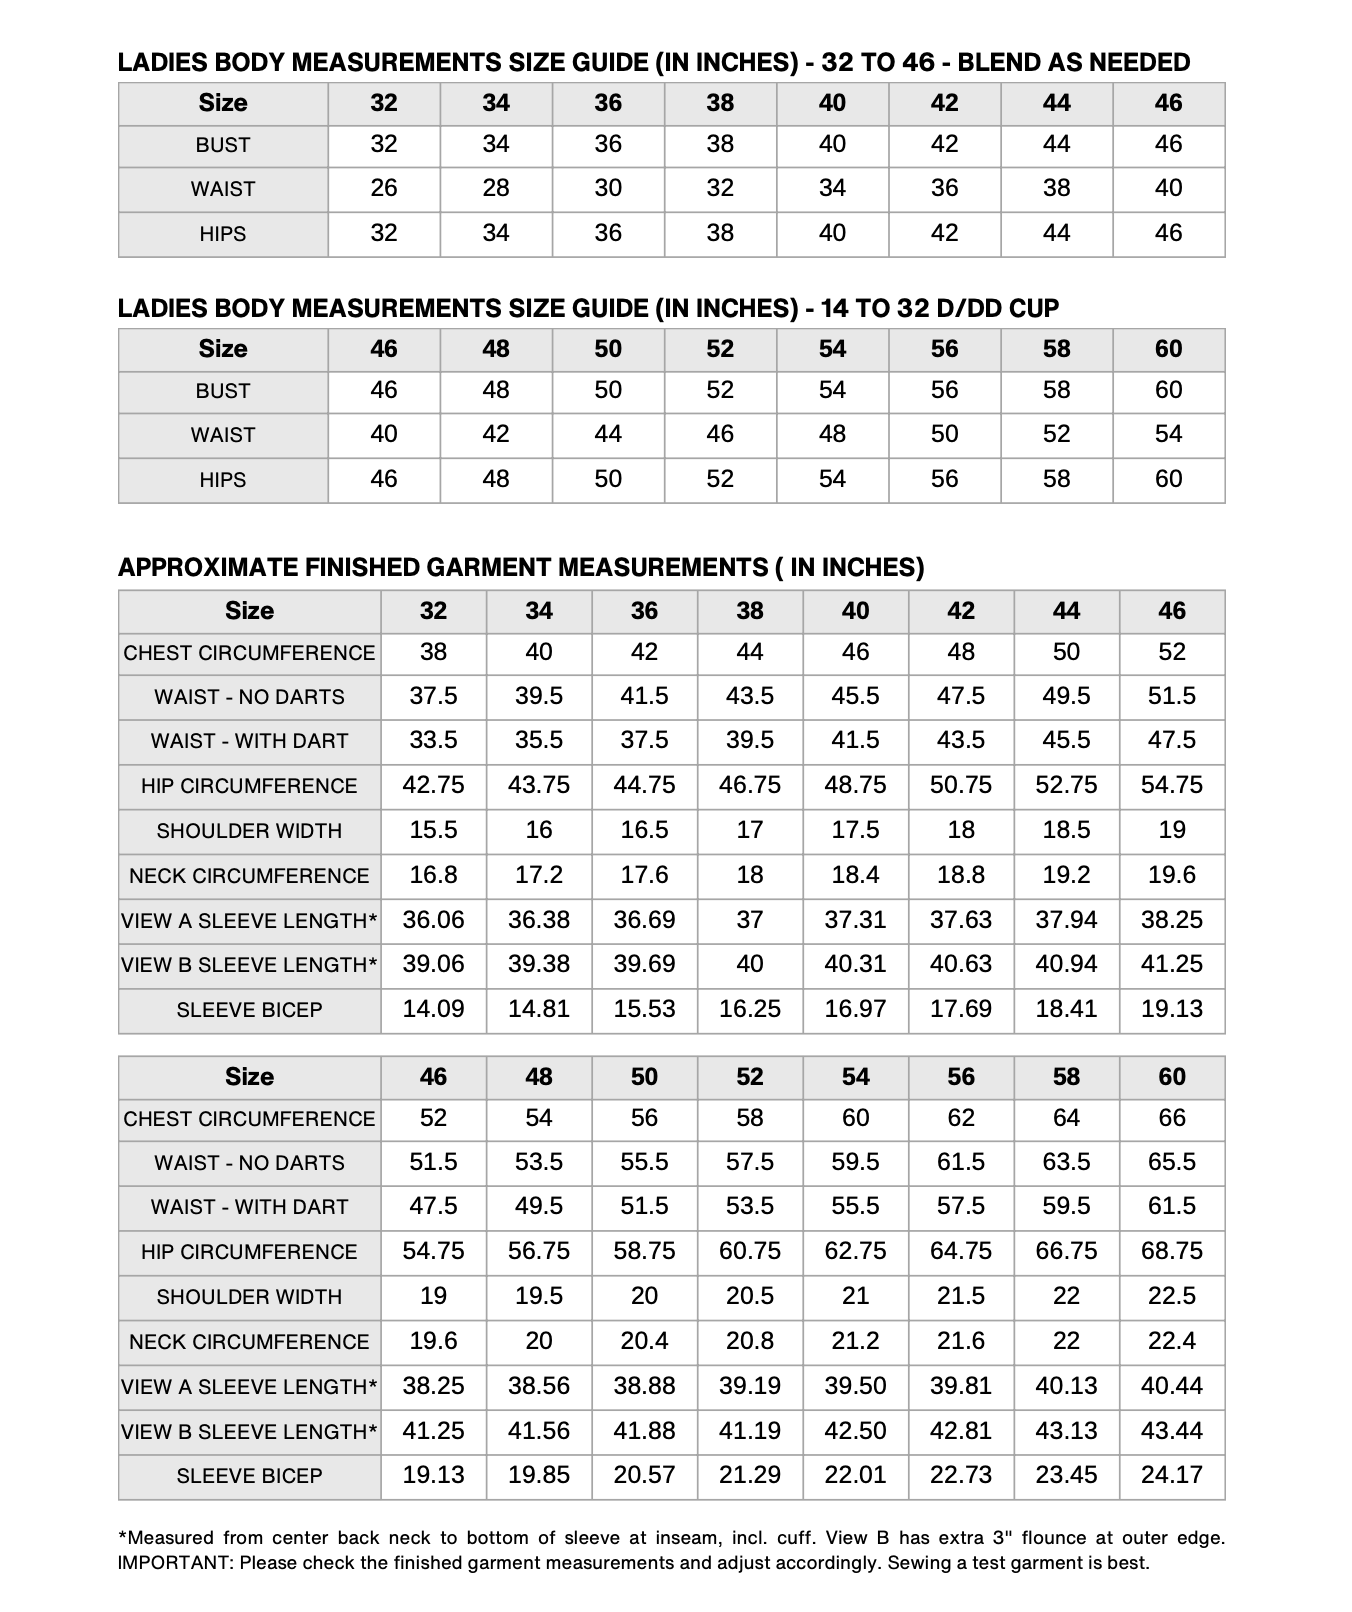
Size Charts, and Finished Garment Measurements
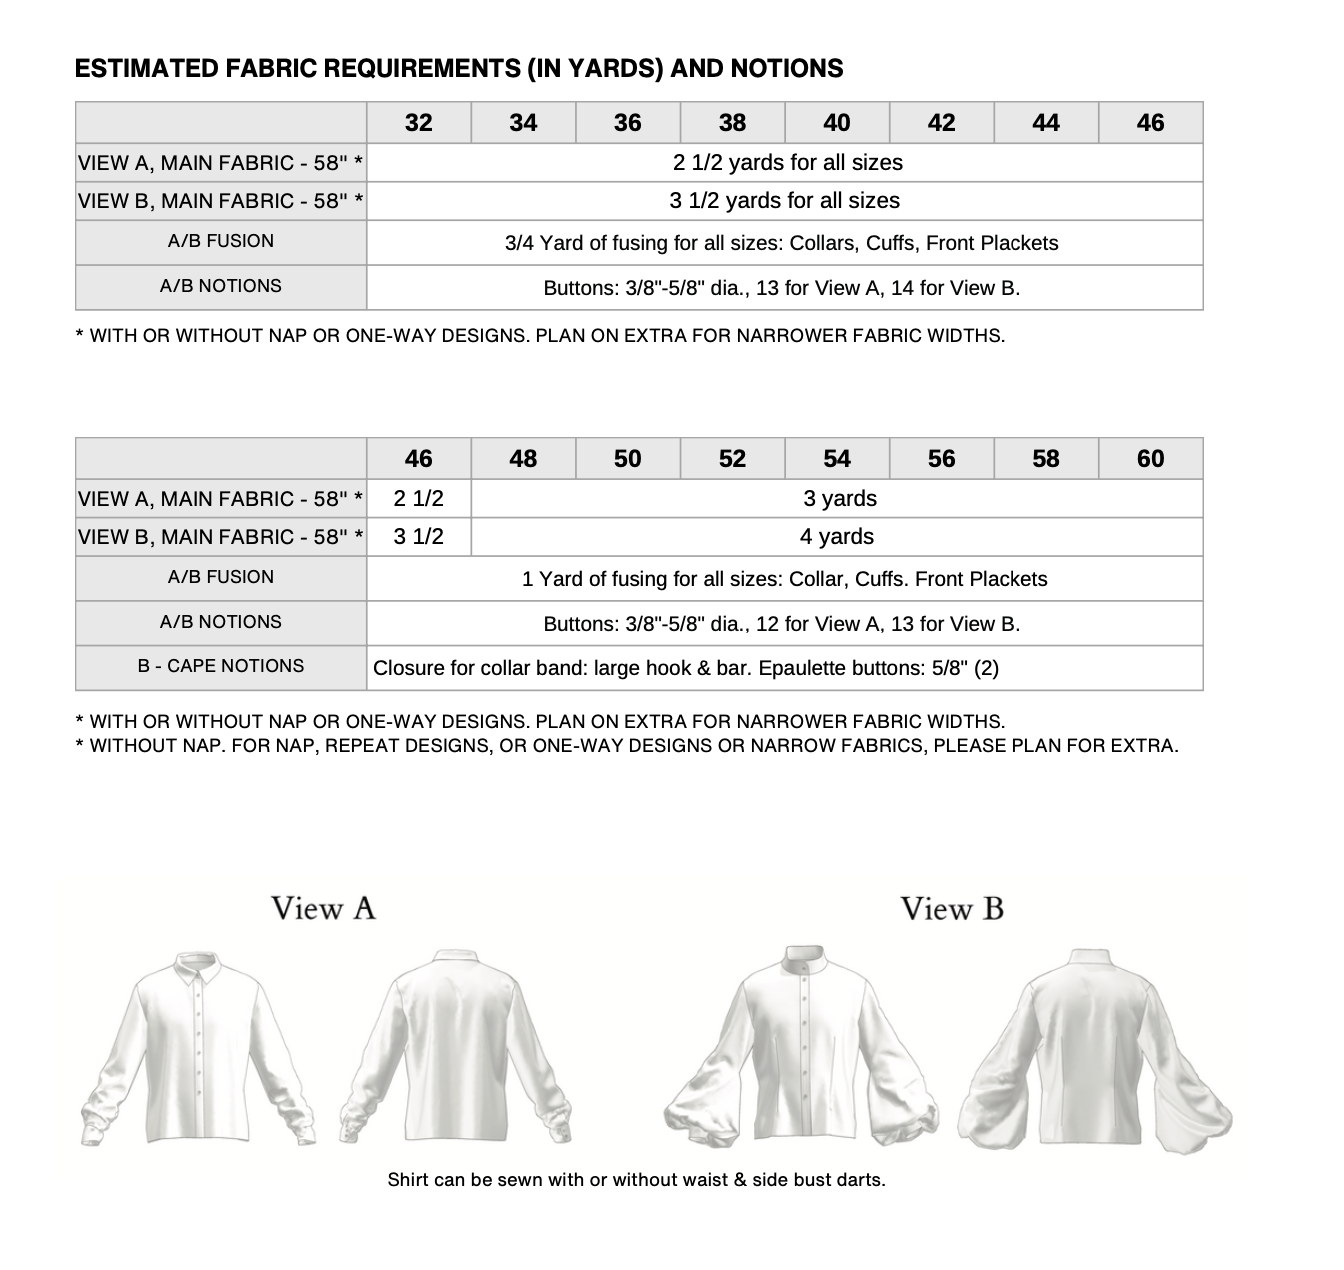
Yardage/ Fabric Consumption