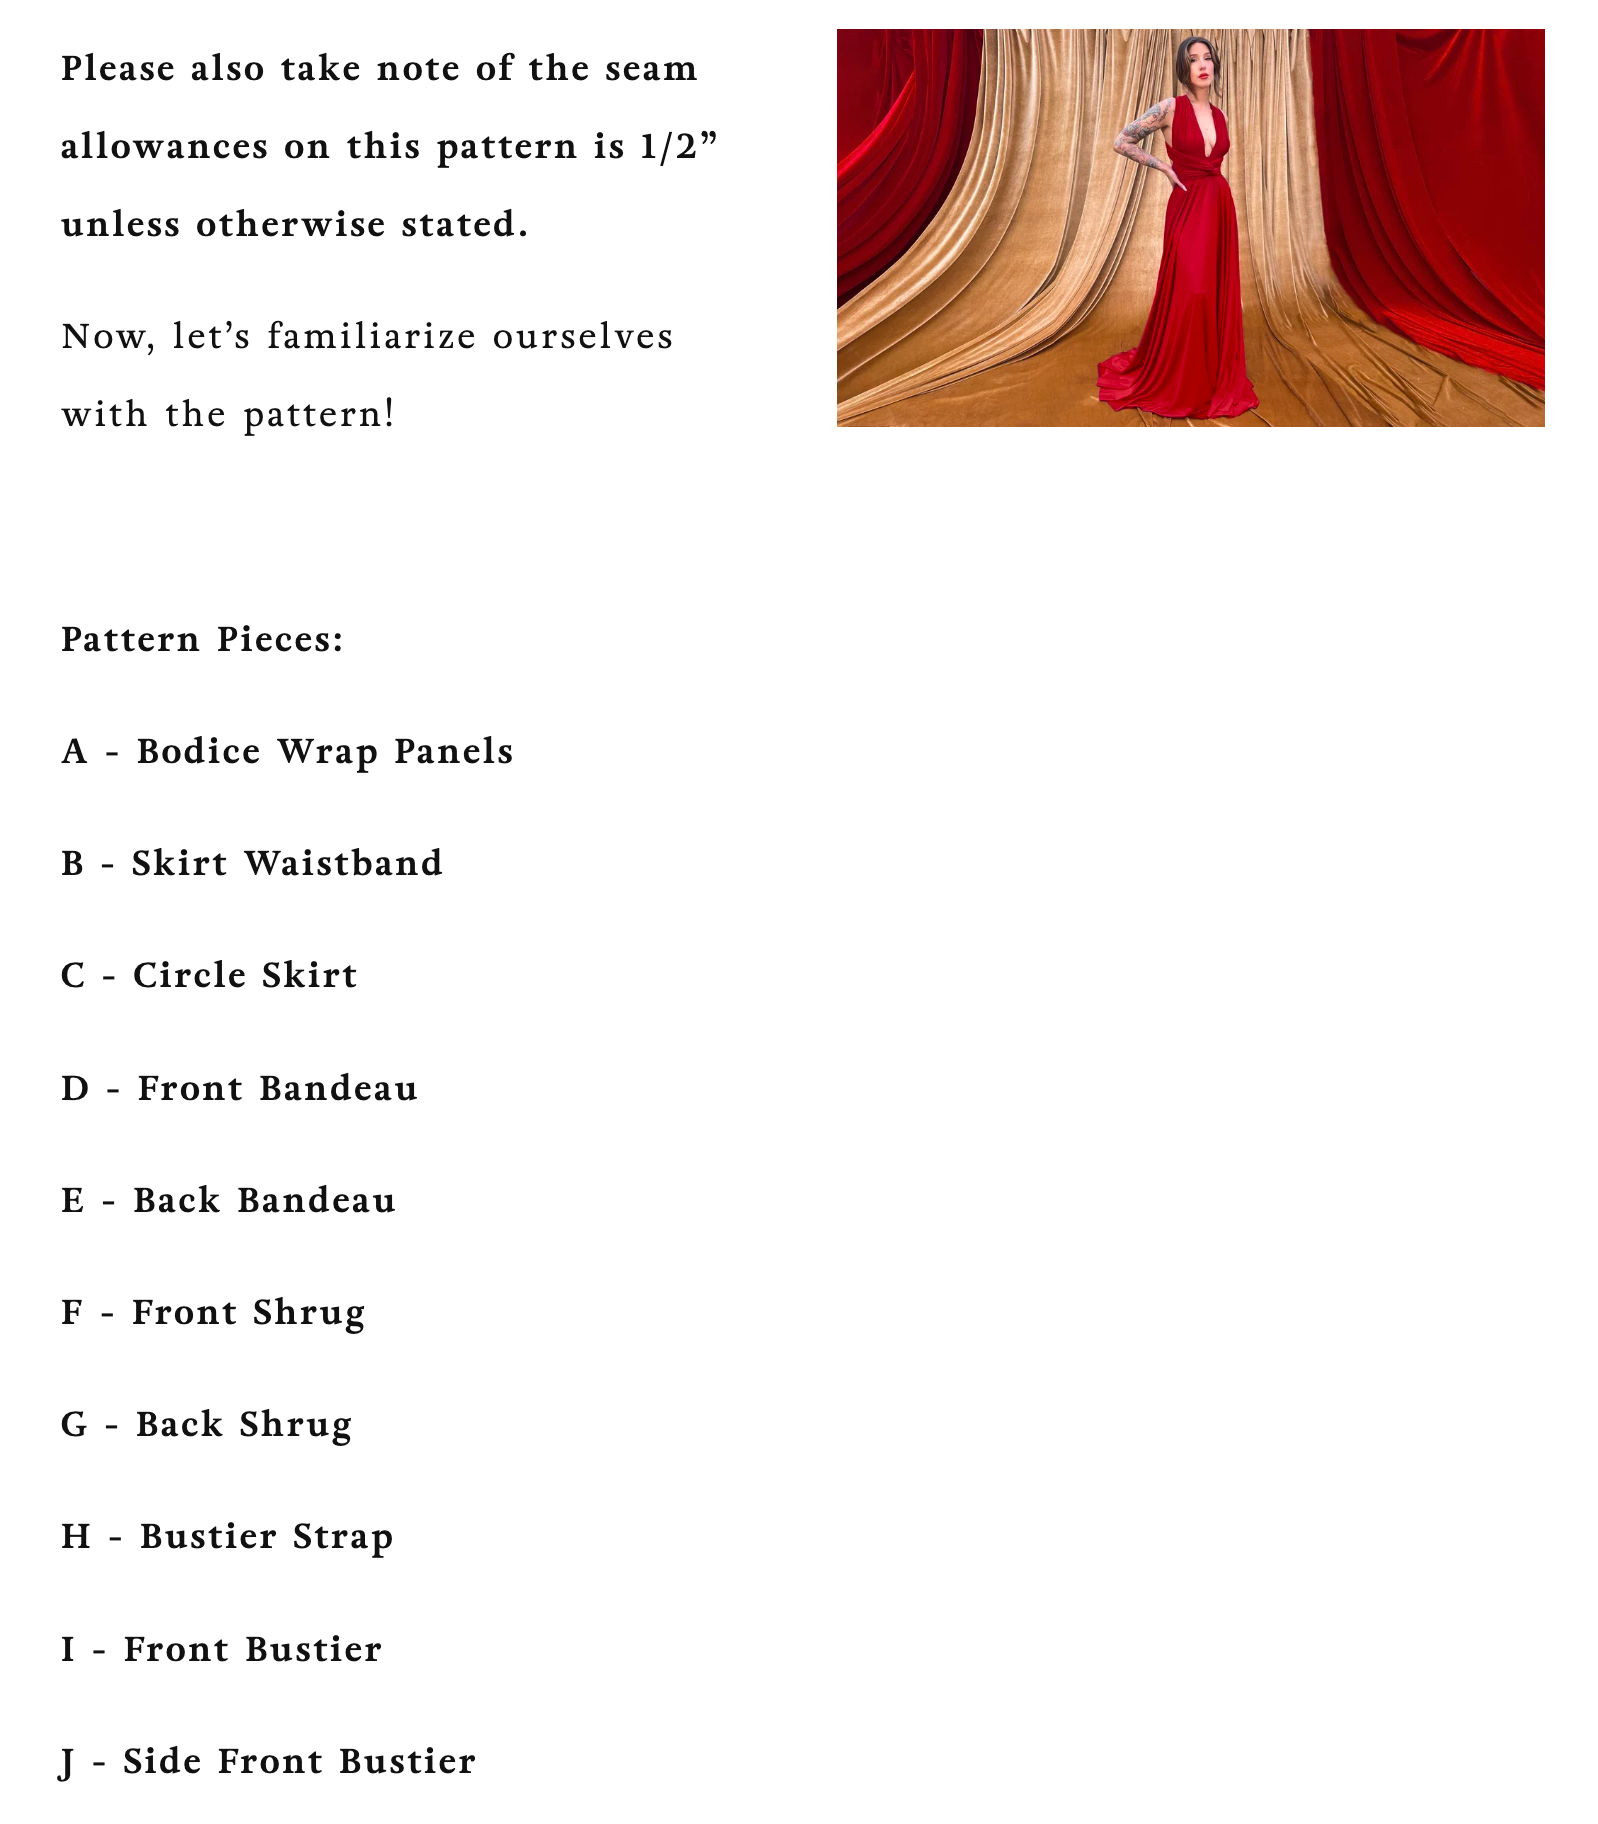
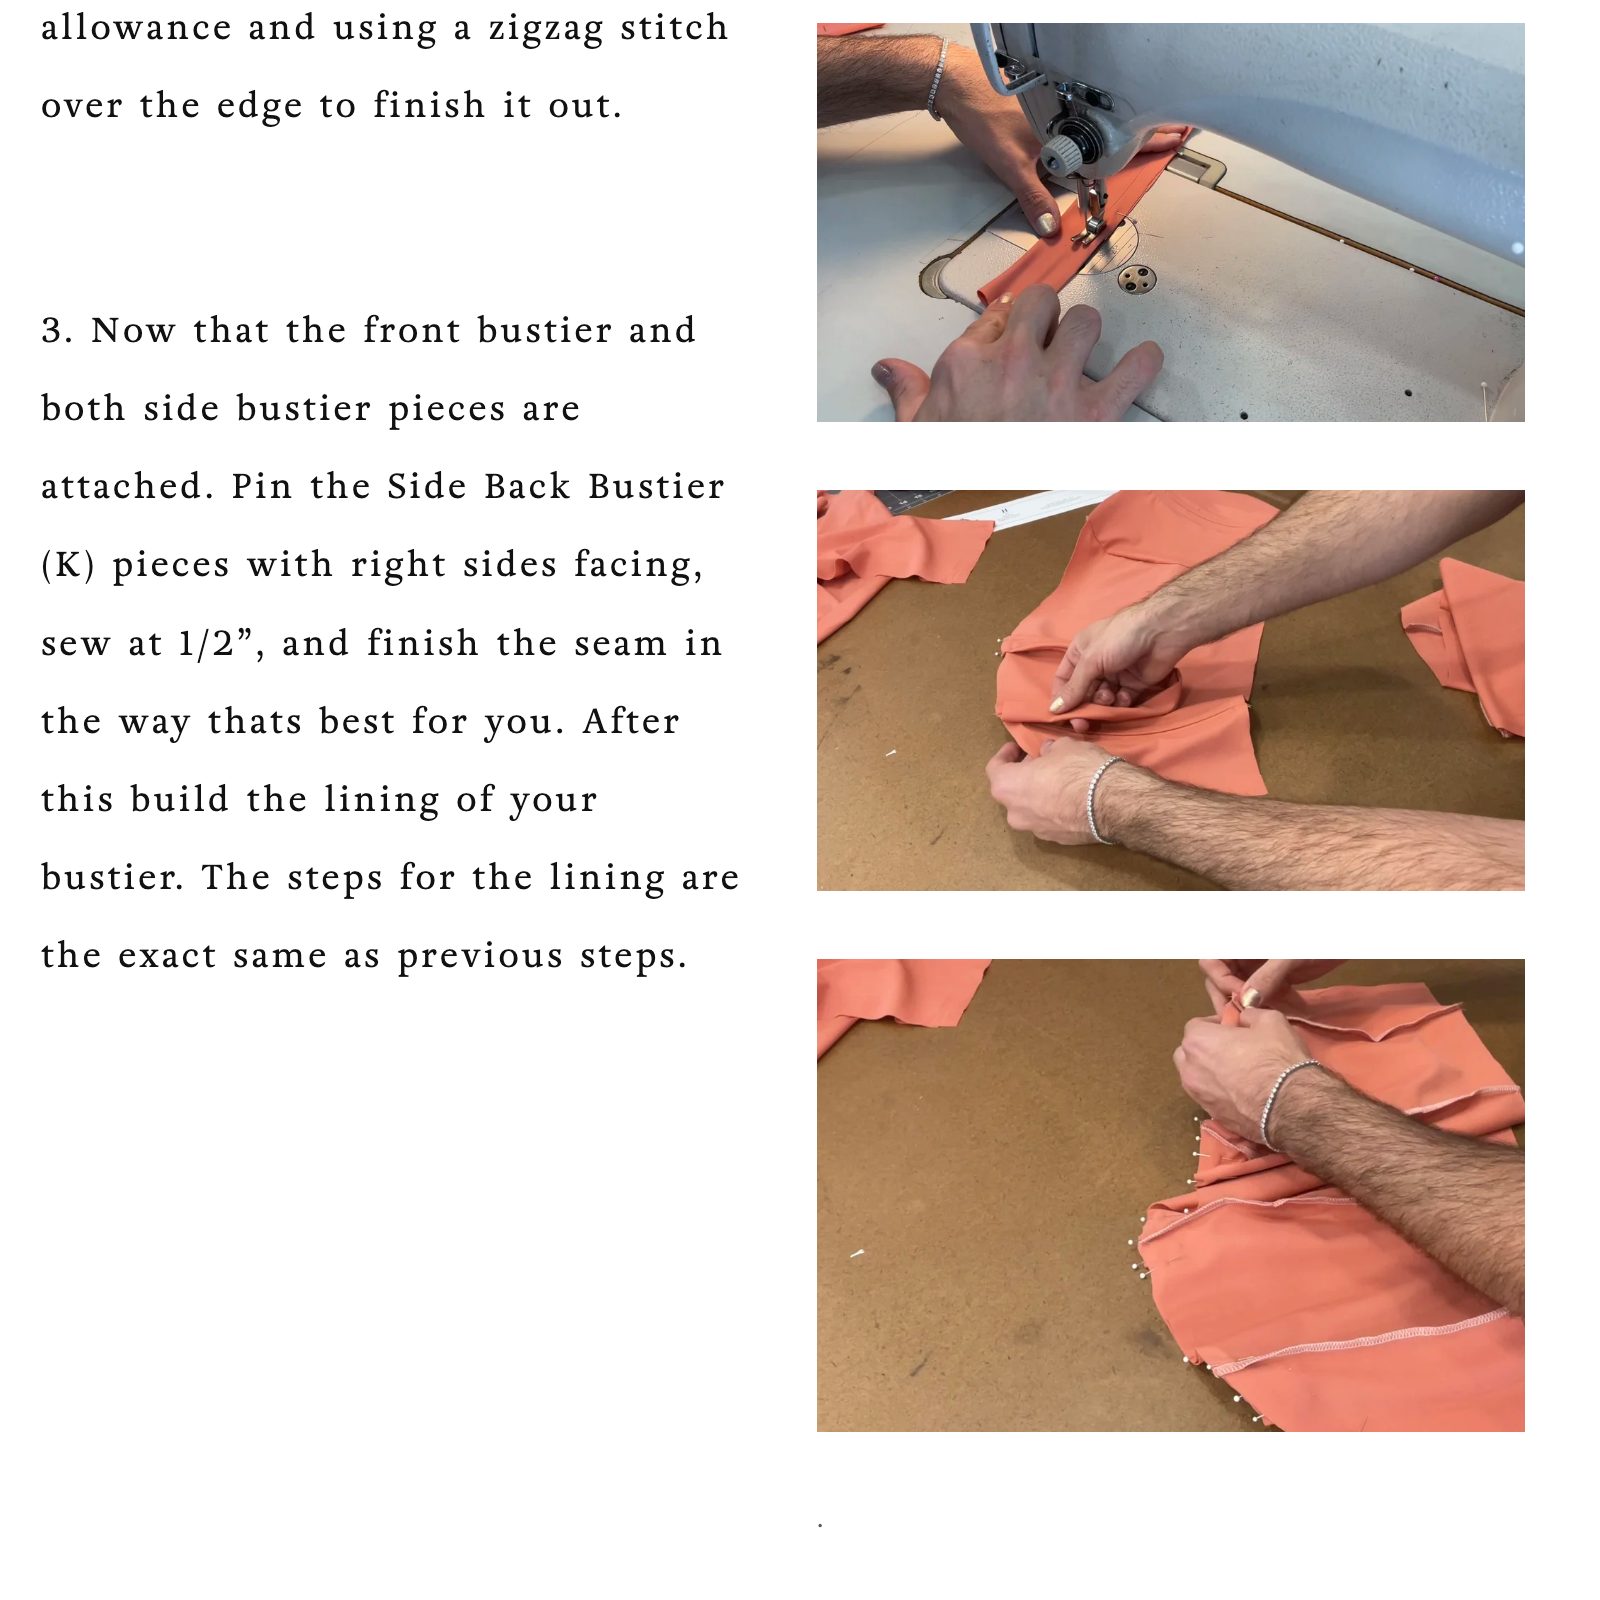
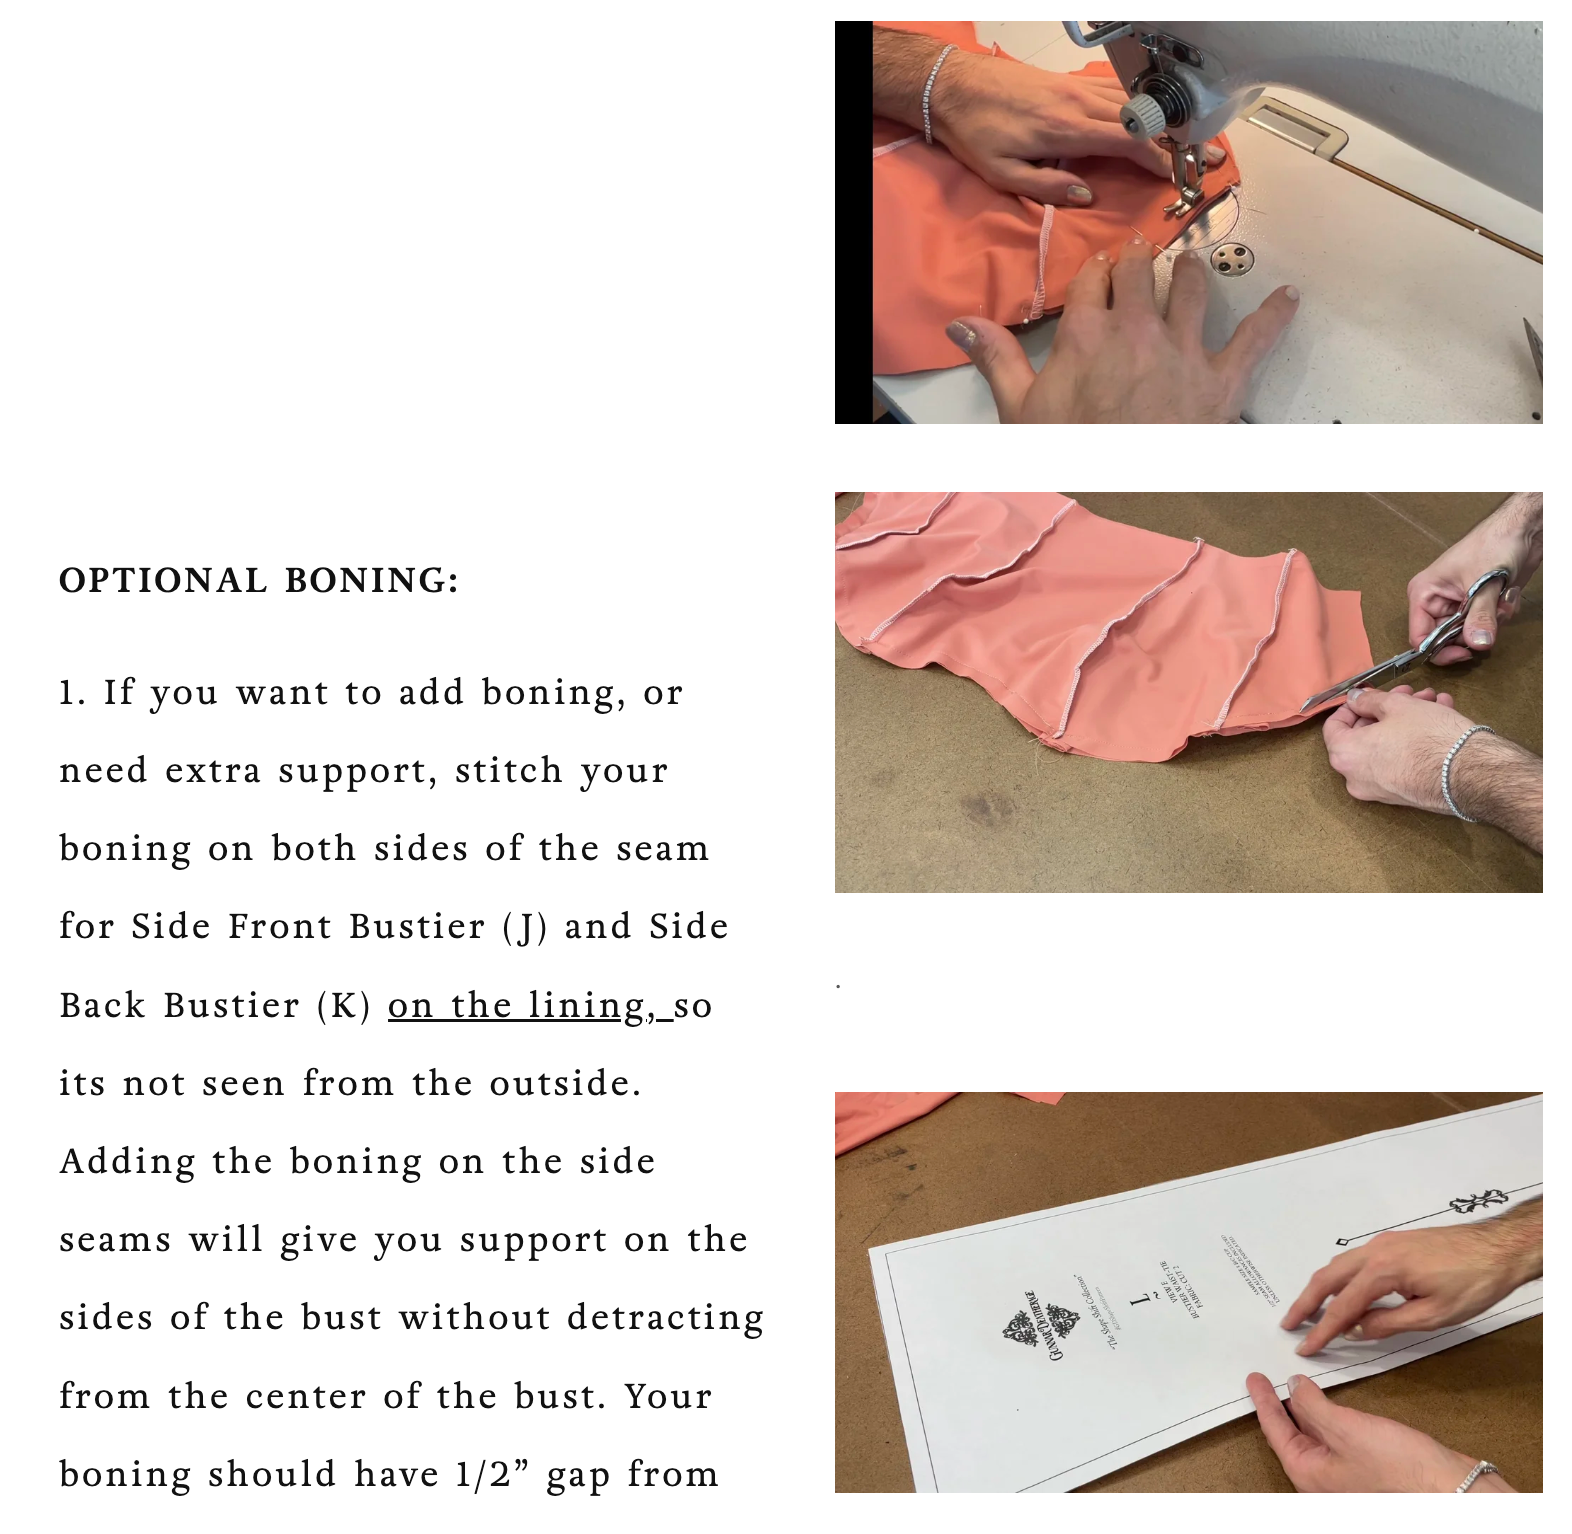
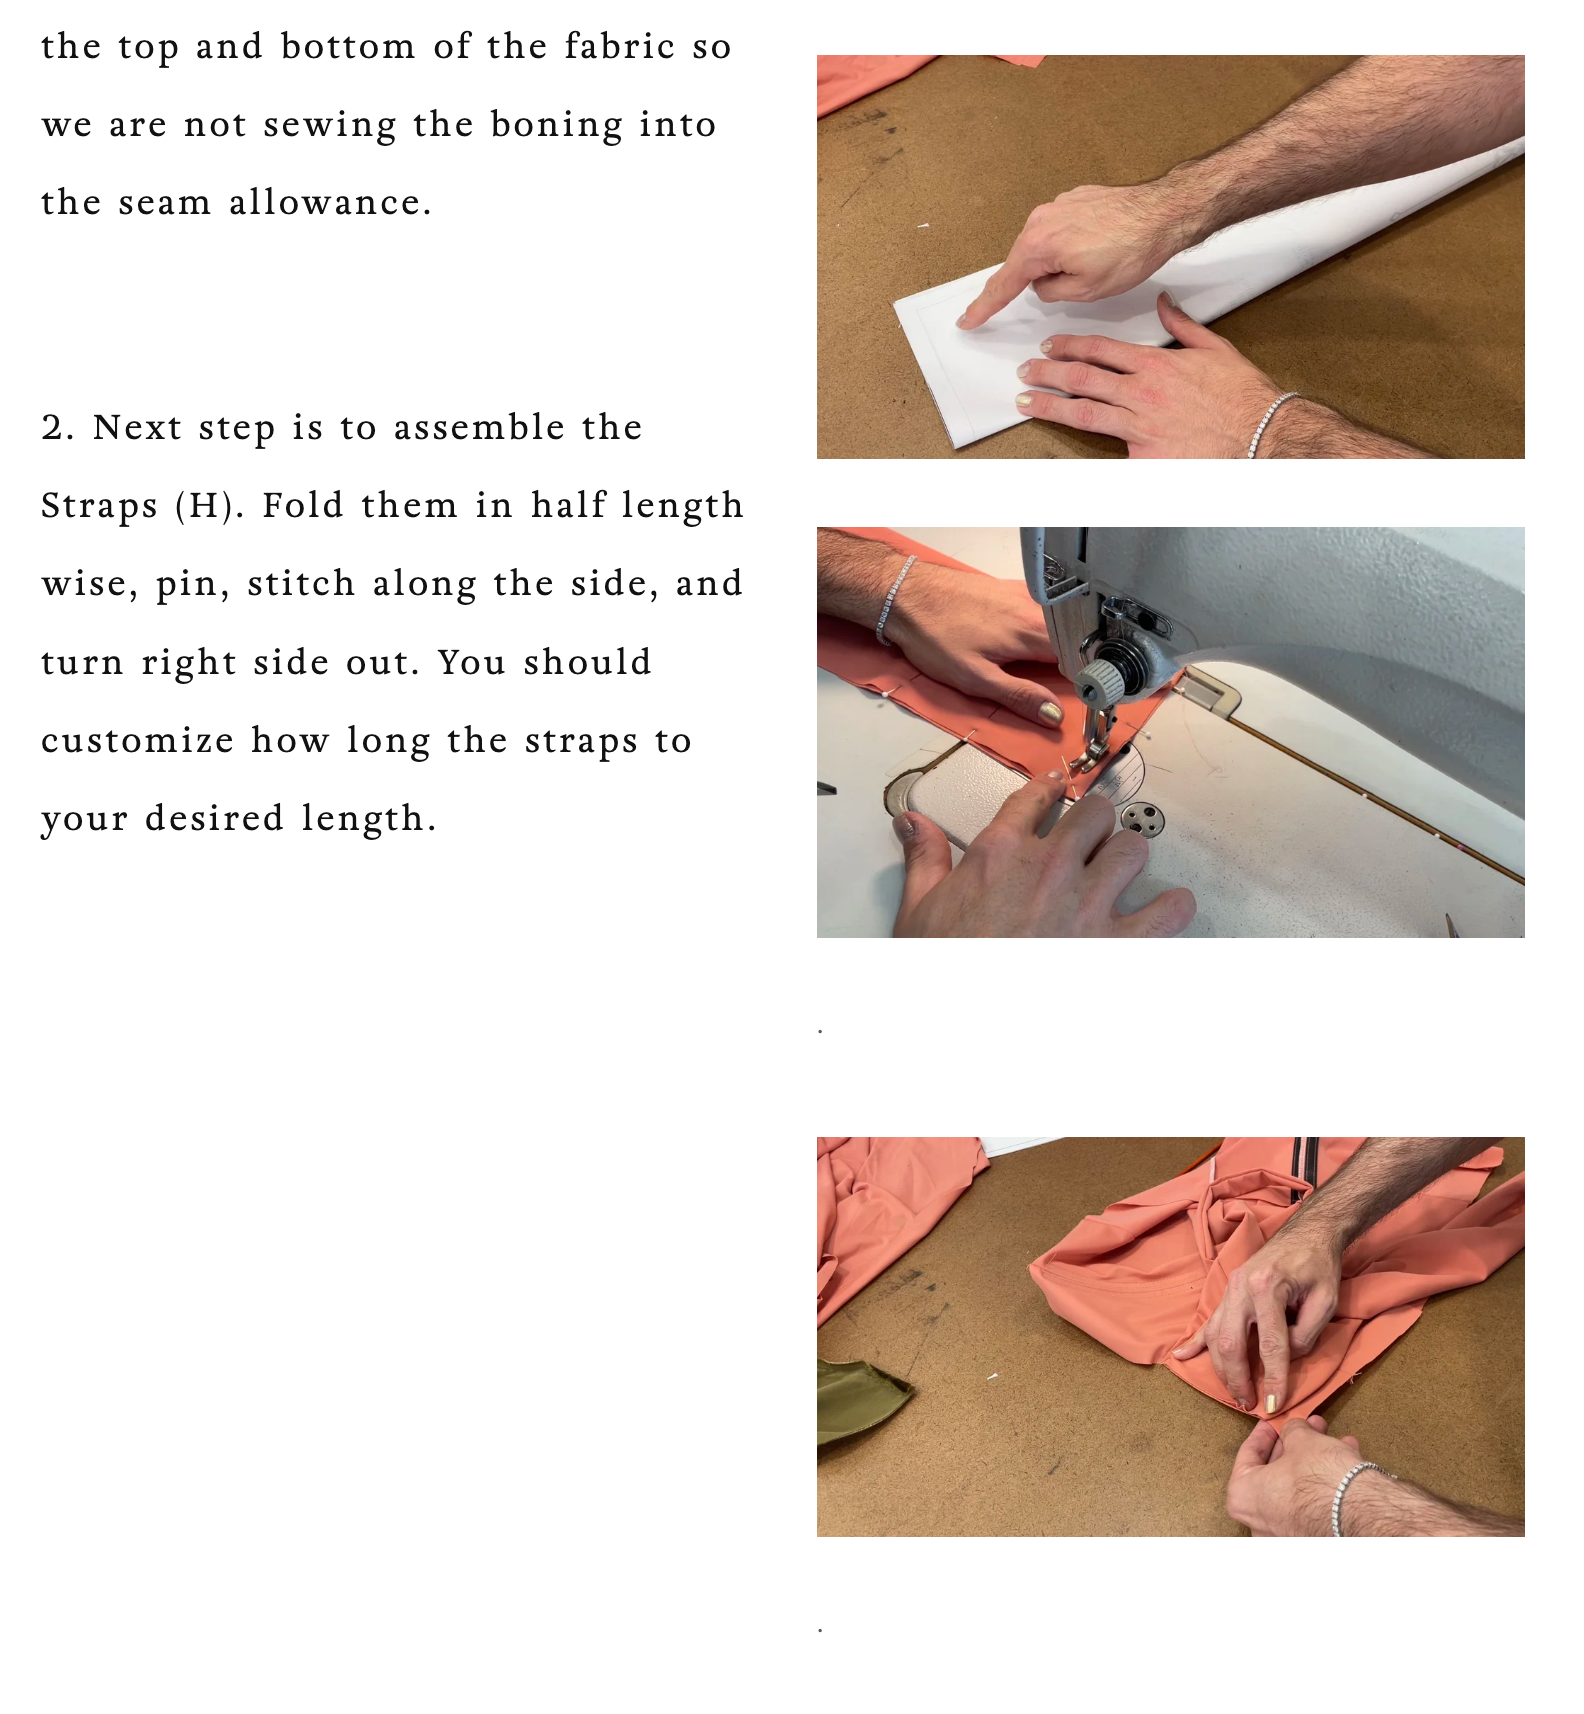
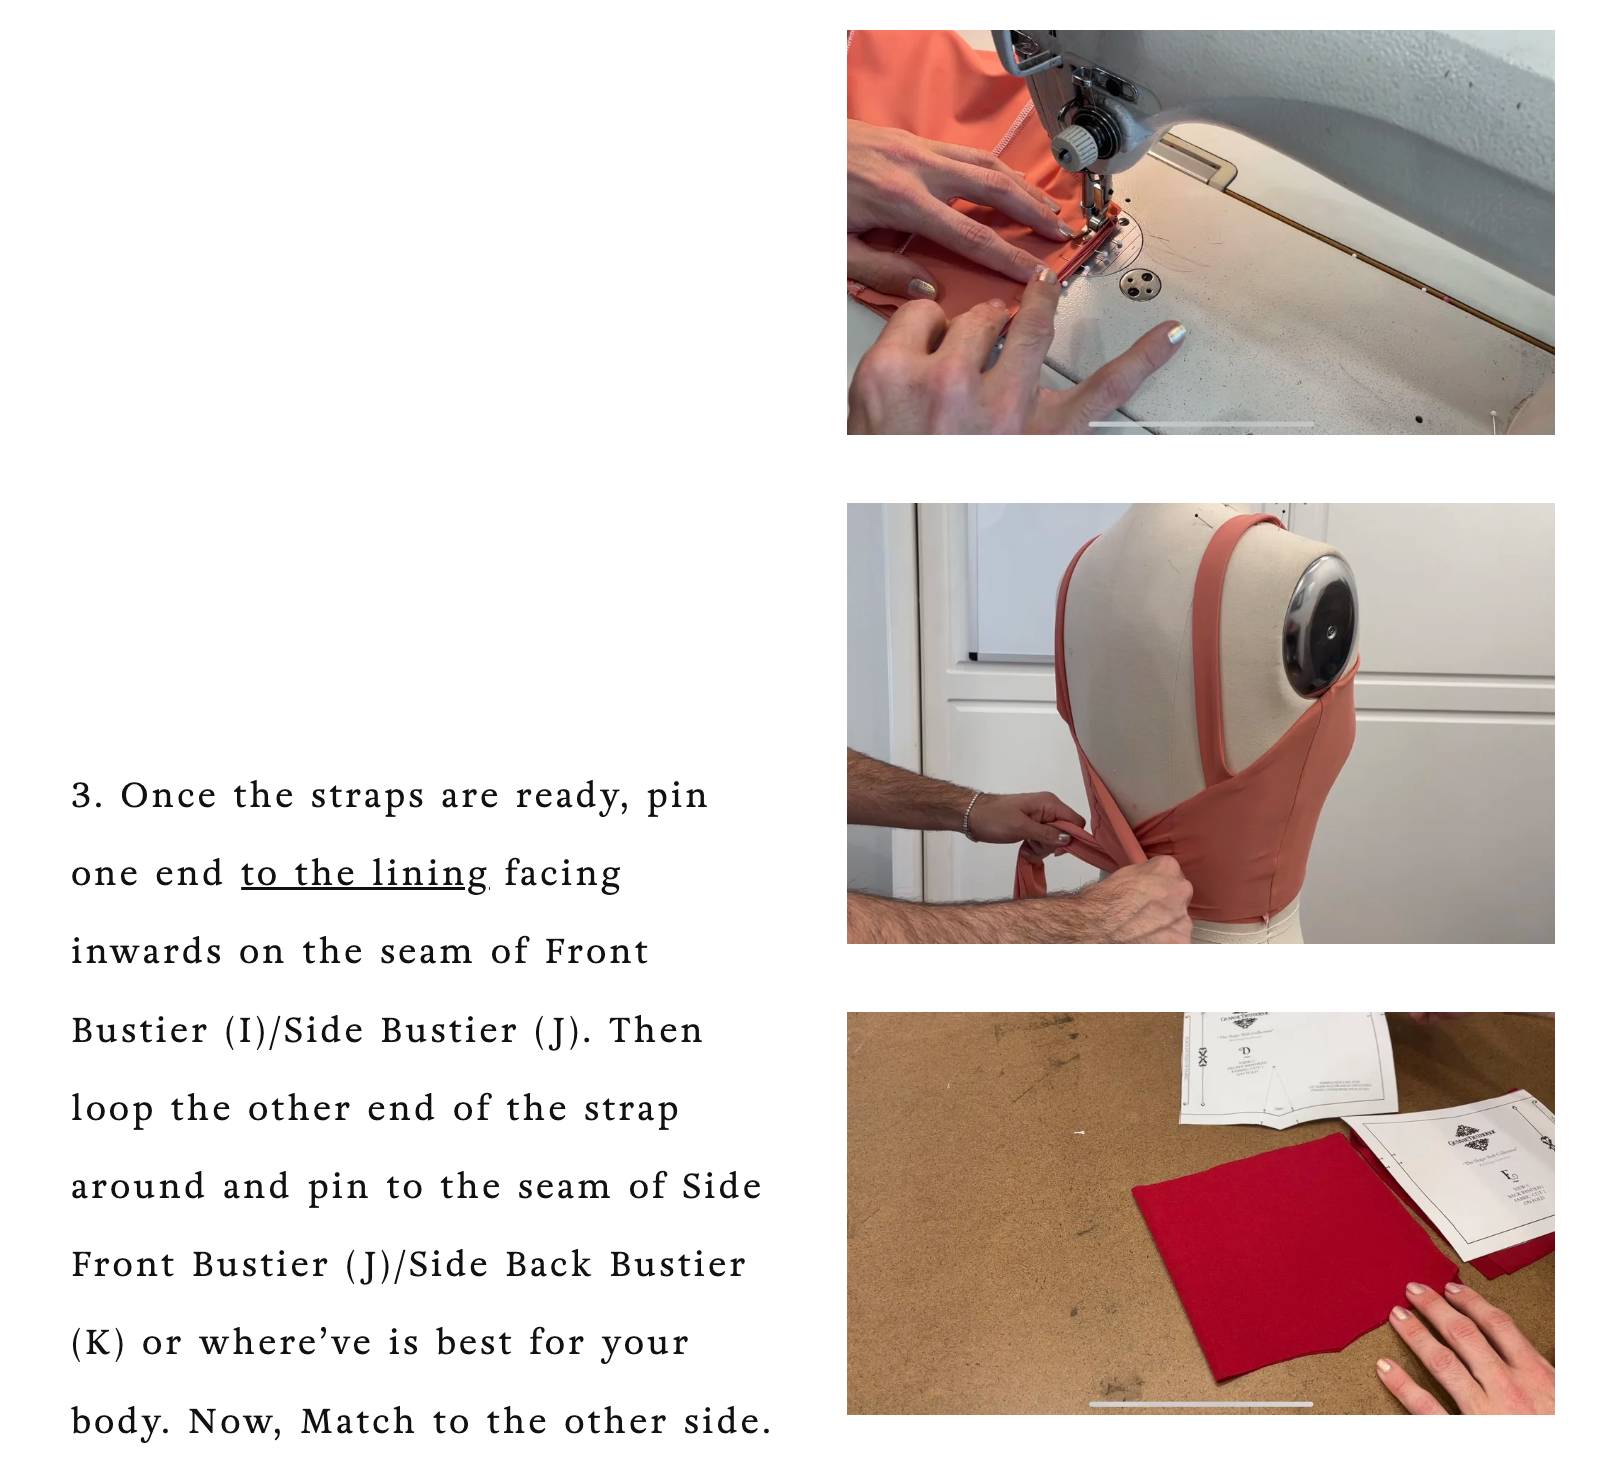
Shapeshift Dress Sewing Pattern Guide

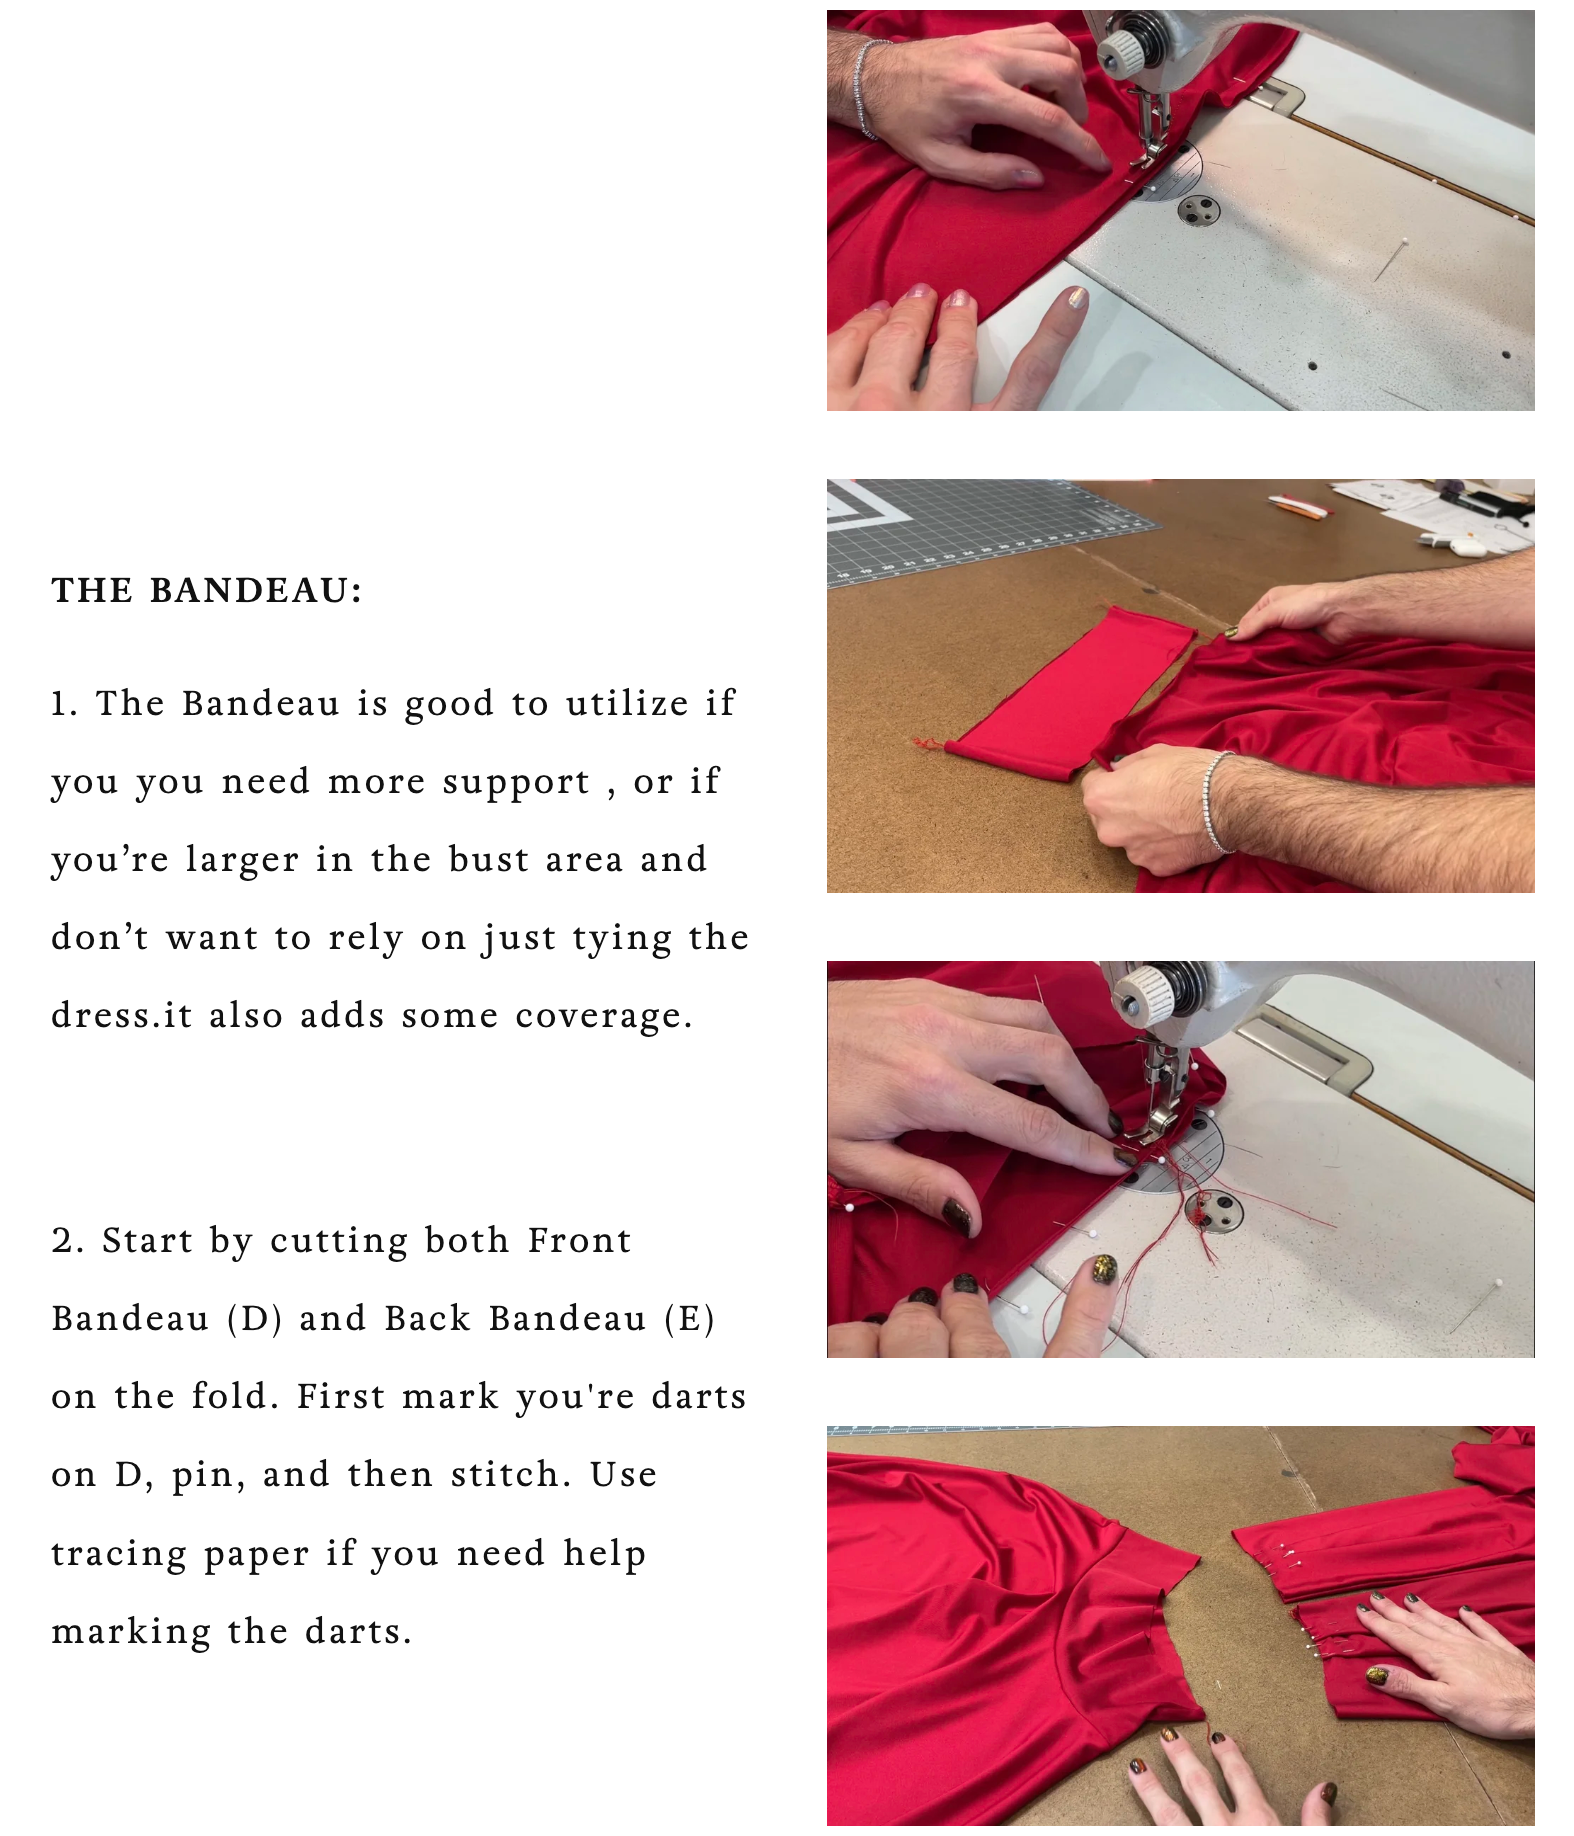
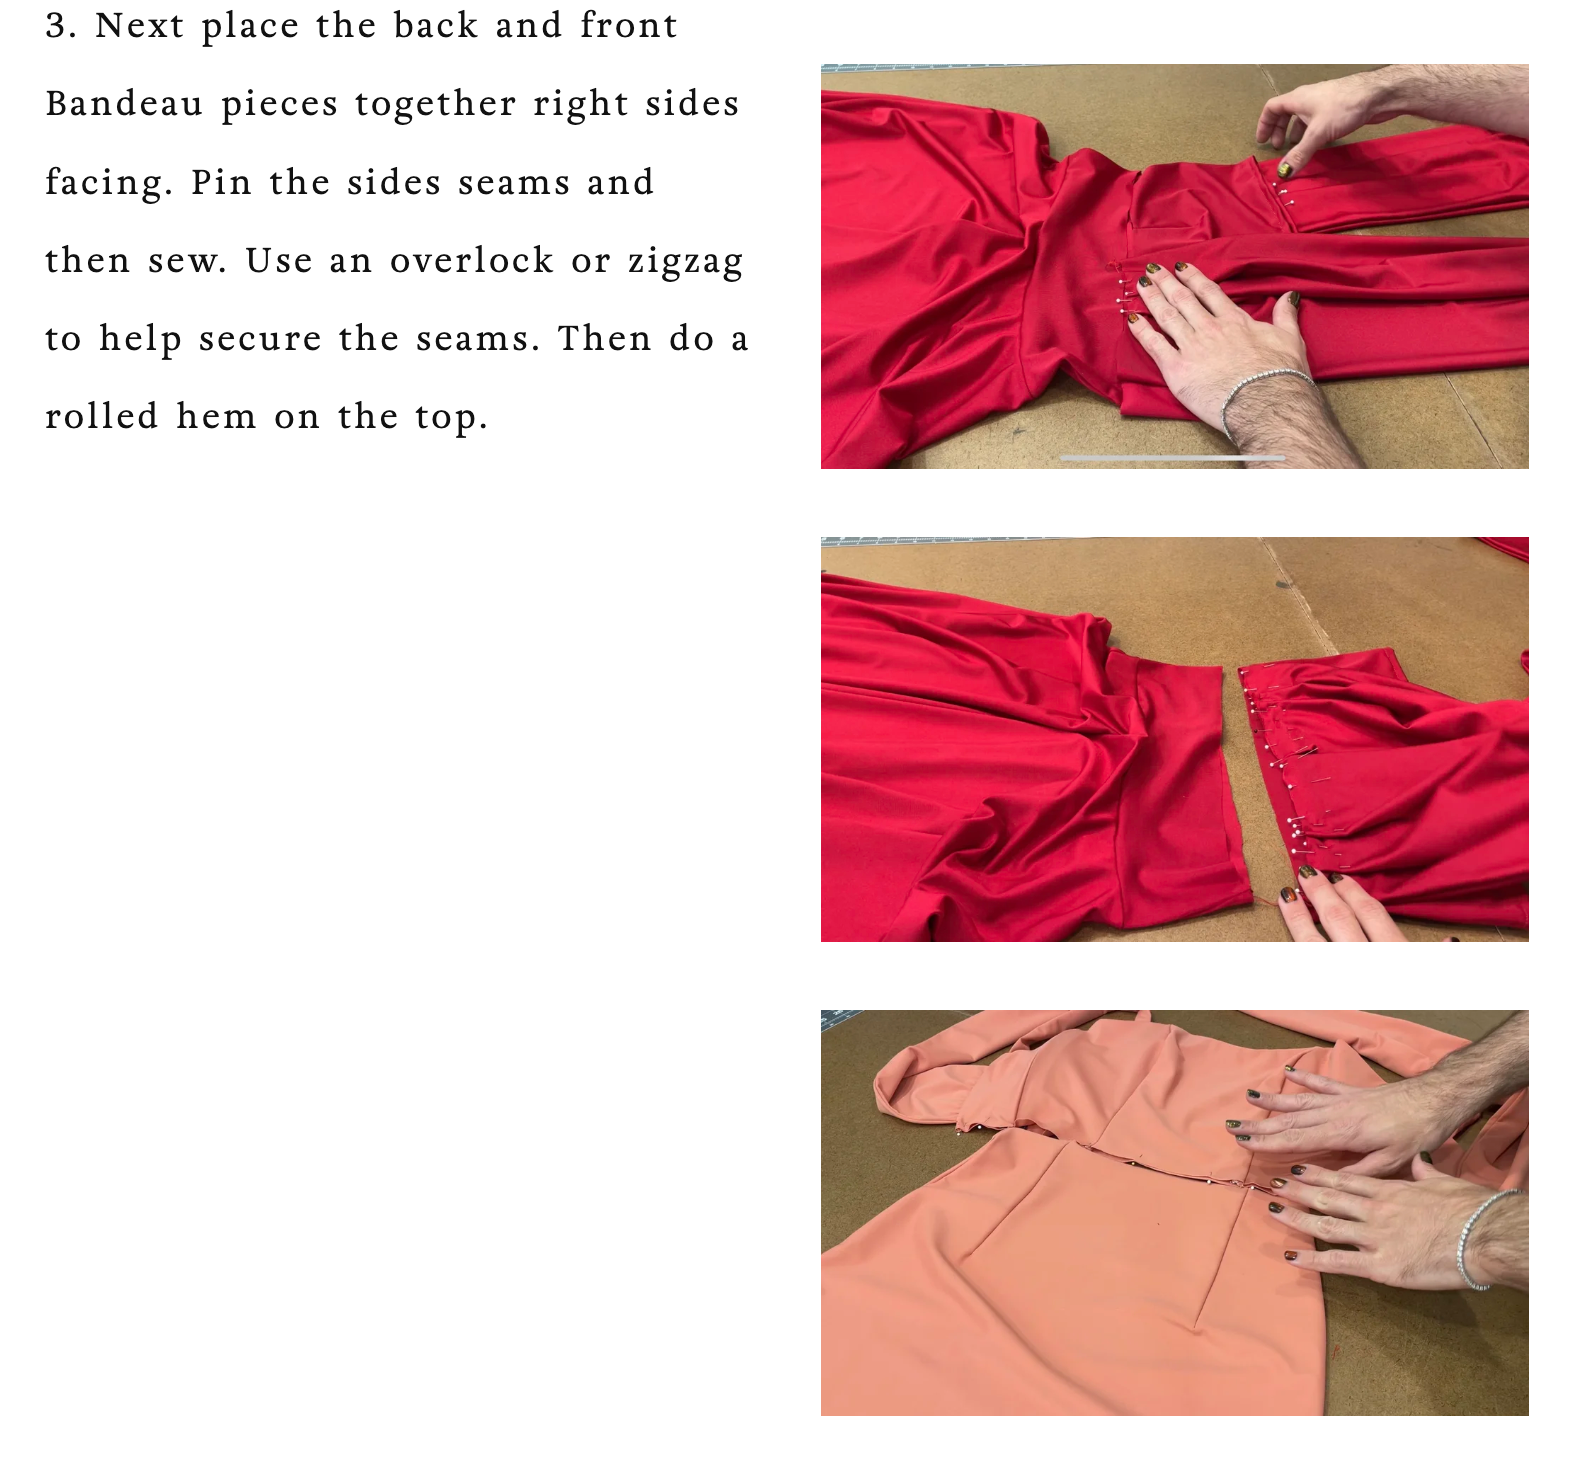
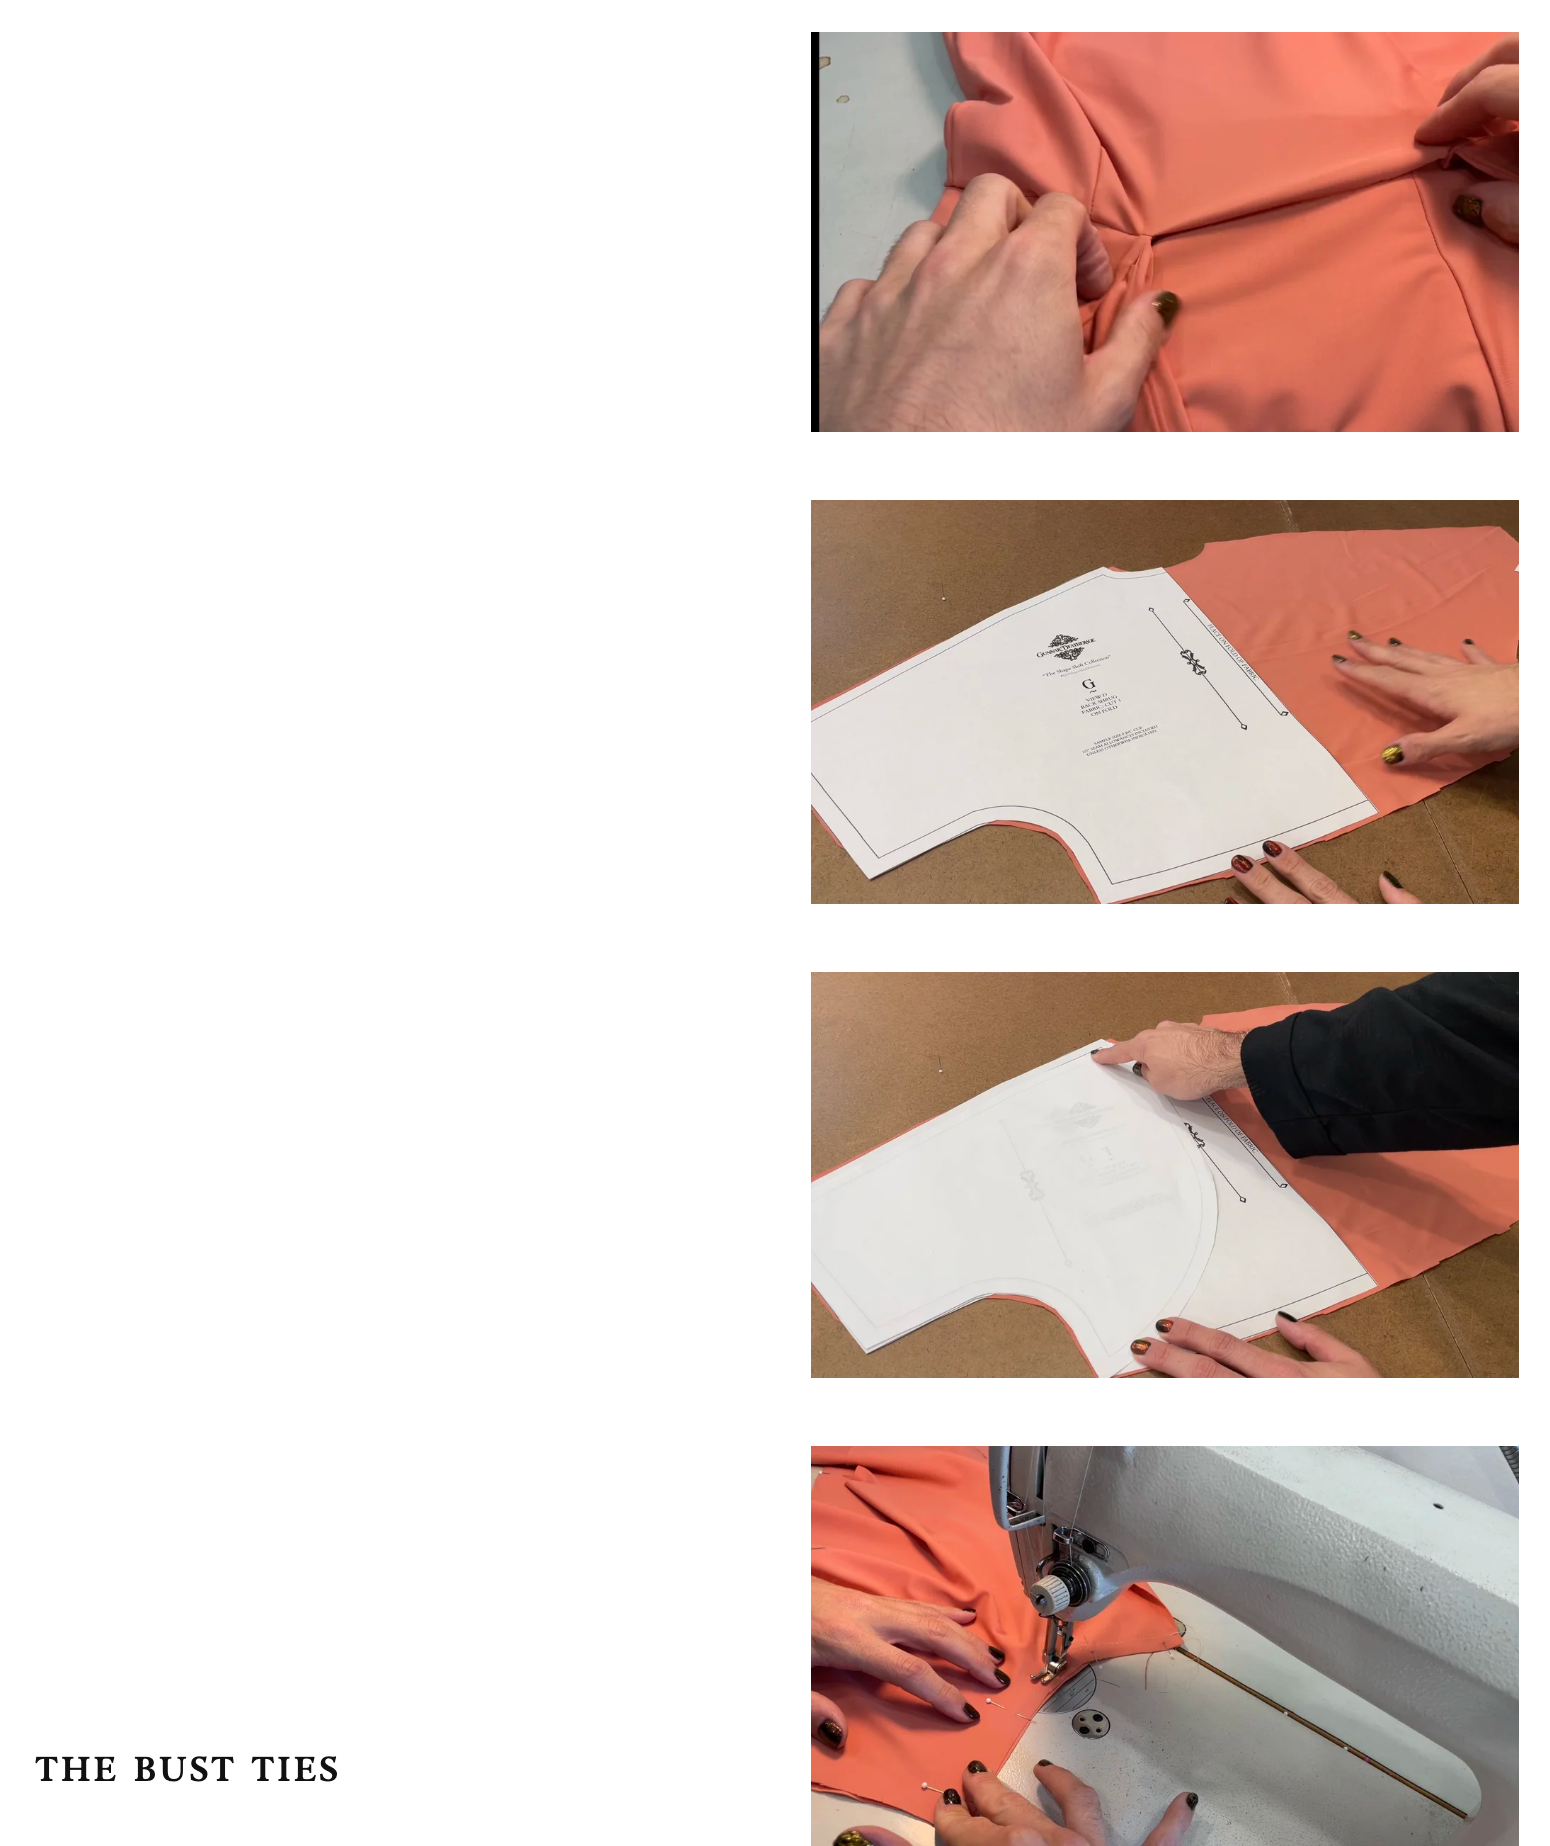
Hello, and welcome to the Shapeshift Dress!


Please also take note of the seam allowances on this pattern is 1/2” unless otherwise stated.

Now, let’s familiarize ourselves with the pattern! 

Pattern Pieces:

A - Bodice Wrap Panels

B - Skirt Waistband

C - Circle Skirt

D - Front Bandeau

E - Back Bandeau

F - Front Shrug

G - Back Shrug

H - Bustier Strap

I - Front Bustier

J - Side Front Bustier

K - Side Back Bustier

L - Bustier Waist-Tie

M - Front Skirt

N - Back Skirt

Gunnar’s Tip For Sewing Stretch Fabric:

Sewing with stretch fabric can be a little tricky. I find its easiest to give the fabric just a little pull when sewing. If you find that stretching the fabric causes it to wrinkle you can treat the fabric with a little bit of steam and it will make the fabric relax back into its original shape. Make sure your chosen fabric can handle steam before doing this though. You don’t want to ruin your fabric. The stretch prevents your seams from breaking when stress is put on the fabric.

BUSTIER:

I have some recommendations before we begin. As this is a bustier, you could add interfacing if you want to make the fabric more stiff. This depends on the fabric you are using though. I do highly suggest using boning for the bustier as it will give the garment more support. Also, the back of the bustier doesn’t have a zipper. It has a tie that attaches. This allows for the design to not be restricted by a zipper. Plus, adding a zipper to stretch fabric is not always fun to do.

1. To begin, with the right sides facing pin the Front Bustier (I) to the Side Bustier (J) using the notches indicated to line the pieces up. Then sew at 1/2 inch.

2. Once you’ve sewn the pieces together you can clip the curves. This will help alleviate the tension on the curve of the bust. An overlock isn’t necessary, if you don’t have the machine, but I do suggest trimming the seam allowance and using a zigzag stitch over the edge to finish it out.

3. Now that the front bustier and both side bustier pieces are attached. Pin the Side Back Bustier (K) pieces with right sides facing, sew at 1/2”, and finish the seam in the way thats best for you. After this build the lining of your bustier. The steps for the lining are the exact same as previous steps.

OPTIONAL BONING:

1. If you want to add boning, or need extra support, stitch your boning on both sides of the seam for Side Front Bustier (J) and Side Back Bustier (K) on the lining, so its not seen from the outside. Adding the boning on the side seams will give you support on the sides of the bust without detracting from the center of the bust. Your boning should have 1/2” gap from the top and bottom of the fabric so we are not sewing the boning into the seam allowance.

2. Next step is to assemble the Straps (H). Fold them in half length wise, pin, stitch along the side, and turn right side out. You should customize how long the straps to your desired length.

3. Once the straps are ready, pin one end to the lining facing inwards on the seam of Front Bustier (I)/Side Bustier (J). Then loop the other end of the strap around and pin to the seam of Side Front Bustier (J)/Side Back Bustier (K) or where’ve is best for your body. Now, Match to the other side. Pin the lining and the front of the bustier on only the top seam. Then stitch across and backstitch over the straps to make sure they are secure. Trim away half of the seam allowance.

4. Next is the Bustier Waist Tie (L). Fold length wise, and pin along the edges leaving one of the short ends open, and sew. If your fabric is bulky you can trim away half of the seam allowance .

5. Now let’s pin the Tie to the Side Back Bustier. Make sure to leave a half of an inch on the bottom for seam allowance.we are basically sandwiching the tie between the bodice, and bodice lining. Now stitch the tie into the bodice where we pinned. Now repeat to the other side of the Bustier. Because this area is high tension, stitch at least twice. Trim away the allowance and either overlock or a zigzag stitch. You want to make sure you do some form of security stitch! Flip right side out. The bodice should be complete ready to sew to the bottom of the garment.

THE BANDEAU:

1. The Bandeau is good to utilize if you you need more support , or if you’re larger in the bust area and don’t want to rely on just tying the dress.it also adds some coverage.

2. Start by cutting both Front Bandeau (D) and Back Bandeau (E) on the fold. First mark you're darts on D, pin, and then stitch. Use tracing paper if you need help marking the darts.

3. Next place the back and front Bandeau pieces together right sides facing. Pin the sides seams and then sew. Use an overlock or zigzag to help secure the seams. Then do a rolled hem on the top.

THE BUST TIES

1. Start by cutting out the bodice wrap panel. Fold it in half and pin one end closed and pin all the way to the other end leaving the remaining end open . Flip right side out making sure your corners are pushed out. Repeat this step for the other bodice wrap panel.

2. At the bottom of the Bodice Wrap Panels (A) there are guidelines to indicate how to pleat. Use tailor chalk to mark pleats and then pin. Now, repeat this on the other bodice wrap panel.

THE SHORT SKIRT OPTION

1. Cut Front Skirt (M) on the fold. Note the dart at the top of Front Skirt (M). These darts are on both sides of the fabric. Use tracing paper if you need help marking the darts. Pin and then stitch them closed. Do the same with the Back Skirt (N).

2. Pin the Front Skirt (M) and Back Skirt (N) with right sides facing. Then stitch the side seams. This is where you would take in the skirt if you needed to.

THE WAIST BAND

1. Skirt Waistband (B) is cut on the fold. Pin the sides and then stitch the side seams. You will want to use a zigzag or overlock as well.

THE LONG SKIRT OPTION

1. It should be noted that on the Circle Skirt (C) that there are two separate pieces to the pattern. The diamond and the dotted lines on both pieces are there to align the two pieces.

2. Lay the two pieces of the skirt right side facing, pin the side seams of both, stitch the side seams, then overlock or zigzag stitch the side seams.

3. Next flip the Skirt Waistband (B) inside out and pin the edge all the way around the waist or the skirt, making sure to match the side seams, to whichever skirt you’ve chosen to make. Then sew the Skirt Waistband to the bottom.

COMBINING SKIRT AND BODICES

1. Attaching the Bandeau is simple. It just gets sewn onto the waist band at a 1/2” same allowance. So you’ll pin all the way around and stitch.

2. If you are adding in the ties they will go overtop on the Bandeau before stitching to the waistband. If you are utilizing these with the Bandeau, pin them to one side of the bandeau where you want them to sit. Try the bandeau on if you need visual help. Then attach to the Waistband with right sides facing.

3. If you are attaching the Bustier, Be aware that the Bustier and the Waistband will not meet up perfectly. The Bustier has a gap in the back. Just fold the waistband over in this area and top stitch.

THE SHRUG

1. The Back Shrug (G) is cut on the fold. The Front Shrug (F) lines up with the under arm seam and top seam of The Back Shrug. Pin, The Back Shrug and The Front Shrug pieces with right sides facing, under arm seam and the top seam then stitch these together. Both sides.

2. Do one seam all the way around the outside when hemming starting at the neck. Then hem both sleeves.

——————————————————

PLEASE TAG ME IN YOUR FINISHED GARMENTS! I LOVE SEEING THEM.


.

.

.

.

.

.