The Vespertine Dress Sewing Pattern Guide

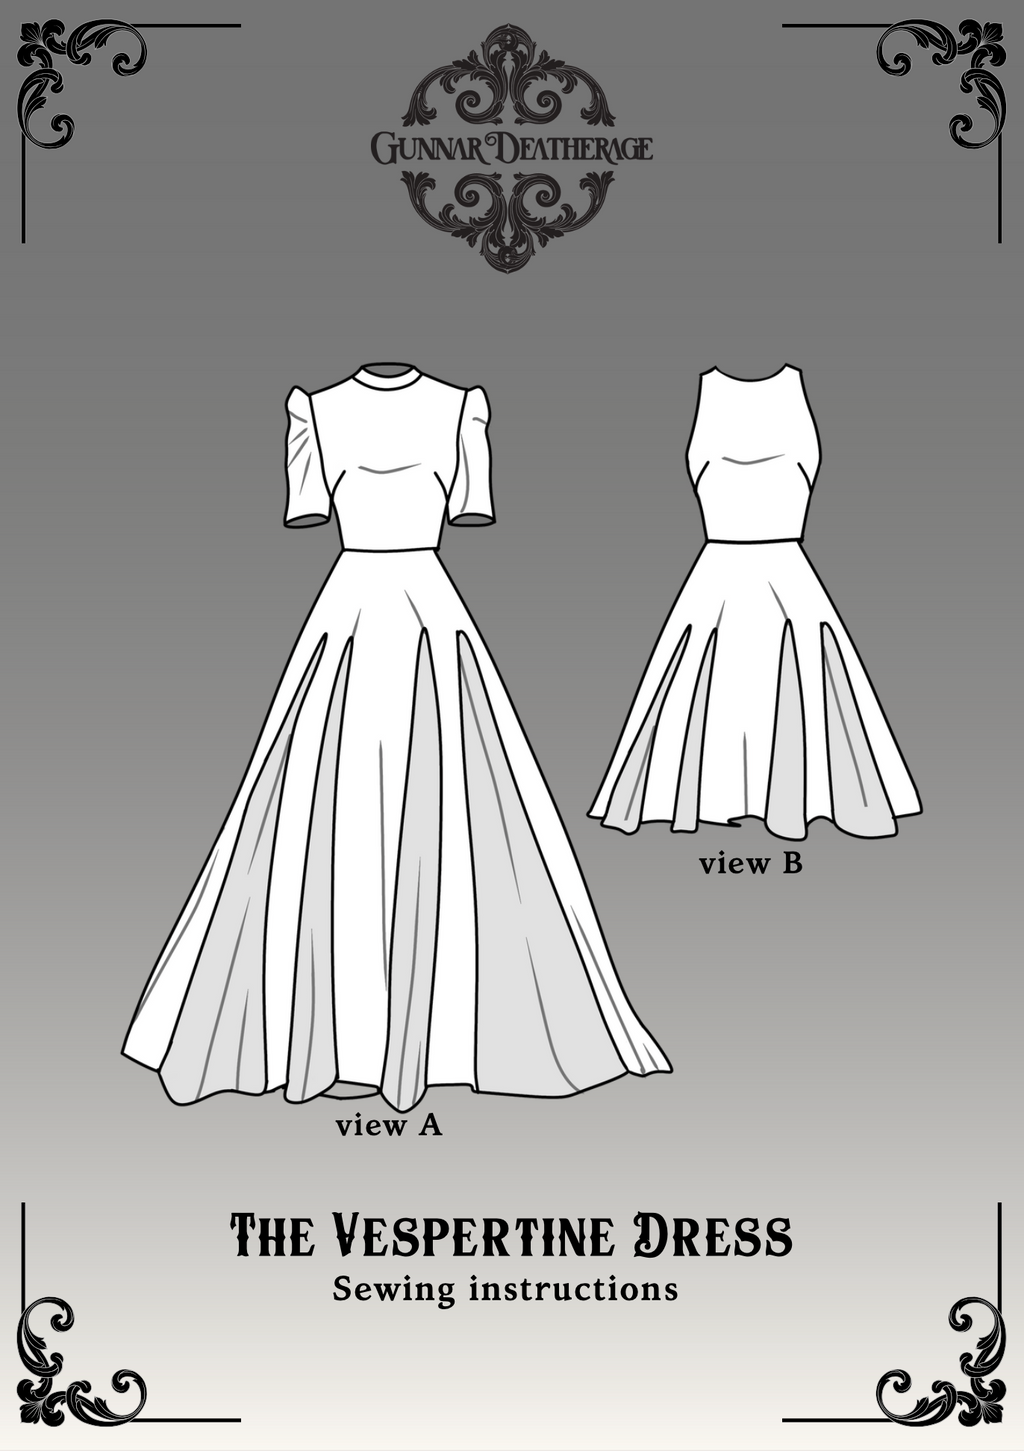
Step into the allure of evening elegance with the Vespertine Dress, a design inspired by the Victorian term for those who come alive after dusk.
This versatile gown offers a range of sewing options to suit your personal style: choose between a chic knee length or a graceful maxi, an elegant high collar or a soft round neckline, and dramatic puffy sleeves or a sleeveless silhouette. The Vespertine's flowy skirt, enhanced by godets, adds volume and movement, while a delicate keyhole at the center back of the neck adds a touch of sophistication.
Designed for woven fabrics, the Vespertine Dress shines in lightweight, silky materials, but the fabric choice is where your creativity truly comes to life. Whether you opt for something classic or bold, this pattern invites you to explore and play with textures and prints, making each Vespertine uniquely yours.
Before You Get Started
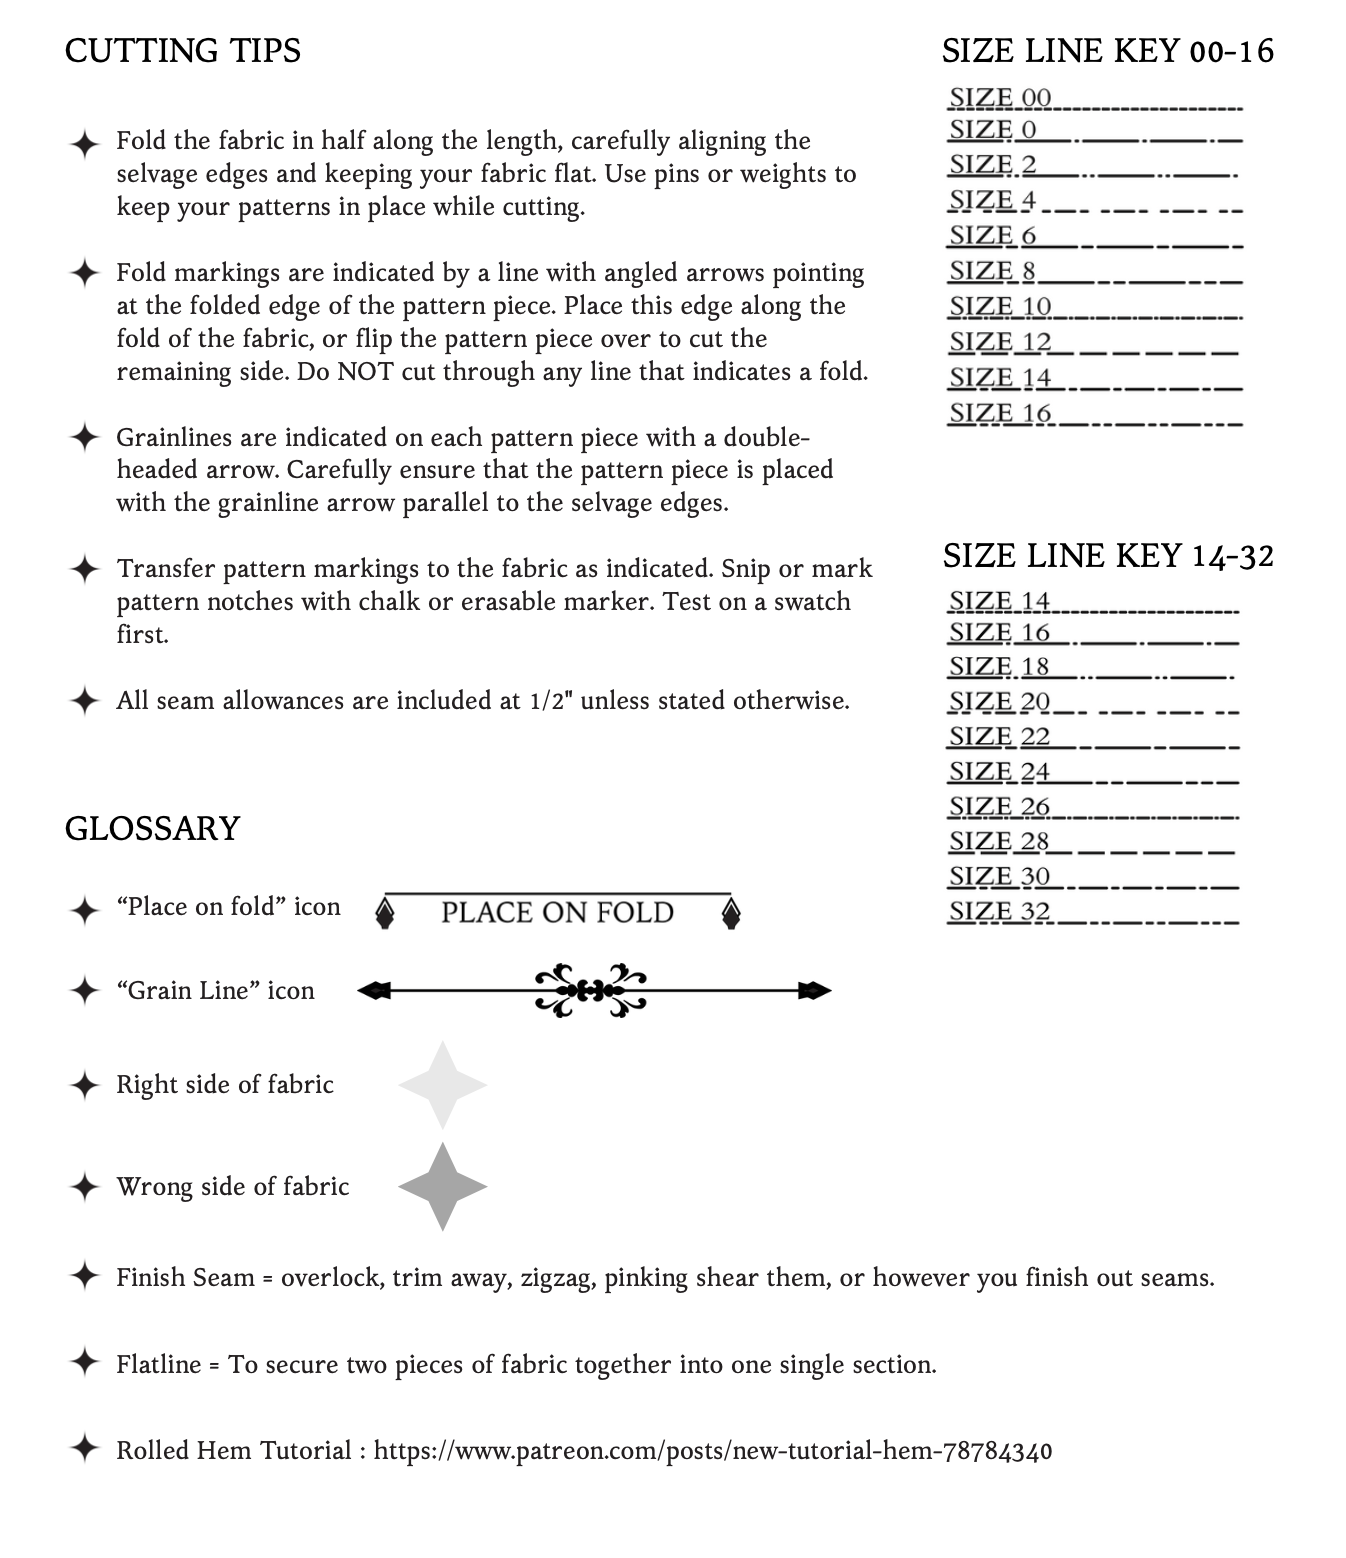
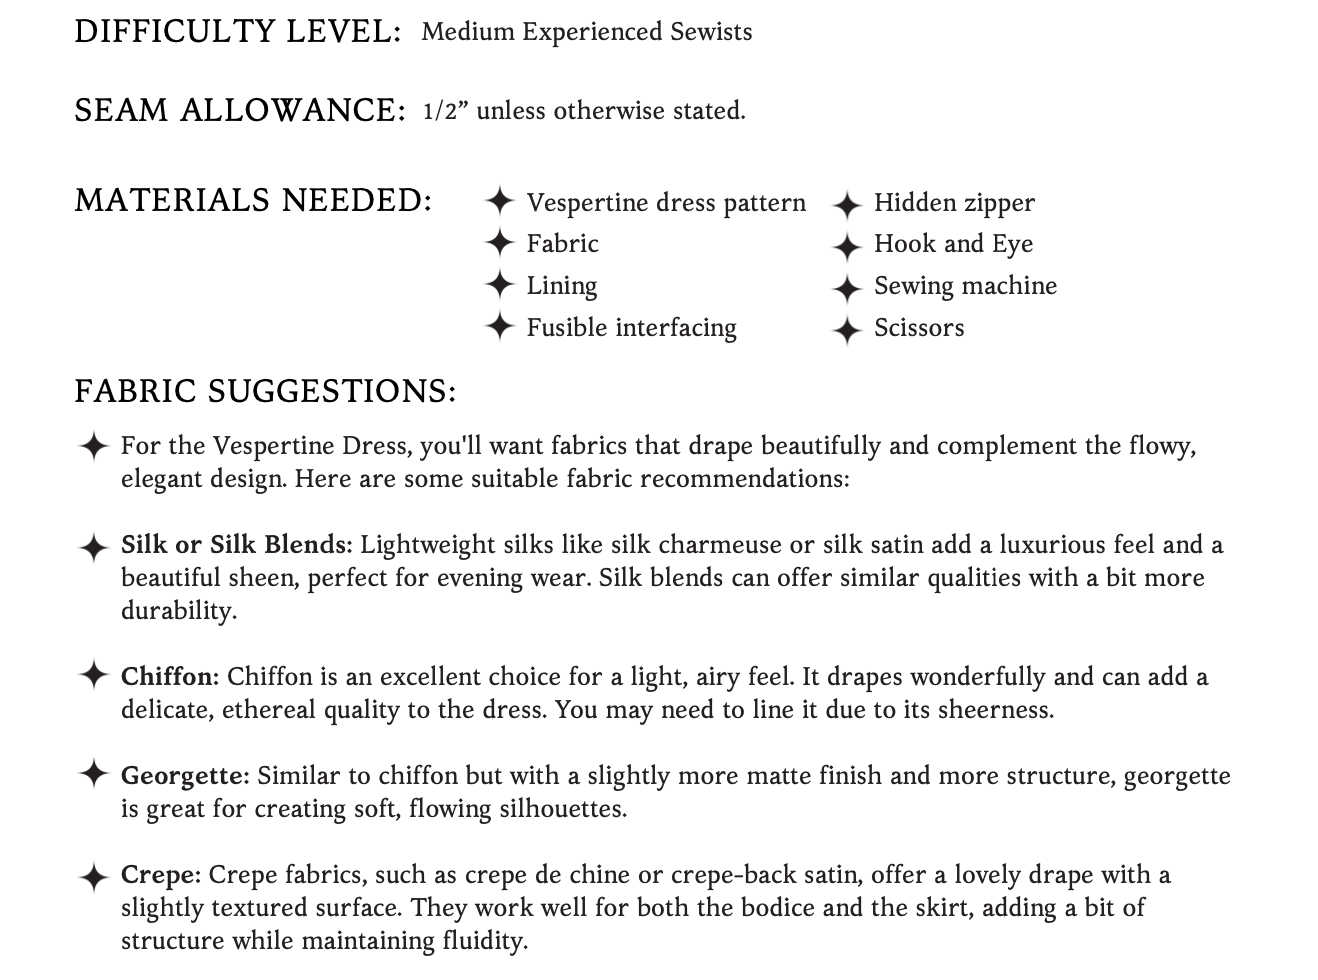
Please take note that the seam allowances on this pattern are 1/2” unless otherwise stated.
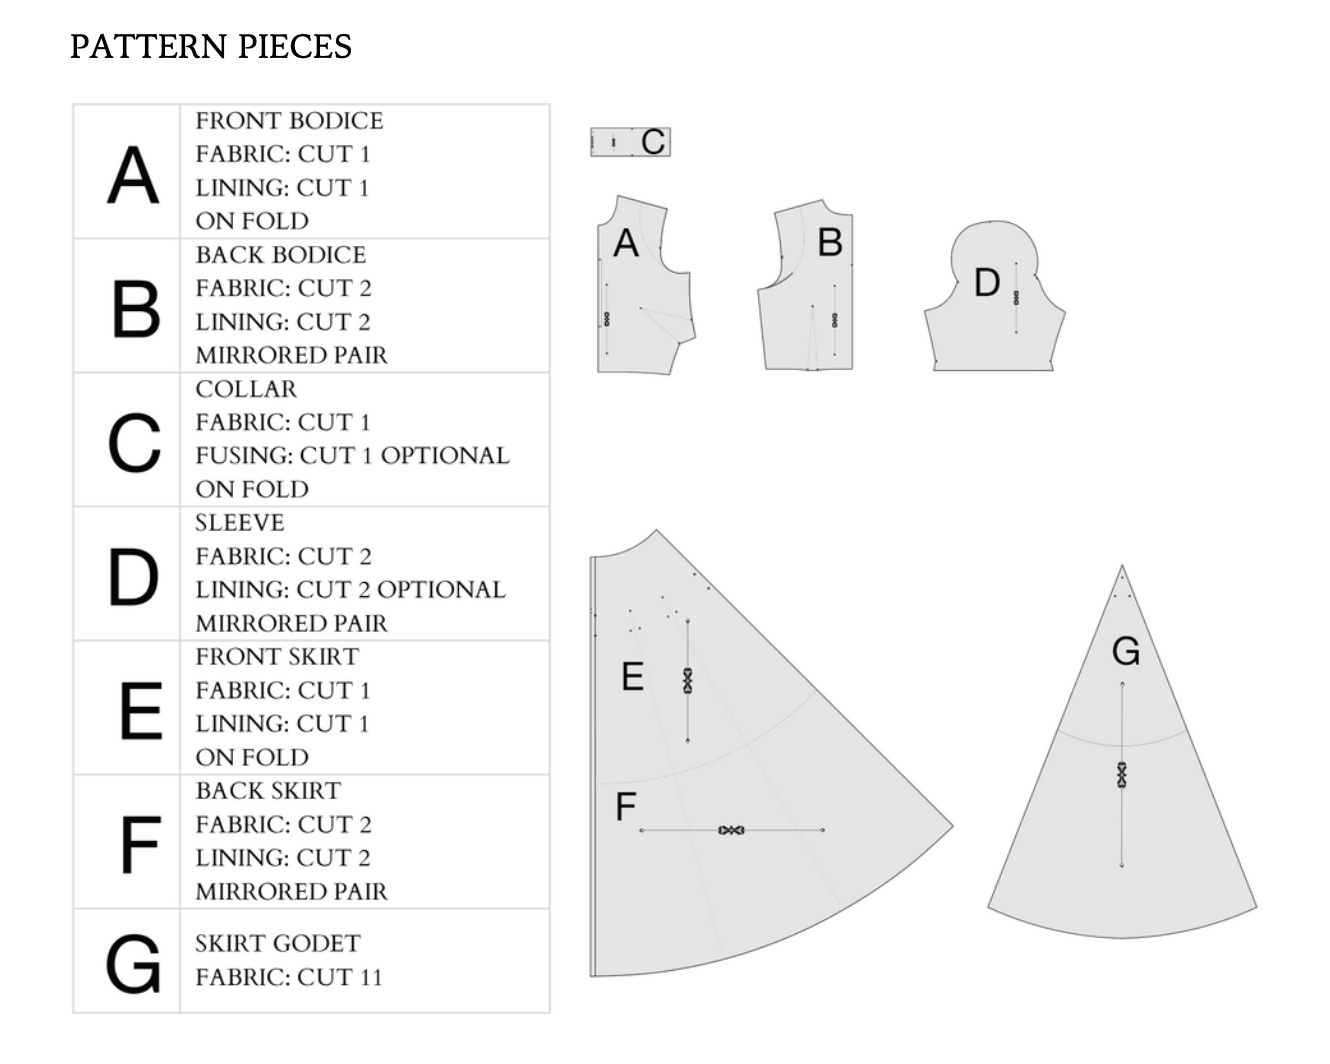
The Pattern will have all the notions and cutting layout you will need in the provided PDF files.
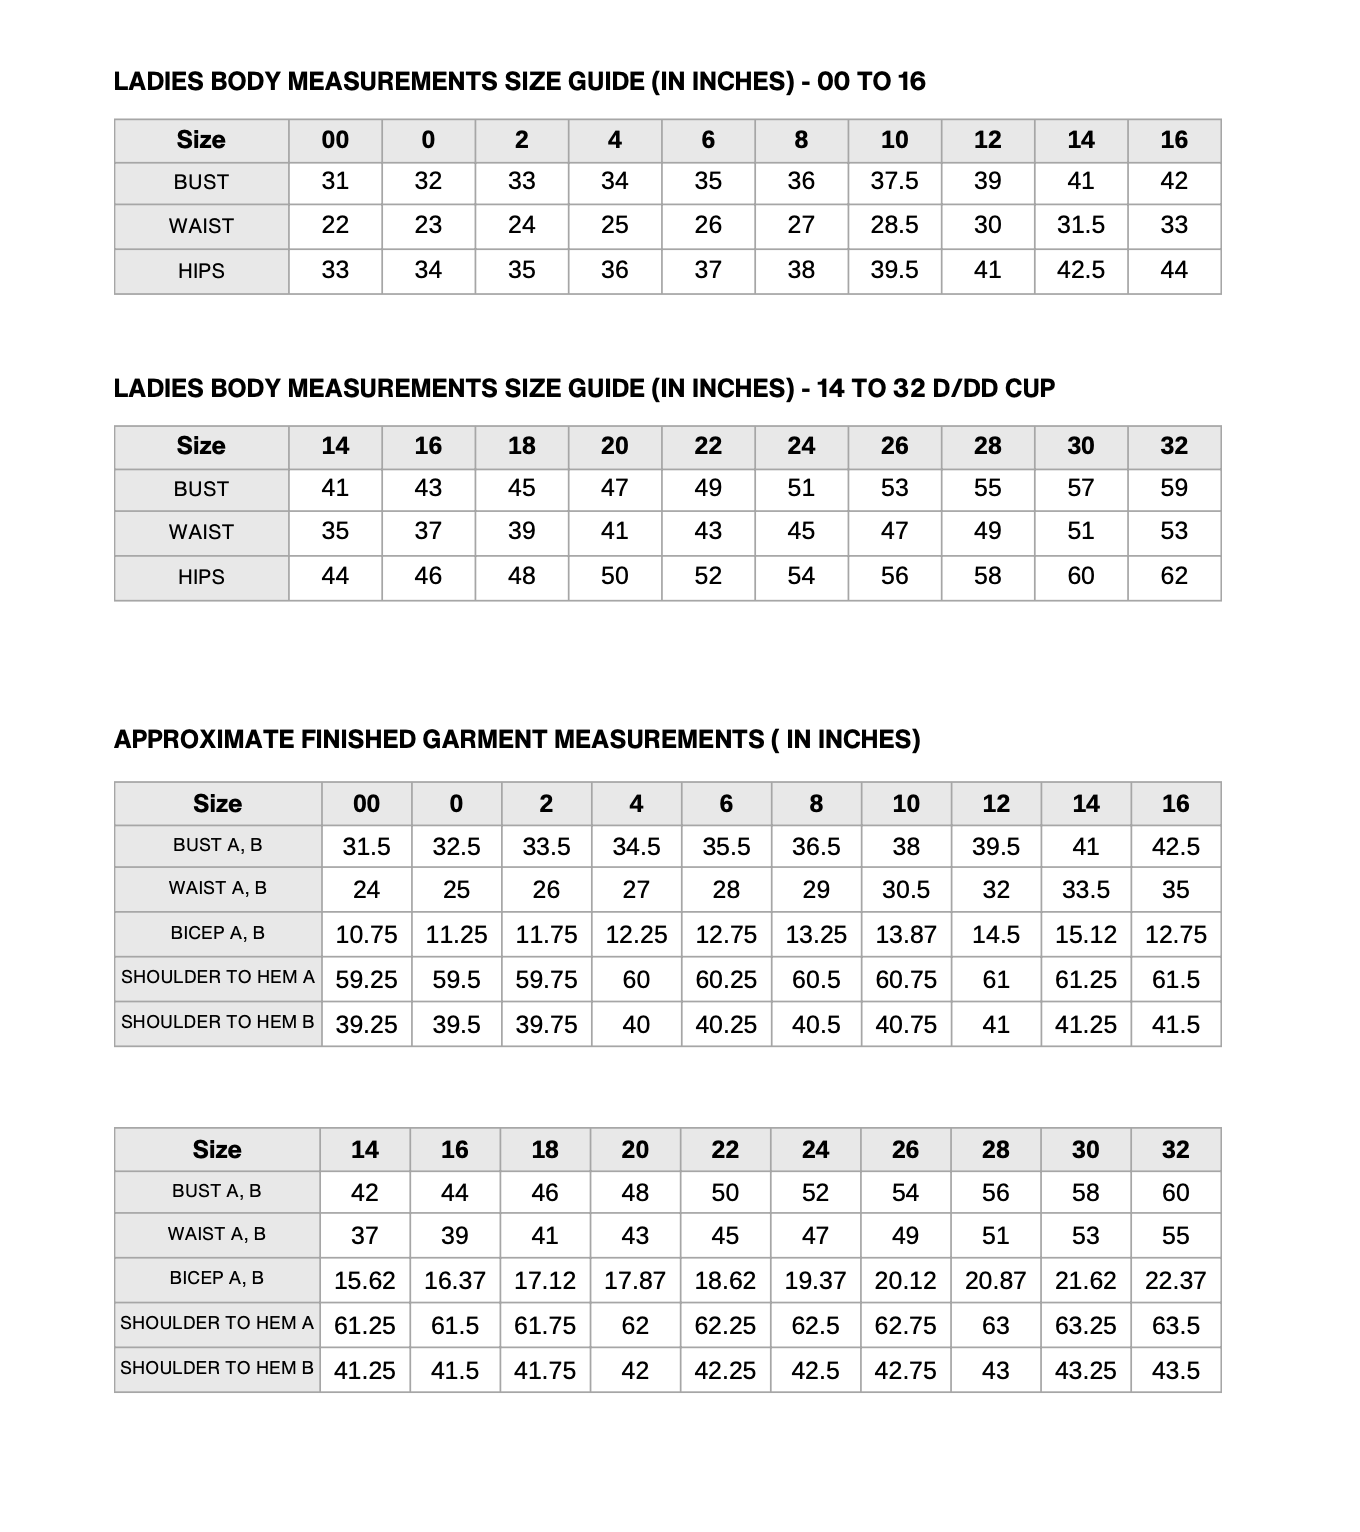
Size Charts, and Finished Garment Measurements
Yardage/ Fabric Consumption

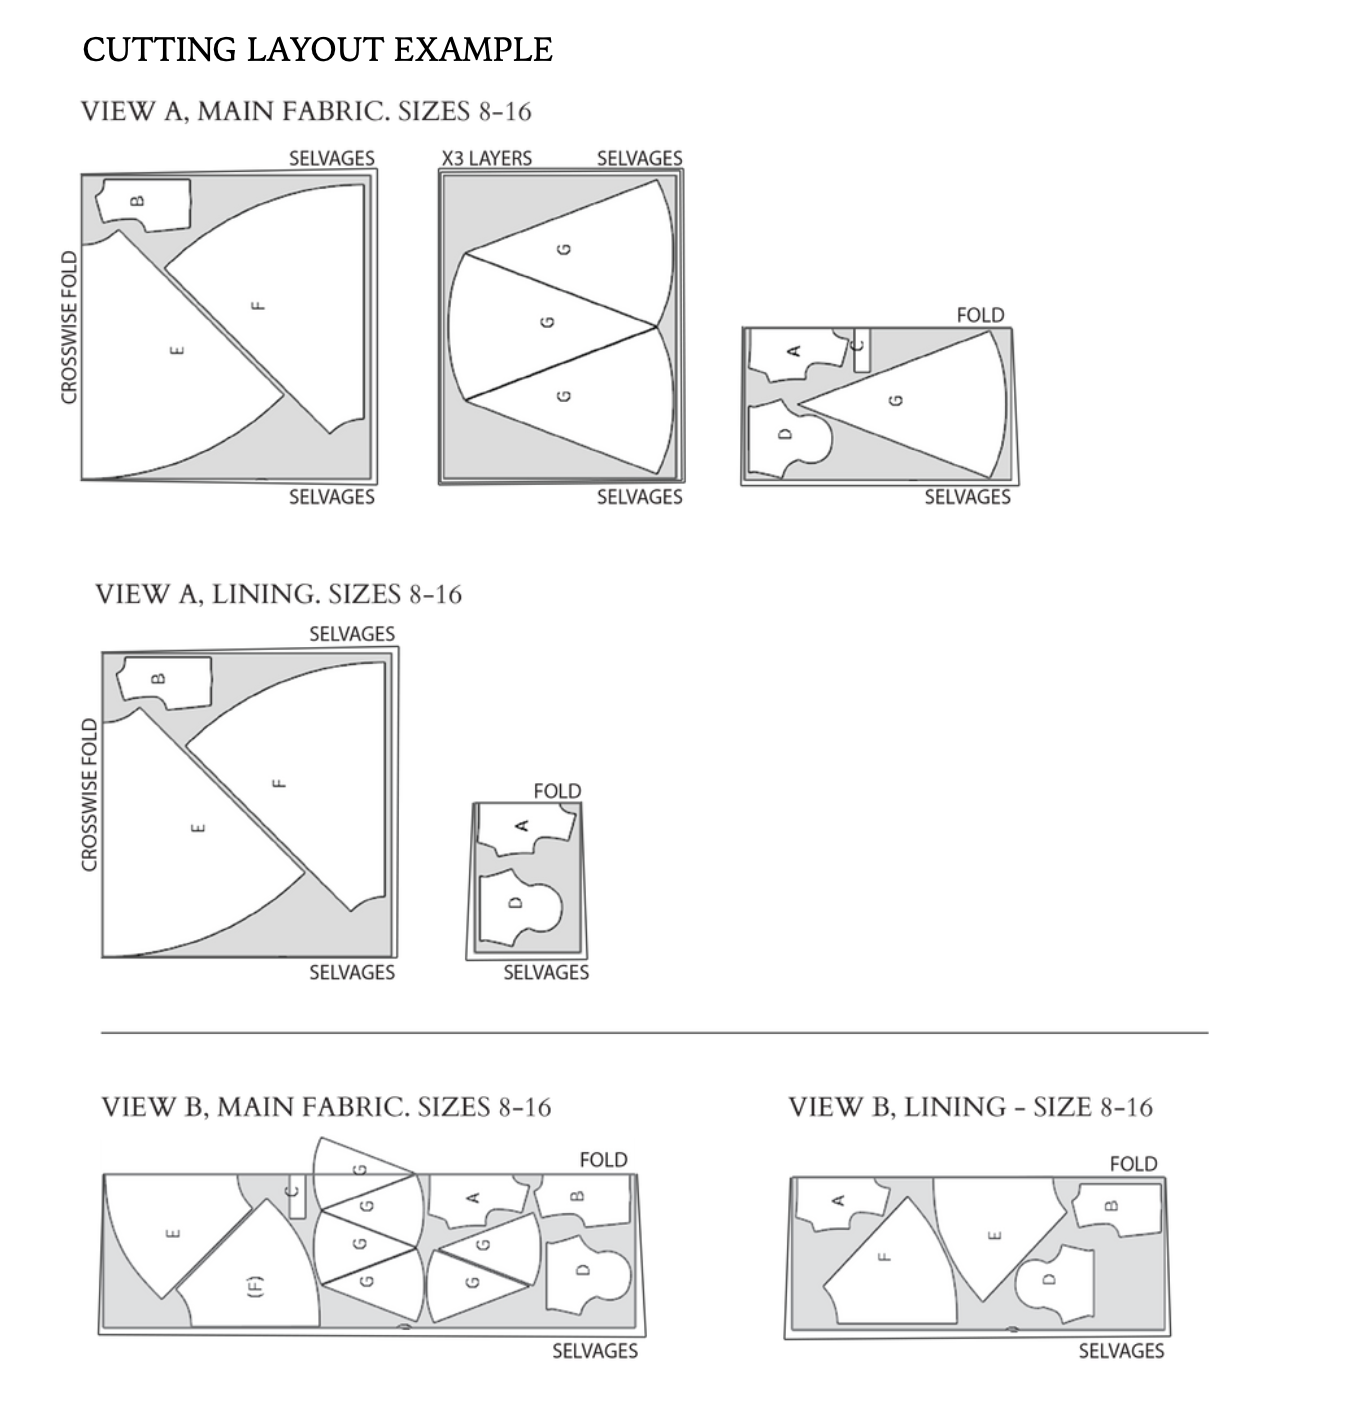
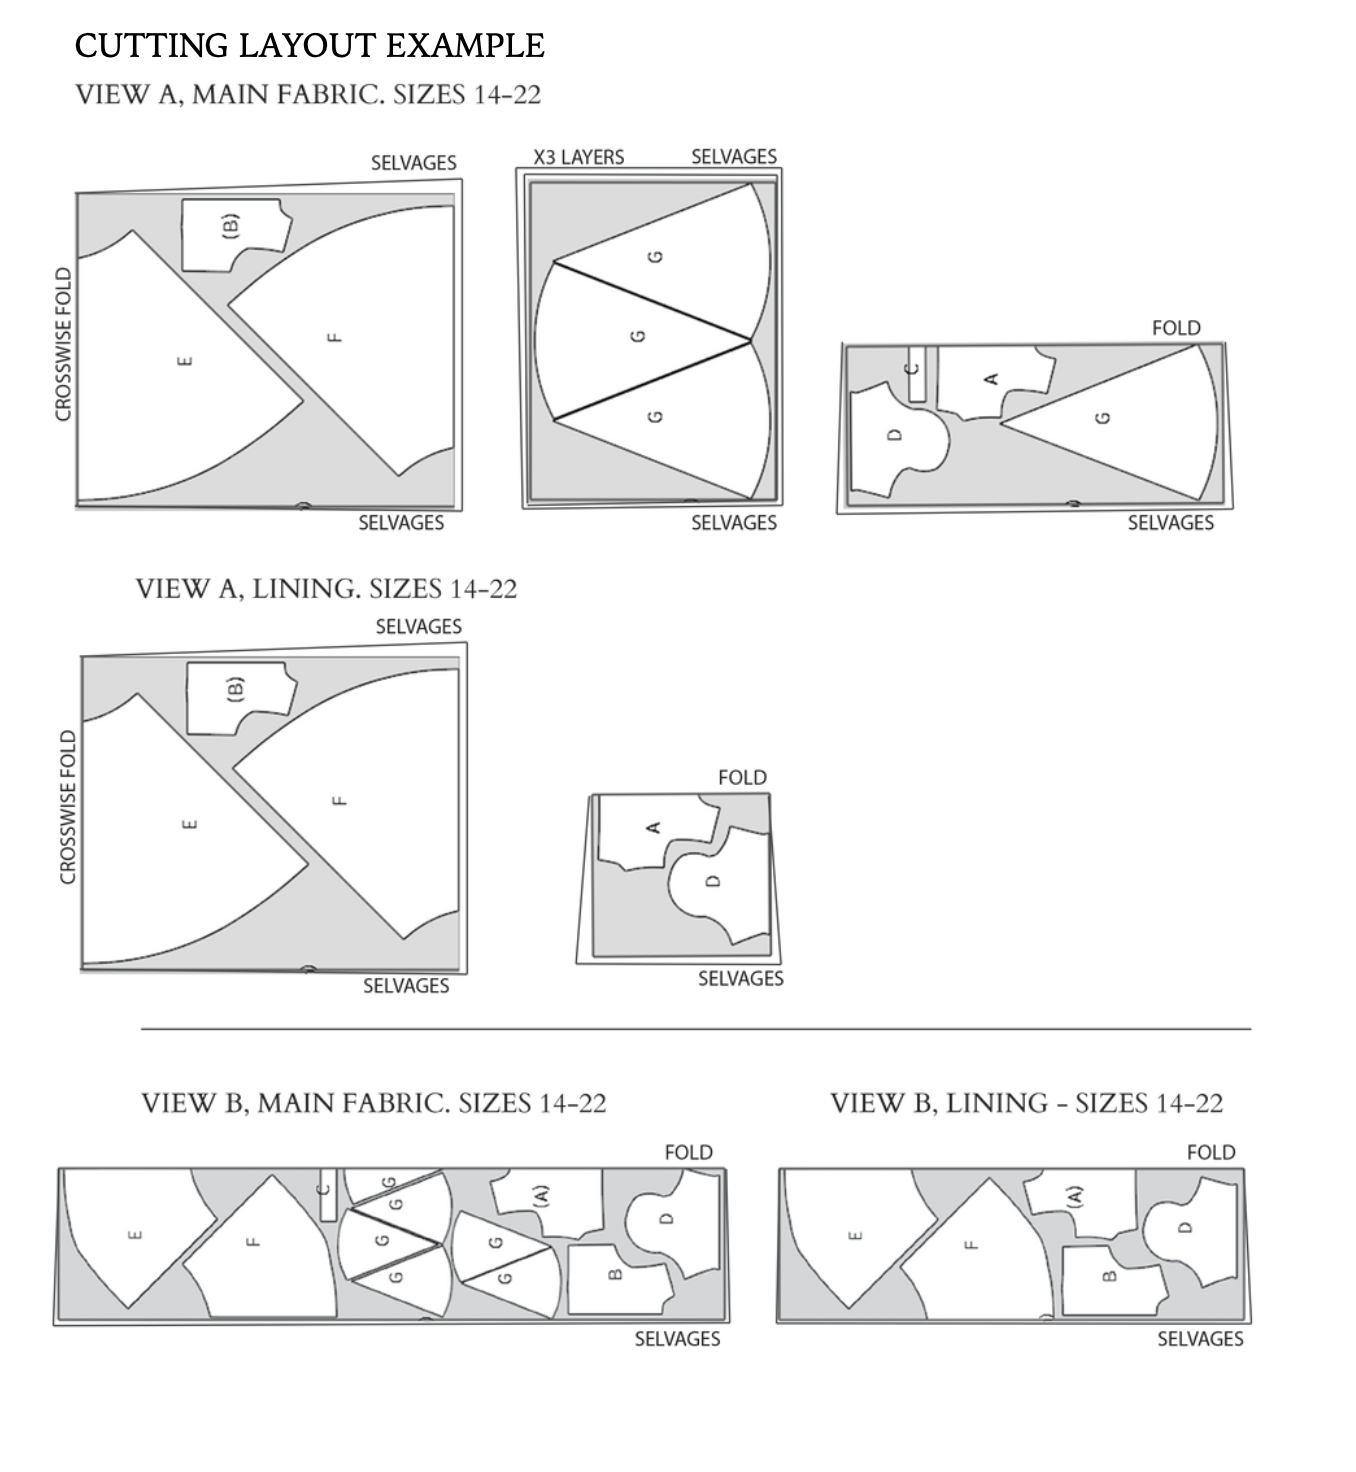
CUTTING LAYOUTS